Tip: You can use filters for better results
-
Latest News
-
Quick Start
-
Work Place
-
-
- How to schedule tickets
- How to search for tickets
- How to query tickets
- How to filter for tickets
- How to use the Ticket Clipboard tab
- How to grab/ungrab tickets
- How to link & unlink components together
- How to download ticket data as a excel sheet
- How to copy filters/queries for colleagues
- How to email filters/queries to colleagues
- How to assign/unassign tickets to/from partners
- How to manage parts
- How to show tickets on Map
- How to open tickets in a new tab
- How to use container tickets
-
-
- How to use the Optimizer
- How to schedule tickets
- How to publish/unpublish tickets
- How to lock/unlock tickets
- How to lock/unlock engineers
- How to manually reschedule PUDOs
- How to show tickets on Map
- How to manage availabilities
- How to manage subgroups
- How to display an additional time zone
- How to move tickets back to the Ticket Pool
-
-
-
- How to manage parts
- How to assign/unassign tickets to/from partners
- How to use the Interaction buttons
- How to use the Workflow buttons
- How to use communications
- How to schedule tickets
- How to edit ticket details
- How to cancel a ticket
- How to use the Remove Pending button
- How to report a ticket
- How to create intervention infos
- How to create intervention reports
- How to cancel an appointment
- How to clone tickets
- How to edit private notes
- How to add & remove skills
-
Admin Panel
-
- How to connect with ServiceNow
- How to create test tickets
- What are aliases?
- What does workflow mean?
- What are appearances in context of workflows?
- What are buttons in context of workflows?
- What are automations in context of workflows?
- What are guides in context of workflows?
- What are actions in context of workflows?
-
- What is the Process menu?
- What does workflow mean?
- What are appearances in context of workflows?
- What are buttons in context of workflows?
- What are automations in context of workflows?
- What are guides in context of workflows?
- What are actions in context of workflows?
- How to create & edit projects
- How to create & edit custom forms
- How to create & edit lists
- How to customize the Customer Portal
- How to create & edit automated actions
- How to create & edit conditions
- How to create & edit indications
- How to set up email templates
- How to create & edit ticket durations
- How to create & edit custom fields
- How to create & edit value sets
- How to create & edit SLA Profiles
- How to repair tickets with Ticket Workflow Monitoring
-
Fieldcode FMA app
-
- Fieldcode FMA app
- How to download the Fieldcode FMA app
- How to login
- How to configure multiple accounts
- How to change the theme
- How to log work times
- How to synchronize tickets
- How to navigate to appointments
- How to log drive times & drive breaks
- How to inform dispatchers
- How to view archived appointments
-
-
Customer Portal
How to complete the planning phase
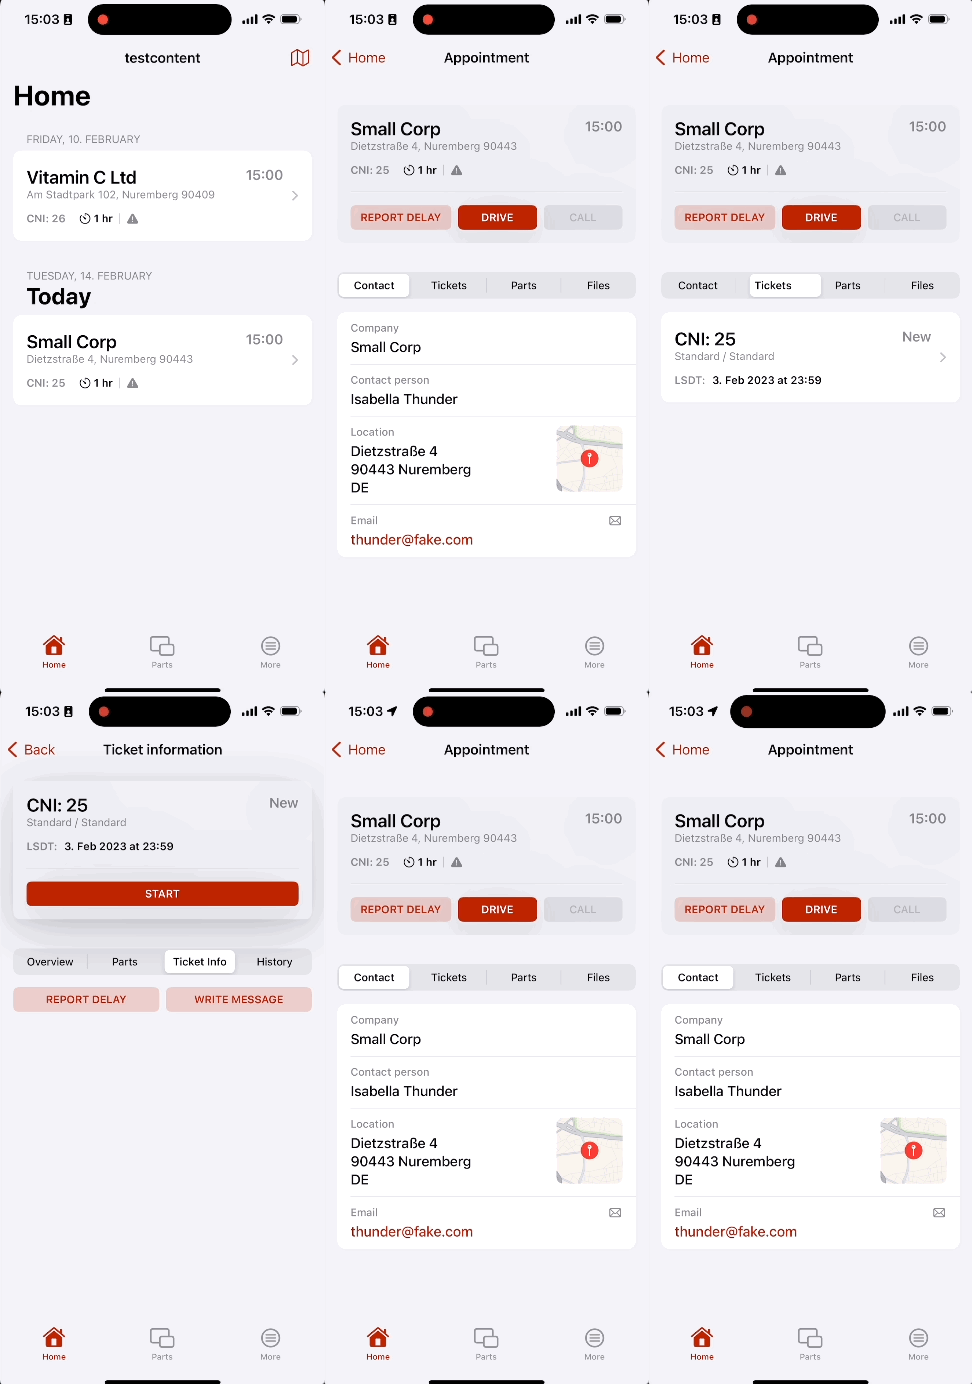
The first phase of resolving a ticket on the field is the Planning phase.
The planning phase can consist of gathering information about an upcoming appointment or upcoming appointments.
- Where do I have to drive?
- What is the problem I have to fix?
- Are there any attachments I need to check?
When you click on an upcoming appointment, you will able to browse through ticket-relevant details like the contact data of the end user, ticket descriptions, necessary parts for the repair, and attached files to the ticket.
In the planning phase, you can already decide to directly contact the end user via phone by clicking for example the Call button or confirm that the drive has started towards the end user’s direction by clicking the Drive button. You can also already announce upcoming delays by clicking the Report Delays button.

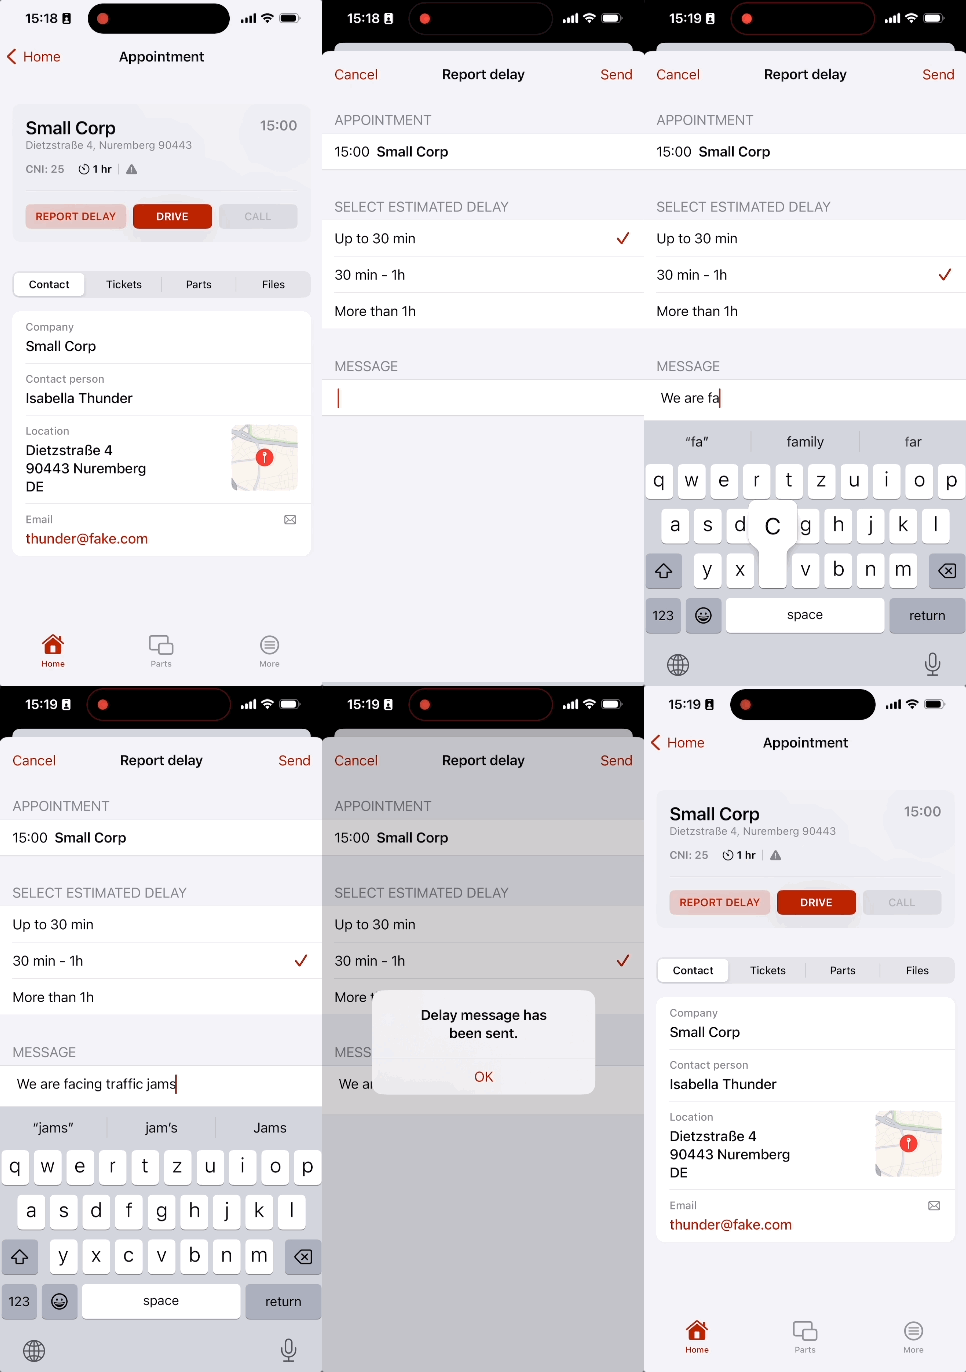
How to report delays
You can report delays by using this button. Select the estimated delay by clicking on the corresponding item. You can choose between Up to 30 minutes or 30 minutes to 1 hour or More than 1 hour. You can optionally leave a comment for the dispatcher by typing a message into the box.
Click on Send afterwards to successfully report the delay.

How to announce-call the end user via his mobile or phone
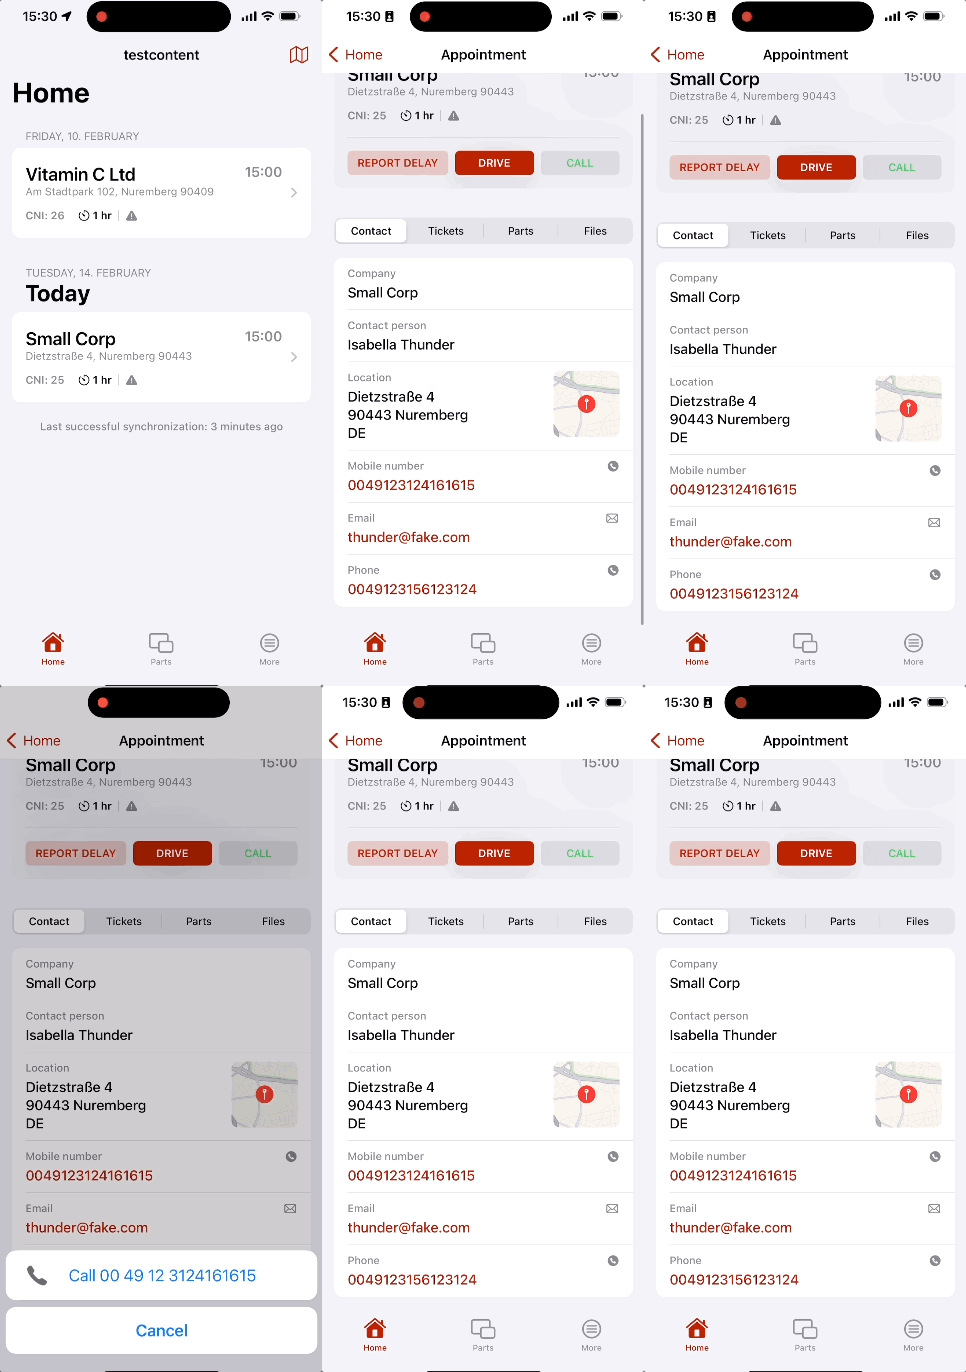
If you want to reach the end user while planning or driving you can do that by pushing the Call button or directly tapping the corresponding number. You can push either the green call button in the top bar or use the button in the Contact tab. The button might be useful to inform the end user that you may arrive later than expected for example because of traffic jams.
Please prioritize the road traffic regulations and only use the call button under safe conditions!

How to announce the end user via email
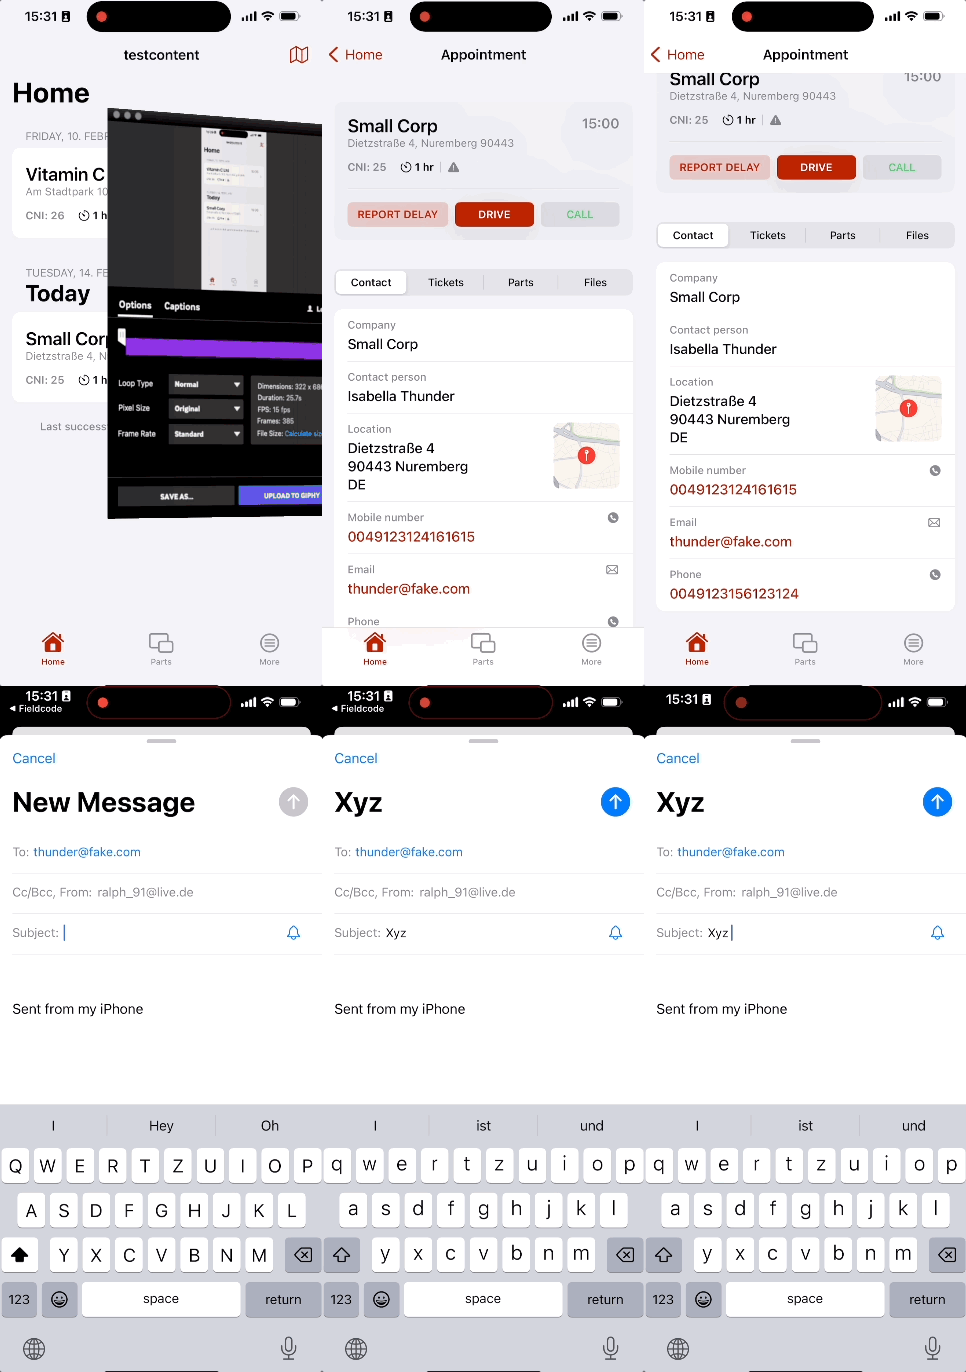
You can also contact the enduser via email by clicking the email button inside the Contact tab to inform the end user about something on-going.
Please prioritize the road traffic regulations and only use the email button under safe conditions!

5 out of 5 stars
1 rating
| 5 Stars | 100% | |
| 4 Stars | 0% | |
| 3 Stars | 0% | |
| 2 Stars | 0% | |
| 1 Stars | 0% |
