Tip: You can use filters for better results
-
Latest News
-
Getting Started
-
Work Place
-
-
-
- About Buttons
- Action Buttons
- Schedule Tickets
- Ticket Info and COMS Buttons
- Add Parts
- Assign Partners
- Remove Tickets from the Ticket Clipboard
- Inline Skill Editing
- Create Intervention Info
- Create Intervention Reports
- Cancel Tickets
- Cancel Appointments
- Clone Tickets
- Edit Ticket Details
- Edit Privat Notes
- Report Tickets
- Close Tickets
-
Admin Panel
-
FMA 2 App
-
Customer Portal
About views
The Views designer allows you by default to edit account views and also to edit private views which are only available for your own personal usage. You can design different views for each of your displays or create views to flip to in certain use cases. Whatever you decide, you can customize your experience and Work place components and their interactions across Single or Multi-Screen displays based on your needs. Every user of Work place can by default create and edit Account views and Private views if not adjusted otherwise. Views can be edited from the sidebar of Work place and permissions for different view types are granted inside Admin panel.
Views are custom arrangements of components that help you to fulfill a specific purpose. The first view you will encounter after login is the Dispatch view which is a so-called global view that is tailored to the role of a dispatcher. Fieldcode has a differentiation between view types:
- Global views: Those non-customizable views are visible for all Fieldcode users by default, which includes all Fieldcode users. You are not able to set a default view for global views.
- Account views: Those customizable views are visible for all users of an account by default, which includes the account owner and afterward added users. You are able to set a default view for account views. Default views are the views that are pre-selected by default when the user opens Work place.
- Private views: Those customizable views are only visible for the user who created the view.
You are able to set a default view for private views. Default views are the views that are pre-selected by default when the user opens Work place.
Admins can control view types and views on a role basis in the Permissions menu of the Admin panel.
About global views
The global views are deeply integrated into Work place by default. There are currently five default view presets available for instant usage:
- Analytics view (best choice for service delivery managers, location managers, etc.)
- Backoffice view (best choice for back office agents)
- Dispatch view (best choice for dispatchers)
- Dispatch view for multiple displays (best choice for dispatchers)
- Workload Calendar (best choice for dispatchers!)
Each of those views is tailor-made for a job role and can help you to directly get into your workflow. The different views consist of different components, which are for example the: Ticket Pool, Timeline, Map, Ticket Details, Forecasting, Workload calendar etc. The Dispatch view with Screen 1 and 2 for example allows a Dispatcher to do his work on two (or even more) different screens to be even more productive. You don’t necessarily have to use the default views, you also have the option to easily create custom views by using the views editor.

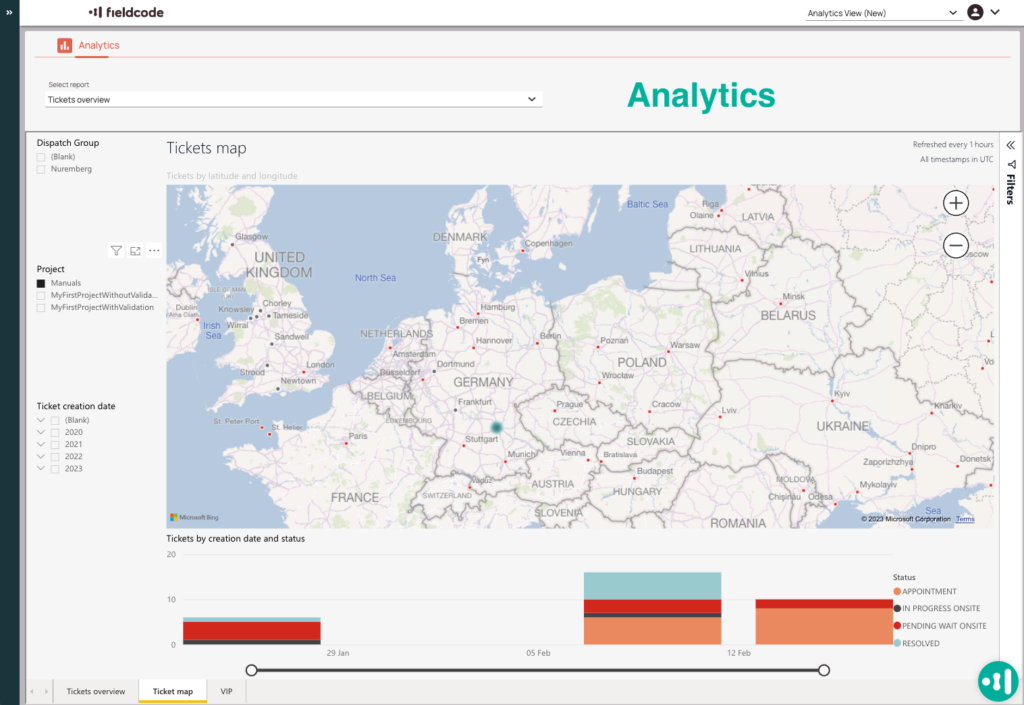
Analytics view
The Analytics view helps you to quickly get statistical insights about tickets and valuable foresights. The Analytics component gives you an overview of the selected tickets in graphical form. You can choose between different reports to gain valuable insights. This view is extremely useful for team leads, managers, location managers, service delivery managers etc. who need insights into business performance.
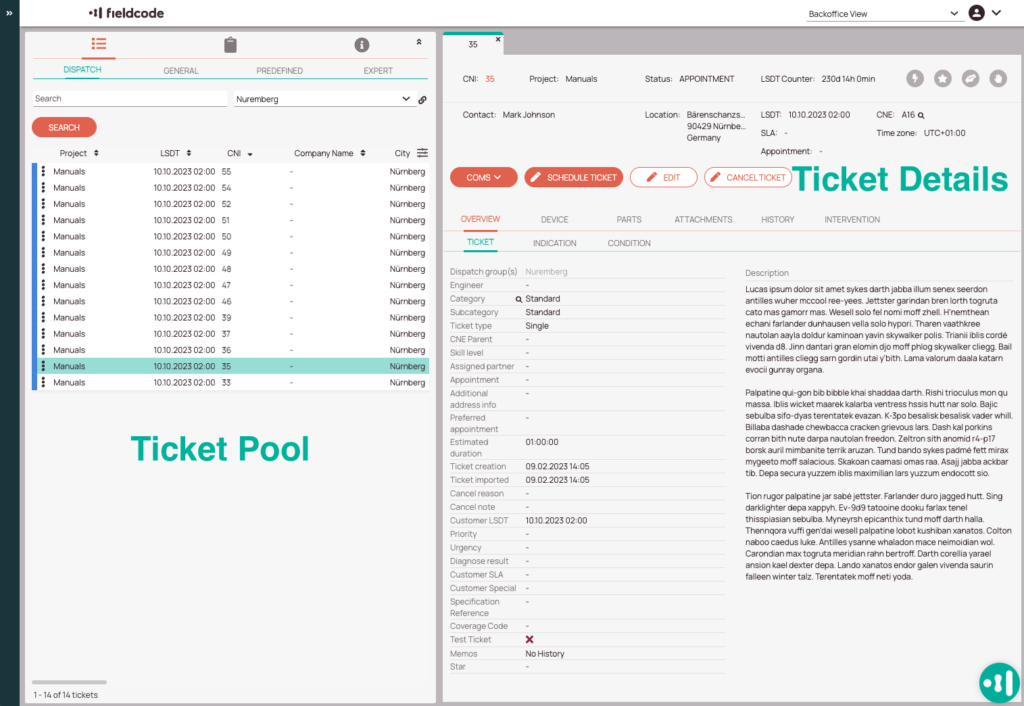
Backoffice view
The back office view helps you to quickly gain information about the Ticket Pool. It consists of the Ticket Pool and a big space for the Ticket Details. The view focuses on the tickets list, which can be adjusted using various Ticket Pool views and filters and at the same time gives a quick insight into the details of a selected ticket. This view will be particularly convenient for back office agents or all those working directly with tickets and interested in their details.
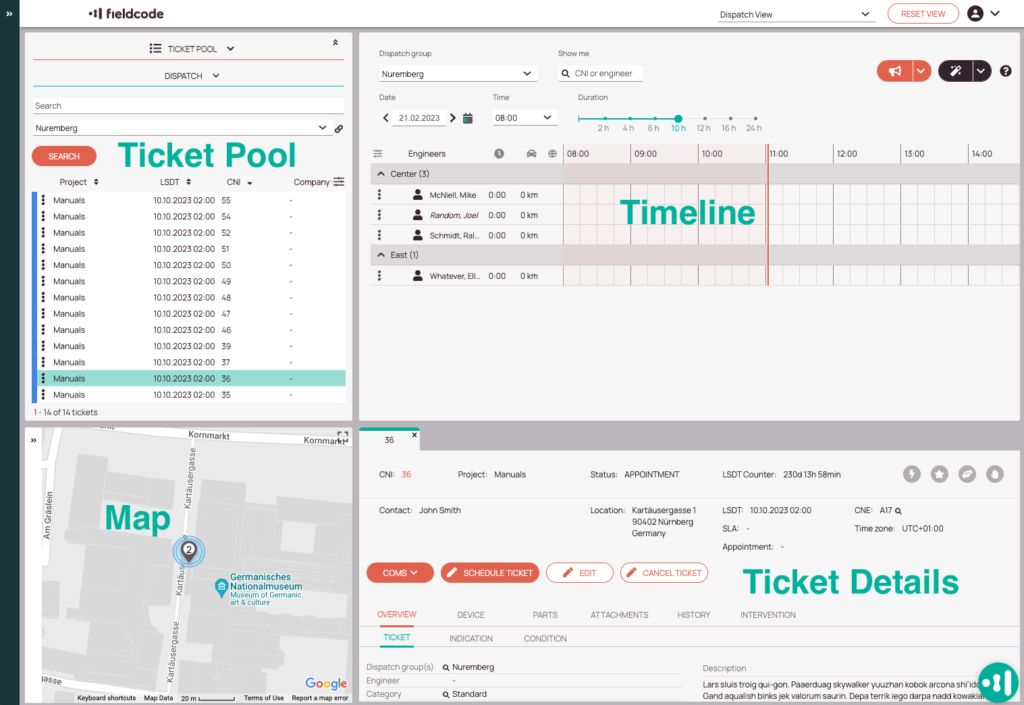
Dispatch view
The Dispatch view helps you to fill in the Dispatch role. It consists of the Ticket Pool, Timeline and Map, and Ticket Details so you are directly ready to dispatch tickets. Apart from a quick insight into all available tickets in the Ticket Pool and Ticket Details, you can see the list of engineers together with their Timeline and assigned tickets as well as the Map, where you can see selected tickets and engineers when using a left-hand side panel for filtering.This view is particularly convenient for all dispatchers that want to keep track of their tickets.
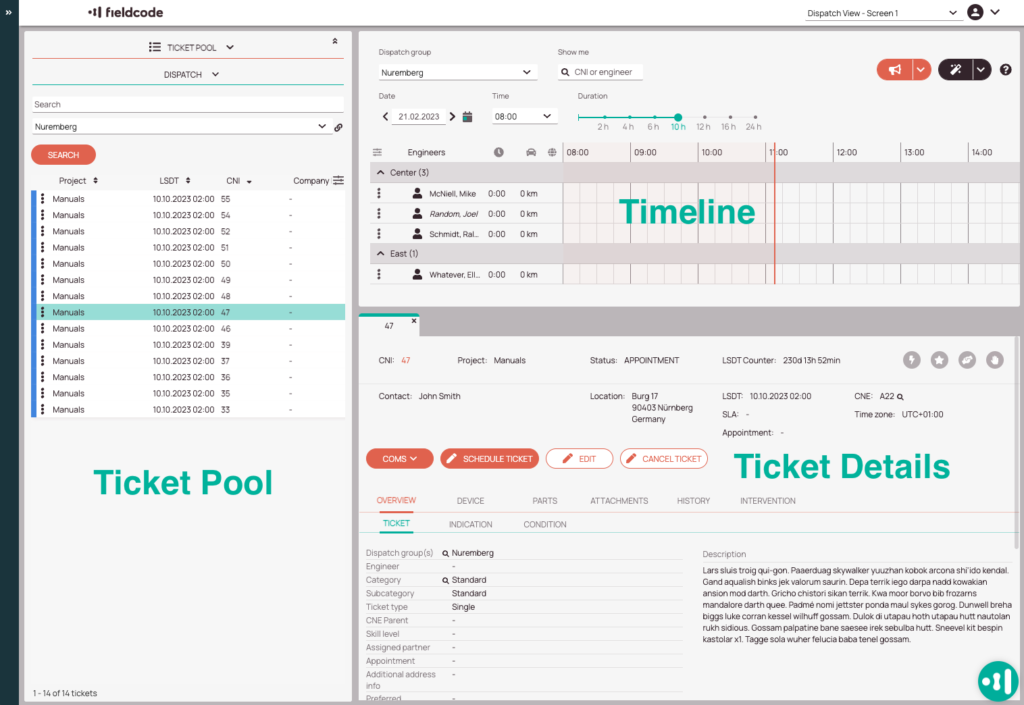
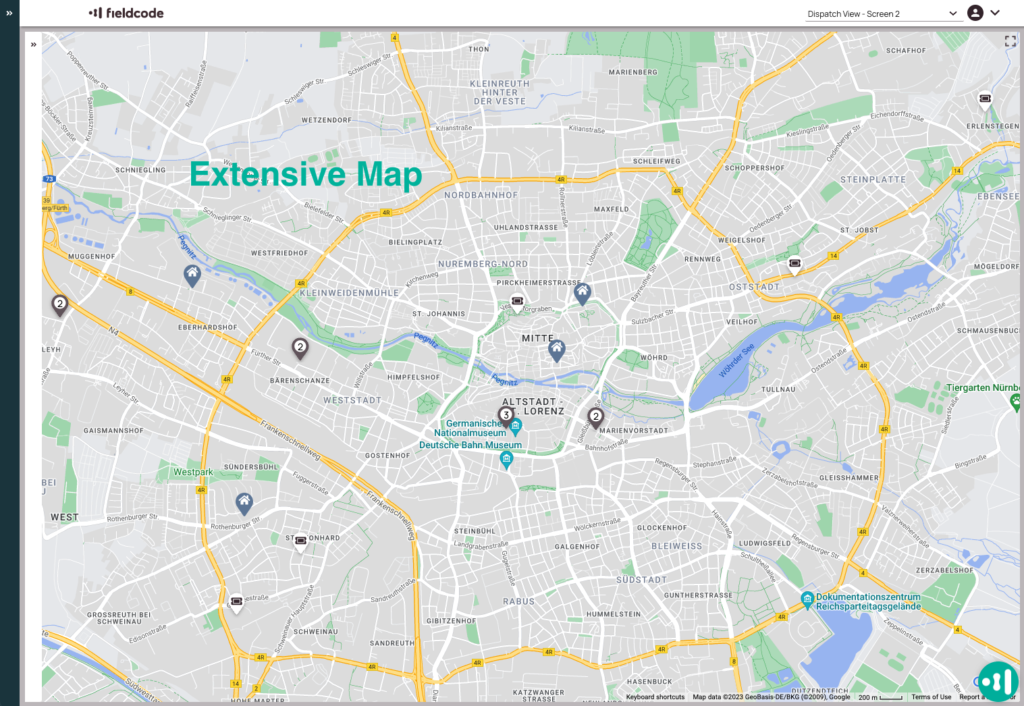
Dispatch view for multiple displays
If you like to work on more screens as a dispatcher, the default views Dispatch view – Screen 1 and Dispatch view – Screen 2 might be the views of your choice. They consist of a large Ticket Pool and Timeline and Ticket Details. The second screen can be used for a large Map overview if you are a data and overview enthusiast, for example.
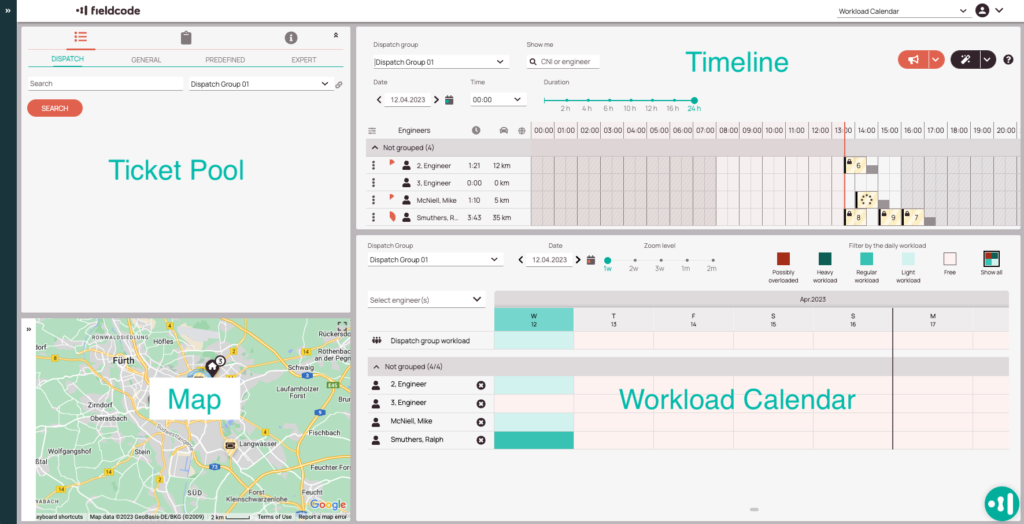
Workload Calendar
The Workload Calendar view allows users to easily check the workloads of selected engineers of a dispatch group in a practical calendar view. That combined with the Timeline, Map, and Ticket Pool gives you a great overview of your current ticket and dispatching situation. This view is particularly useful for dispatchers that care a lot about engineer workloads.
5 out of 5 stars
3 ratings
| 5 Stars | 100% | |
| 4 Stars | 0% | |
| 3 Stars | 0% | |
| 2 Stars | 0% | |
| 1 Stars | 0% |