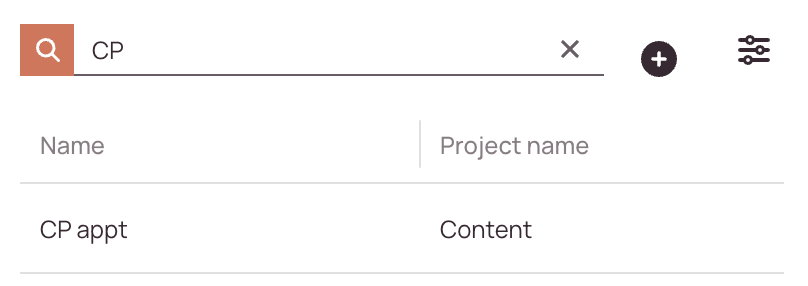
Tip: You can use filters for better results
🔎 Searching for Automated Actions:
- Use the search bar at the top of the automated actions list.
- Enter any of the following:
- Description
- Creator
- Status (e.g., active, inactive)
As you type, the list will automatically filter to match your query.
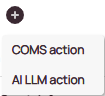
- Click on the plus button to create a new automated action.
- Choose between COMS action and AI LLM action
COMS actions are communication focused and include sending emails, SMS, or adding info onto a ticket.
AI LLM actions allow you to have an external Large Language Model provider of your choosing perform tasks targeting ticket fields.
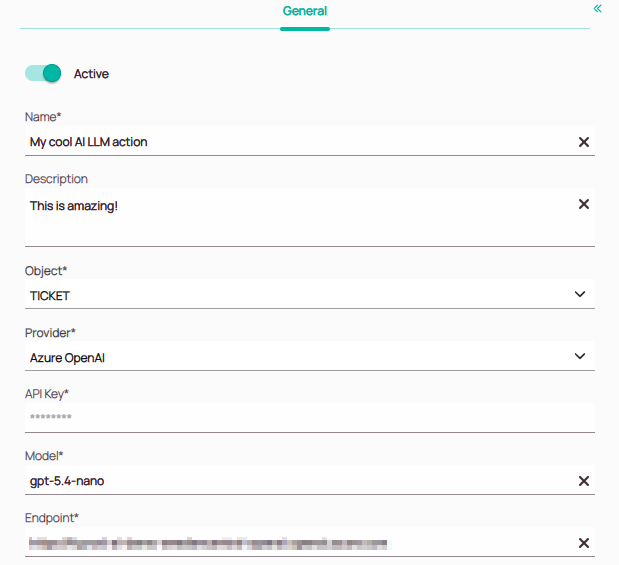
In the general section on the left,
- Decide if your automated action should be activated in the system after creation.
- Enter a name for your custom automated action.
- (Optional) - Enter a description for your new automated actions. If you make your description clear and distinctive now, you will make it easier to distinguish between different automated actions.
- Select the object from the dropdown. The action will only apply for this specific object. Unless you have set up custom objects, TICKET will be the only option presented.

In the center section,
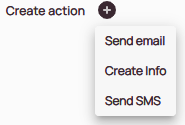
- Click on the plus button.
- Select the action you want performed.
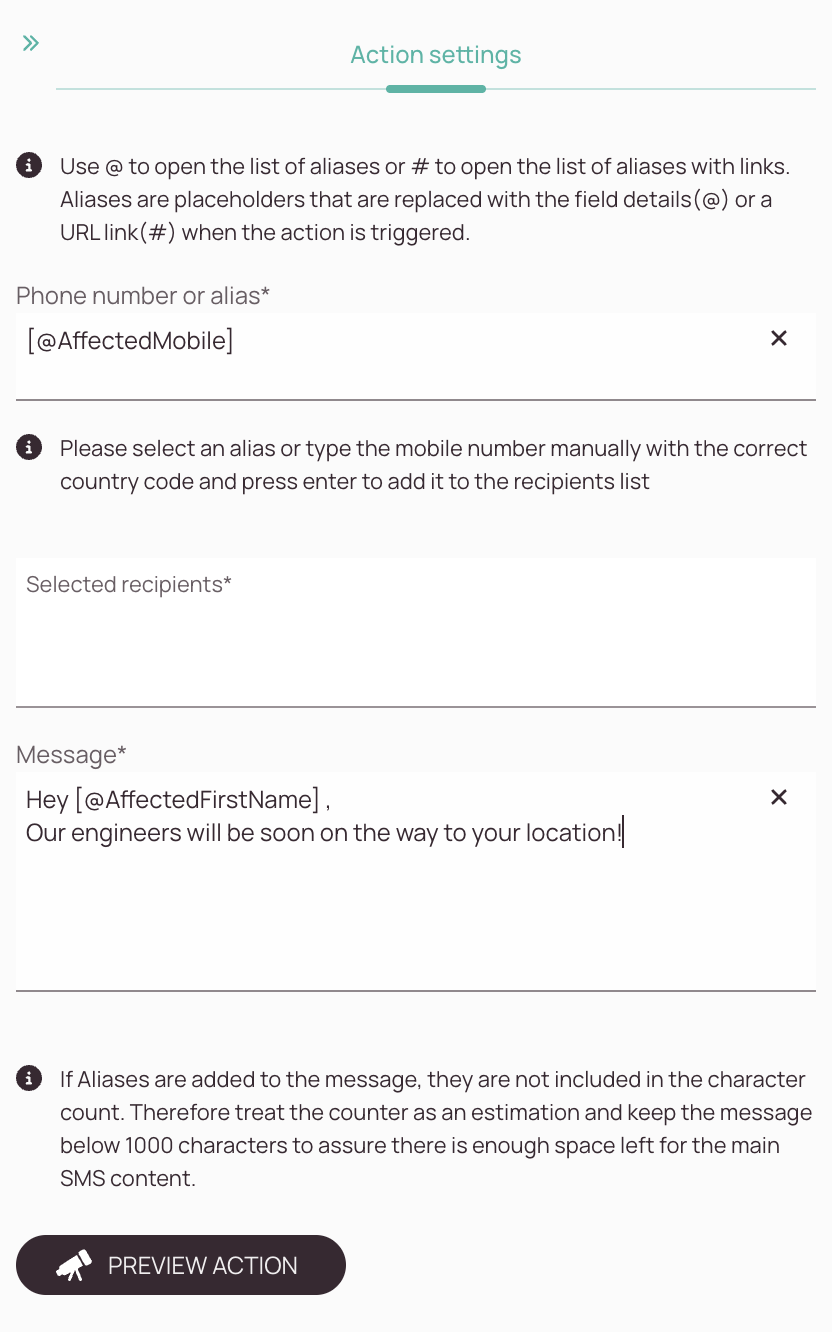
- From field: Please ensure that an SMTP configuration is set up and configured correctly. You can also use email aliases, if desired, after toggling the Custom Sender switch above.
- To field: Enter who should receive the email.
You can use aliases to have email addresses added dynamically. - CC field: Enter one or more carbon copy recipient(s).
You can use aliases to have email addresses added dynamically. - BCC field: Enter one or more blind carbon copy recipient(s).
You can use aliases to have email addresses added dynamically. - Body field: Draft your email text.
You can use aliases to display information from various ticket fields.
You can also use hashtags to add links for the Customer Portal or Partner Portal.
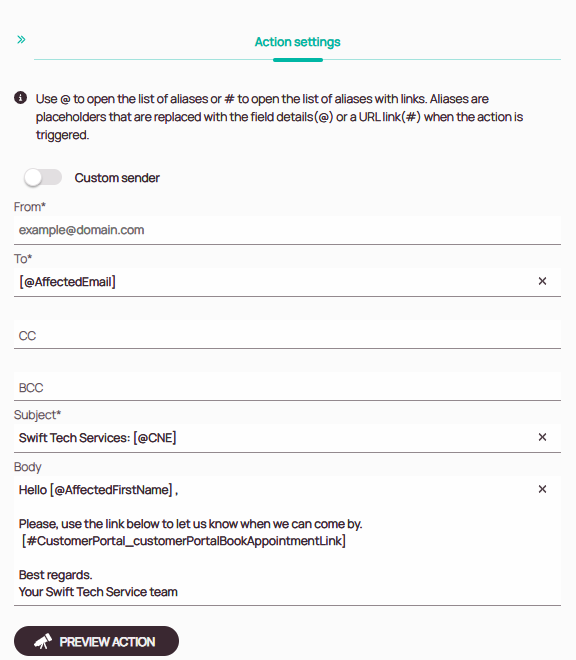
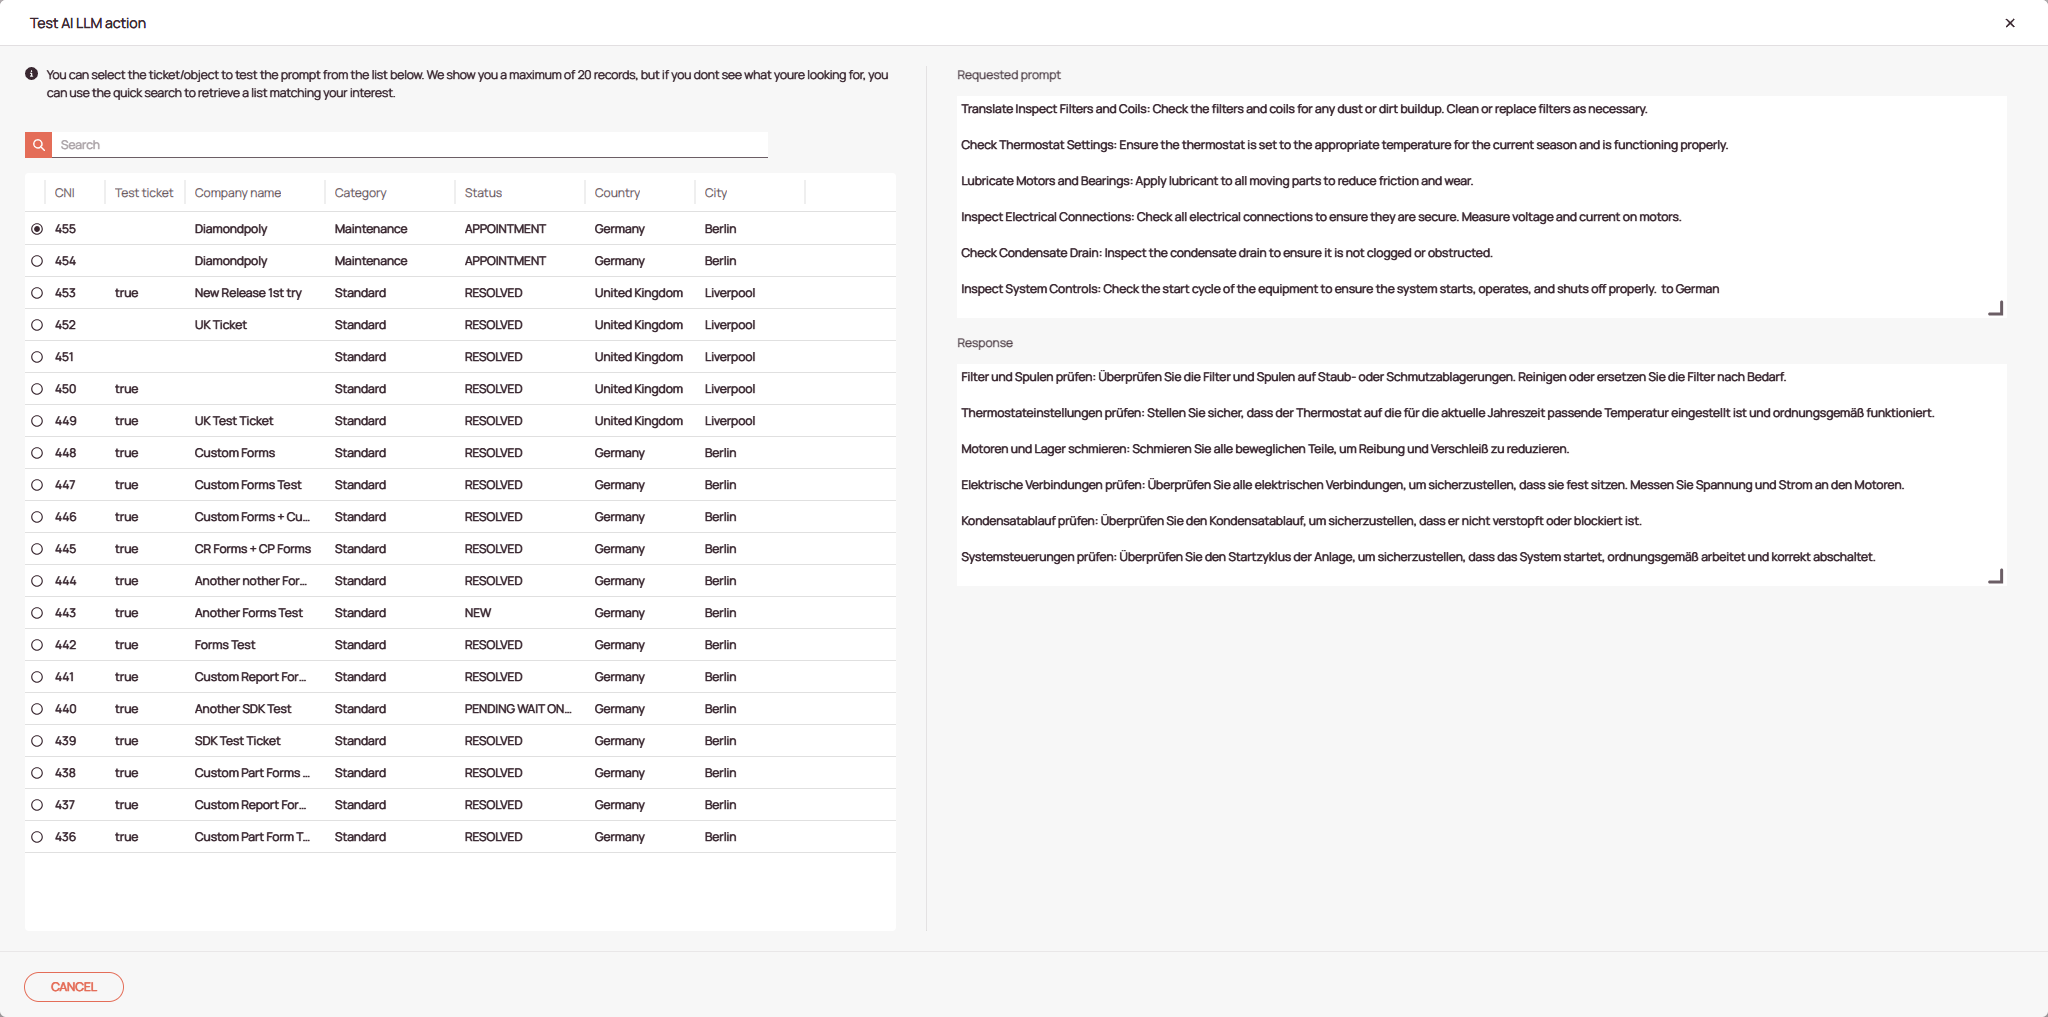
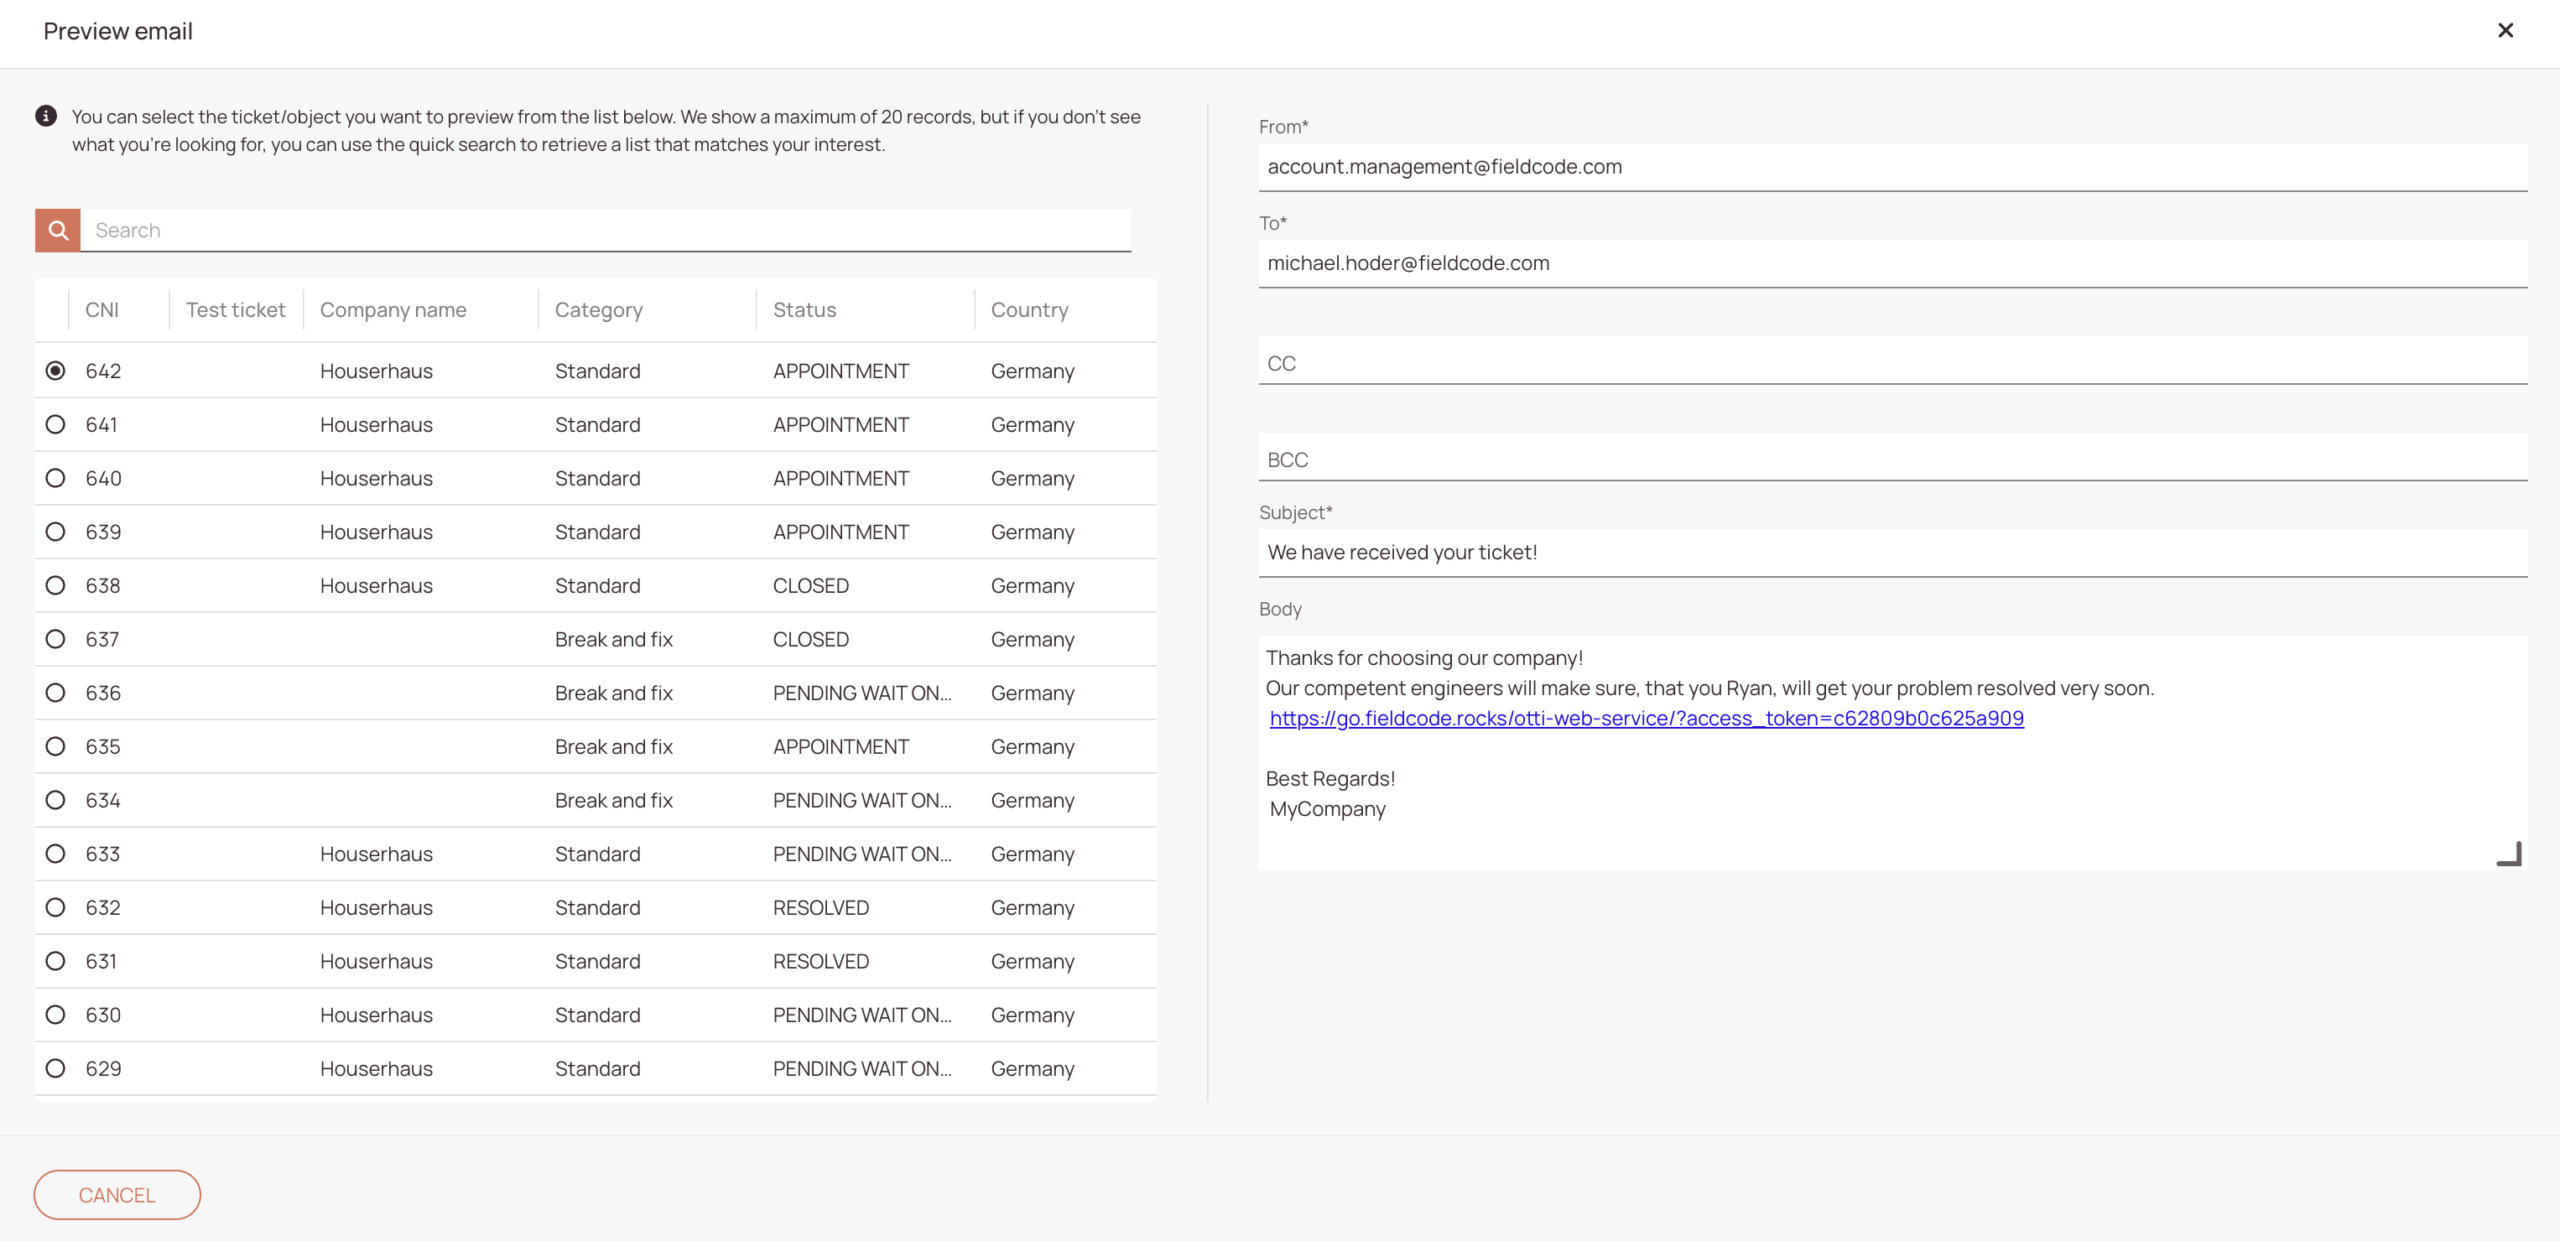
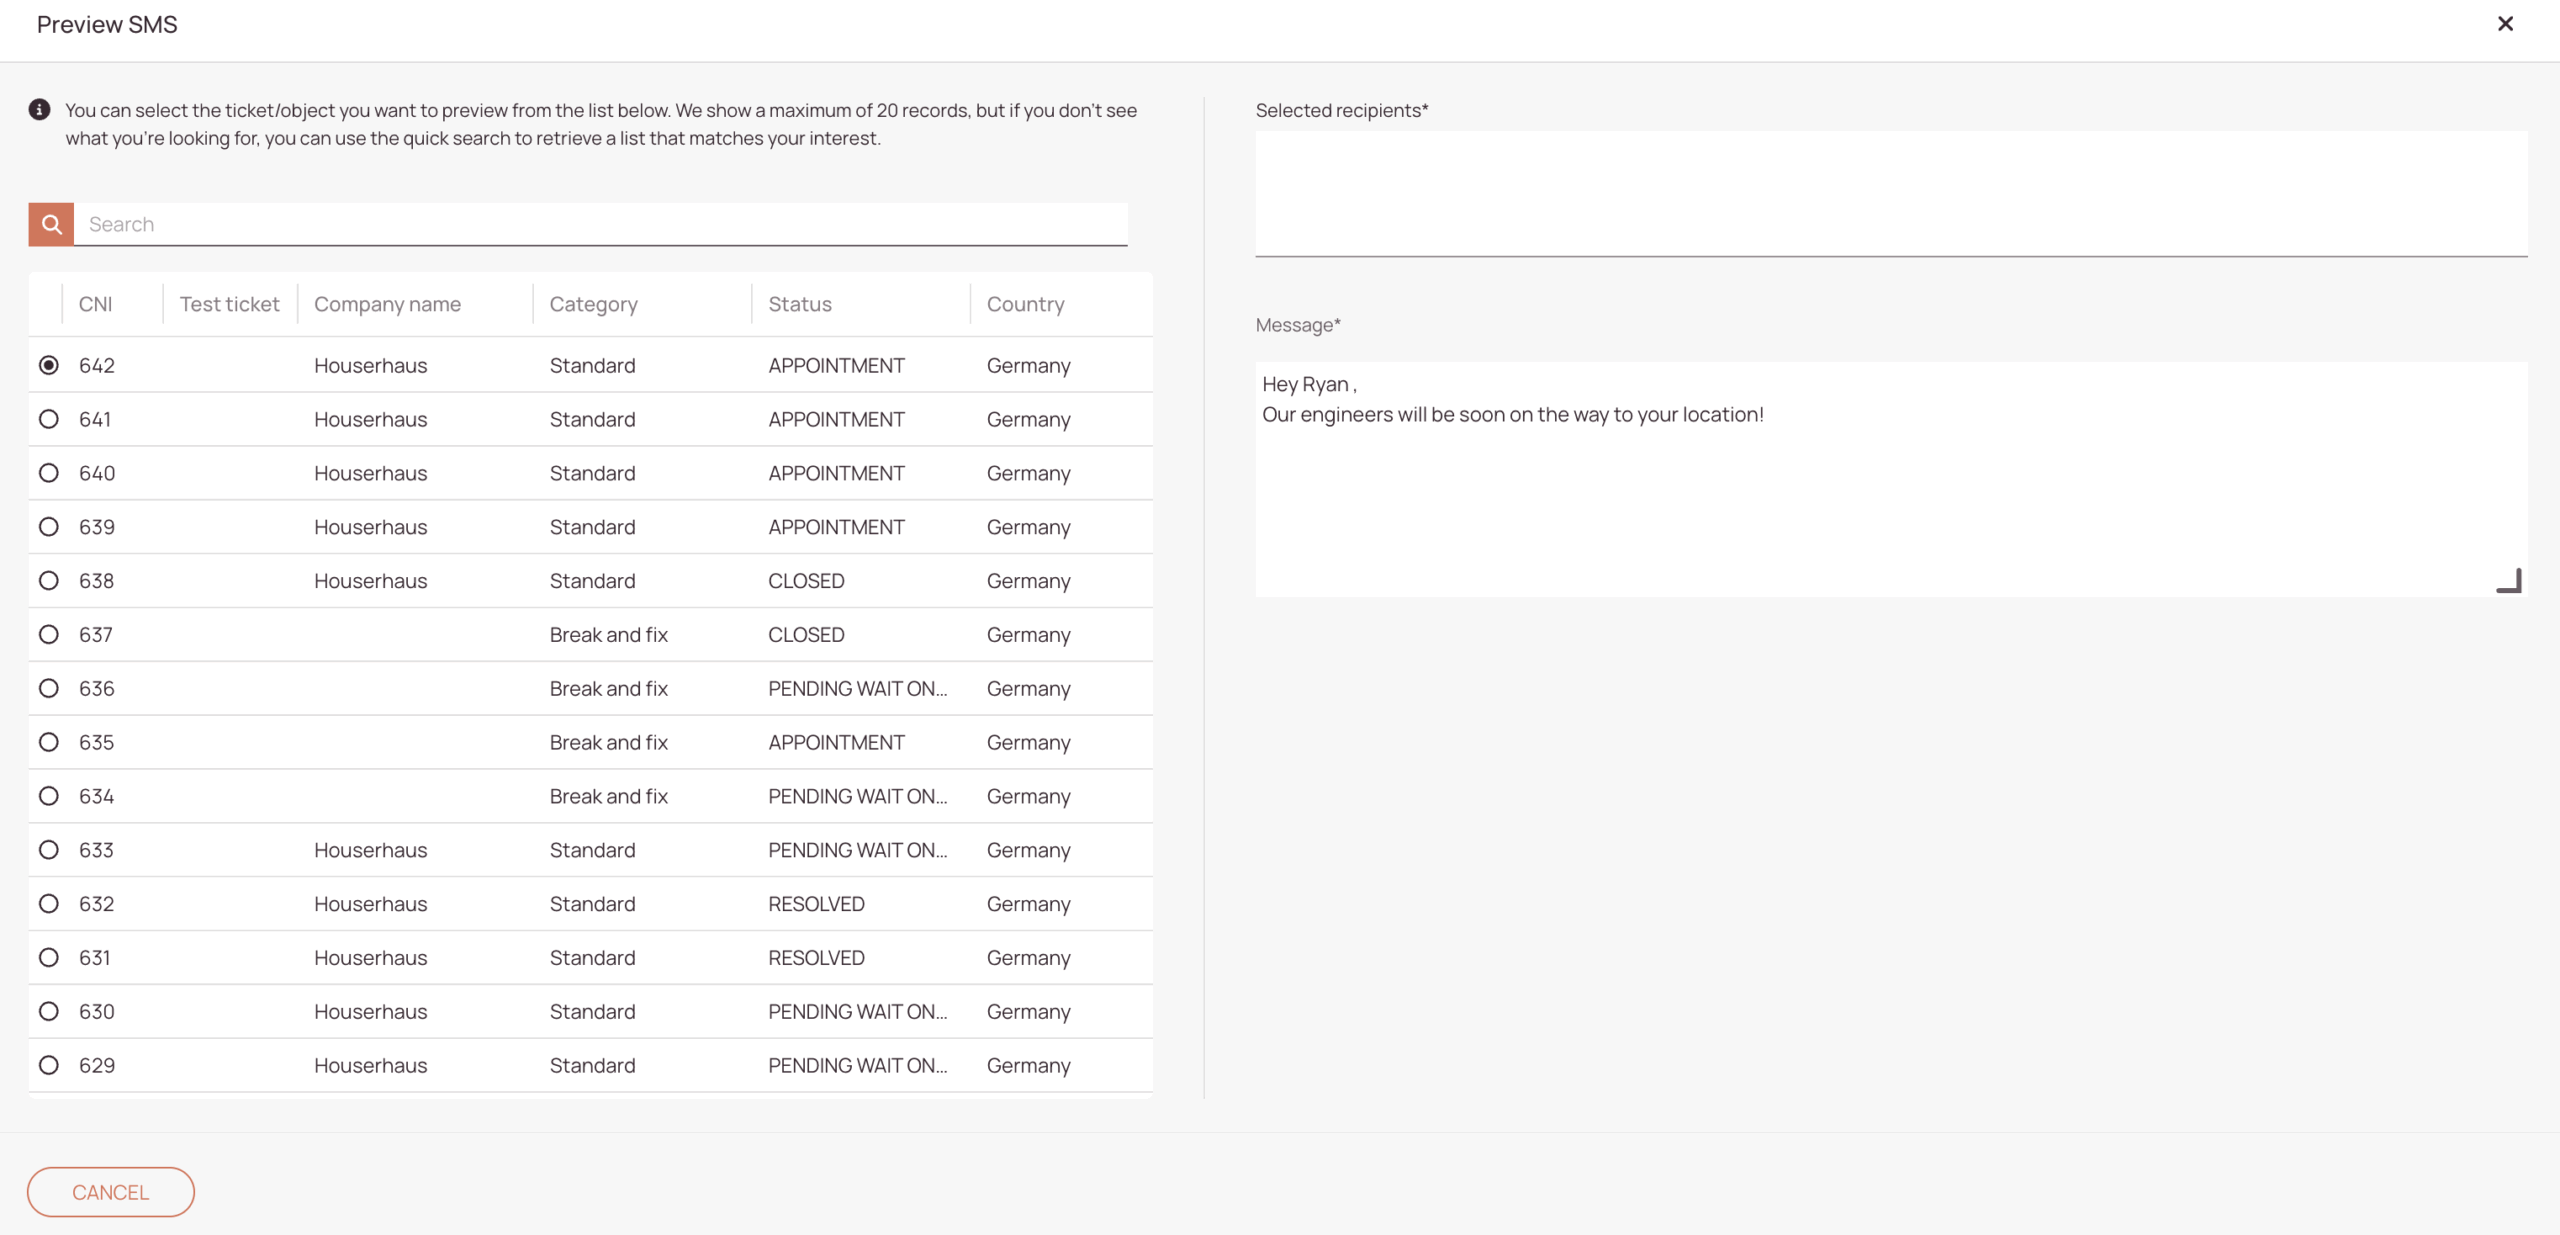
Preview your action to ensure it will produce your intended results.
Object records or actual tickets are required in order to test if your action performs as expected.
- Select a ticket info type from the dropdown.
- Draft your info text.
You can use aliases to include information from ticket fields.
You can use hashtags to add links for the Customer Portal or Partner Portal.
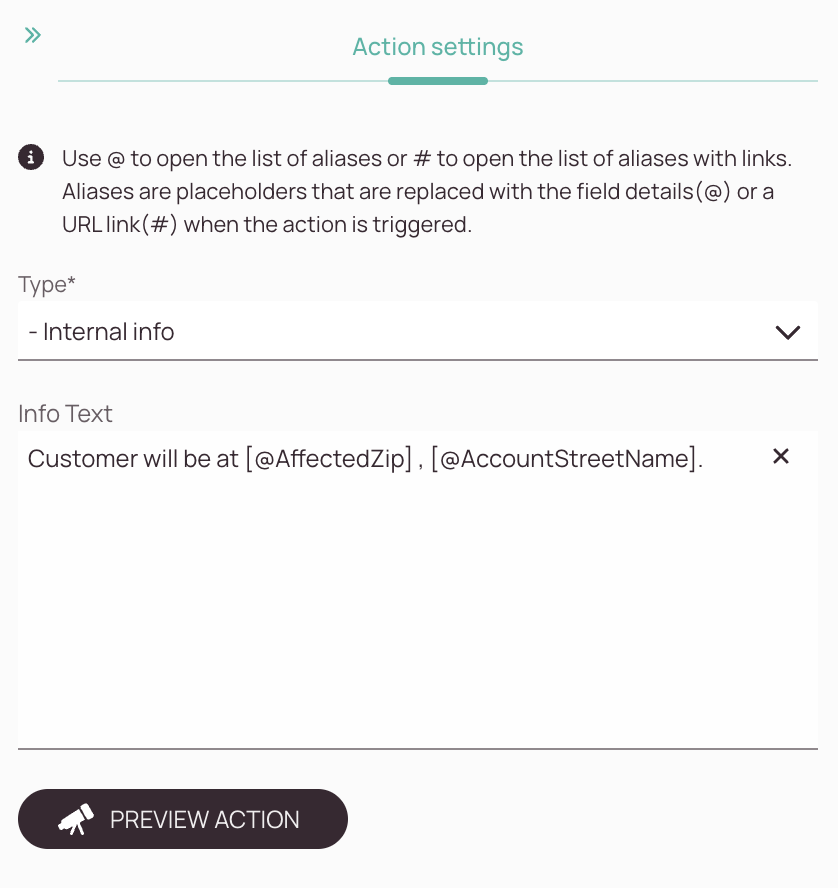
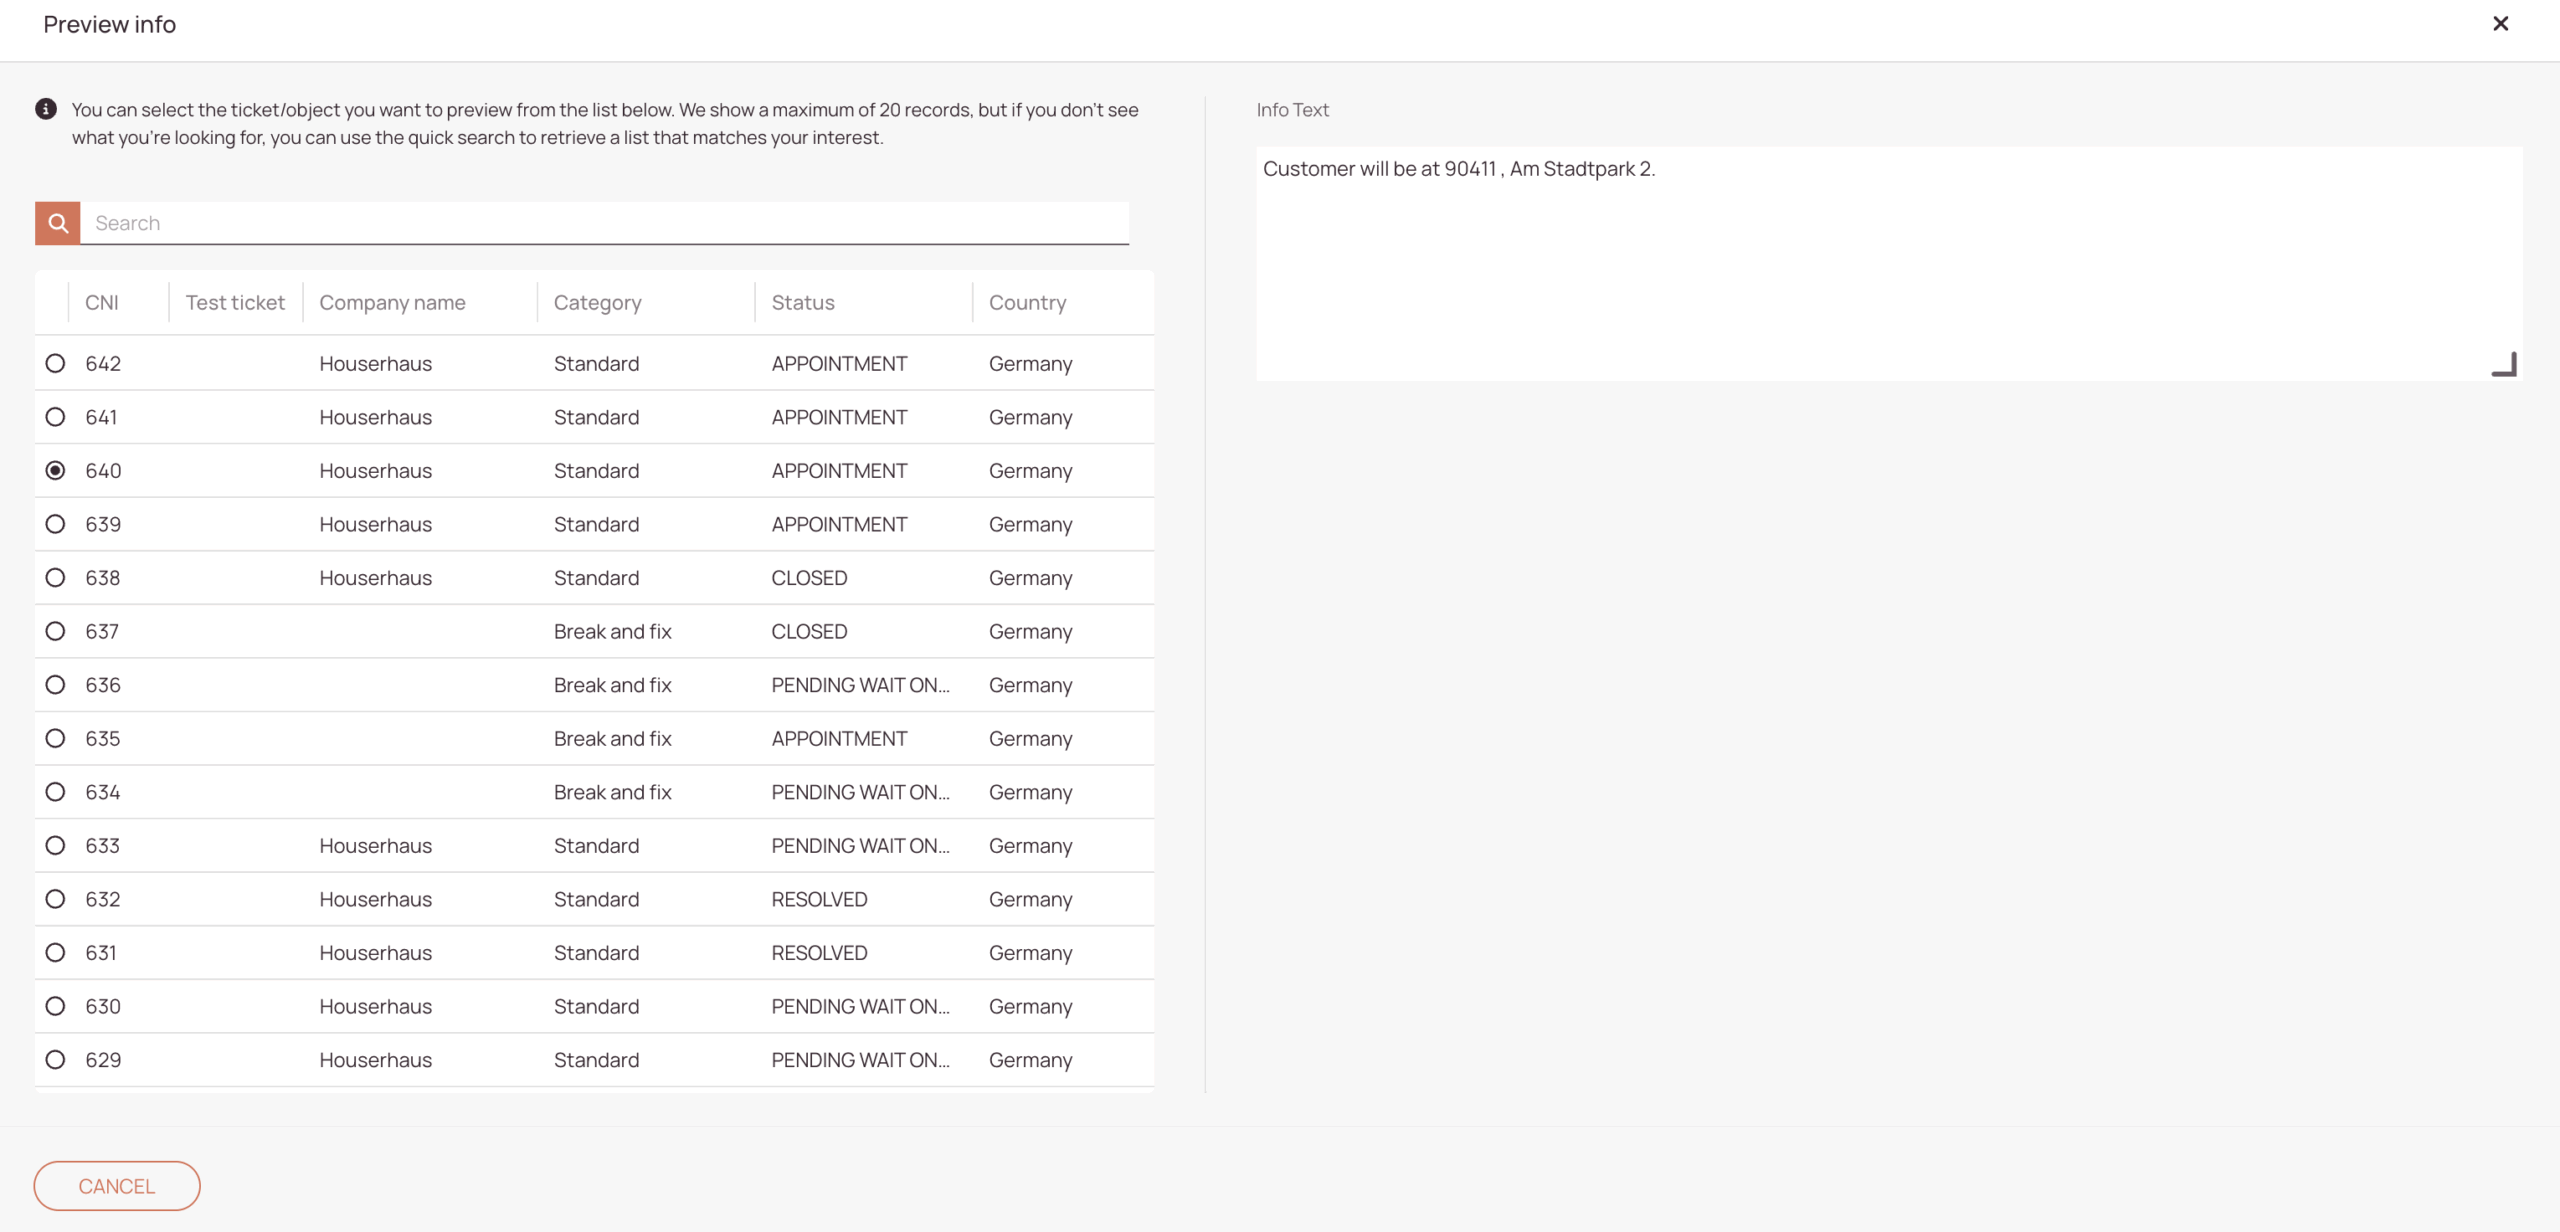
Preview your action to ensure it will produce your intended results.
Object records or actual tickets are required in order to test if your action performs as expected.
Preview your action to ensure it will produce your intended results.
Object records or actual tickets are required in order to test if your action performs as expected.
In the General section on the left,
- Decide if your automated action should be activated in the system after creation.
- Enter a name for your custom automated action.
- (Optional) - Enter a description for your new automated actions. If you make your description clear and distinctive now, you will make it easier to distinguish between different automated actions.
- Select the object from the dropdown. The action will only apply for this specific object. Unless you have set up custom objects, TICKET and ITEM will be the only options presented.
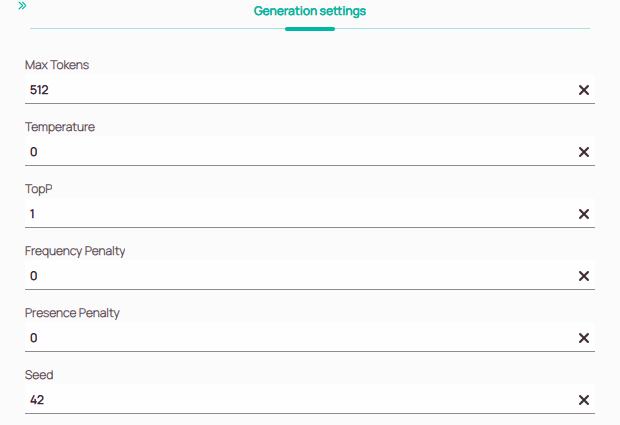
In the Generation Settings section in the center,
Max Tokens defines the maximum number of tokens the model is allowed to generate in its response. A token is a chunk of text (roughly 3–4 characters on average), not necessarily a full word.
Why it matters:
- Prevents overly long responses
- Helps manage cost and performance
- Ensures predictable output length for structured workflows
Temperature controls the randomness of the model’s output. Lower values make responses more deterministic; higher values make them more varied or creative.
Range: 0–2 (typical default: 0.7) Effects:
- Low temperature: consistent, factual, repeatable
- High temperature: imaginative, exploratory, less predictable
TopP enables nucleus sampling, an alternative to temperature. Instead of sampling from all possible tokens, the model samples only from the smallest set of tokens whose combined probability is p.
Range: 0–1
- Low TopP: narrow, focused responses
- High TopP: broader, more diverse responses
Use either Temperature or TopP for best results.
Frequency Penalty discourages the model from repeating the same words or phrases too often. It applies a penalty based on how frequently a token has already appeared in the generated text.
Range: –2.0 to 2.0 Effects:
- Higher values → fewer repeated phrases
- Lower values → more repetition allowed (useful for structured formats)
Presence Penalty encourages the model to introduce new topics by penalizing tokens that have already appeared, regardless of frequency.
Range: –2.0 to 2.0
- Higher values: more topic exploration
- Lower values: more focused, on‑topic responses
Difference from Frequency Penalty:
- Frequency Penalty reduces repeated frequency
- Presence Penalty reduces repeated occurrence
Seed is a number that controls the model’s internal randomness. When you set a seed, the model will produce the same output every time as long as all other inputs and parameters stay the same.
Difference from Temperature:
- Temperature controls the randomness of responses
- Seed controls the reproducibility of that randomness
In the Prompt section on the right,
- Provide a prompt with clear instruction for your LLM.
You can use aliases to include information from ticket fields. - Select a response schema from the dropdown.
string: any text output (sentences, labels, IDs, etc.).
long: a large whole number (integer) without decimals.
boolean: a true/false value.
datetime: a date or timestamp in a recognized format.
number: any numeric value, including decimals.
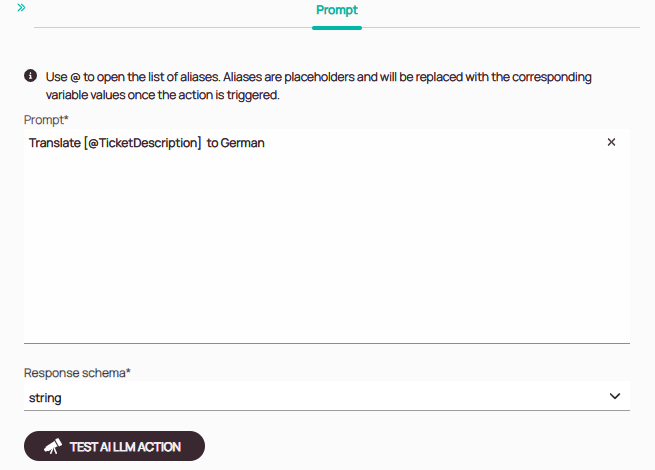
Preview your action to ensure it will produce your intended results.
Object records or actual tickets are required in order to test if your action performs as expected.