Fieldcode Manual
Tip: You can use filters for better results
-
Latest News
-
Getting Started
-
Work Place
-
-
-
- Add Parts
- Assign Partners
- Interaction Buttons
- Workflow Buttons
- Ticket Info and COMS Buttons
- Schedule Tickets
- Edit Ticket Details
- Cancel Tickets
- Remove Tickets from the Ticket Clipboard
- Report Tickets
- Create Intervention Info
- Create Intervention Reports
- Cancel Appointments
- Clone Tickets
- Edit Privat Notes
- Inline Skill Editing
-
Admin Panel
-
Fieldcode FMA app
-
Customer Portal
Last updated:June 27, 2024
How to complete the reporting phase
Copy the URL link to this section to share
After tapping the Finish button inside a ticket in the appointment phase, it’s time to proceed to the report phase and report the ticket.
- The reporting consists of two parts, one is the actual report and the second part is the sign-off from the end user to finish the ticket.
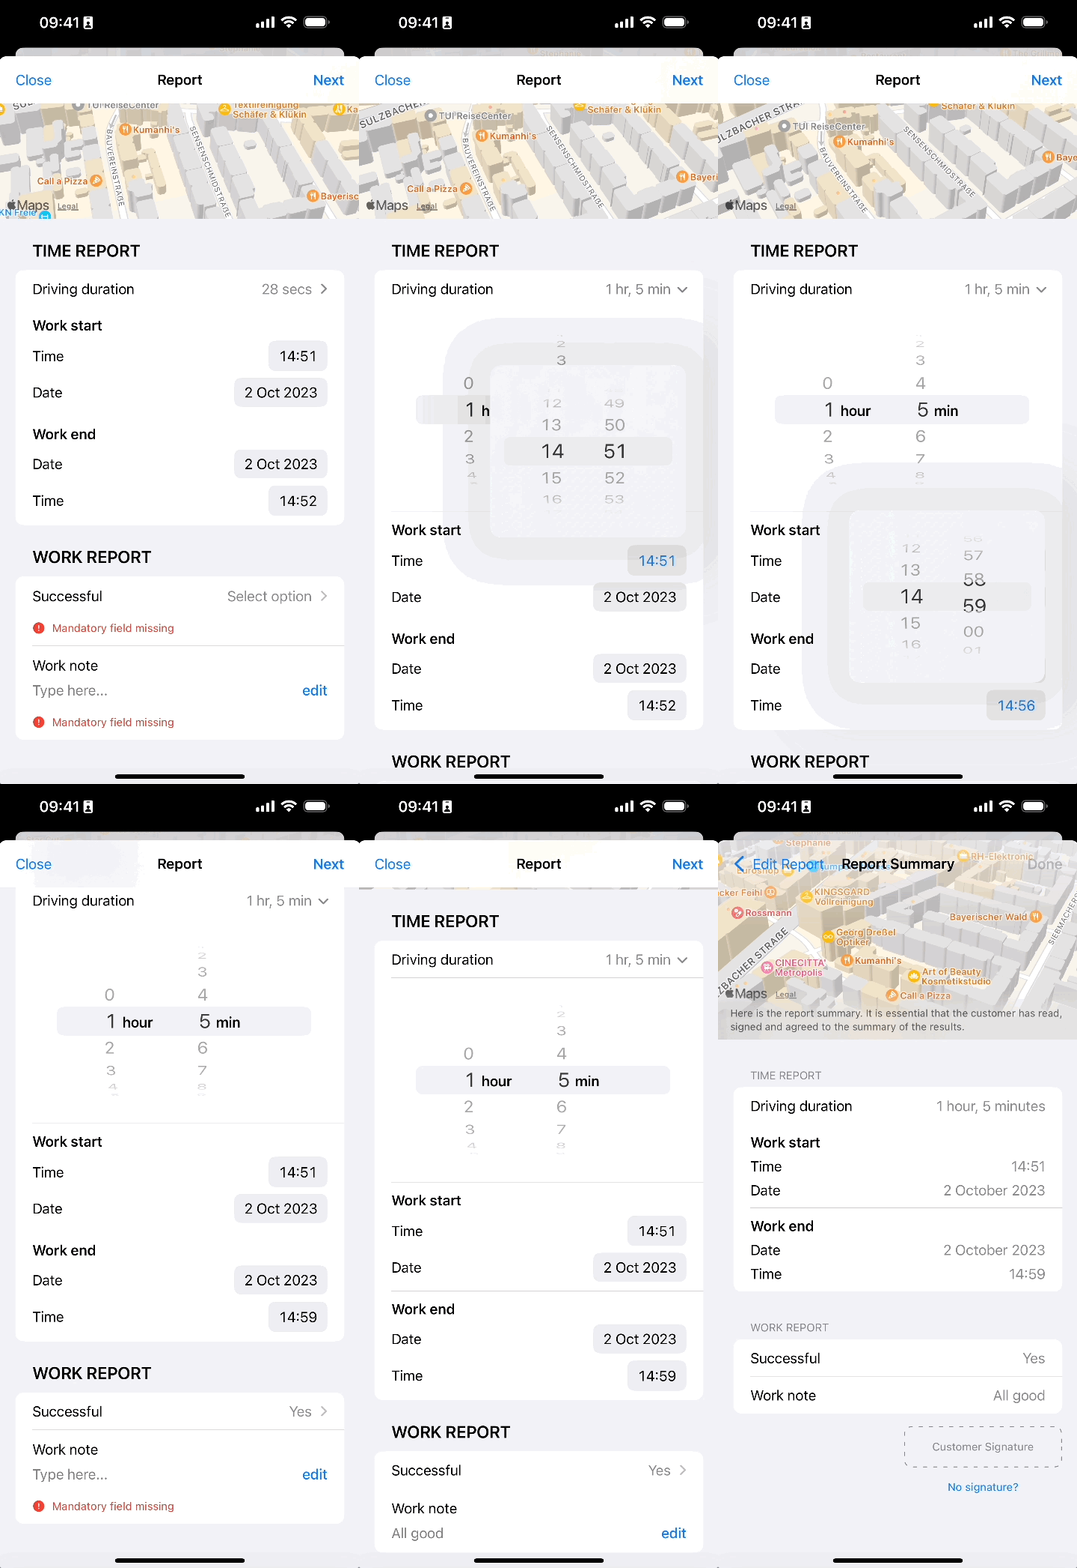
- In the report, the work start and work end times are taken over.
- You can manually edit times, dates, etc. by tapping the corresponding calendar and time buttons.
- After that, you fill in if the Intervention has been successful or not. It is always mandatory to fill in a work report, regardless of how the intervention went.
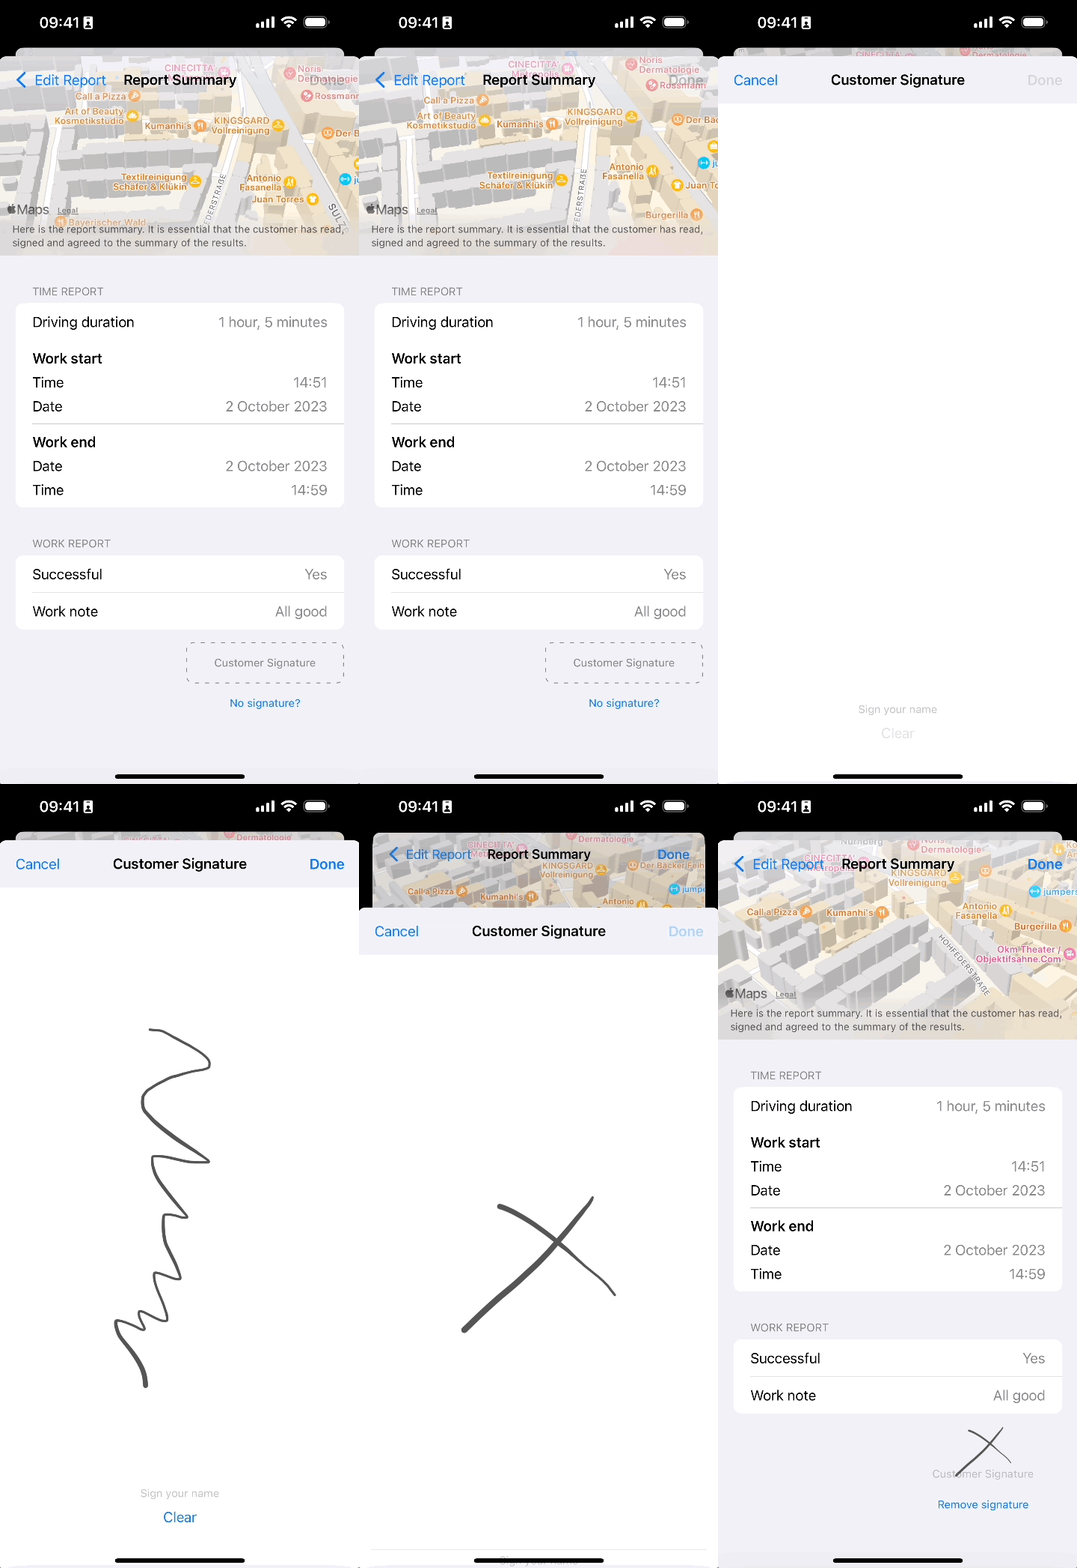
- Click on the Report summary button to proceed to customer sign-off. The mobile device will enter landscape mode and the customer can sign comfortably.
- At the end, you click on Submit and Finish to finish the ticket.
The Report phase is usually the last phase of the ticket.
After a ticket has been submitted and finished it will be available for viewing purposes in the Archive section of the FMA app.
After a ticket has been submitted and finished it will be available for viewing purposes in the Archive section of the FMA app.
How to finish the appointment
Copy the URL link to this section to share
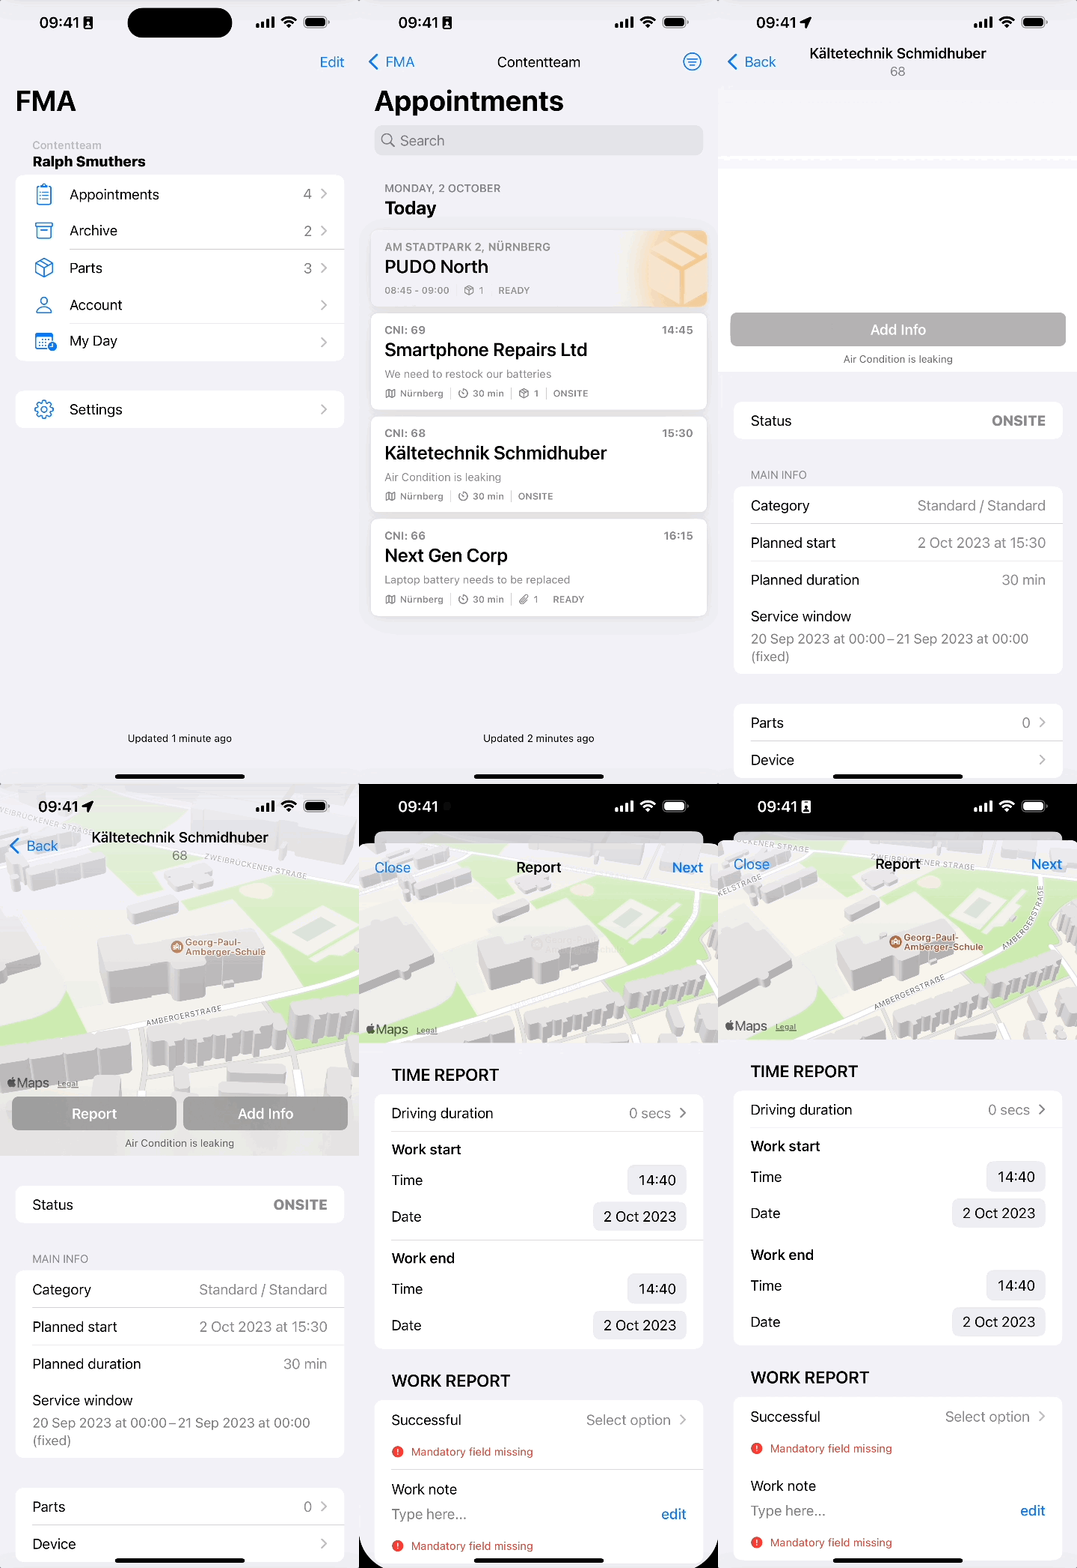
The Report button can be triggered from the top bar inside an appointment after the work on the ticket has been finished.
- Tap on the appointment you want to resolve.
- Tap on the Report button at the top.

How to fill in the report
Copy the URL link to this section to share
- Enter the Time report.
Duration field: You have the option to manually enter the Driving time that was required for this appointment. The driving time that has been tracked by the App will be pre-filled.
Work start field: You have the option to manually enter the Working time (Work start time) that was required for this appointment. The working time that has been tracked by the App will be pre-filled, this simplifies the handling of the report.
End time field: You have the option to manually enter the Working time (Work end time) that was required for this appointment. The working time that has been tracked by the App will be pre-filled, this simplifies the handling of the report. - Enter the Work report.
Successful field: Select Yes or No, depending on whether you were able to resolve the ticket problem.
Work note field: Add a work note message for this ticket. - Tap on Next after you finish entering the report.

How to submit the report summary
Copy the URL link to this section to share
- You will see a summary of all your entered details and an additional message informing you that it is important the customer has read the report and agrees to the results of the intervention.
- Tap on the Customer Signature field.
An interface where the customer can put in the signature by touch should appear and the customer is able to sign. - (Optional) – Clear button/Trash button: Allows the customer to redo the signature in case the signature has to be resubmitted.
- (Optional) – No signature? button: In case you weren’t able to retrieve a signature from the ticket requestor, you can select a reason, why this wasn’t the case.
Signature available: You can use the Customer Signature field normally.
Rejected: The end user refused to give you a signature.
Unavailable: The end user was not available in person.
Provided separately: The signature will be provided separately. - Let the customer sign directly on the device.
- Tap on Done after the signature has been provided in order to finish the Report.
Finishing the appointment with child appointments involved
- After finishing the work on all tickets (including child ticket reports) you have to finish the whole appointment to complete the process.
- This will mark the ticket in the system as resolved.

Was this topic helpful?
0 out of 5 stars
| 5 Stars | 0% | |
| 4 Stars | 0% | |
| 3 Stars | 0% | |
| 2 Stars | 0% | |
| 1 Stars | 0% |
5
Navigation
