Tip: You can use filters for better results
-
Latest News
-
Getting Started
-
Work Place
-
-
-
- About Buttons
- Action Buttons
- Schedule Tickets
- Ticket Info and COMS Buttons
- Add Parts
- Assign Partners
- Remove Tickets from the Ticket Clipboard
- Inline Skill Editing
- Create Intervention Info
- Create Intervention Reports
- Cancel Tickets
- Cancel Appointments
- Clone Tickets
- Edit Ticket Details
- Edit Privat Notes
- Report Tickets
- Close Tickets
-
Admin Panel
-
FMA 2 App
-
Customer Portal
How to create test tickets
You can create test tickets, for example, to test automated actions or generally experiment with the system or your workflows. Test tickets can only be created in the Work place after they have been integrated into the ticket form via the Forms creator.
Admin panel steps
- Inside the Admin panel go to Forms.
- Important: You have to first create a new form to replace the default form.
- Click on the plus button.
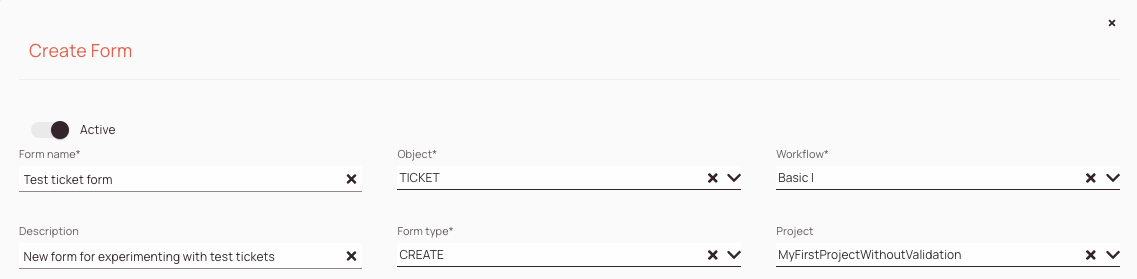
- Fill in the fields as described below and customize the form as desired:
-
Make sure your new form is set to active – otherwise, this form cannot be immediately utilized inside Work Place.
-
Insert a distinctive name for your new custom form. As we want to utilize this custom form for test tickets we have decided to go for the name “Test ticket form”.
-
Select the TICKET object type from the drop down.
-
Select the Workflow from the drop-down to which this form should apply. If you for example use the Basic I form mostly for your tickets, you can pick that one.
-
(Optional) – Enter a description for your new custom form. Try to make it as descriptive as possible.
-
Select the CREATE form type from the drop-down.
-
Select the Project from the drop-down to which this form should apply. If you for example want to apply this form to the default project, use the default project.
- Search the test ticket form field by typing “test” in the search field.
- Expand the ticket category by clicking on the expand arrow.
- Drag & Drop the Test ticket field into the custom form to your desired spot.
In our case, we put it above the company field of the contact container. - Click on Save.
Work place steps
The only main difference is that test tickets are excluded from the Analytics statistics as they would distort the overall statistics.
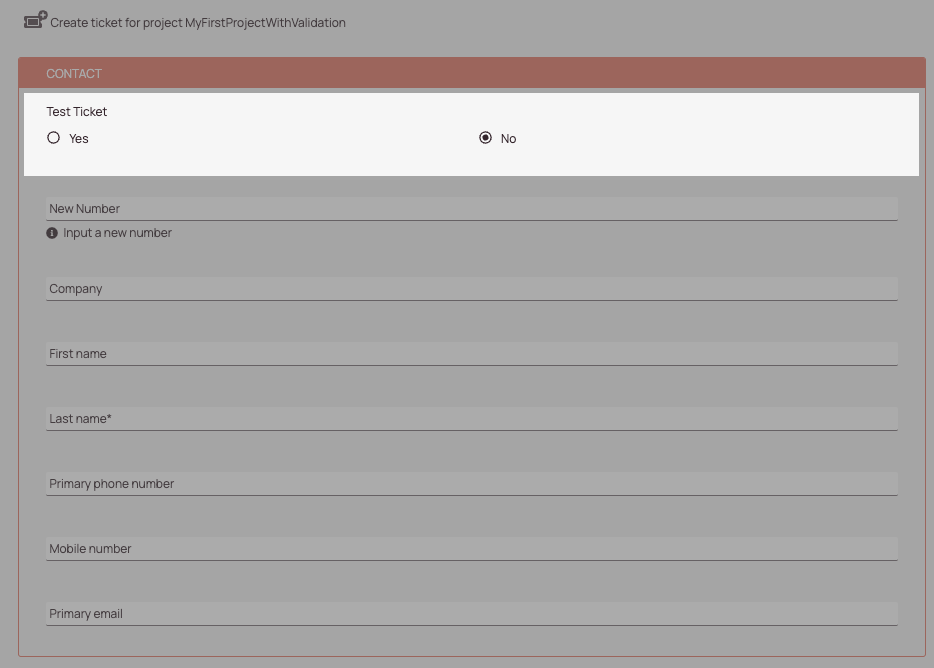
- Inside the Work place expand the left side bar by clicking on the expand arrow.
- Click on the Create ticket button.
- Select the project for which you created the custom form that includes the test ticket field.
In our case: MyFirstProjectWithoutValidation - The form should now show the new test ticket field when a new ticket is created.
0 out of 5 stars
| 5 Stars | 0% | |
| 4 Stars | 0% | |
| 3 Stars | 0% | |
| 2 Stars | 0% | |
| 1 Stars | 0% |