Tip: You can use filters for better results
-
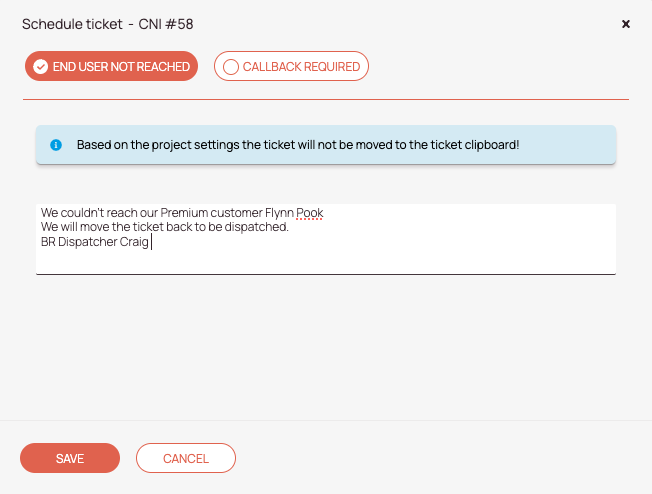
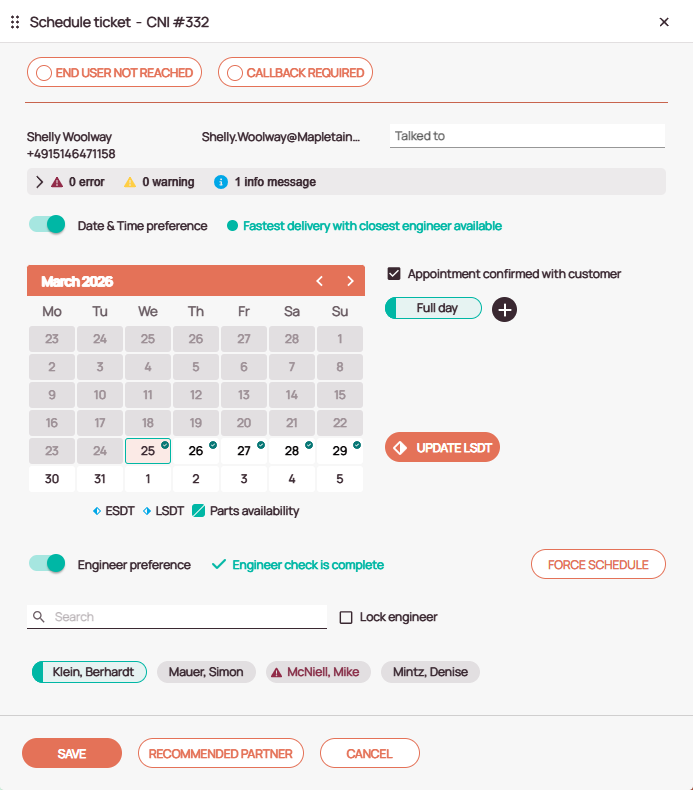
This button should be utilized if the end user couldn’t be reached directly.
Section: You couldn’t reach the customer? -
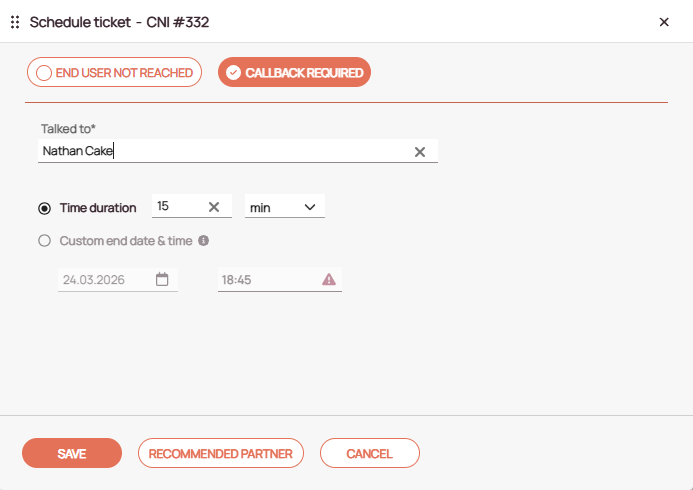
This button should be utilized if the end-user requests a later callback. The ticket will then move to the Ticket Clipboard. Please also note that the Ticket Clipboard behavior is configurable.
Section: Your customer wants to call you back later? -
Use thhe Talked to field to record the name of the person with whom you spoke while scheduling the appoitment.
-
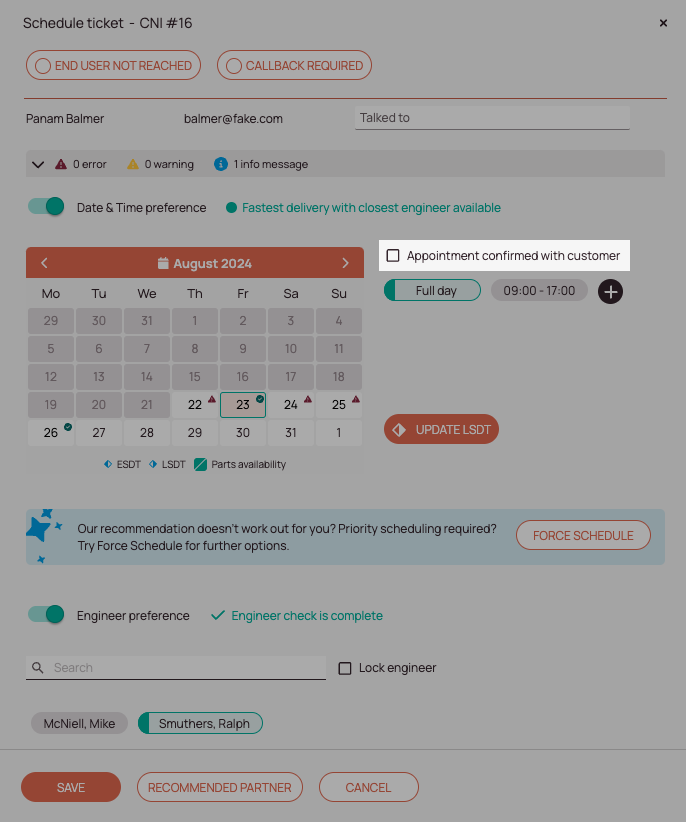
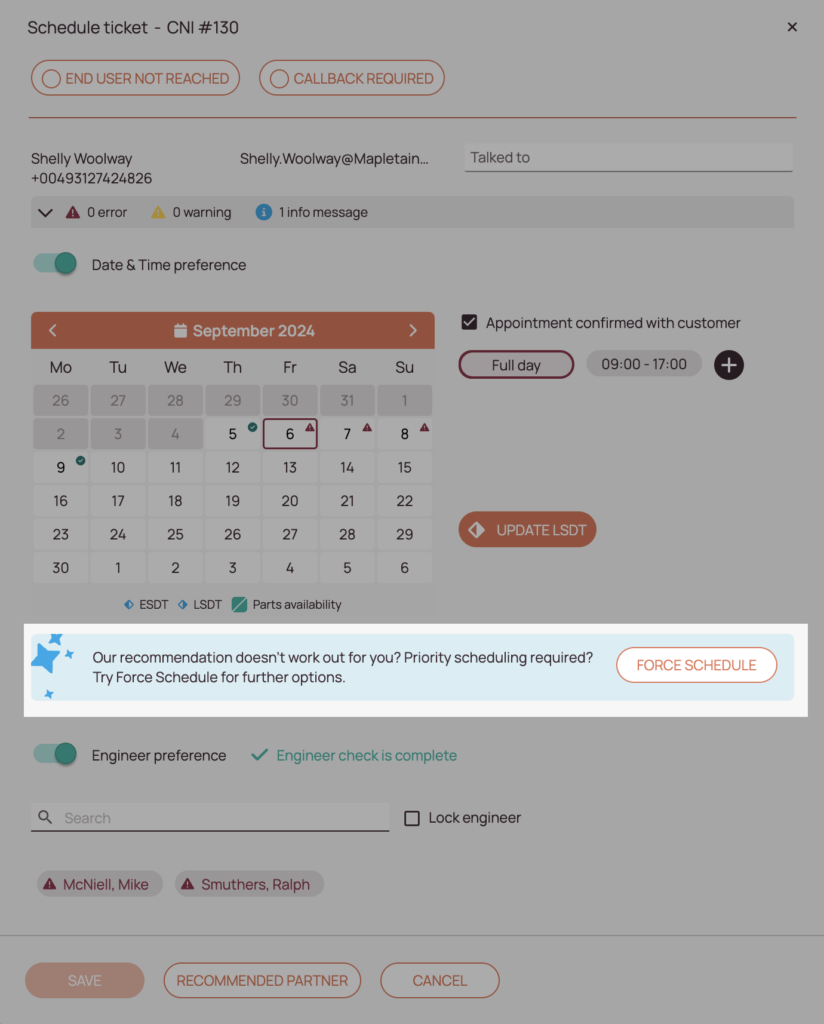
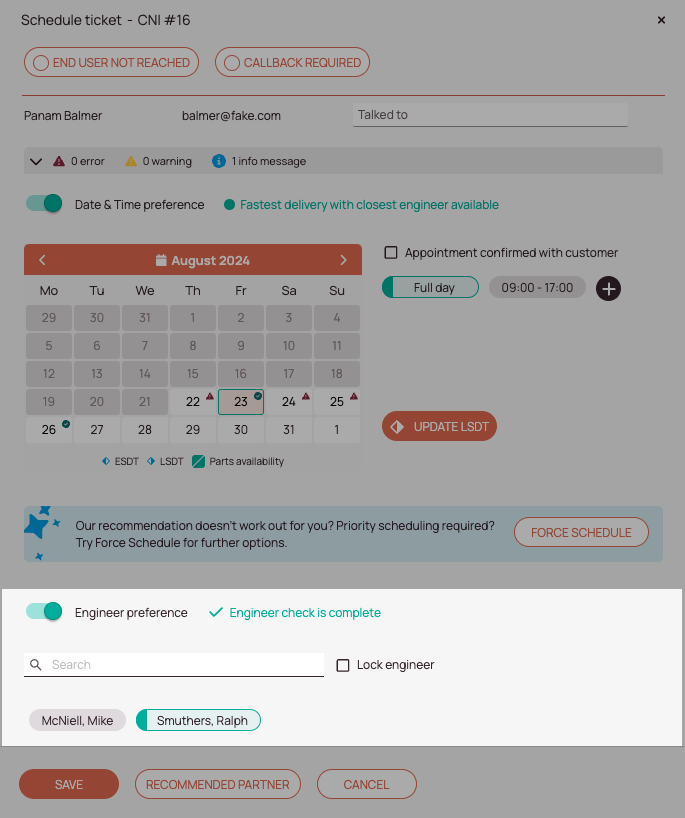
Scheduling Assistant Notifications: The Scheduling Assistant notifications are clustered by error, warnings, and info messages and are supposed to give you insights about the scheduling behavior. The expand arrow lets you expand and detail-view the notifications
-
The Date & Time preference toggle gives you the option to set a particular date & time preference for the ticket/object.
-
This checkmark lets you switch between the option to enter fixed appointments (where enduser input has been received) and proposed appointments (where customer input has not been received). If the customer didn’t give input, it is smart to choose the proposed appointment option, because the time window is bigger and allows the optimizer to arrange the ticket more freely.
-
When customers have limited availability, you can ensure the ticket is scheduled at a convenient time.
-
You can pick a date for the ticket in the calendar. The arrows in the upper row of the calendar allow you to switch the month.
-
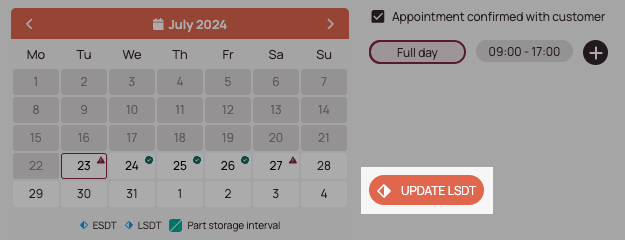
This button gives you the option to update the Latest Service Delivery time for this appointment.
Learn More: You need/want to update the LSDT? -
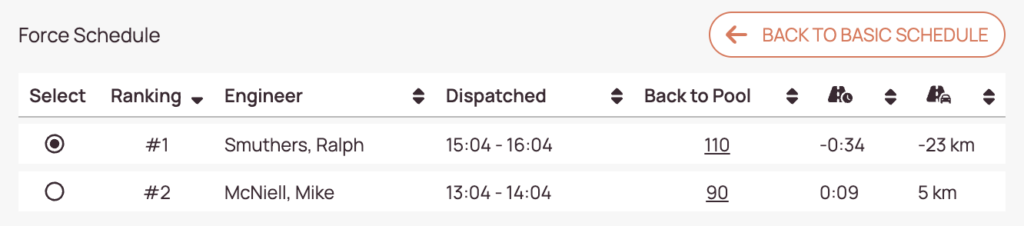
The Force Schedule option is useful for urgent tickets that require prioritization for various reasons.
Learn More: You want to prioritize a ticket (Force Schedule)? -
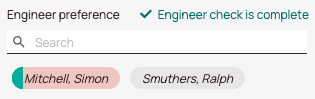
The engineer preference toggle gives you the option to pick the engineer for the ticket. You also can benefit from engineer suggestions from the Optimizer if you turn this toggle on.
-
The search field gives you the option to search for a specific engineer who should process this ticket. This is useful when a dispatch group has many engineers and the engineer you wish to assign was not the recommended engineer.
-
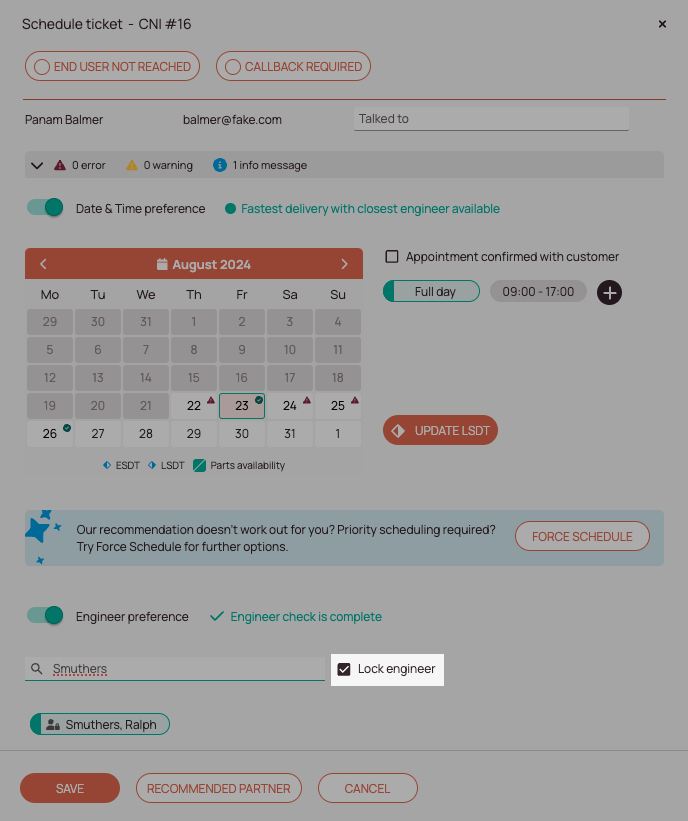
This checkmark gives you the option to lock/tie a particular engineer to the ticket. Please select an engineer (number 12) first, before clicking the “Lock engineer” button. If an engineer is locked to a ticket, the optimizer will not change the engineer for this ticket anymore.
-
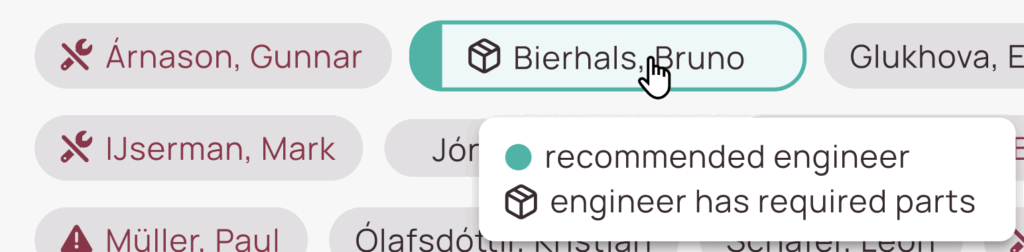
An engineer will be recommended based on distance, skills and availability, but you may select a different engineer. Engineers who are not avialable or lack required skills will be marked in red.
-
Save, Cancel, and Recommended Partner buttons. The Save button allows you to save all your set settings for the appointment, while the Cancel button closes the Scheduling assistant without applying any changes. The recommended partner button opens a pop up for selecting potential outsourcing partners, that could work on the ticket instead of your engineers. Partner recommendations are based on cooperation partner/account partner scores. Partner recommendations are sorted by best score first/best recommendation first.
-
When the optimizer proposes a suggestion, the button on the left side has a green mark. The current selection can be recognized by a prominent border. In our case, the scheduler suggests that we pick “Full Day”.
-
When there is an appropriately skilled engineer available on a day, a green circle with a checkmark will appear on the day. The scheduler automatically checks the next five days, but you can have it check another day by selecting it.
-
When a suggestion is proposed by the optimizer, the button is marked with green on the left side. The current selection can be recognized by the prominent border. In our case, the scheduler suggests that we pick “Klein, Bernhardt”.