Tip: You can use filters for better results
-
Latest News
-
Getting Started
-
Work Place
-
-
-
- About Buttons
- Action Buttons
- Schedule Tickets
- Ticket Info and COMS Buttons
- Add Parts
- Assign Partners
- Remove Tickets from the Ticket Clipboard
- Inline Skill Editing
- Create Intervention Info
- Create Intervention Reports
- Cancel Tickets
- Cancel Appointments
- Clone Tickets
- Edit Ticket Details
- Edit Privat Notes
- Report Tickets
- Close Tickets
-
Admin Panel
-
FMA 2 App
-
Customer Portal
About FMA Settings
You can configure FMA App behavior inside the FMA settings menu.
Accessing the FMA Settings Page
Navigate to Dispatch → FMA to change various FMA app settings.
About the "Simultaneous Appointments" switch
This FMA app setting determines whether engineers can process tickets simultaneously or sequentially. By flipping the toggle to the right engineers are allowed to start appointments at the same time opposed to be forced to work from ticket to ticket.
- Enable/disable the toggle.

What does this mean for the engineer using the FMA app?
If the feature is enabled the engineer can:
- Drive to an appointment and note it down in the app as usual.
- Start working on the ticket and note it down in the app as usual.
The engineer can also get back to the Home screen and can:
- Drive to another appointment or appointments in parallel and resolve the ticket in the app as usual.
- Start working on another ticket or tickets in parallel and resolve the ticket in the app as usual.
If the feature is disabled the engineer can:
- Work on tickets only one by one.
About the "Publish PUDO Appointments" switch
This FMA app setting controls if PUDO appointments can reach the FMA app or not. Enabling this toggle ensures that scheduled PUDO appointments will reach the engineer. If this toggle is switched off PUDO appointments will not be displayed inside the FMA app.
- Enable/disable the toggle.

About the "My Day" switch
This FMA app setting allows you to enable/disable the My Day feature. Enabling this toggle will make the My Day tab available inside the FMA app. The My Day menu inside the FMA app can be used by engineers to track their work start, work breaks, and work ends.
- Enable/disable the toggle.

About the "Part tracking code uniqueness check" switch
This FMA app setting allows you to control whether part tracking codes should be checked for uniqueness. Checking part tracking codes for uniqueness ensures that tracking numbers are not reused or mistyped, resulting in reduced errors and improved traceability. If the “Uniqueness Check” toggle is enabled, the feature will check if the tracking code (for part forms/shipping forms) exists among the last 200 entries reported on the FMA device under a particular user account. This is checked as soon as the FMA app user logs in successfully. The feature is configurable per project in the Admin panel, allowing flexibility between projects that require unique tracking codes and those that allow shared codes (e.g., multiple parts in one box). Depending on the configuration, engineers will either receive a warning or be blocked from saving invalid tracking codes.
- Enable/disable the toggle.

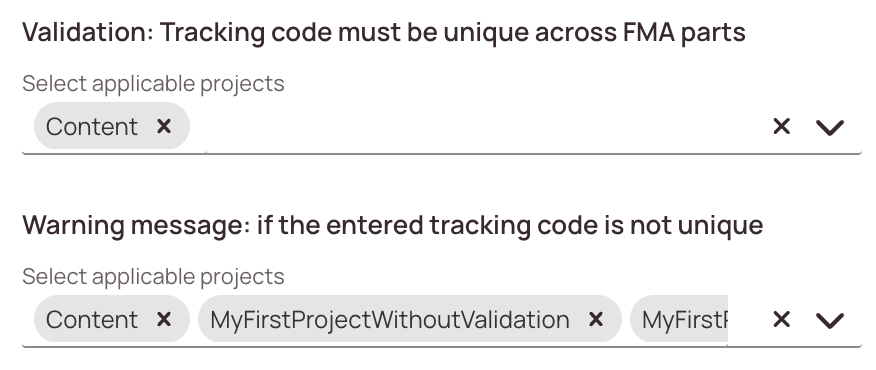
If the toggle has been enabled you can configure additional settings:
- The engineer can only be warned about not entering a unique or proper tracking number format. You can set the warning to appear on a project basis.
- The engineer can be prevented to save the return tracking number which is not matching the validation. You can set the validation on a project basis.
0 out of 5 stars
| 5 Stars | 0% | |
| 4 Stars | 0% | |
| 3 Stars | 0% | |
| 2 Stars | 0% | |
| 1 Stars | 0% |