Tip: You can use filters for better results
-
Latest News
-
Getting Started
-
Work Place
-
-
-
- About Buttons
- Action Buttons
- Schedule Tickets
- Ticket Info and COMS Buttons
- Add Parts
- Assign Partners
- Remove Tickets from the Ticket Clipboard
- Inline Skill Editing
- Create Intervention Info
- Create Intervention Reports
- Cancel Tickets
- Cancel Appointments
- Clone Tickets
- Edit Ticket Details
- Edit Privat Notes
- Report Tickets
- Close Tickets
-
Admin Panel
-
FMA 2 App
-
Customer Portal
About Templates
The templates page allows you to configure email templates and ticket info templates which you can later re-use inside Work place.
Accessing the Templates Page
Navigate to Projects and More → Templates to create/edit templates.
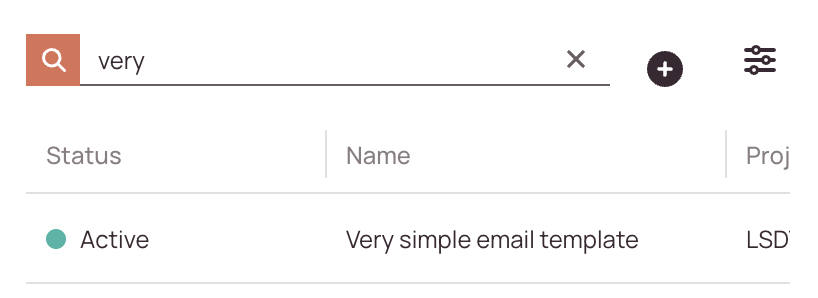
Searching for Templates
How to search:
- Navigate to Projects and more → Templates.
- Use the search bar at the top of the templates list.
- Enter any of the following:
- Templates
- Creator
- Status (e.g., active, inactive)
-
As you type, the list will automatically filter to match your query.
Creating/Editing Email Templates
You can use aliases when creating and sending emails by typing the "@" command inside a field. This will reveal an alias dropdown.
HTML is supported inside COMS and email templates.
You may not be able to see a "Preview" with the HTML formatting for now, however, when emails are sent out the HTML formatting will be visible to end customers.
Please pay attention to use the correct HTML declaration and scheme for emails in the body field:
				<!DOCTYPE html>

<html lang="en" xmlns="http://www.w3.org/1999/xhtml" xmlns:o="urn:schemas-microsoft-com:office:office">
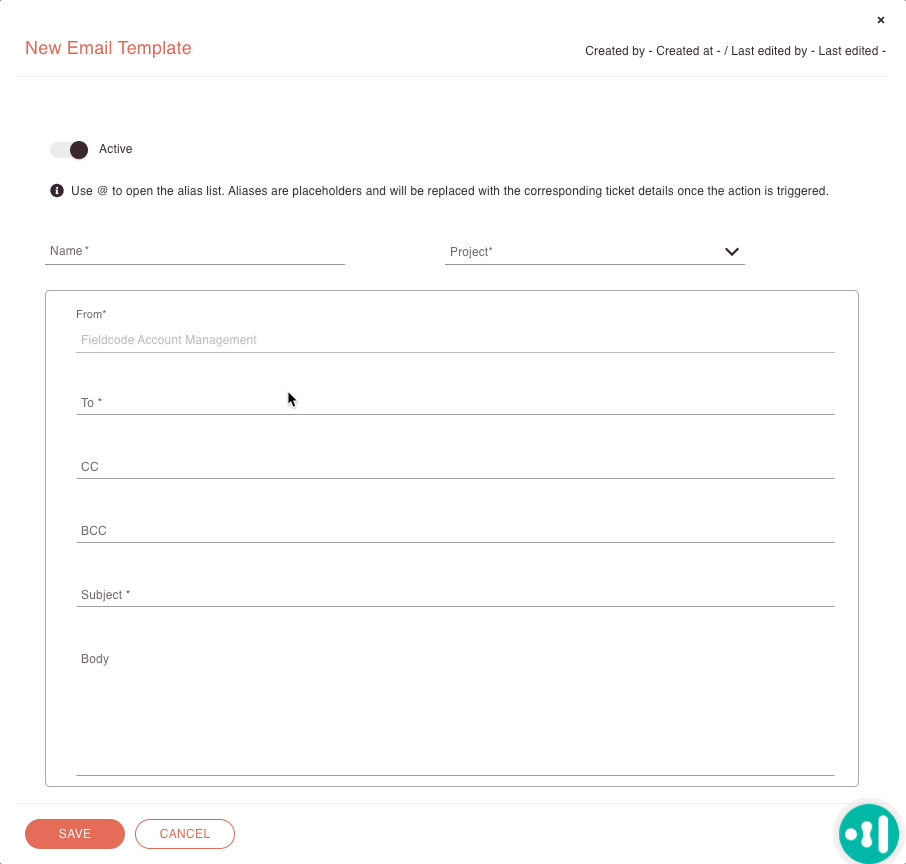
- Click on the plus button and then on the Create email template button to open the email template creation form (or click on an item on the list to edit).
- Fill in the email template form.
- Decide if your new or existing email template should be set to active in the system.
- Enter a name for your new or existing email template.
- Select a project from the drop-down. Email templates are project based.
- Insert from which email address the email should be sent.
- Insert to which email address the email should be sent.
- (Optional) – Decide to whom you want to CC (“Carbon Copy”) the email.
- (Optional) – Decide to whom you want BCC (“Blind Carbon Copy”) the email.
- Enter the email subject.
- (Optional) – Enter the email content.
Creating Ticket Info Templates
You can use aliases when creating and sending ticket infos by typing the "@" command inside a field. This will reveal an alias dropdown.
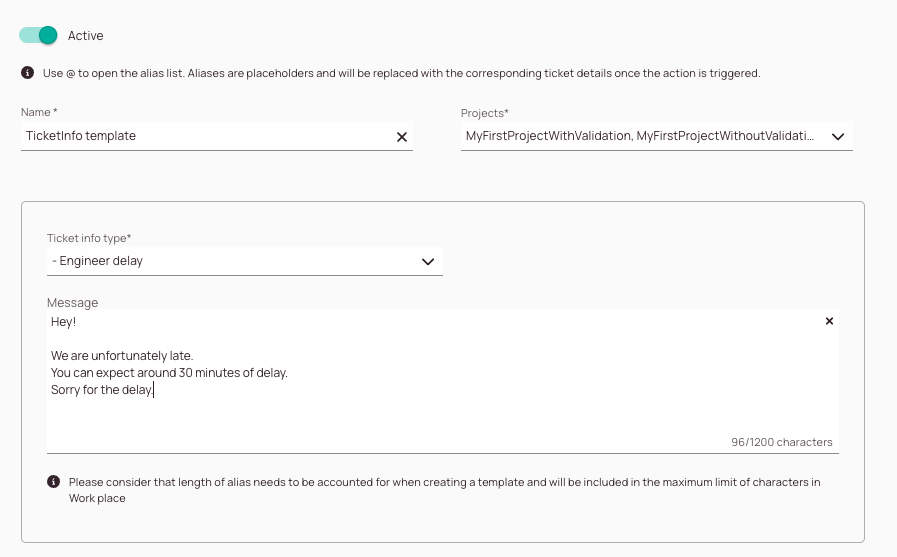
- Click on the plus button and then on the Create ticket info template button to open the ticket info template creation form (or click on an item on the list to edit).
- Fill in the ticket info template form.
- Decide if your new or existing ticket info template should be set to active in the system.
- Enter a name for your new or existing ticket info template.
- Select a project or multiple projects from the drop-down. Ticket info templates are project based.
- Select for which ticket info types you want to create templates. You can create template for all ticket info types individually or select multiple templates at once.
- Enter the ticket info content in the message field.
- Click Save.
About Email and Ticket Info Template Utilization
Templates are utilized inside the Work place.
- Select a ticket from the Ticket Pool.
- Click the speech bubble button in the Ticket Details and select either the Info or the Email action.
- From there you can select your configured templates and the content should load.
Creating Document Templates
You can use images, such as a company logo, on your document templates.
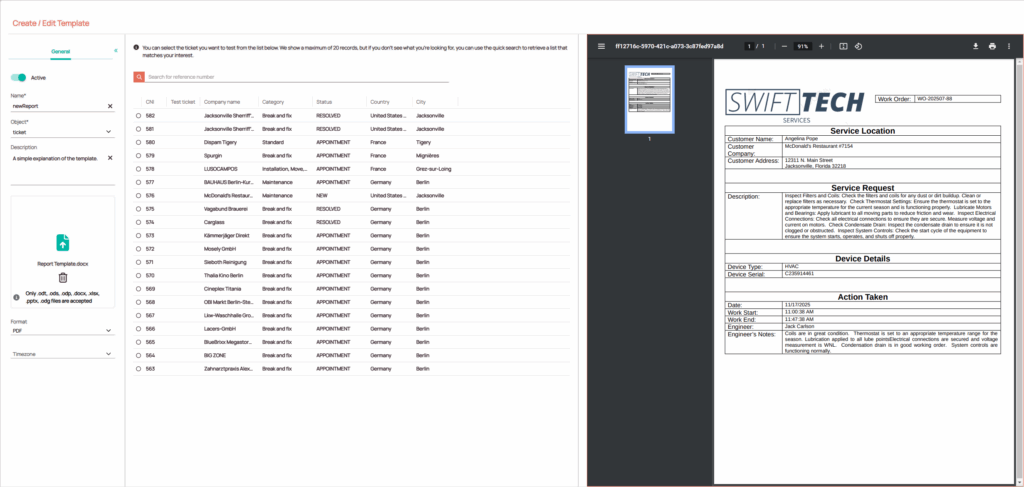
- Click on the plus button and then on the Create document template button to open the document template creation form (or click on an item on the list to edit).
- Enter a name for your new or existing document template.
- Select an object from the drop-down.
- Provide a description of the document.
- Upload your template. Only .odt, .ods, .odp, .docx, .xlsx, .pptx, .odg files are accepted
- (Option) Select the format for the document. The default is .pdf.
- (Optional) Select the timezone for the form. If your chosen object is ticket, then the default timezone is the timezone of the ticket.
- Click Save.
*Swift Tech Services is not a real company. Any resemblance to an actual company is purely coincidental.
0 out of 5 stars
| 5 Stars | 0% | |
| 4 Stars | 0% | |
| 3 Stars | 0% | |
| 2 Stars | 0% | |
| 1 Stars | 0% |