Tip: You can use filters for better results
-
Latest News
-
Getting Started
-
Work Place
-
-
-
- About Buttons
- Action Buttons
- Schedule Tickets
- Ticket Info and COMS Buttons
- Add Parts
- Assign Partners
- Remove Tickets from the Ticket Clipboard
- Inline Skill Editing
- Create Intervention Info
- Create Intervention Reports
- Cancel Tickets
- Cancel Appointments
- Clone Tickets
- Edit Ticket Details
- Edit Privat Notes
- Report Tickets
- Close Tickets
-
Admin Panel
-
FMA 2 App
-
Customer Portal
About Lists
The lists menu inside the Admin Panel gives you the possibility to add lists, so you can reuse them for different purposes. Lists can be useful for entering a bigger bulk of data into the system that you want to reuse or use for smart automation in various system parts. For example, you could use the list menu to create site lists, device lists, address lists, etc. You could also utilize lists for triggering workflow events, for enhancing system connections, and for almost any other automation that you want to achieve. You can even version your lists, to keep maintaining all your lists convenient and straight forward.
You can contact support@fieldcode.com via email if you want to have lists configured in a specific way.
Accessing the Lists Page
Navigate to Projects and More -> Lists to add/edit lists.
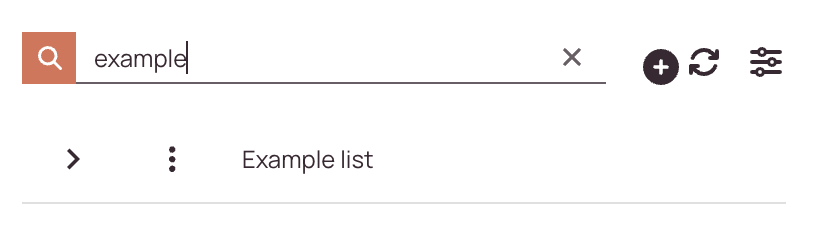
Searching for Lists
How to search:
- Navigate to Projects and more → Lists.
- Use the search bar at the top of the Lists list.
- Enter any of the following:
- List Name
- Creater name
- Status (e.g., active, inactive)
As you type, the list will automatically filter to match your query.
- With the Refresh button you can instantly refresh search results. Lists may get small updates meanwhile, thefore it may make sense to use the refresh button before checking results.
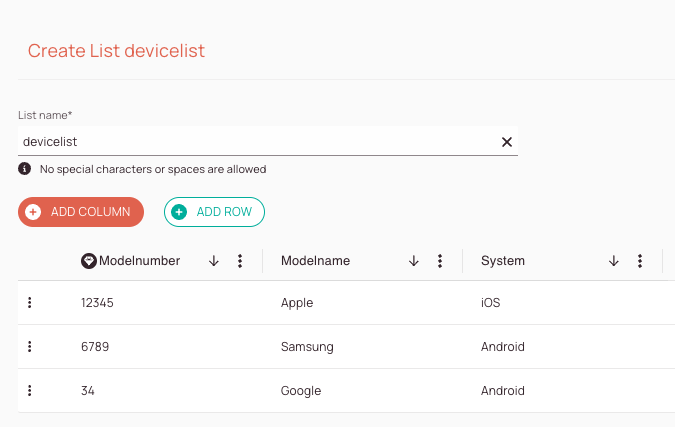
Adding New Lists
- Click on the plus button to open the list creation form.
- Select the Create new list button.
- Enter a name for your list item in the list name field.
Please note that the name cannot contain spaces or special characters. - Click on Add Column to be able to enter the first column of your new list.
- Enter a unique column name for the first column of your new list.
Please note that the name cannot contain spaces or special characters.
Please note that the first column always will be a mandatory and unique field.
This limitation ensures that the list can later be utilized by the system. - (Optional) – Add further columns.
Please note that you cannot delete columns, only rows.
If you enter a column incorrectly, you may need to redo your list. - (Optional) – Add rows with data. You can inline-edit data anytime by clicking directly inside a data field.
- (Optional) – After or while you are adding your list items, you can sort the data ascending or descending by clicking on the arrow inside a column.
- (Optional) – After or while you are adding your list items, you can decide if your column should be unique or mandatory by clicking on the three-dots menu.
Please note that unique fields are always also mandatory. - Click Save to save your new list.
Adding New Lists via Excel Upload
- Click on the plus button to open the Excel upload form.
- Select the Create via excel upload button.
- Enter a name for your list item in the list name field.
Please note that the name cannot contain spaces or special characters. - Enter a unique column name in for the first column of your new list.
Please note that the name cannot contain spaces or special characters.
Please note that the first column always will be a mandatory and unique field.
This limitation ensures that the list can later be utilized by the system. - Click on the Choose File button and select the Excel File from your Explorer.
Alternatively, you can drag & drop a .xls file directly from your desktop. - Click on the Save button.
- Your new Excel List should now be visible as a new list inside the List overview.
Please note that the Upload process may take a while to finish!
It may help to use the Refresh button on the right side to make your new list item visible.
Troubleshooting List Uploads
If your Excel upload fails, the file usually contains formatting or structure issues. In most cases, the problem can be fixed directly in Excel before uploading again. Here are some common issues and how to fix them.
- The primary identifier is not unique
The first column in a new uploaded list must be unique. This field is mandatory and used as the unique identifier.
Common causes
- Duplicate values
- Empty rows creating duplicate empty values
- Remove duplicate entries
- Delete empty rows before uploading
- The file contains unused empty rows or columns
Excel may still treat blank rows or columns as part of the data range.
How to check
- Press CTRL + END to jump to the last active cell in the worksheet
- Remove unused rows and columns after the actual end of your table
- Save the file and upload it again
- An unsupported column name is used
Some column names are not supported, for example id.
How to fix
- Rename the column to a different name
- Use a clear text-based column name
- Values contain leading or trailing spaces
Extra spaces can cause validation issues or mismatches.
How to fix
- Trim all values before uploading
- Make sure copied values do not include hidden spaces
- The file contains unsupported formats
List uploads support text/string values only.
How to fix
- Format all columns as Text
- Avoid numeric, date, or datetime formatting
- Make sure values are stored consistently as text
- The Excel file contains multiple or hidden sheets
Only files with one sheet should be uploaded.
How to fix
- Remove additional tabs
- Check for hidden tabs and delete or unhide them before uploading
- Duplicate or empty identifier values
- Hidden empty Excel ranges
- Unsupported column names
- Extra spaces
- Non-text formatting
- Multiple sheets in the file
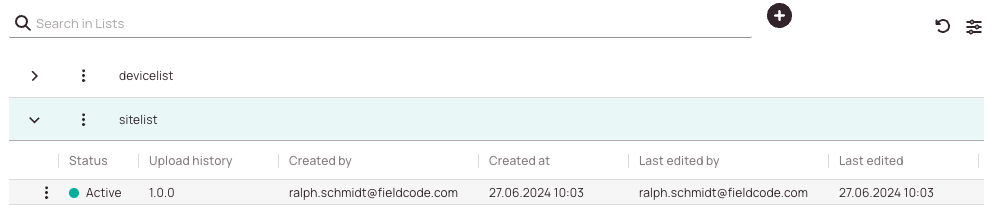
Editing Lists
- Select a list from the list menu for which you want to edit data.
- Click on the list.
- Inline-edit fields that you want to change.
Please note that the created by, created at, last modified by, and last modified at are auto-created when you create lists, and cannot be edited. - Click on Save to save your list changes.

List Versioning
Versioning a list is as easy as just uploading an updated Excel file version of your list that you want to update.
The updated list will be displayed at the top, while the older list will be displayed further down.
-
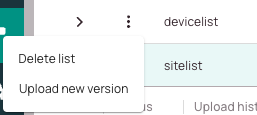
Click on the context menu of the list item for which you want to update the version.
-
Click on the Upload new version button. Proceed as explained in the How to create a new list via Excel Upload section.
Activating List Versions
If you have multiple list versions uploaded you can decide which one to set active. Only one list can be active at a time if you have multiple list versions uploaded.
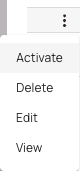
-
Click on the context menu of the version that you would like to activate.
-
Click on the Activate button. The selected version will be your new active list.
Deleting Lists
You can easily delete whole list items or versions of your list items by utilizing the correct context menu.

-
This is the context menu of the whole list item which allows you to delete all versions of a list at once.
-
This is the context menu of a particular version of your list, which allows you to delete particularly that version.
-
Click on the context menu of the list item or version that you would like to delete.
-
Click on the Delete list button. The list will be deleted and cannot be restored anymore. Therefore please make sure to backup first.
0 out of 5 stars
| 5 Stars | 0% | |
| 4 Stars | 0% | |
| 3 Stars | 0% | |
| 2 Stars | 0% | |
| 1 Stars | 0% |