Tip: You can use filters for better results
-
Latest News
-
Getting Started
-
Work Place
-
-
-
- About Buttons
- Action Buttons
- Schedule Tickets
- Ticket Info and COMS Buttons
- Add Parts
- Assign Partners
- Remove Tickets from the Ticket Clipboard
- Inline Skill Editing
- Create Intervention Info
- Create Intervention Reports
- Cancel Tickets
- Cancel Appointments
- Clone Tickets
- Edit Ticket Details
- Edit Privat Notes
- Report Tickets
- Close Tickets
-
Admin Panel
-
FMA 2 App
-
Customer Portal
About SLA Profiles
If you want to learn how to benefit from SLA Profiles, please check out the following topic: SLA Profiles
The SLA Profiles menu allows you to define business hours (operating hours), business days, and bank holidays in bulk. SLA stands for Service Level Agreement and specifies the service commitments that must be met and observed. The SLA Profile is used when the end user wants to book an appointment via the Customer Portal, and the system only suggests available dates that were specified in the SLA Profile.
Accessing the SLA Profile Page
Navigate to Projects and More → SLA Profiles to add/edit SLA Profiles.
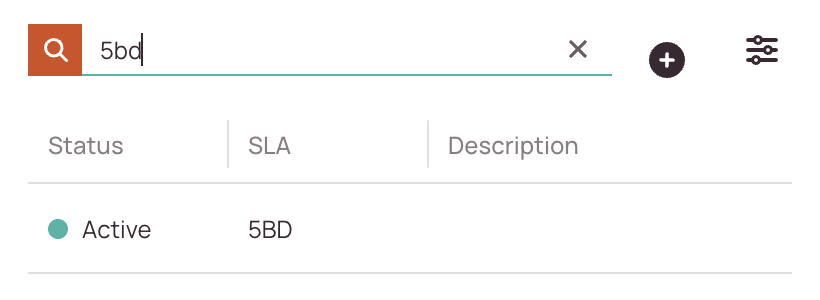
Searching for SLA Profiles
How to search:
- Navigate to Projects and more → SLA Profiles.
- Use the search bar at the top of the SLA Profiles list.
- Enter any of the following:
- Name
- Creator
- Status (e.g., active, inactive)
-
As you type, the list will automatically filter to match your query.
Create/Edit SLA Profiles
- Click on the Plus button.
- Decide if your new or existing SLA Profile should be set to active in the system.
- Select which business rule should be applied for your SLA Profile in the Select SLA field.
Tip: You can configure custom SLA values inside Value Sets. - (Optional) – Add a description for your SLA Profile.
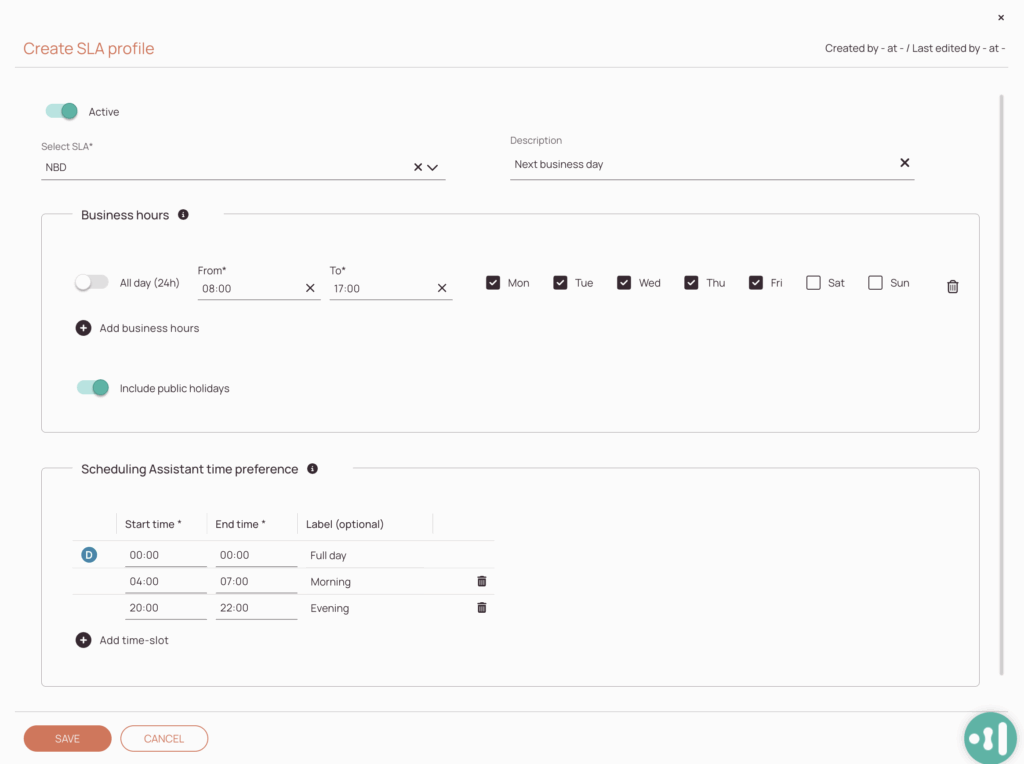
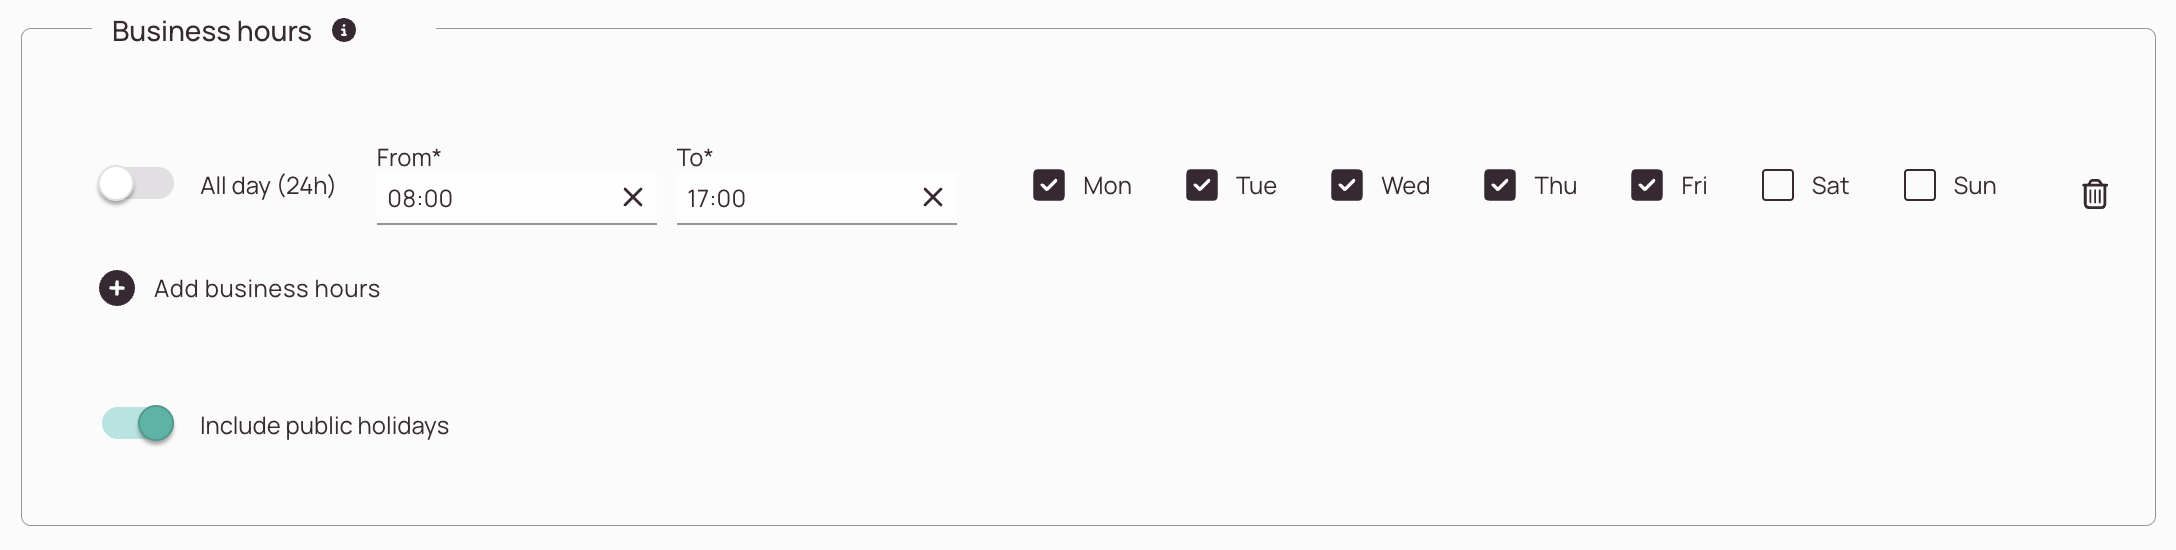
Defining Business Hours
Your goal when defining business hours is to cover all open company business hours.
- Define your business hours.
Different use cases are described in the below section: Defining business hours - Decide if your new or existing SLA profile should consider public holidays of the ticket’s location.
If enabled, the system won’t schedule bookings on public holidays. - Click Save.
Below you can check some concrete examples of business hours definition.
Examples:
Business operates from Monday to Friday from 08:00 to 17:00 – no business on weekends:
- Set the time from 08:00 to 17:00.
- Click on Save
- Set the time from 08:00 to 12:00 for Monday to Friday.
- Remove the checkbox for Thursday and Friday.
- Click on Add business hours.
- Set the time from 08:00 to 17:00.
- Turn on checkboxes for Thursday and Friday.
- Click on Save.
If your business has different operating hours for other days, the above is the proper way to configure this, covering all eventualities.
- Set the time from 06:00 to 15:00 for Monday to Friday:
- Click on Add business hours.
- Set the time from 18:00 to 19:00.
- Turn on the checkbox for Saturday.
- Click on Save.
Business operates 24 hours – every day:
- Click on Add business hours.
- Enable the 24 business hours switch.
- Click on Save.
Business operates with night shifts that occur from Monday morning to end of Tuesday night:
- Select only Monday in the first row.
- Set the time from 00:00 to 00:00.
- Select only Tuesday in the second row.
- Set the time from 00:00 to 00:00.
- Click on Save.
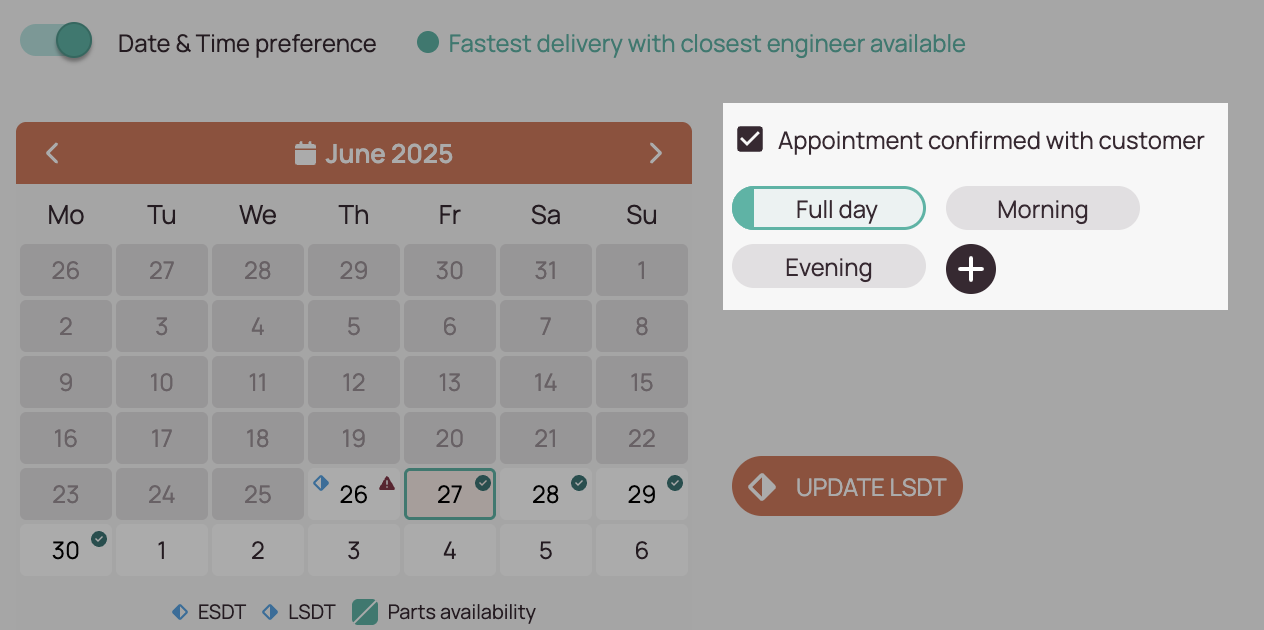
Defining Scheduling Assistant Time Preferences
The default fullday slot cannot be changed, as it is used by the system as a fallback.
You can configure your own scheduling preferences for the Scheduling Assistant. The Scheduling Assistant time preferences you configure here will later be visible as chips in the Scheduling Assistant and can be selected by dispatchers. The time slots you configure here will later be suggested inside the Scheduling Assistant.
When defining Scheduling Assistant time preferences please keep in mind that the previously defined business hours have no correlation to this setting.
Business hours versus scheduling assistant preferences: We have defined business hours for Monday to Friday before. If the dispatcher will try to schedule a ticket on Saturday, the configured custom preferences, e.g. Morning and Evening would be still available for selection.
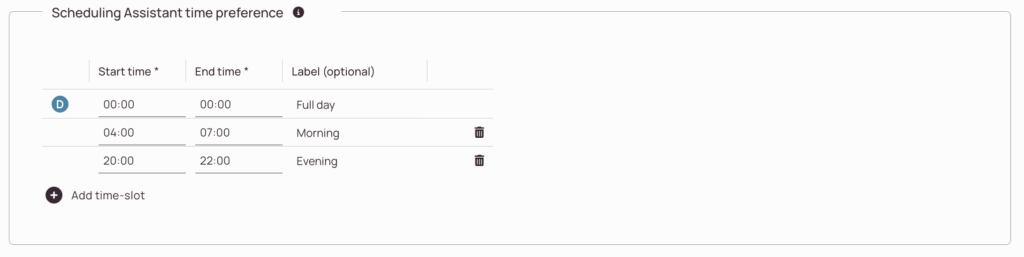
- Define your custom time preferences for the Scheduling Assistant by adding custom time-slots. You can remove/replace other time preferences then the default one by clicking on the trash button right next to a time slot.
- Click on the Add time-slot button to add an additional time slot.
- Define the start and end time for the new time slot by picking times.
Please be aware that time slots cannot be filled in empty. - (Optional) – Add descriptive labels for your new time slots. The label will be displayed as a tooltip of the selectable chip when one hovers over the chip.
- (Optional) – You can delete time slots, which you don’t want to use.
- Click on Save.
Effects in the Scheduling Assistant:
The configured Scheduling Assistant time preferences will be suggested and taken into consideration.
My custom SLA Profile chips do not appear in the Scheduling Assistant, what could be the cause?
You have to make sure that the SLA field is configured for your ticket creation form and that your SLA value is available for selection. Otherwise, if you don't select a SLA for your ticket, the custom time chips won't show up in the Scheduling Assistant.

5 out of 5 stars
1 rating
| 5 Stars | 100% | |
| 4 Stars | 0% | |
| 3 Stars | 0% | |
| 2 Stars | 0% | |
| 1 Stars | 0% |