Tip: You can use filters for better results
-
Latest News
-
Getting Started
-
Work Place
-
-
-
- About Buttons
- Action Buttons
- Schedule Tickets
- Ticket Info and COMS Buttons
- Add Parts
- Assign Partners
- Remove Tickets from the Ticket Clipboard
- Inline Skill Editing
- Create Intervention Info
- Create Intervention Reports
- Cancel Tickets
- Cancel Appointments
- Clone Tickets
- Edit Ticket Details
- Edit Privat Notes
- Report Tickets
- Close Tickets
-
Admin Panel
-
FMA 2 App
-
Customer Portal
About Aliases
Aliases are used in certain parts of the applications to automatically pull specific ticket details out of the system so that manual data input is not required anymore. Aliases are placeholders and will be replaced with actual values once the action is triggered.
- Aliases can be used when configuring Automated Actions, when configuring email templates.
- The alias list only appears context-sensitive and only where the usage of aliases actually makes sense.
- You may see for example a different alias list popping up in email templates, than in Automated Actions.
- Triggering the alias list: This is done by typing @ in a text field, where aliases can be used.
- The aliases list will then appear and you can decide which alias to use.
- When the content is sent out, the placeholder will be replaced with actual ticket details.
Alias Types
You can trigger different alias types, depending on the prefix you use:
- If you use the # prefix you will trigger the link type.
You could for example create Customer Portal links or Partner Portal links with the # prefix. - If you use the @ prefix you will trigger the variables type.
You could for example utilize values from fields by using the @ prefix, such as actual email address values or dispatch time field values, which should be retrieved automatically by the system.
Alias Examples
You can use aliases to pull data from the Ticket Details, so you don’t have to enter data manually every time.
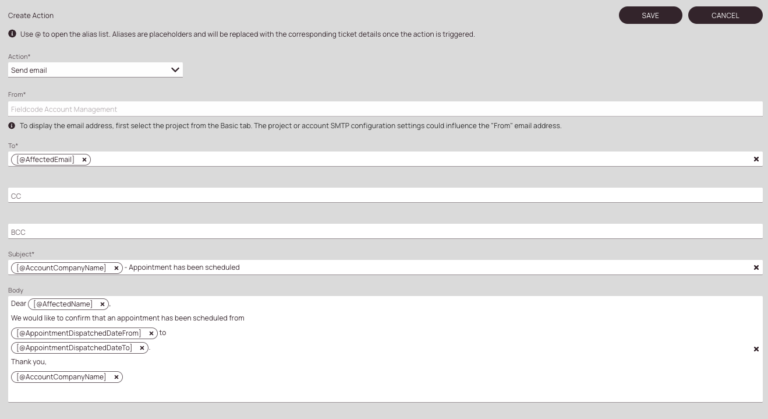
For example, this may provide as useful the “Send email” action inside Automated Actions.
-
The affected email alias will use ticket details from the ticket to fill in the data. So instead of the Alias @affectedEmail the actual recipient value of the ticket will be auto-filled. As aliases are dynamic and tied to the ticket, the data will auto-replace accordingly.
-
Aliases can be also used in the Subject field. They will be suggested context-based by the system.
-
Aliases can also be used inside the Body field. They will be suggested context-based by the system. In this example the dispatched from and dispatched to times are used to dynamically inform the end customer.
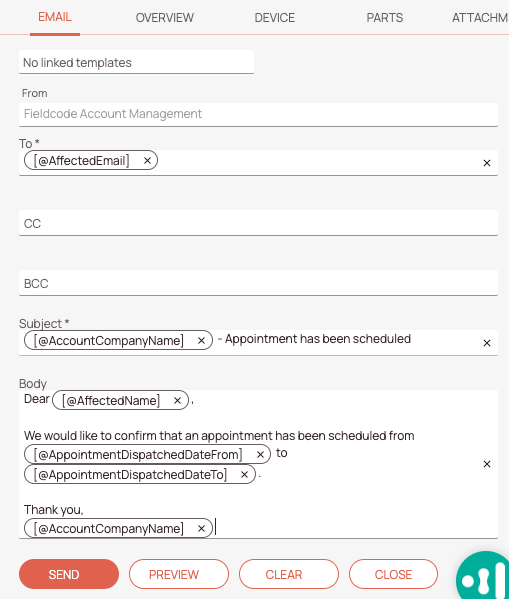
Another helpful usage of aliases is when writing one-time emails to customers, which are not automated yet for any reason:
-
The affected email alias will use ticket details from the ticket to fill in the data. So instead of the Alias @affectedEmail the actual recipient value of the ticket will be auto-filled. As aliases are dynamic and tied to the ticket, the data will auto-replace accordingly.
-
Aliases can be also used in the Subject field. They will be suggested context-based by the system.
-
Aliases can also be used inside the Body field. They will be suggested context-based by the system. In this example the dispatched from and dispatched to times are used to dynamically inform the end customer.
-
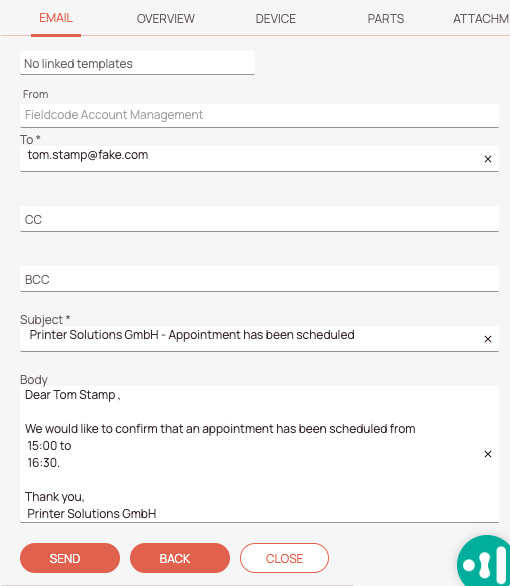
The Preview button lets you check how the final email that is actually sent out will look like.
This is how the actual sent out email will look like:
-
After clicking on the Preview button you can double check which values are actually used for the alias placeholders. In our example you can see that every value has been taken over properly, therefore we are ready to send out this email by clicking on the Send button.
Accessing Fields Dynamically with Function Statements
While aliases provide a convenient way to reference predefined fields in templates, there are cases where no alias exists – especially for custom fields or tenant-specific configurations.
To address this, Fieldcode supports function statements that allow dynamic access to field values in templates such as automated actions, emails, and other configurable components.
Syntax (=Fieldcode Expression Language):
- FUNCTIONNAME: The function used to retrieve or format the value.
- OBJECT: The type of object (e.g.,
ticket,device,reporting). - OBJECTID: The reference to the specific object instance.
- FIELDNAME: The name of the field to retrieve.
Examples
Custom Fields:
- Ticket custom field with a NULL replacement:
[$getCustomFieldValue(‘ticket’, ticket.id, ‘CustomFieldName’)] - Report custom field:
[$getCustomFieldValue(‘reporting’, ticket.interventions[last].reporting.id, ‘CustomFieldName’)] - Device custom field:
[$getCustomFieldValue(‘device’, ticket.device.id, ‘CustomFieldName’)] - Checklist custom field:
[$getCustomFieldValue(‘checklist’, checklist.id, ‘CustomFieldName’)]
Custom Fields:
- unformatted Fixed From: [$getFieldValue(‘ticket’, ticket.interventions[last].appointments[last].fixedFrom)]
- formatted Dispatched From:
[$format((toDate(ticket.interventions[last].appointments[last].dispatchedFrom) || ticket.interventions[last].appointments[last].dispatchedFrom), “MMM dd, yyyy HH:mm”)] - Included alias: [$getFieldValue(‘ticket’,[@CNI])]
4 out of 5 stars
1 rating
| 5 Stars | 0% | |
| 4 Stars | 100% | |
| 3 Stars | 0% | |
| 2 Stars | 0% | |
| 1 Stars | 0% |