Fieldcode Manual
Tip: You can use filters for better results
-
Latest News
-
Getting Started
-
Work Place
-
-
-
- Add Parts
- Assign Partners
- Interaction Buttons
- Workflow Buttons
- Ticket Info and COMS Buttons
- Schedule Tickets
- Edit Ticket Details
- Cancel Tickets
- Remove Tickets from the Ticket Clipboard
- Report Tickets
- Create Intervention Info
- Create Intervention Reports
- Cancel Appointments
- Clone Tickets
- Edit Privat Notes
- Inline Skill Editing
-
Admin Panel
-
Fieldcode FMA app
-
Customer Portal
Last updated:June 27, 2024
How to complete the driving phase
Copy the URL link to this section to share
The next phase of resolving a ticket on the field is the driving phase.
- The driving phase is utilized to track driving times.
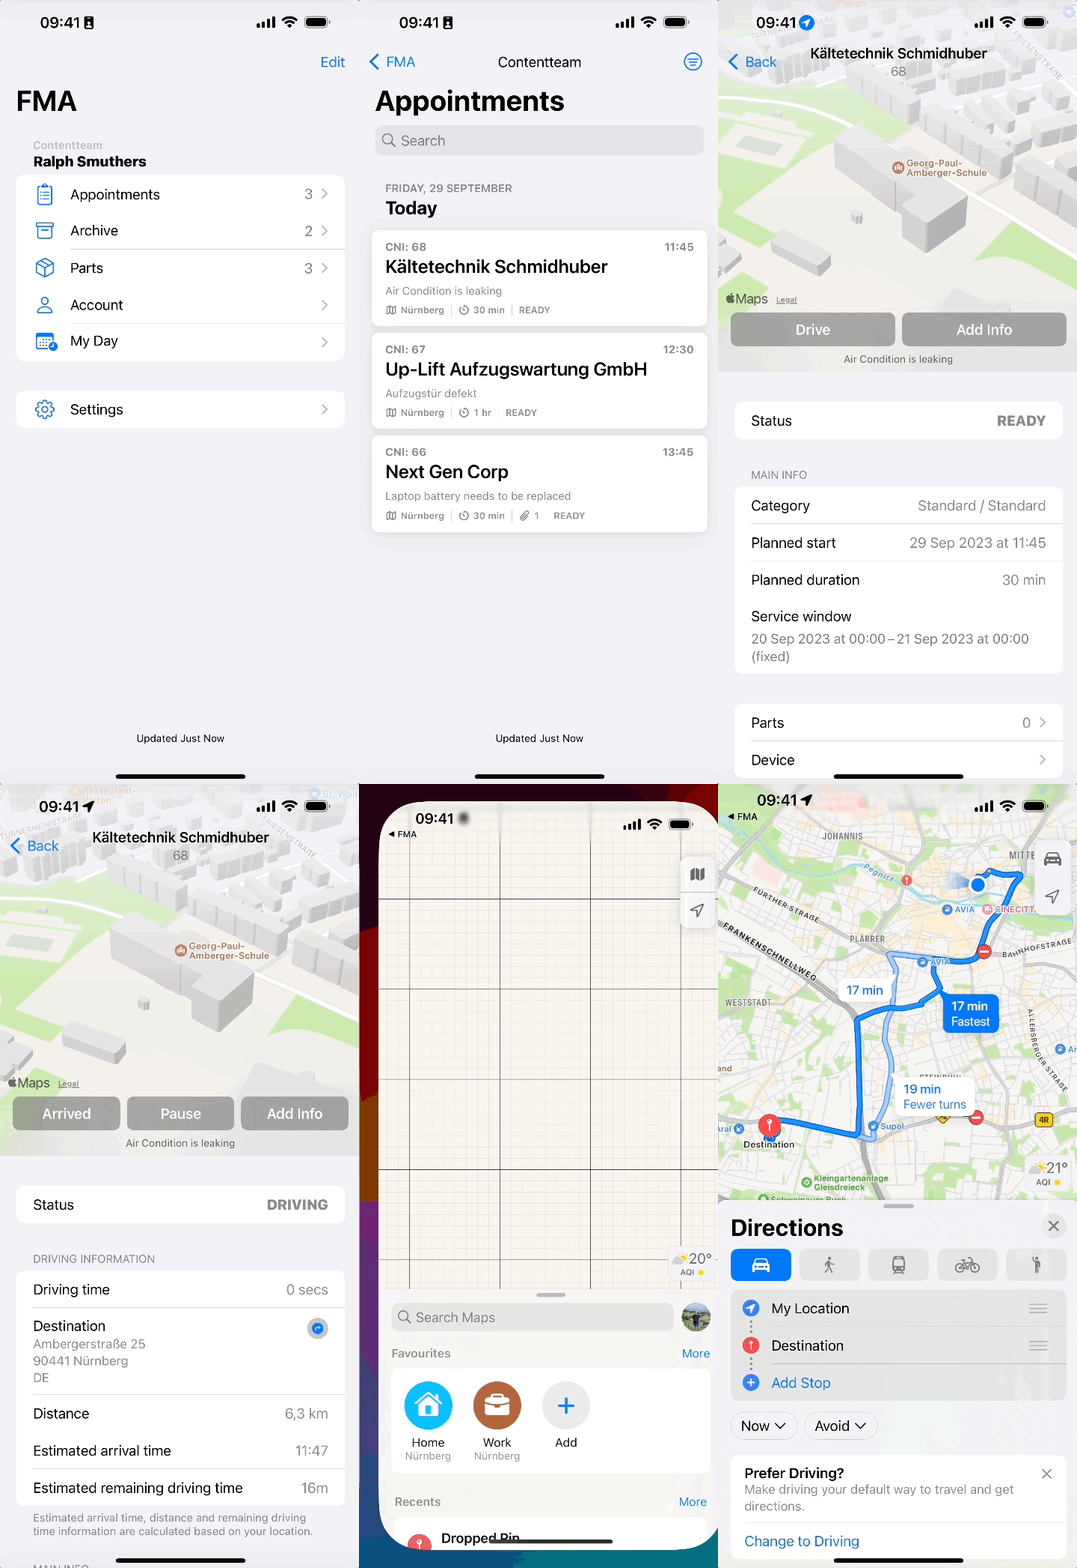
- You can navigate to your next destination by tapping on the destination arrow.
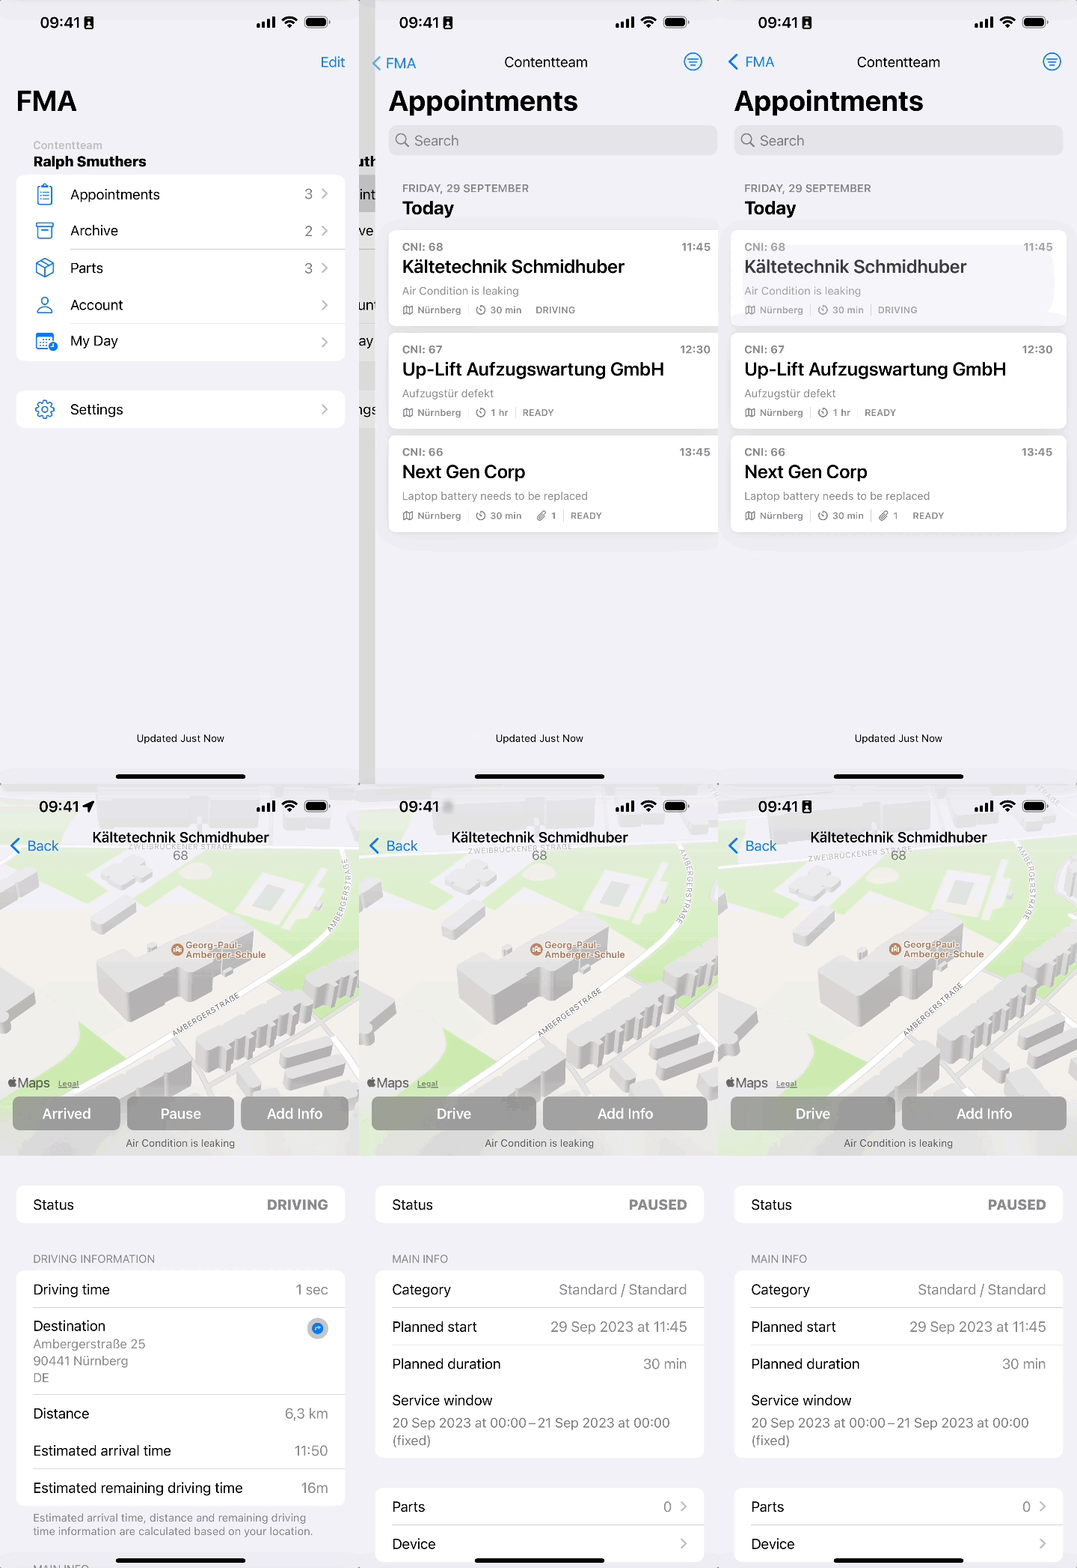
- You can pause the Driving phase.
- You can end the Driving phase.
After resolving the driving phase you can proceed to the appointment phase.
How to start the drive
Copy the URL link to this section to share
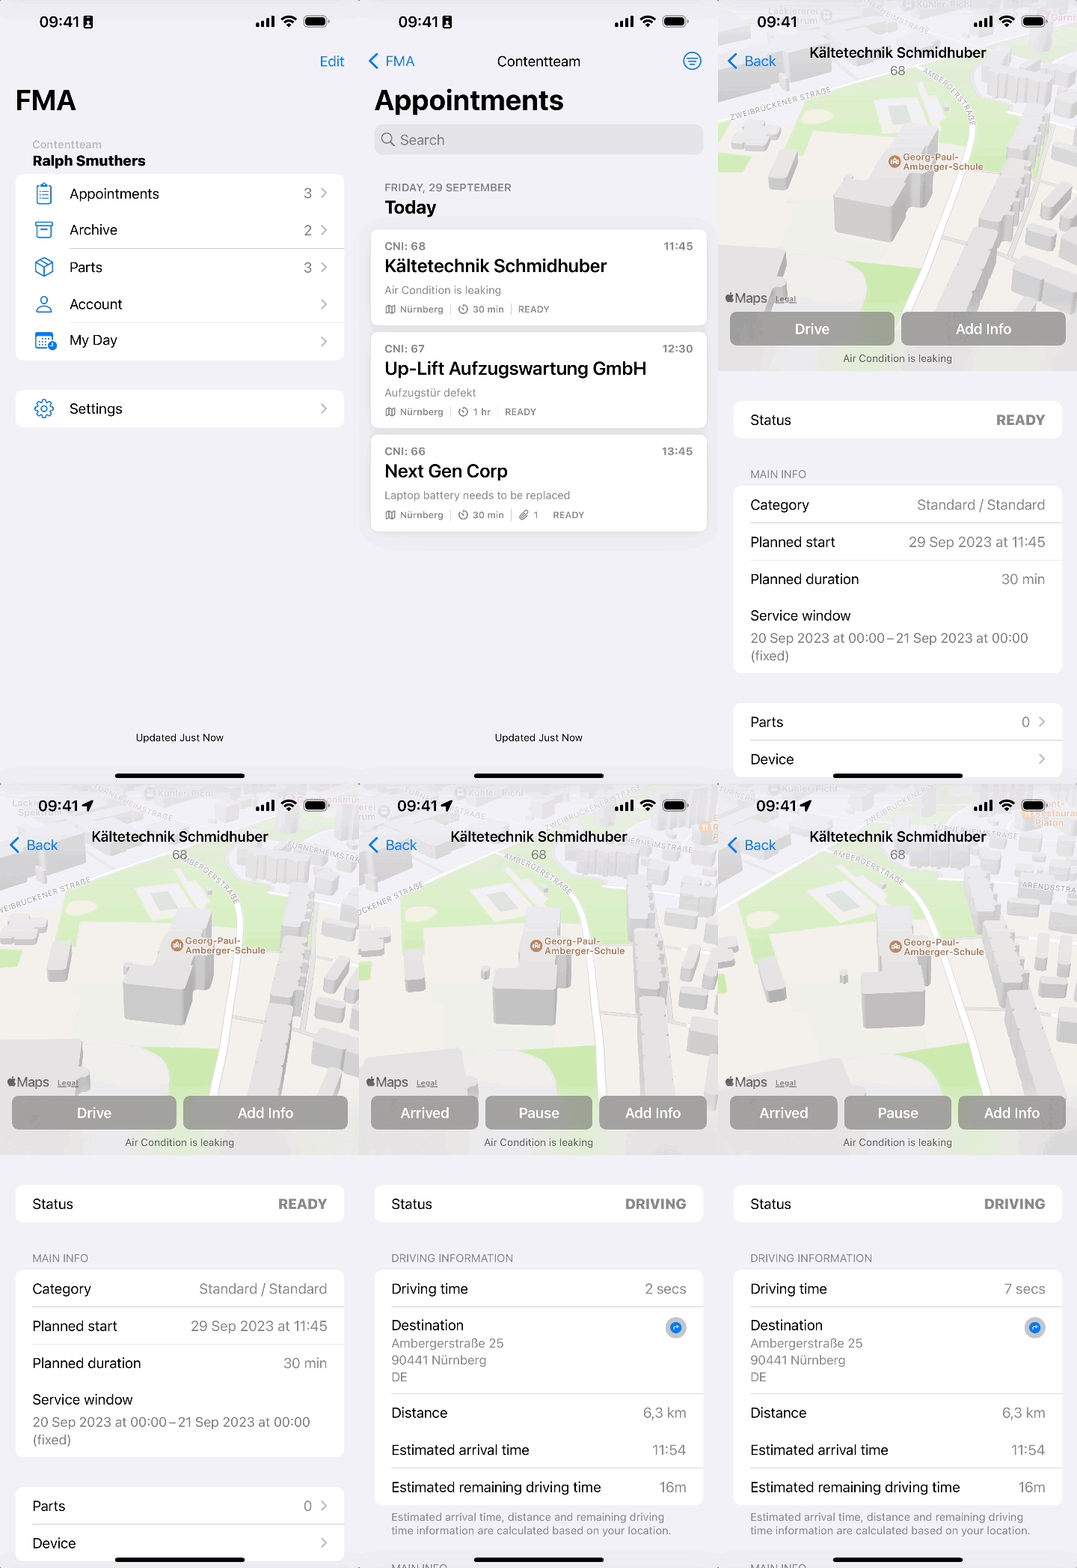
The drive button starts the drive and lets Work Place know that the driving phase to the ticket location has been initiated. The status inside FMA app will change to status Driving.
- Tap on the appointment you want to resolve.
- Tap on the Drive button at the top.

How to pause the drive
Copy the URL link to this section to share
- Tap on the appointment you want to resolve.
- Tap on the Pause button at the top.

How to navigate to the appointment
Copy the URL link to this section to share
FMA Application and Maps App
- You can switch between the FMA App and your Maps App anytime.
- The FMA App and the Maps App will by default continue to run in the background.
- Tap on the appointment you want to resolve.
- Tap on the Drive button at the top.
- Tap on the destination arrow.
- Your navigation app should launch allowing you to navigate to your location.

How to end the drive
Copy the URL link to this section to share
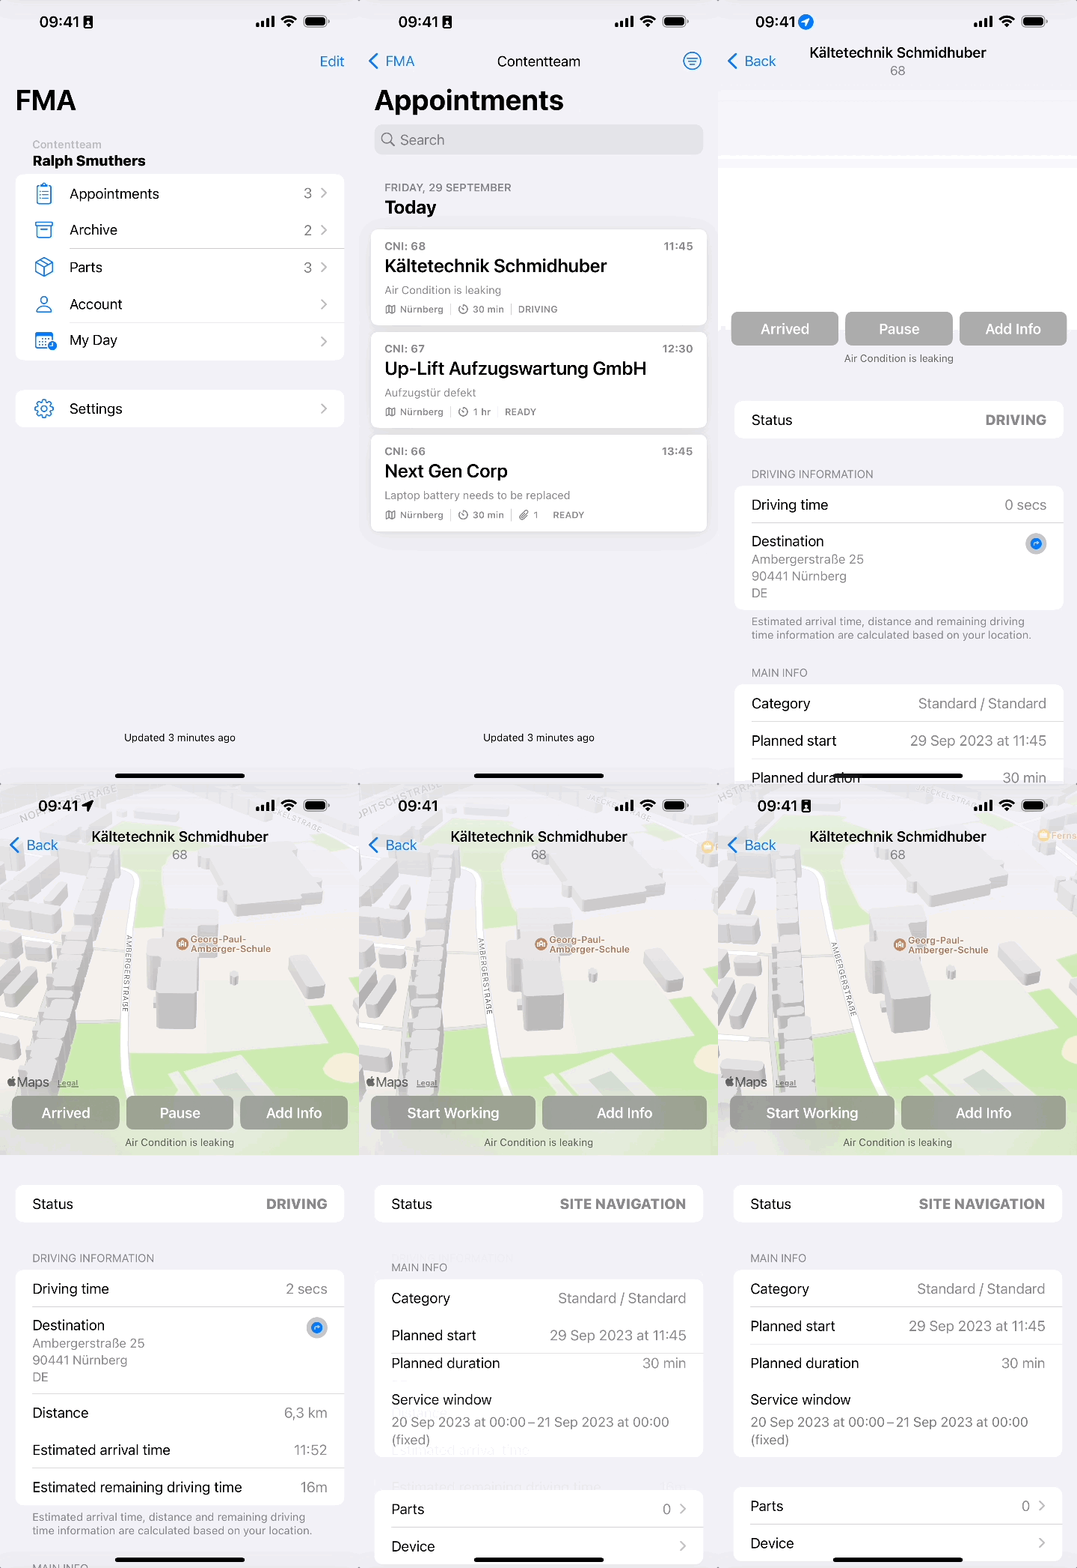
Let’s assume you arrived at your ticket location.
Then it’s time to proceed over to the Appointment phase.
- Tap on the appointment you want to resolve.
- Tap the Arrived button to finish the driving phase and initiate the appointment phase.

Was this topic helpful?
0 out of 5 stars
| 5 Stars | 0% | |
| 4 Stars | 0% | |
| 3 Stars | 0% | |
| 2 Stars | 0% | |
| 1 Stars | 0% |
5
Navigation
