
Tip: You can use filters for better results
-
Latest News
-
Getting Started
-
Work Place
-
-
-
-
- About Buttons
- Action Buttons
- Schedule Tickets
- Ticket Info and COMS Buttons
- Add Parts
- Assign Partners
- Remove Tickets from the Ticket Clipboard
- Inline Skill Editing
- Create Intervention Info
- Create Intervention Reports
- Cancel Tickets
- Cancel Appointments
- Clone Tickets
- Edit Ticket Details
- Edit Privat Notes
- Report Tickets
- Close Tickets
-
-
Admin Panel
-
FMA 2 App
-
Customer Portal
About Ticket Pool
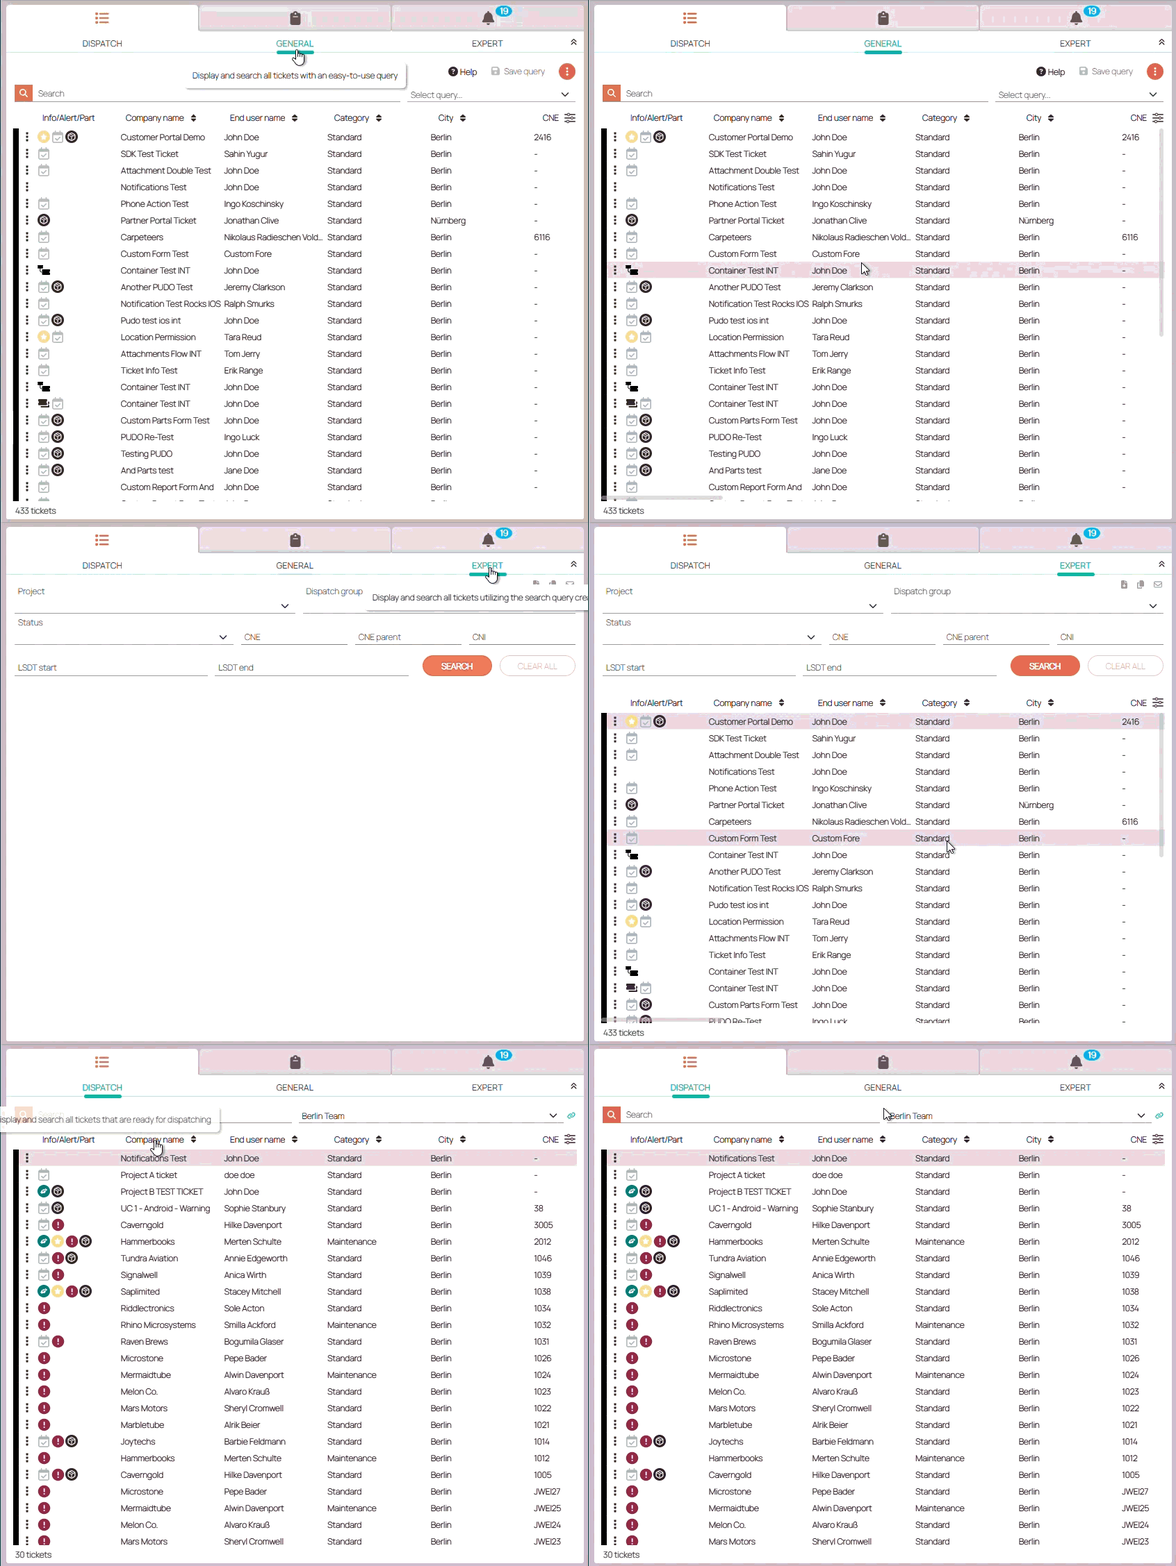
The Ticket Pool is the main source for incoming tickets. The Ticket Pool is clustered in different tabs, which further filter tickets depending on your use case/ job role. The ticket pool stores all tickets and shows relevant ones in the different tabs. For example, in the Dispatch tab, you will only see tickets of your selected Dispatch group. The Ticket Pool allows you to cluster by specific tickets, allows you to temporarily or permanently store tickets, allows you to be notified on specific tickets (to gather useful information), allows you to apply filters, and allows you to view conditions or indications of specific tickets.
Customize displayed columns
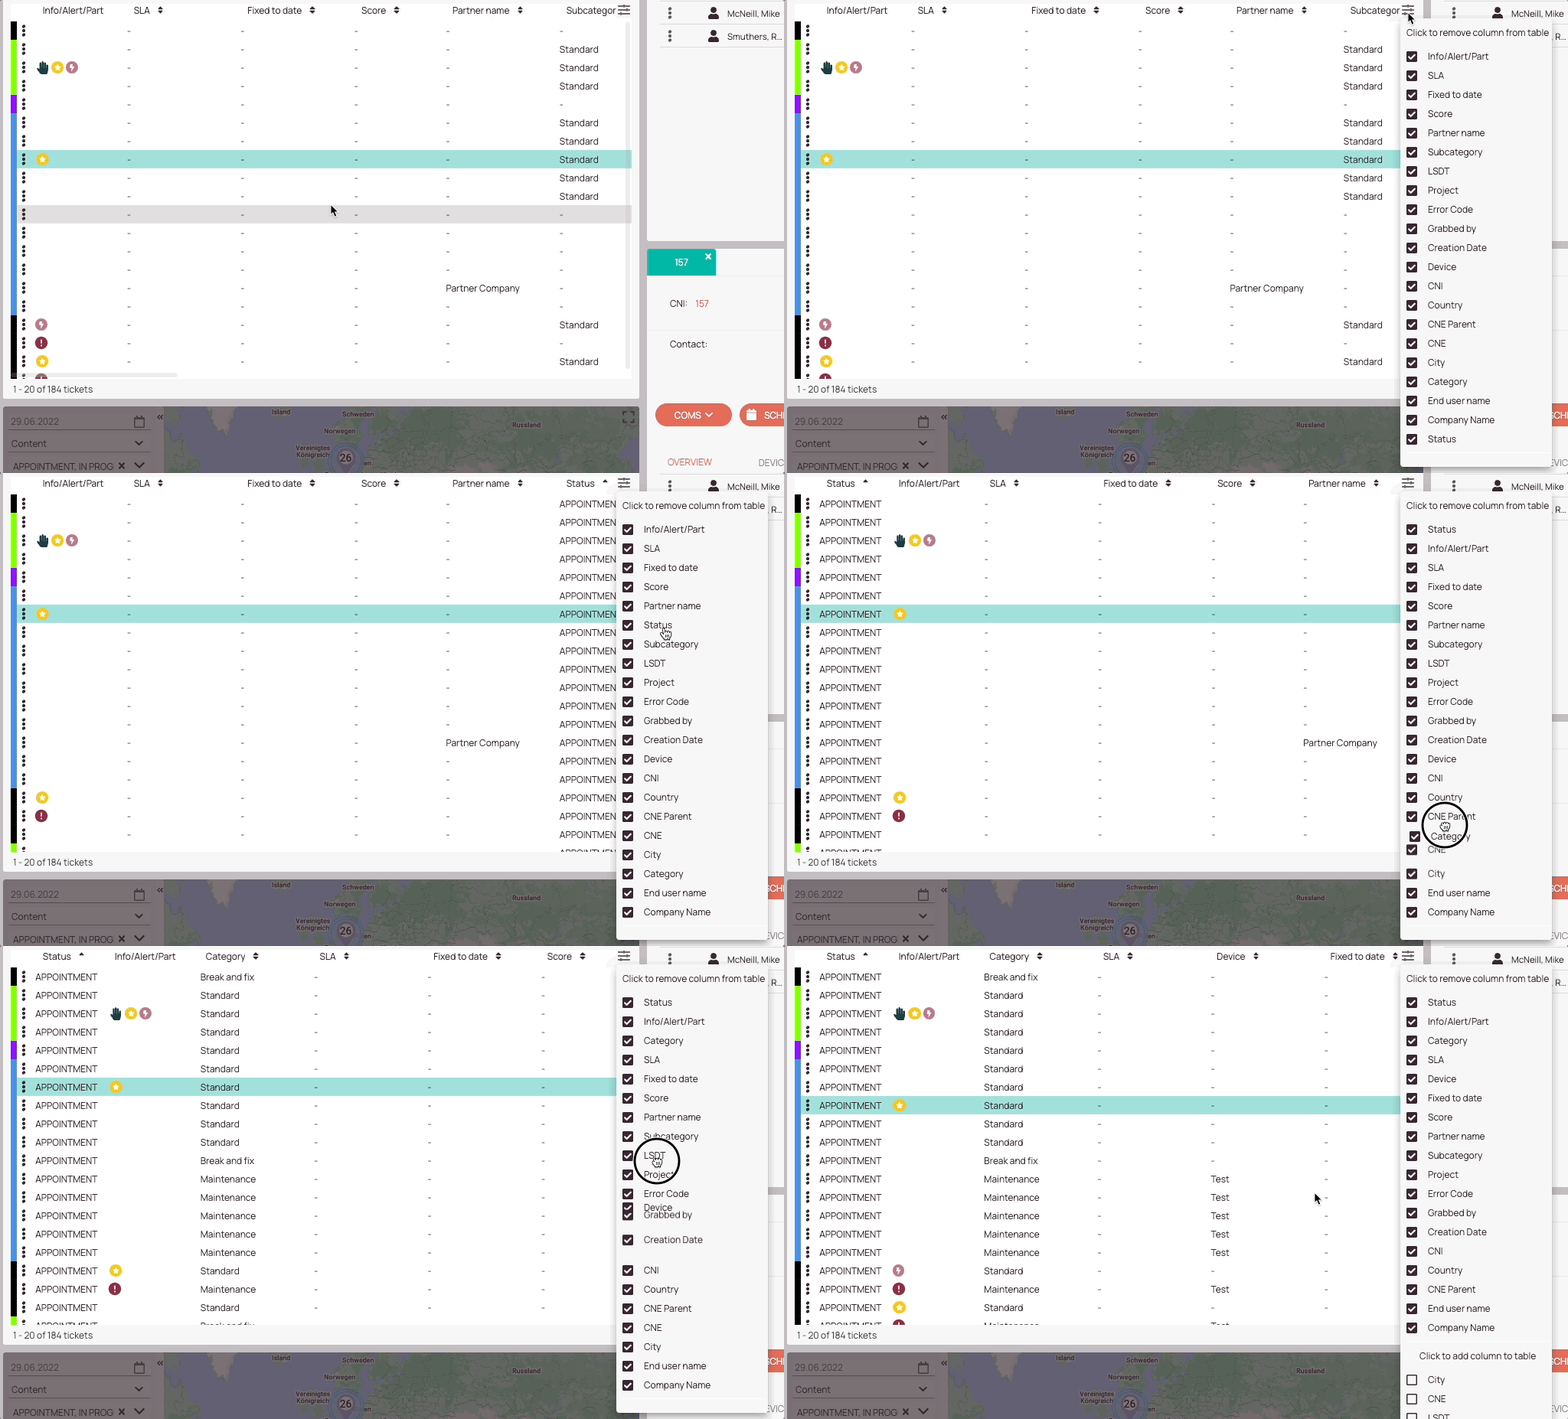
The displayed columns in the Ticket Pool can be customized according to your needs for a customized overview that is tailored to your dispatching needs. Inside the Work place go to the Ticket Pool to reveal the Table view editor. From there you can decide which column items are displayed by checking or unchecking the matching check boxes. You can change the order of items in the Ticket Pool by rearranging them via drag & drop in the table view editor.
- Info/Alert/Part
- LSDT
- CNI
- Company Name
- City
- Status
About Ticket Pool columns
You can learn more about the meaning of the different columns in the table below:
| Column name | Description |
|---|---|
| Category | Displays the ticket category (e.g. Standard/Break & Fix/IMACD). |
| City | Displays the city of the affected end user. |
| CNE | Call Number External. It is a number sent by the customer’s system for a particular task, that refers to a single ticket in Work place (e.g. WO-004203327). |
| CNE parent | Call Number External Parent. It is a number sent by the customer’s system for a particular task, that refers to a single ticket in Work place (e.g. WO-004203327). |
| CNI | Call Number Internal. Internal ticket number, which is now used synonymously with the Ticket ID (e.g. 466758). |
| Company name | Displays the Company name of the end user (e.g. Printer Corporate). |
| Country | Displays the country of the affected end user. |
| Creation date | Displays the ticket creation date. |
| Device | Displays the device name of the affected end user. |
| Device category | Displays the device category of the affected end user. |
| Enduser | Displays the name of the contact person, who is requesting the ticket/object record. |
| Error code | Error codet is displayed (in case there is an error ocurring for the ticket/object record). |
| ESDT | Earliest Service Delivery Time. |
| Fixed to date | The 'Fixed to' date of the scheduled appointment. |
| Grabbed by | Displays if the ticket is grabbed by yourself or an other user. |
| Info/Alert/Part | Displays special notifications for a ticket. It can display if a ticket/object record contains parts, if a ticket/object is a container ticket, if a ticket/object record is assigned to a partner, critical conditions, warnings, LSDT Expirations etc. |
| LSDT | Latest Service Delivery Time. |
| Partner name | If the ticket/object record has been assigned to a partner the name of the partner will be displayed. |
| Project | Displays the project name (eg. PrinterCorp_XXX) |
| Score | Displays the ticket score. |
| Short description | A brief explanation of the ticket |
| SLA | Displays the Service Level Agreement, (e.g. NBD – Next business day). |
| State | Displays the federal state assigned to the ticket/object record. |
| Status | Displays the status in which a ticket currently is (e.g. 'VALIDATION'/'APPOINTMENT' etc.). |
| Subcategory | Displays the ticket subcategory (eg. preventive maintenance). |
| ZIP | Displays the ZIP number assigned to the ticket/object record. |
Dispatch Group Link Icon
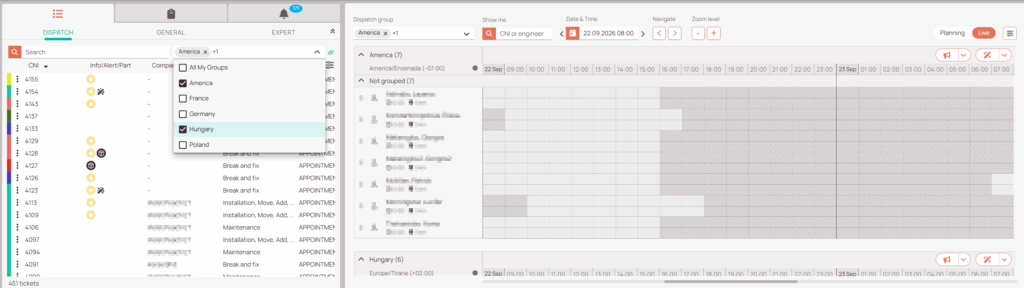
To the right of the Dispatch Group selection dropdown is the Dispatch Group Link icon. This option is active by default.
When active, the disptch group selected using the dropdown menu in either the Ticket Pool or Resource Timeline will match and changing the selected group will update the groups displayed in both components.
When deactivated, users may display different dispatch groups in the Ticket Pool and Resource Timeline. The map always displays the dispatch group selected in the Resource Timeline.
Click the down arrow on the right side of the Dispatch Group field to open the list of available dispatch groups for the tenant. Select one or more groups from the list. The selected groups will be displayed in the Timeline, allowing you to view appointments for all selected groups.
5 out of 5 stars
1 rating
| 5 Stars | 100% | |
| 4 Stars | 0% | |
| 3 Stars | 0% | |
| 2 Stars | 0% | |
| 1 Stars | 0% |