Tip: You can use filters for better results


-
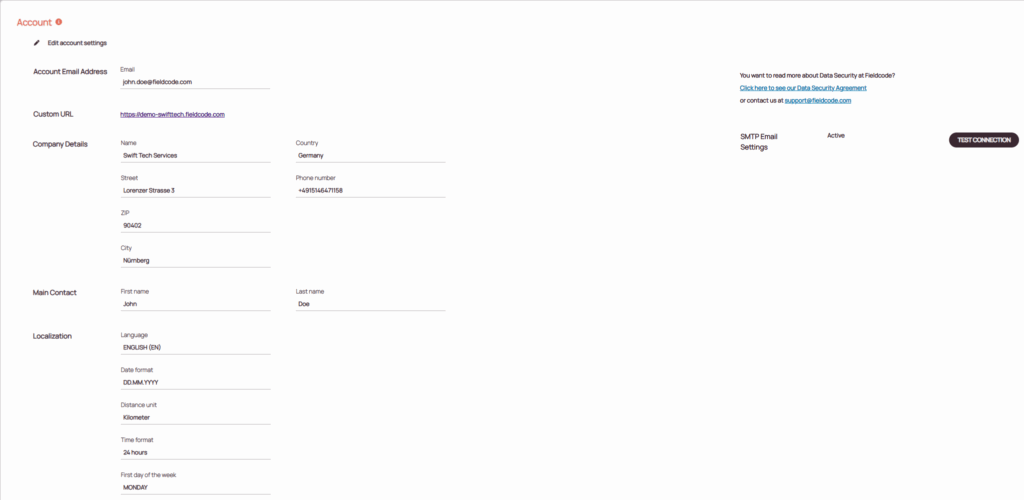
Active Toggle
-
Select the Basic Authentication Type.
-
Enter the user name that you use for login to the SMTP Account.
-
Enter the password that you use for login to the SMTP Account.
-
Enter the from email address. This email address will be later visible when sending out emails to customers.
-
Enter the from display name. This display name will be later visible when sending out emails to customers.
-
Enter the SMTP Host address. On the left, you can see what it might look like. You can find the SMTP host address for example by checking mail provider support pages.
-
Enter the SMTP Port. On the left, you can see what it might look like. You can find the SMTP host address for example by checking mail provider support pages.
-
Check if the SMTP connection works by clicking the Test Connection button.
-
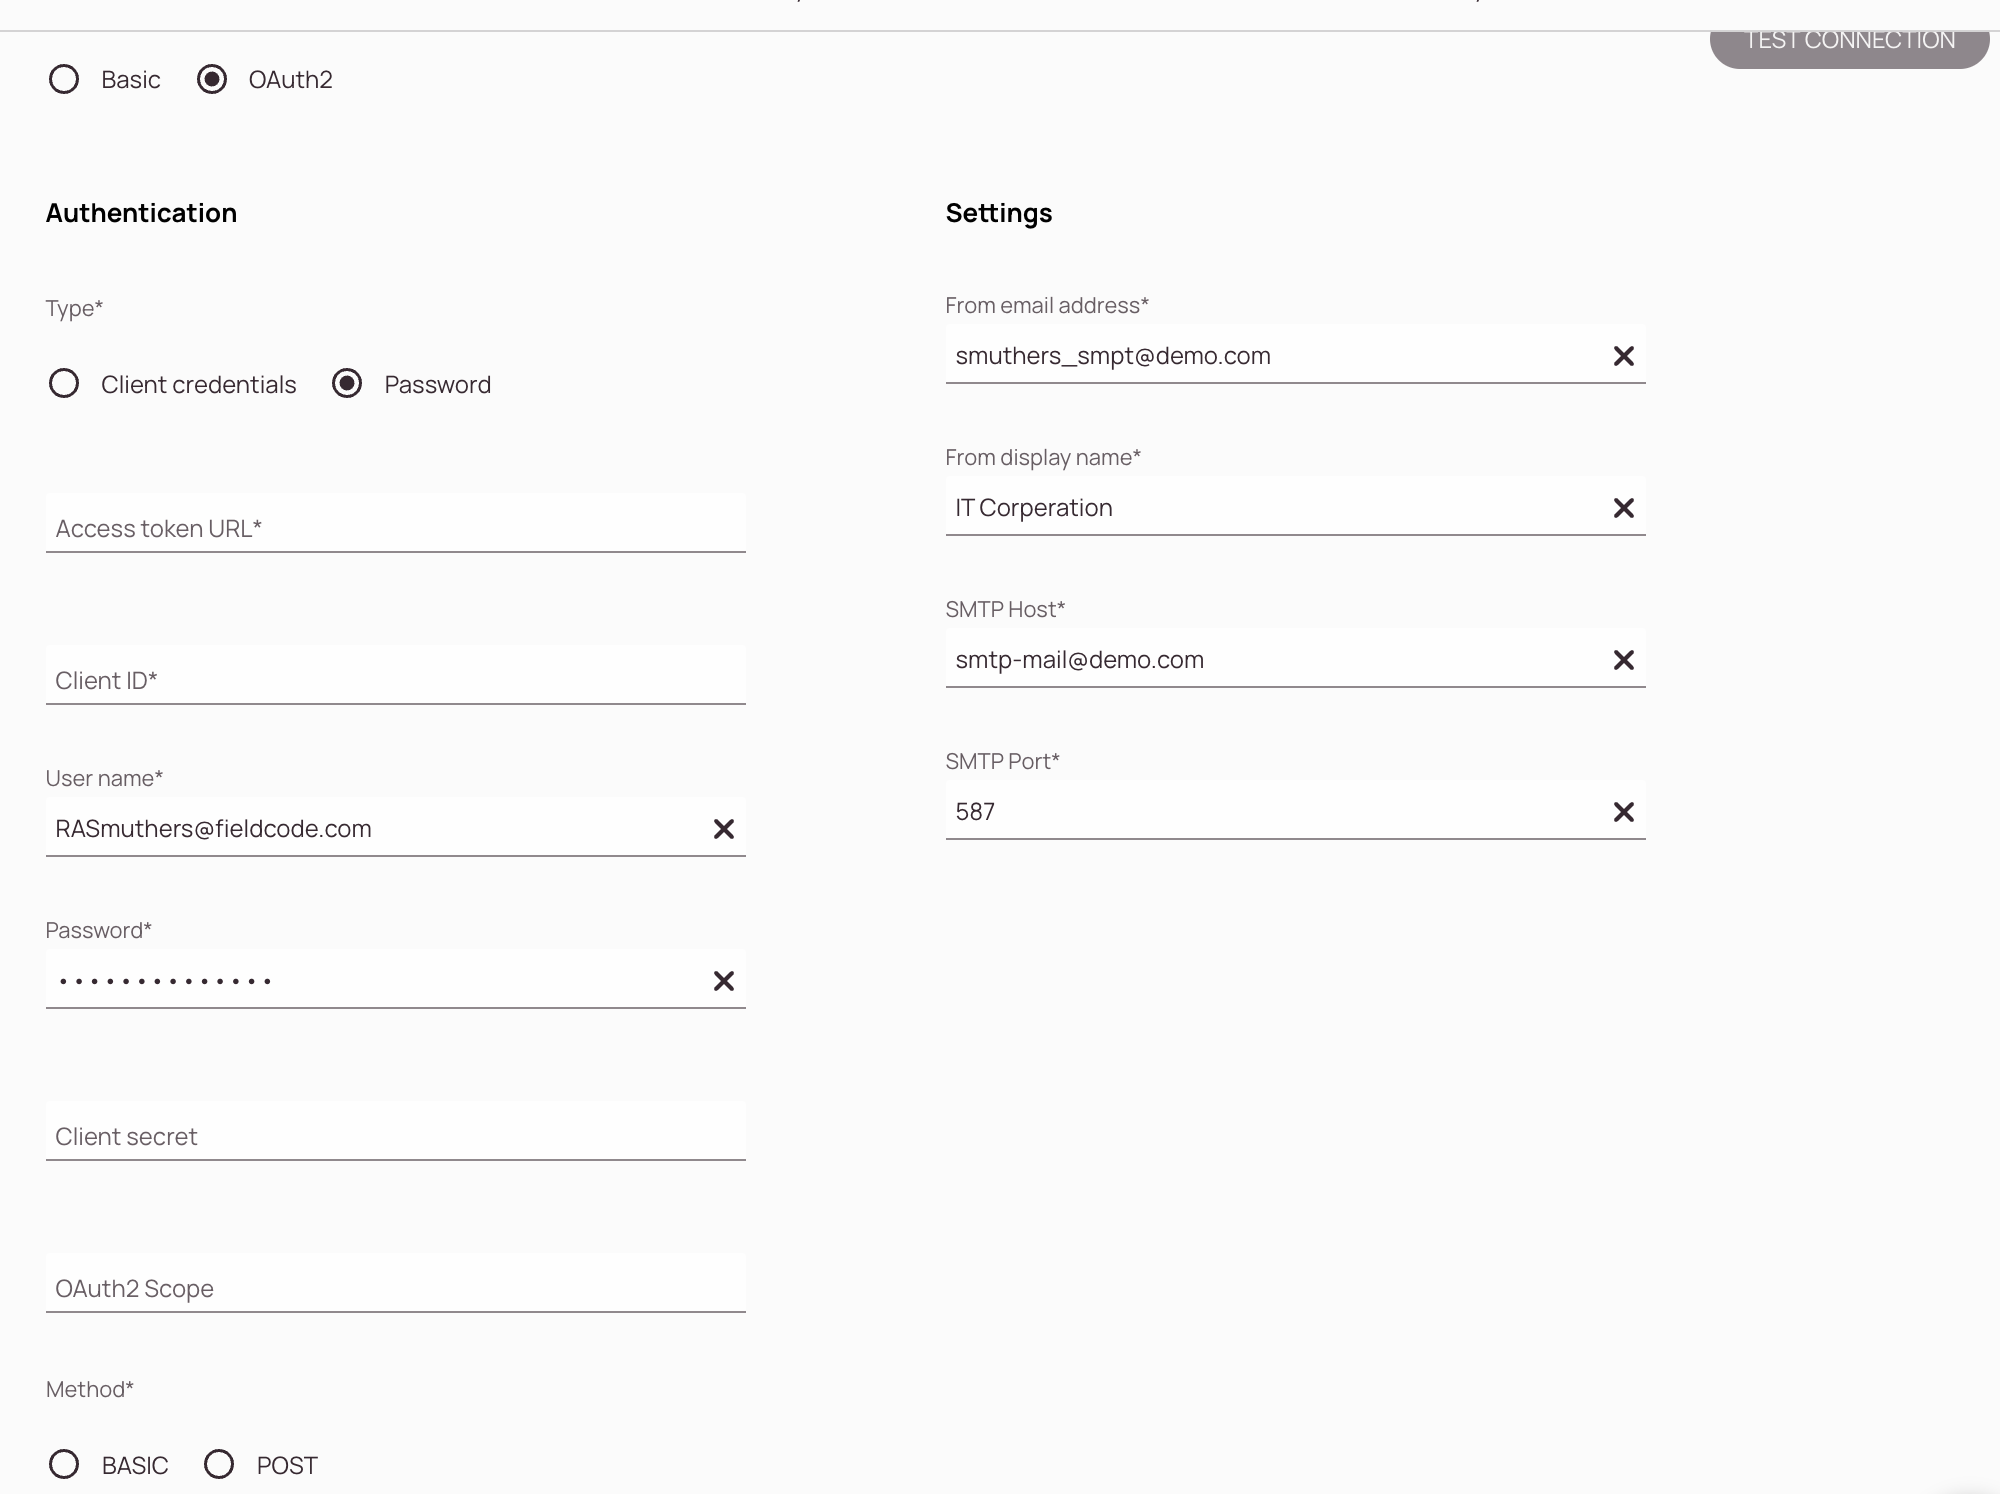
Active Toggle
-
Select the OAuth2 authentication method.
-
Select the Authentication type:
Client Credentials: Authentication is done via Client credentials
Password: Authentication is done via here set password. -
Enter the Access token URL.
-
Enter the Client ID.
-
Enter the User name.
-
Enter the Password (if Password is selected as Authentication type).
-
(Optional) – Enter the Client secret.
-
(Optional) – Enter the OAuth2 Scope.
-
Select the Method:
Basic: The BASIC method sends the client credentials (Client ID and Client Secret) using HTTP Basic Authentication. This means the credentials are encoded and included in the Authorization header of the request.
Use case: Preferred when the token endpoint expects credentials in the header.
Security: Credentials are not exposed in the request body, but still require HTTPS to ensure secure transmission.Post: The POST method sends the client credentials in the body of the HTTP request instead of the header. This is useful for endpoints that do not support Basic Authentication headers.
Use case: Required when the token endpoint expects credentials in the request body.
Security: Credentials are included in the body, so HTTPS is essential to protect sensitive data.💡 If you’re unsure which method to use, check the documentation of your SMTP provider or test both using the “Test Connection” button.
-
Enter the from email address. This email address will be later visible when sending out emails to customers.
-
Enter the from display name. This display name will be later visible when sending out emails to customers.
-
Enter the SMTP Host address. On the left, you can see what it might look like. You can find the SMTP host address for example by checking mail provider support pages.
-
Enter the SMTP Port. On the left, you can see what it might look like. You can find the SMTP host address for example by checking mail provider support pages.
-
Check if the SMTP connection works by clicking the Test Connection button.