Tip: You can use filters for better results
-
Latest News
-
Getting Started
-
Work Place
-
-
-
- Add Parts
- Assign Partners
- Interaction Buttons
- Workflow Buttons
- Ticket Info and COMS Buttons
- Schedule Tickets
- Edit Ticket Details
- Cancel Tickets
- Remove Tickets from the Ticket Clipboard
- Report Tickets
- Create Intervention Info
- Create Intervention Reports
- Cancel Appointments
- Clone Tickets
- Edit Privat Notes
- Inline Skill Editing
-
Admin Panel
-
Fieldcode FMA app
-
Customer Portal
How to search & filter for tickets
The Map displays the engineer's routes only after the engineer has started working on them in the Fieldcode Mobile App.
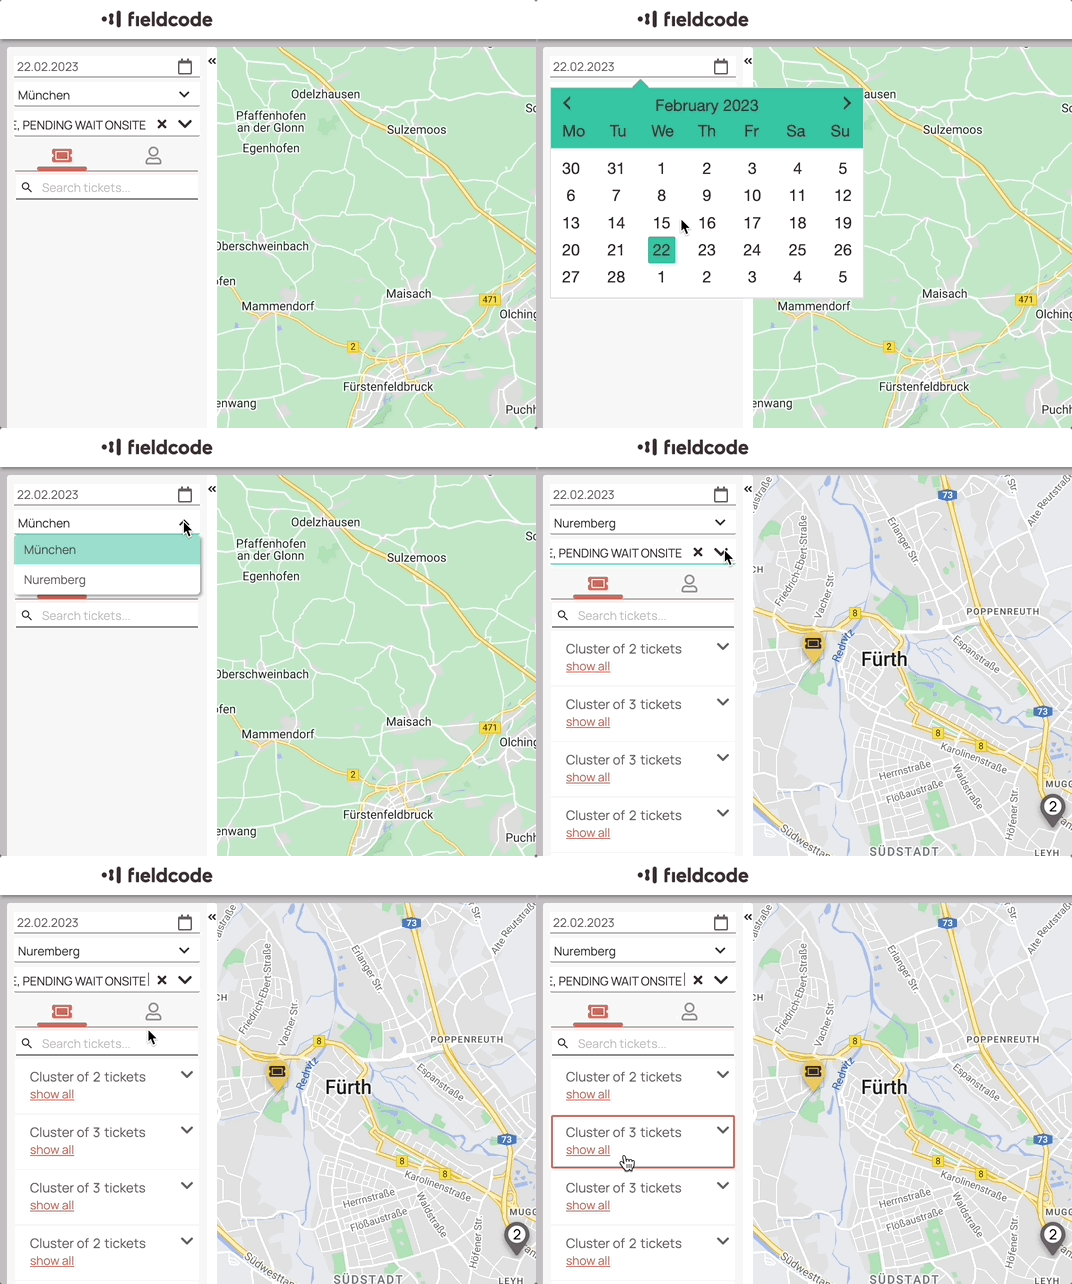
Before searching for tickets or engineers on the map you first have to set a date and your dispatch group.
This can be done inside the map component with an expanded sidebar:
- Click on the calendar and select a date from the drop-down to define for which day you want to see information on the Map at a glance.
- Click on the group drop-down selector and select the Dispatch group that you want to see on the Map.
- Select matching ticket statuses to decide which tickets are displayed on the Map.
By default, tickets in the APPOINTMENT, IN PROGRESS ONSITE, and PENDING WAIT ONSITE statuses are preselected because these are typically the tickets a dispatcher would want to review on the map. You can however always change what ticket statuses should be displayed on the Map.

All tickets for the selected date should now appear in the finding tickets tab. If tickets are clustered they will be shown as numbers on the map.
The search inside the Map allows you to search for all possible search queries (eg. ID, telephone number, etc.).
- Search for specific tickets by using the search glass or clicking on a ticket or ticket cluster.
- Open the ticket cluster with the arrow to reveal the tickets inside the cluster.
- You can quickly check the important details of a ticket at a glance or even interact with them if they are in the appropriate status.
- The map will jump automatically to the selected ticket spot.

0 out of 5 stars
| 5 Stars | 0% | |
| 4 Stars | 0% | |
| 3 Stars | 0% | |
| 2 Stars | 0% | |
| 1 Stars | 0% |
