Tip: You can use filters for better results
-
Latest News
-
Getting Started
-
Work Place
-
-
-
- About Buttons
- Action Buttons
- Schedule Tickets
- Ticket Info and COMS Buttons
- Add Parts
- Assign Partners
- Remove Tickets from the Ticket Clipboard
- Inline Skill Editing
- Create Intervention Info
- Create Intervention Reports
- Cancel Tickets
- Cancel Appointments
- Clone Tickets
- Edit Ticket Details
- Edit Privat Notes
- Report Tickets
- Close Tickets
-
Admin Panel
-
FMA 2 App
-
Customer Portal
Scheduling tickets
You can either use the Scheduling Assistant to schedule tickets or drag and drop a ticket directly from the Ticket Pool onto the Timeline.Tickets can be scheduled from the Ticket Pool (Dispatch tab), Timeline, Map, and Ticket Details. Scheduling tickets will not work from the General tab or Expert tab.
Manual Scheduling
If you drag & drop a ticket from the Ticket Pool to the Timeline, you will see if the appointment fits with the help of the colors indicated in the Timeline (think of it as a traffic light for tickets).
Tickets that are dragged & dropped to the Timeline are automatically locked and will not be organized by the Optimizer. Tickets can be unlocked to allow the Optimizer to move them to more optimal engineers and times.
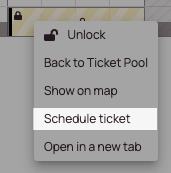
After dragging and dropping a ticket onto the Timeline, the dispatcher must right-click the ticket and select Schedule Ticket. This opens the Scheduling Assistant. To complete the scheduling process, simply click Save.
Assisted Scheduling
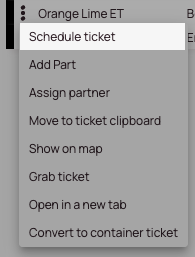
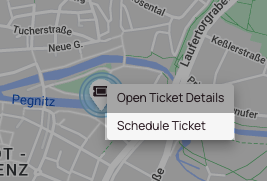
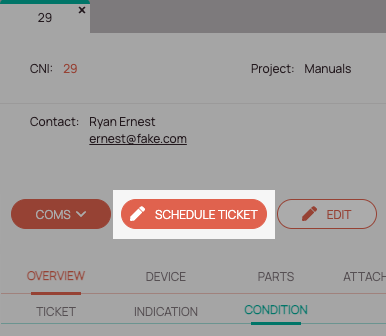
In case you schedule tickets with the Scheduling Assistant, the helper will open as soon as you click on the Schedule ticket button in the Ticket Pool, Timeline, Map, and Ticket Details.
The Scheduling Assistant will assist dispatchers in assigning tickets to the nearest, qualified, and available engineer.
- We generally recommend using the Optimizer or the Scheduling Assistant primarily over Drag & Drop scheduling.
- Our system will assist you in finding the best ticket options for engineers, skills, date, time, etc. if you use the Optimizer or the Scheduling Assistant.
- You can drag & drop the Scheduling Assistant window around freely, as the SA window is not part of a custom component view.
- You can quickly open the Scheduling Assistant by double-clicking on a ticket in the Ticket Pool.
- If you want to learn in what ways the Scheduling Assistant can assist you in arranging appointments smartly, please check out the topic: Scheduling Assistant.
Assisted Scheduling
After you click on the Schedule ticket button, the Scheduling Assistant will open.
Manual Scheduling
If you schedule tickets manually the system will check if the current engineer is available and if the placement time makes sense. The system also smartly checks if the placed ticket is close to an engineer’s end shift.

Red: Placing the ticket here is not recommended by the system!
The ticket is in the past / The engineer is unavailable
Green: Placing the ticket here is recommended by the system!
The ticket is in the future / The engineer is available
Yellow: Placing the ticket here can have a negative impact on compliance with regular working hours!
The ticket is close to the engineer’s end shift / The engineer has to work overtime
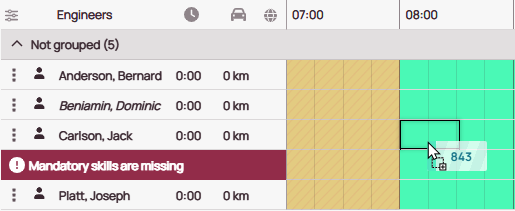
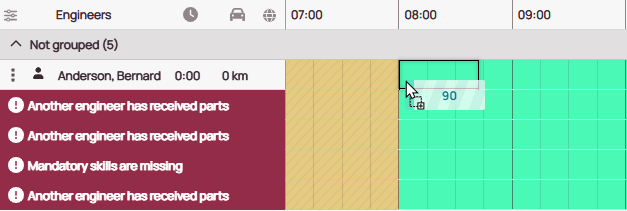
Drag and Drop Warnings
To assist dispatchers, warnings will be displayed over the names of engineers who should not be selected. This includes when engineers are missing required skills or when the parts assigned to a ticket have already been marked as in the possession of an engineer. Similar guidance is provided by the Scheduling Assistant and the Optimizer will also use this information to decide which engineers can handle certain tickets.
4.5 out of 5 stars
1 rating
| 5 Stars | 0% | |
| 4 Stars | 100% | |
| 3 Stars | 0% | |
| 2 Stars | 0% | |
| 1 Stars | 0% |