Tip: You can use filters for better results
-
Latest News
-
Getting Started
-
Work Place
-
-
-
- About Buttons
- Action Buttons
- Schedule Tickets
- Ticket Info and COMS Buttons
- Add Parts
- Assign Partners
- Remove Tickets from the Ticket Clipboard
- Inline Skill Editing
- Create Intervention Info
- Create Intervention Reports
- Cancel Tickets
- Cancel Appointments
- Clone Tickets
- Edit Ticket Details
- Edit Privat Notes
- Report Tickets
- Close Tickets
-
Admin Panel
-
FMA 2 App
-
Customer Portal
How to complete the planning phase
The first phase of resolving a ticket on the field is the planning phase.
- The planning phase can consist of gathering information about upcoming appointments.
- You can use our engineer checklist below better to understand the typical planning phase of an engineer.
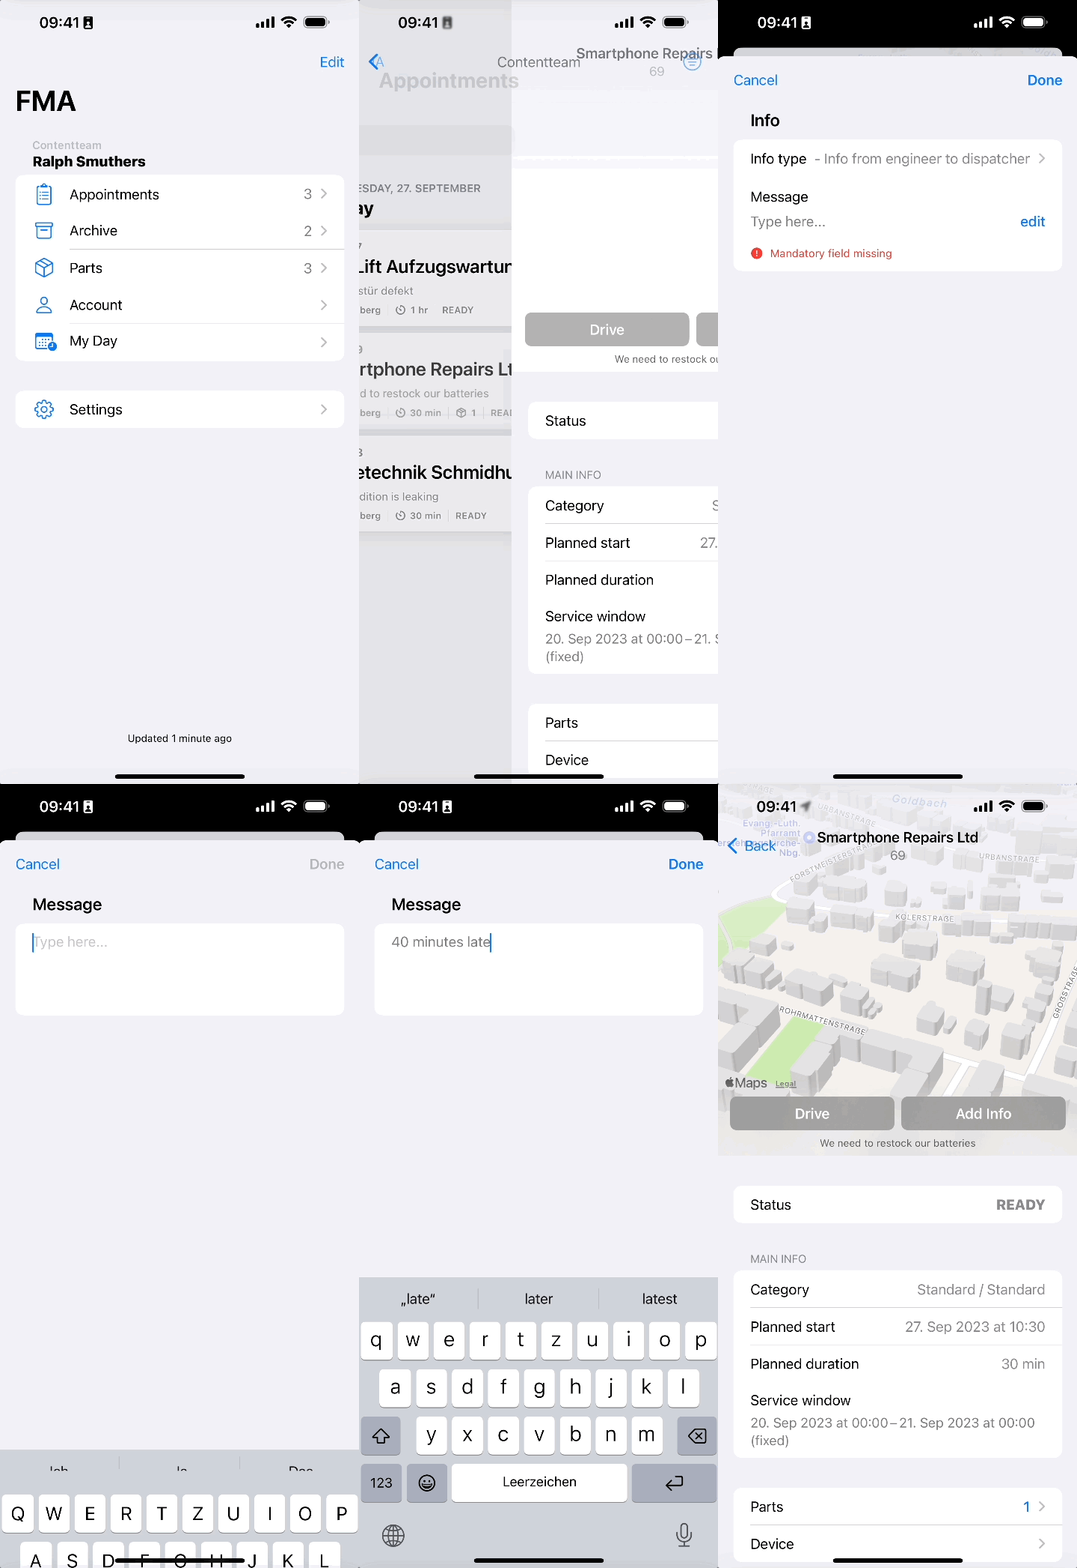
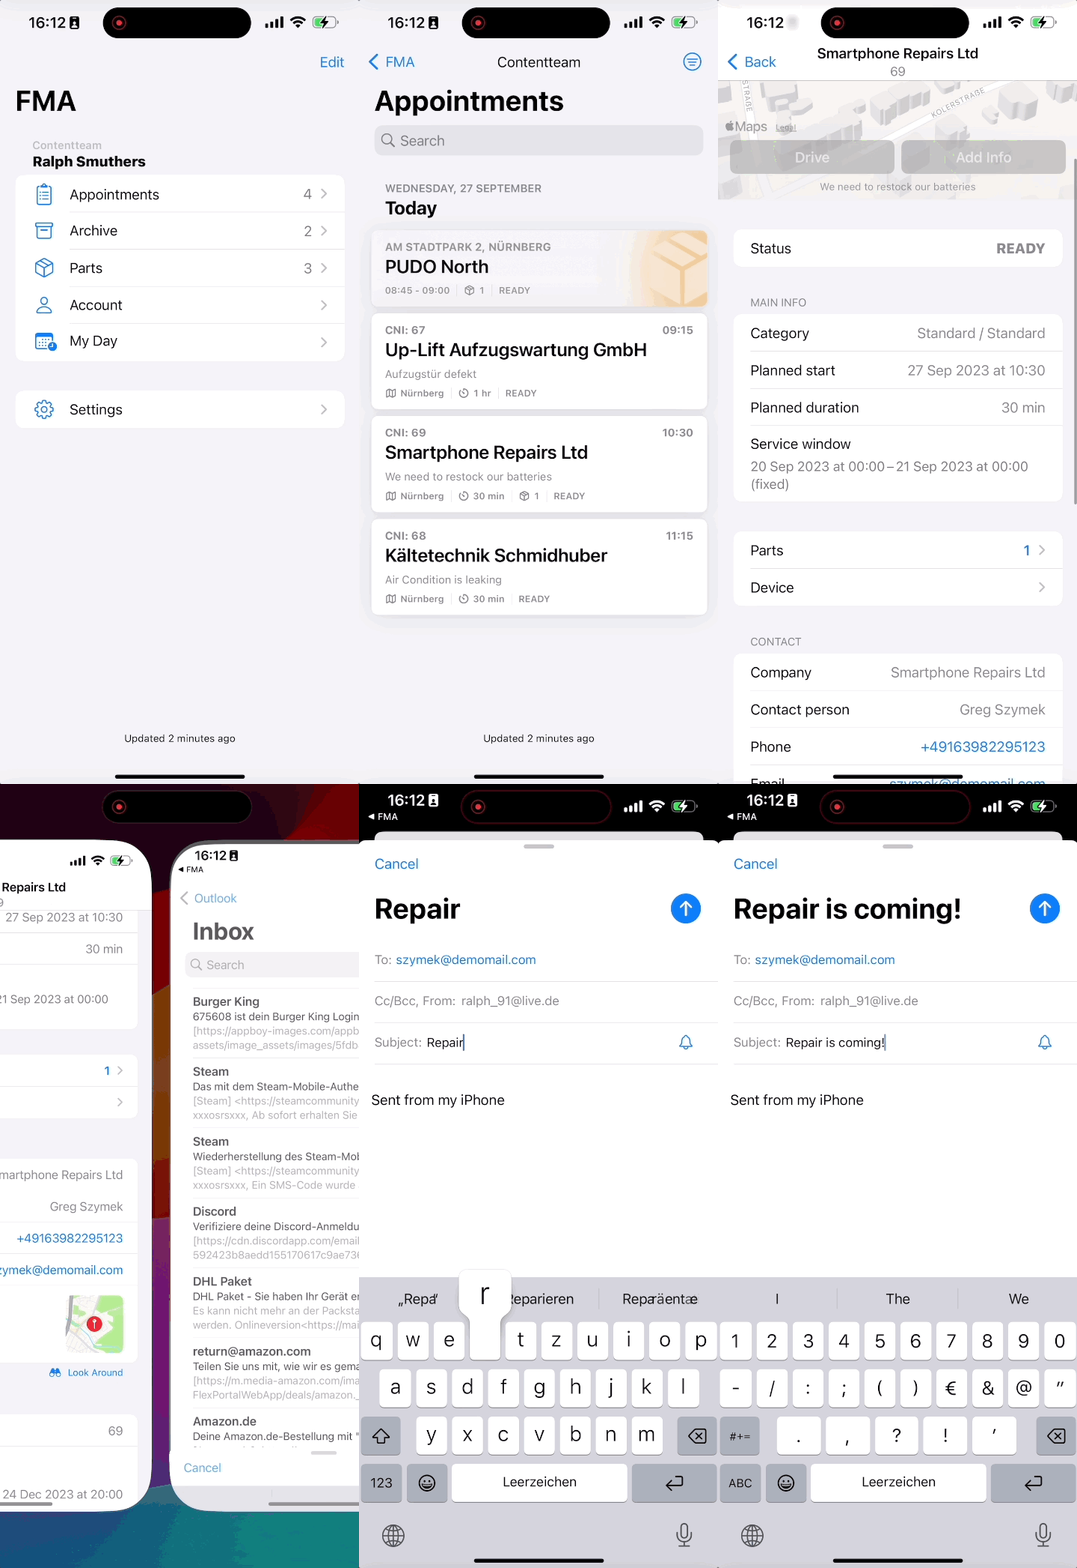
- When you click on an upcoming appointment, you can browse through ticket-relevant details like the contact data of the end user,
ticket descriptions, necessary parts for the repair, and attached files to the ticket. - In the planning phase, you can decide to directly contact the end user via phone by clicking for example the Call button or confirm that the drive has started towards the end user’s direction by clicking the Drive button.
- You can also announce upcoming delays by clicking the Report Delays button.
Engineer checklist
Before starting the appointment or while at the appointment, it may make sense to check all the main aspects of the ticket. Tap on the appointment you want to solve and check out the Main Info section to find out important key details of the ticket. In the Main Info section, you can check the ticket category, the scheduled start for the ticket, the scheduled ticket duration, and of course the scheduled total service window for your appointment.
Before starting the appointment or while at the appointment, it can make sense to check out if spare parts are required for the ticket. Spare parts can be essential for a ticket, for example, to repair/maintain a specific device. Parts that may be needed are displayed in the spare parts tab of the respective ticket. Tap on the appointment you want to solve and check out the Parts menu to check out the required spare parts for the ticket.
Before starting the appointment or while at the appointment, it may make sense to check the device details. Tap on the appointment you want to solve and check out the Device details menu to find out important device details regarding this particular ticket. In the Device details menu, you can check the Type, Model, Serial, Asset tag, Notes regarding the device, the device category, the MAC address, the operating system, Hostname, Bundle tag, the Supplier, the Barcode, and the Manufacturer. What data is actually displayed depends on what exact details the dispatcher submitted.
Before starting an appointment, it makes sense to check where to drive. Tap on the appointment you want to solve and check out the Contact section to find out where to drive. In the Contact section, you can check the company name, the contact person, and the actual address of where to drive to resolve the ticket.
Tap on the map inside the Contact section to launch the default navigation app on your phone.
iOS only: Additionally you have the option to utilize the Look Around Feature which gives you a street view, making it even easier to find the desired ticket location. Just tap on the “Look around” binocular button.
Before starting the appointment or while at the appointment, it may make sense to check the deadlines for the ticket and the ticket number for reference. Tap on the appointment you want to solve and check out the Ticket details section to find out important key details of the ticket. In the Ticket details section, you can check the internal ID of the ticket (CNI), the Latest Service Delivery Time (LSDT), and the default ticket duration that has been configured for this ticket.
Before starting the appointment or while at the appointment, it makes sense to closely examine the problem description of the ticket so that you already know ahead of what kind of problem you have to expect. It is essential to read the problem description to fully understand the ticket. Tap on the appointment and scroll to the Description section. There you will usually find the problem described in detail.
Before starting the appointment or while at the appointment, it can make sense to check for stored ticket info. For example, it could be the case that the customer shared some special entrance instructions or the dispatcher wants to let you know something specific about the ticket. This info will be stored in the ticket info menu. Tap on the appointment, scroll to the ticket info section, and tap on it. Eventual ticket info should be stored there. You also have the option to add info by yourself. This is however done by tapping the main Add info button at the top of the appointment.
Before starting the appointment or while at the appointment, it can make sense to check for the ticket history. This can be for example useful if this ticket has been processed before and therefore stores valuable information for the job. Tap on the appointment, scroll down to the Ticket history menu, and tap on it. Eventual useful ticket history should be stored in this menu.
Before starting the appointment or while at the appointment it for sure makes sense to check if the ticket has some attachments. In the attachment of a ticket, for example, certain work instructions can be stored as a .pdf, certain instructions required for the job, or other attachments such as pictures, diagrams, etc. Tap on the Appointment, scroll down to the Attachments menu, and tap on it. Attachments of the ticket are stored in the attachment tab of the given appointment. You have the option to also download and upload attachments from this menu.
How to report delays
You can report delays by using the Add info button and selecting the Engineer delay. Select the estimated delay by clicking on the matching option. You can choose between Up to 30 minutes or 30 minutes to 1 hour or More than 1 hour. You can optionally leave a comment for the dispatcher by typing a message into the box. Click on Send afterwards to successfully report the delay.

How to announce-call the end-user via his mobile or phone
If you want to reach the end-user while planning or driving you can do that by tapping on the telephone number inside the Contact section and selecting Call. This function is useful if you want to announce-call the end-user or announce a later arrival because of for example traffic jams.

How to announce the end-user via email
You can also contact the end-user via email by tapping the email menu inside the Contact section to inform the end user about something on-going. After tapping the email button the email app will launch and you will have the option to formulate your email and send it.

0 out of 5 stars
| 5 Stars | 0% | |
| 4 Stars | 0% | |
| 3 Stars | 0% | |
| 2 Stars | 0% | |
| 1 Stars | 0% |
