Tip: You can use filters for better results
-
Latest News
-
Getting Started
-
Work Place
-
-
-
- About Buttons
- Action Buttons
- Schedule Tickets
- Ticket Info and COMS Buttons
- Add Parts
- Assign Partners
- Remove Tickets from the Ticket Clipboard
- Inline Skill Editing
- Create Intervention Info
- Create Intervention Reports
- Cancel Tickets
- Cancel Appointments
- Clone Tickets
- Edit Ticket Details
- Edit Privat Notes
- Report Tickets
- Close Tickets
-
Admin Panel
-
FMA 2 App
-
Customer Portal
About Ticket Import
If you want to import tickets from another system you can use the ticket import.
The tool gives you the option to import excel sheets with ticket data into the Work place with the appropriate ticket standards.
Go to sidebar -> Ticket import button
The import is clustered into five different steps. It is required to successfully go through all five steps, otherwise tickets won’t get imported into Fieldcode.
These five steps are required for the import:
1. Upload -> 2. Configuration -> 3. Test -> 4. Import -> 5. Done
Excel template for ticket import
You don’t want to create your Excel file all by yourself? You can use our ready-made template instead and replace it with your ticket data.
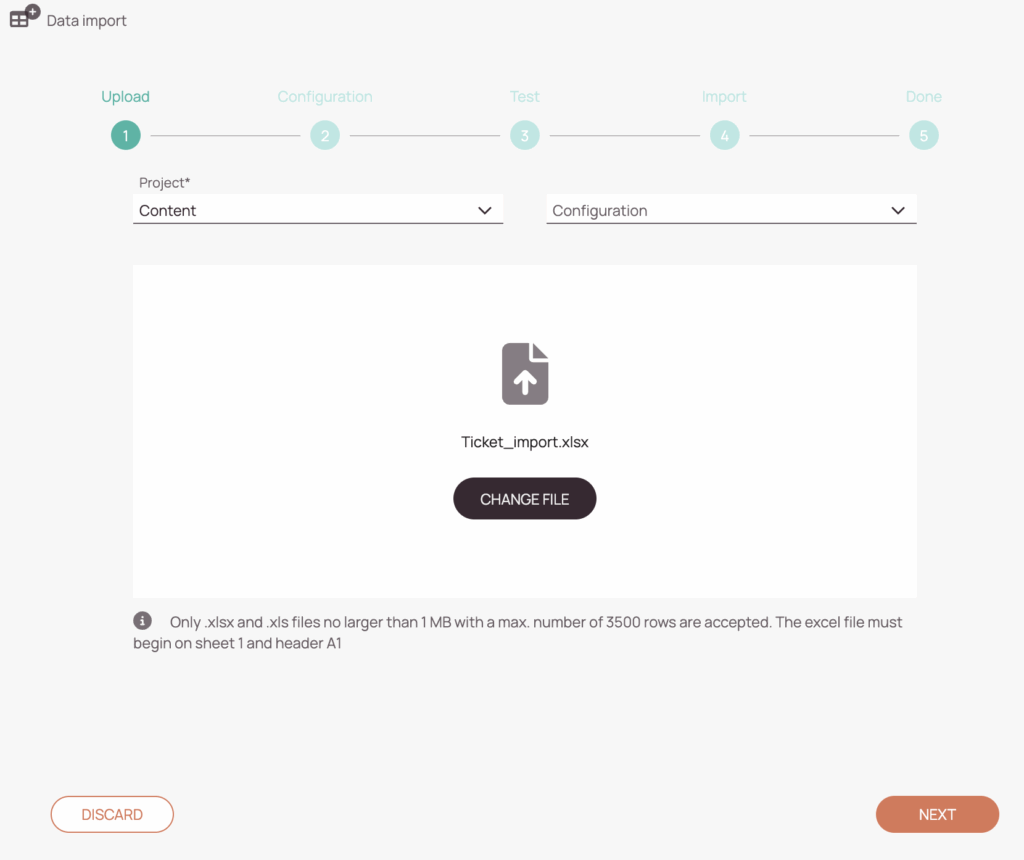
1. Uploading your Ticket Data Excel File
The first step is to add the Excel file for the import and assign it to a project. In the upload step, you also have the option of using existing configurations for the file to be uploaded.
- Select the project from the project name dropdown to which you want to assign your import tickets.
- (Optional) – You can use an already existing configuration for your new import. Configurations can be saved in the last step of the ticket import.
- Click Add File and select the Excel File you want to import with File Explorer or drag it directly from your desktop to the Drag & Drop window. Please wait until the file is added.
- Click on the Next button to proceed to the next step.
The excel file must begin on sheet 1 and header A1. Please also ensure that you stick to the format specifications in order to make the ticket import as smooth as possible:
- The LSDT date must be formatted in this scheme: YYYY/MM/DD or D/M/YYY
- The system uses the GMT timezone, therefore please make sure to convert the LSDT date and time fields accordingly in your template first
- The preferred appointment time must be formatted in this scheme: YYYY/MM/DD or D/M/YYYY.
- Only .xlsx and .xls files will be accepted by the ticket importer
- The Excel file must not exceed 3500 rows.
You can save configurations for later usage and reuse them for later ticket imports. Let's say you mapped your Excel file correctly and just updated the ticket data in the Excel file. By saving the configuration you do not need to remap every field again, instead, you can just quickly import the new tickets in the file without further re-configuration.
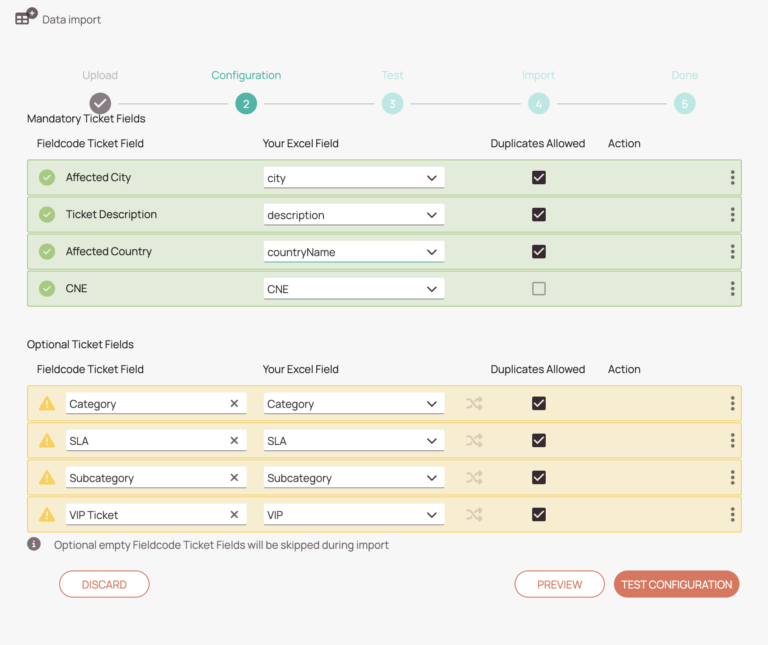
2. Configuring fields to match Fieldcode Fields
The second configuration step involves assigning the fields in the Excel file to matching fields in Fieldcode. You have the flexibility to assign optional fields to optional fieldcode fields in this step. Furthermore, you can also determine whether duplicate values are allowed for a particular field or not. If desired, the importer can also automatically add prefixes and suffixes or a fixed value for fields. You can also determine for each optional field which Fieldcode field should correspond to the field and make adjustments if necessary. All these options together ensure that tickets are imported according to the Fieldcode system standards.
In the last step of the configuration step, you can also utilize the preview button to check whether the importer has assigned everything as desired.
-
Switch Excel fields: Mandatory fields are necessary for the system to further process the import. By clicking the drop-down in one of these fields you can choose another field that should be mapped to Fieldcode ticket fields.
-
Adjust to Fieldcode ticket fields: The system tries to also adjust optional fields to match Fieldcode fields and smartly recommends matching fields. However, the fields can also mapped manually by clicking inside the dropdown field.
-
Edit Values: By clicking the
 button inside a field you can change the assigned value (Subcategory, Category, or Boolean) of your field.
 -
Allow duplicates checkbox: This checkbox lets you decide if fields that contain the same value in another row are allowed to be in the system or not. The default setting is Duplicates allowed. If duplicates are not allowed for a ticket field, the system will bring up an error and allow you to fix the issue manually.
-
Context menu – advanced options: You can see three dots beside every row which enable further functionality. In the context menu, you have options to manually Add fixed values, Add Prefixes, and Add Suffixes to selected Ticket fields. Click Save after you are making changes here, otherwise, the changes won’t be taken over.
-
Preview button: You can click on the Preview button to conveniently check if the mapping matches requirements.
-
Test configuration button: The test configuration button lets you proceed to the next step.
3. Testing the Ticket Data Excel File
In the test step, the importer checks whether every value and header from your Excel File can be imported as required. The importer now runs through automatically and validates your field mappings. The validation can either fail or succeed.
Test failed
In case the test failed you will be prompted with the errors and the affected tickets and can go back to configuration or Skip & Start import (not recommended!).
Test succeeded
In case of success, you can click on Start import to start the next step.
4. The actual Import process
The Import will now run through automatically while showing the number of tickets that are being processed. If tickets couldn’t be imported successfully the reason for why they couldn’t will be displayed conveniently for each ticket.
5. Finishing the Excel Import
The import can either run through successfully or with skipped tickets.
Skipped tickets will not be imported into the system, therefore make sure to adapt your excel file and upload the corrected version once again into the importer. You may start from step 1 again with the corrected Excel File if the ticket import fails.
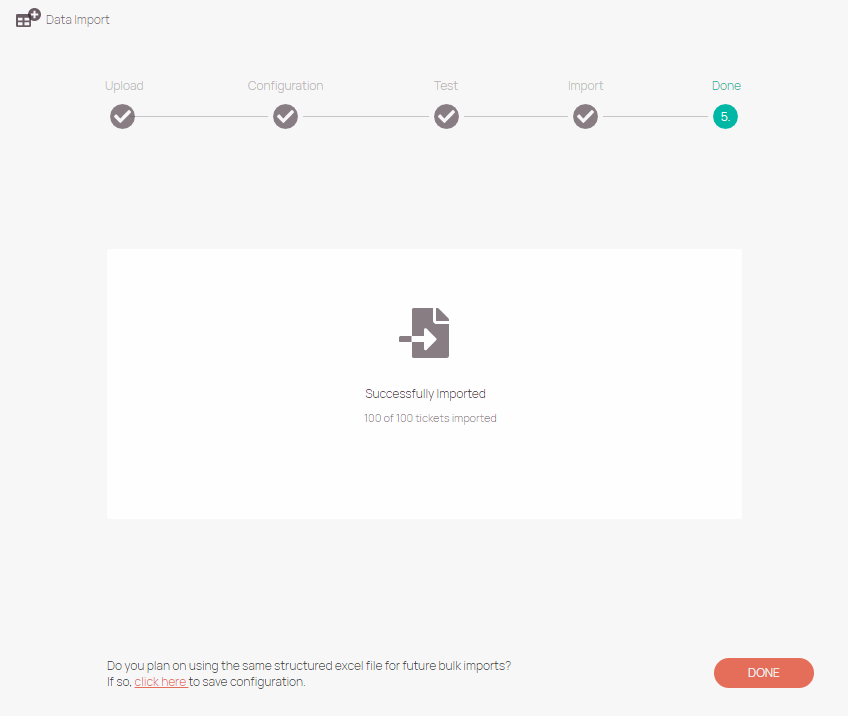
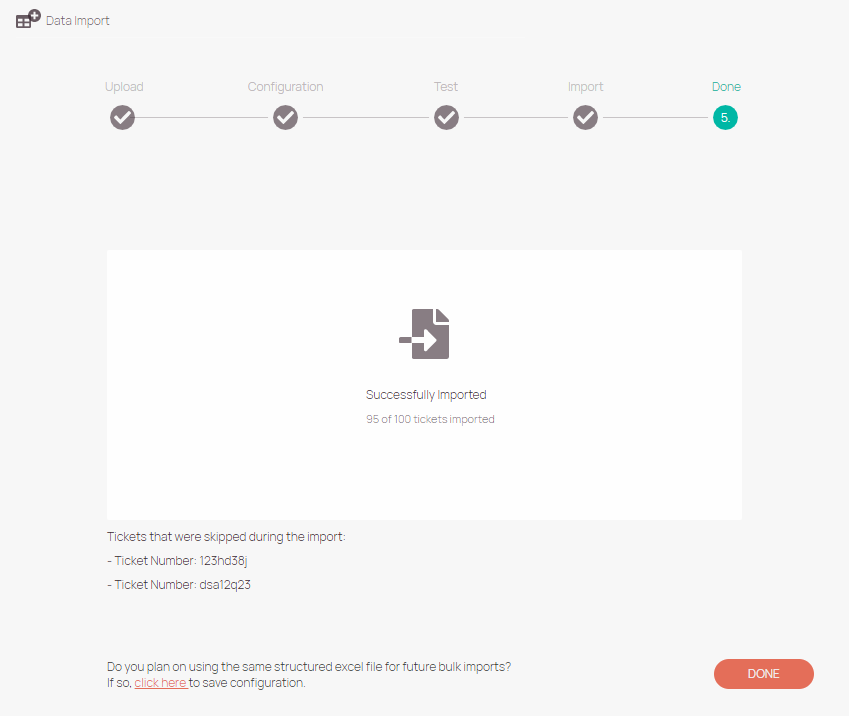
Regardless of how the Import ends, you have two options now.
Either click DONE to finish the process or press click here (as shown in the screenshot above) to save the configuration for later purposes.
6. (Optional) - Saving the Configuration
You can save configurations for later usage scenarios. This means you don’t have to map fields new each time, but can simply continue to maintain your existing Excel file. This is useful, for example, if you simply want to add new tickets to an existing an already existing Excel file and don’t want to remap each field every time.
When the import is done click the Click here button BEFORE clicking the Done button in order to be able to save configurations.
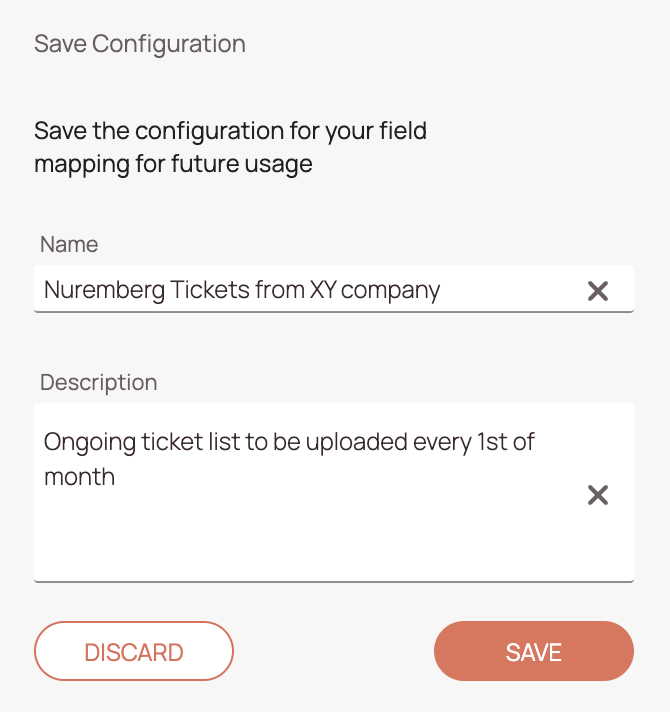
-
Enter a name for your configuration. The name will be selectable from the Configuration field (Step 1) for later imports.
-
Enter a description for your configuration. This makes it easier to understand the purpose of the later saved Configuration.
-
Click on Save to save your Configuration for later usage.
0 out of 5 stars
| 5 Stars | 0% | |
| 4 Stars | 0% | |
| 3 Stars | 0% | |
| 2 Stars | 0% | |
| 1 Stars | 0% |