Tip: You can use filters for better results
-
Latest News
-
Getting Started
-
Work Place
-
-
-
- About Buttons
- Action Buttons
- Schedule Tickets
- Ticket Info and COMS Buttons
- Add Parts
- Assign Partners
- Remove Tickets from the Ticket Clipboard
- Inline Skill Editing
- Create Intervention Info
- Create Intervention Reports
- Cancel Tickets
- Cancel Appointments
- Clone Tickets
- Edit Ticket Details
- Edit Privat Notes
- Report Tickets
- Close Tickets
-
Admin Panel
-
FMA 2 App
-
Customer Portal
About Fieldcode Plus
Fieldcode Plus is an advanced extension framework designed for enterprise customers who need to go beyond traditional field service operations. It empowers organizations to build custom business logic, data models, and workflows tailored to their unique processes – all within the Fieldcode environment.
Whether you’re managing assets, partners, surveys, or customer interactions, Fieldcode Plus provides the flexibility to design and automate complex scenarios without writing code. We will use a common usage scenario to demonstrate the range of functions, possibilities, and power of Fieldcode Plus.
- Create an Asset Object to get started and familiarize yourself with the Fieldcode Plus feature set.
- Customize forms and design components tailored to your Asset Object.
- Build a custom workflow to define how your Asset Object behaves within your processes.
- Add your first asset records to bring your configuration to life.
- Explore advanced possibilities with Fieldcode Plus to expand your solution beyond the basics.
What makes Fieldcode Plus special?
- Low code customization: Create/Manage custom objects, forms, and workflows with minimal technical effort.
- Enterprise-grade flexibility: Tailor Fieldcode to fit your business processes, not the other way around.
- Modular architecture: Reuse components like forms and automations across multiple scenarios.
- Seamless integration: Connect with external systems using APIs and system connections.
Who is the target audience for Fieldcode Plus?
- Enterprise customers with complex operational needs.
- Teams looking to digitize and automate internal processes.
- Users who want to extend Fieldcode beyond field service use cases.
Fieldcode Plus permissions:
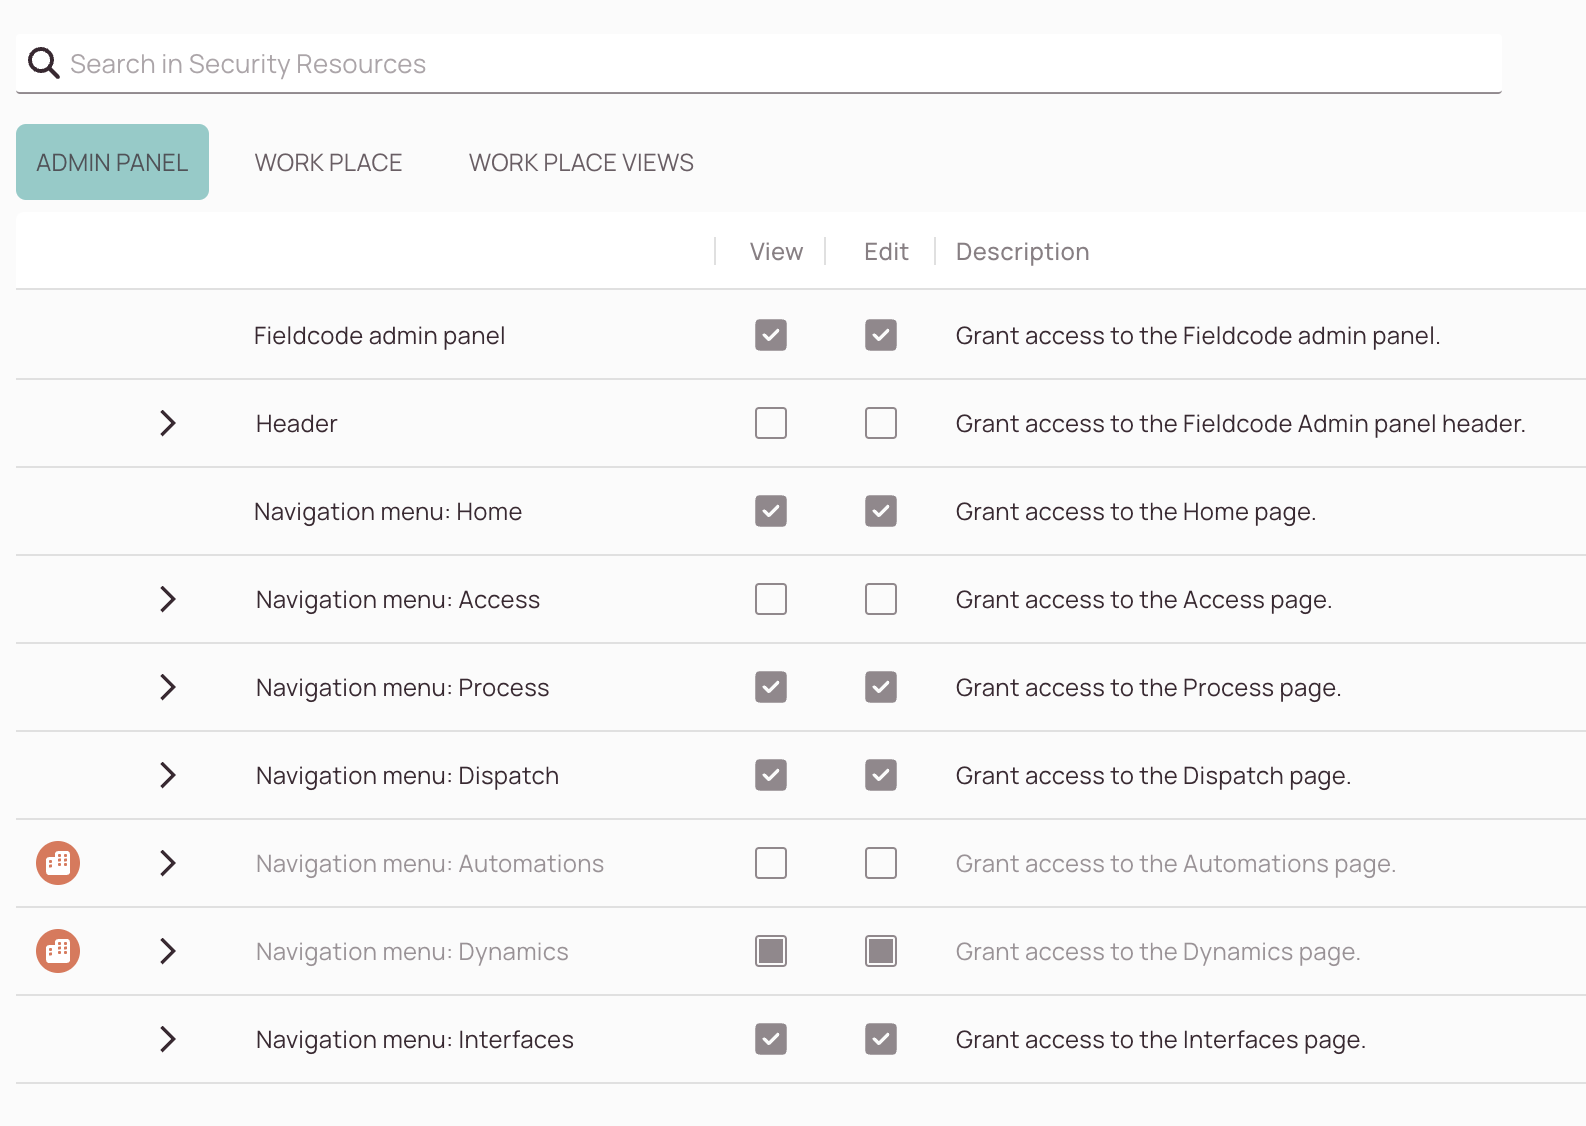
Please be advised that adequate permissions must be set to access all the Fieldcode Plus-related features.
Admins do not have Fieldcode Plus permissions by default, so one has to grant access to Plus first.
Required Enterprise permissions:
- Admin panel/Navigation menu/Fieldcode Plus
- Admin panel/Navigation menu/Automations
- Work place/Fieldcode Plus
- Objects; Custom Fields; Forms; Components
Asset Management Scenario
In the following sections, we guide you through the individual requirements and even additional steps you could pursue to cover a successful use case of Fieldcode Plus. We will learn to create a asset object in Fieldcode and start to utilize dynamic Fieldcode features. In this guide you will learn to puzzle the pieces together to create your first working custom asset object.

- Create Objects
- Configure Asset Lifecycle
- Define the Visual Layout (Not Available Yet)
- Start Working with Assets
- Explore Additional Settings
1. Create Objects
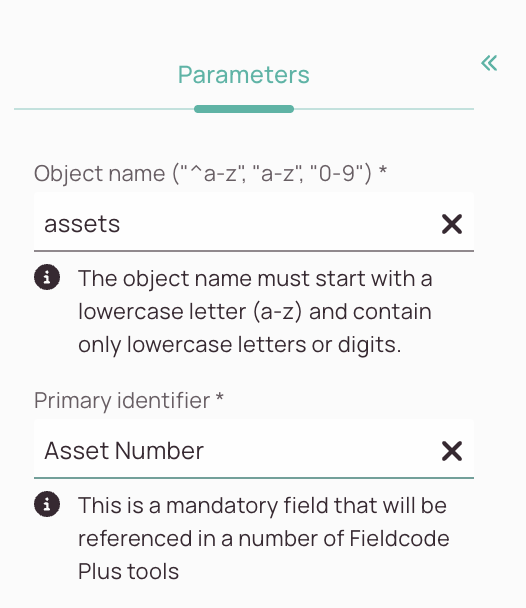
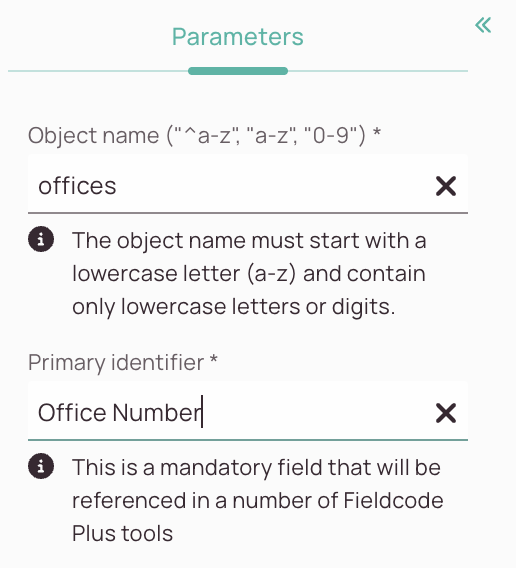
To start working with custom objects, the first thing you need to do is create your object data model. The model defines the key characteristics of your custom object, the fields and potential relationships to other objects, and more. Later, you will define how these fields are populated and updated with values throughout the object’s lifecycle. We will create two objects for our scenario: Assets, Offices.
1.1. Add Asset Fields and Relations
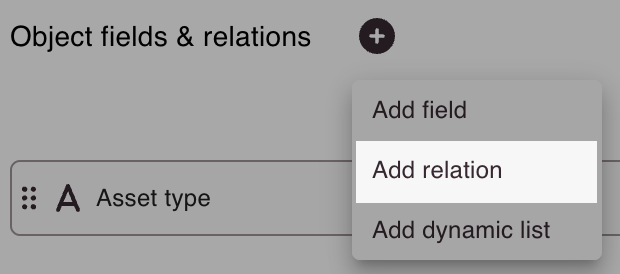
- What we do now, is to start to add some object fields by clicking on the plus button inside the middle section.
- The fields you add should all be available inside the X-Pool and should all be searchable inside the X-Pool, luckily, both toggles are activated by default.
The X-Pool, by the way, is a custom component, which you will create later (3.2). - Let's create our first field!
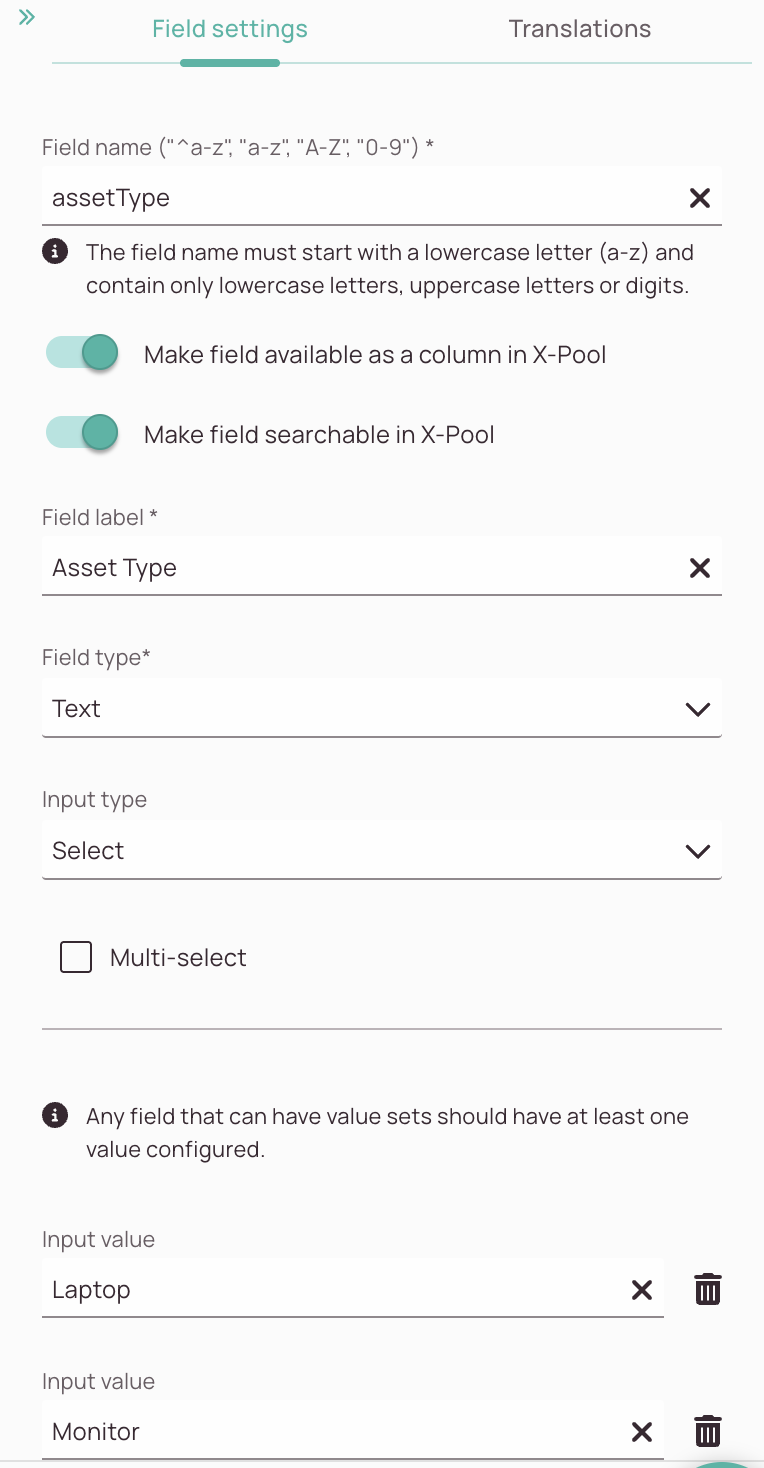
Enter "assetType" as a field name. - Enter "Asset type" as a field label.
- Select "Text" as a field type.
- Select "Select" as an input type.
- Do not check the "Multi-select" checkbox. The user should only have the possibility to select one value for this particular field.
- Start to add these values: Laptop, Monitor, Tablet, Printer, Phone, Mouse, Headset, Keyboard, Desktop.
You can check the "Make field available as a column in the X-Pool" toggle if you'd like to see this field as a table column later when you list the object records in the X-Pool in the workspace. The field order you set inside Models determines the default table column order. The "Make field searchable in X-Pool" toggle controls if the particular field is searchable by users inside the X-Pool search.
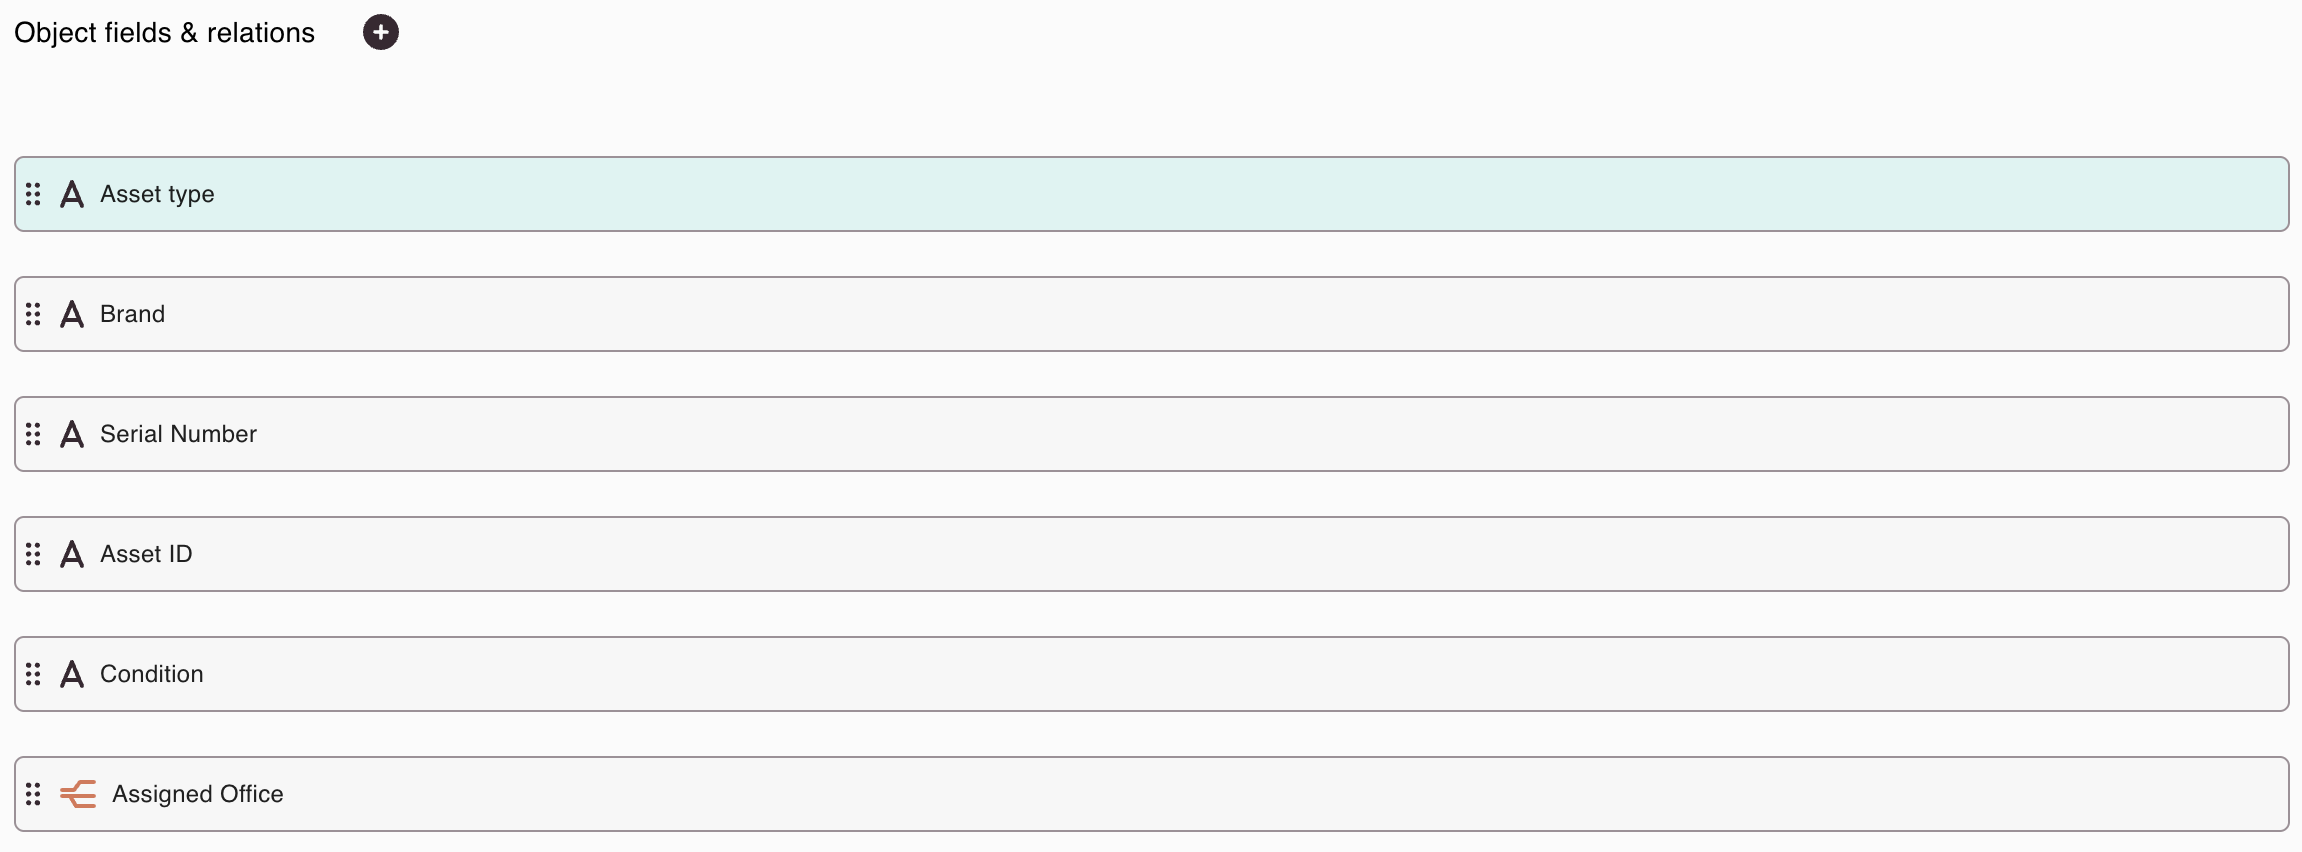
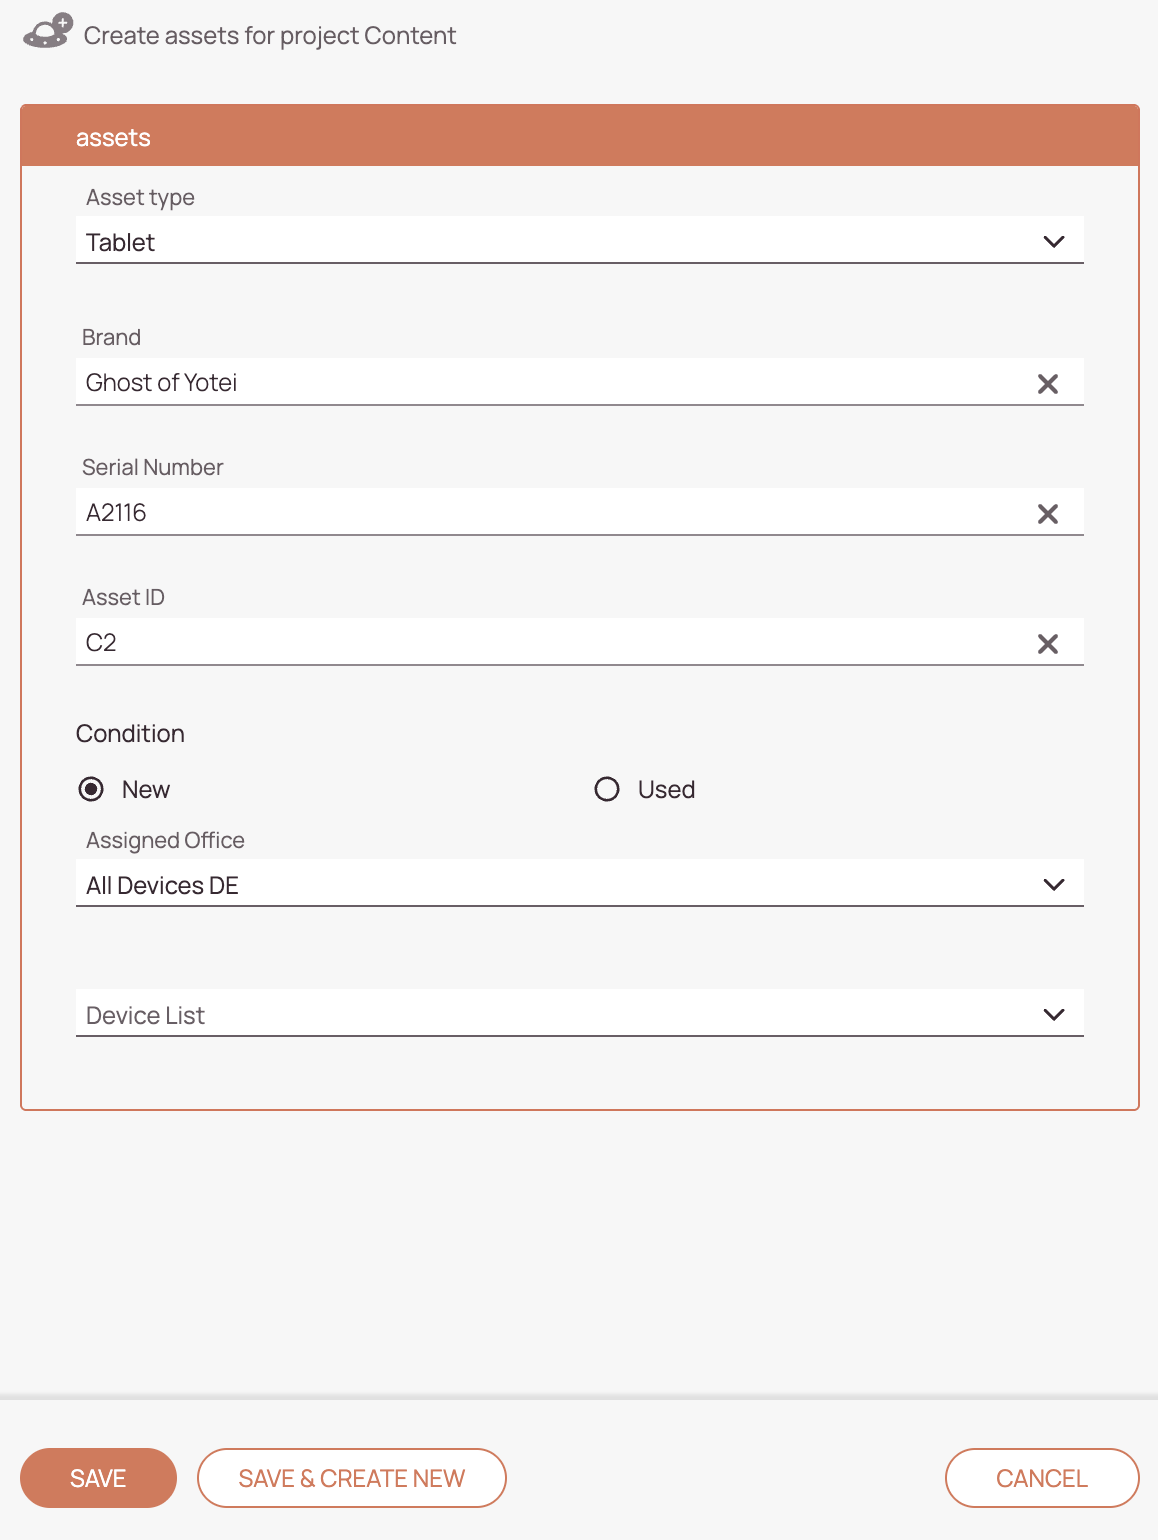
- Let's add more fields since one field is simply not enough for our sophisticated asset object. Let's also add these following fields: Asset Type (Text field), Brand (Text field), Serial Number (Text field), Asset ID (Text field), Condition (Text field; Radio; Values: New/Used).
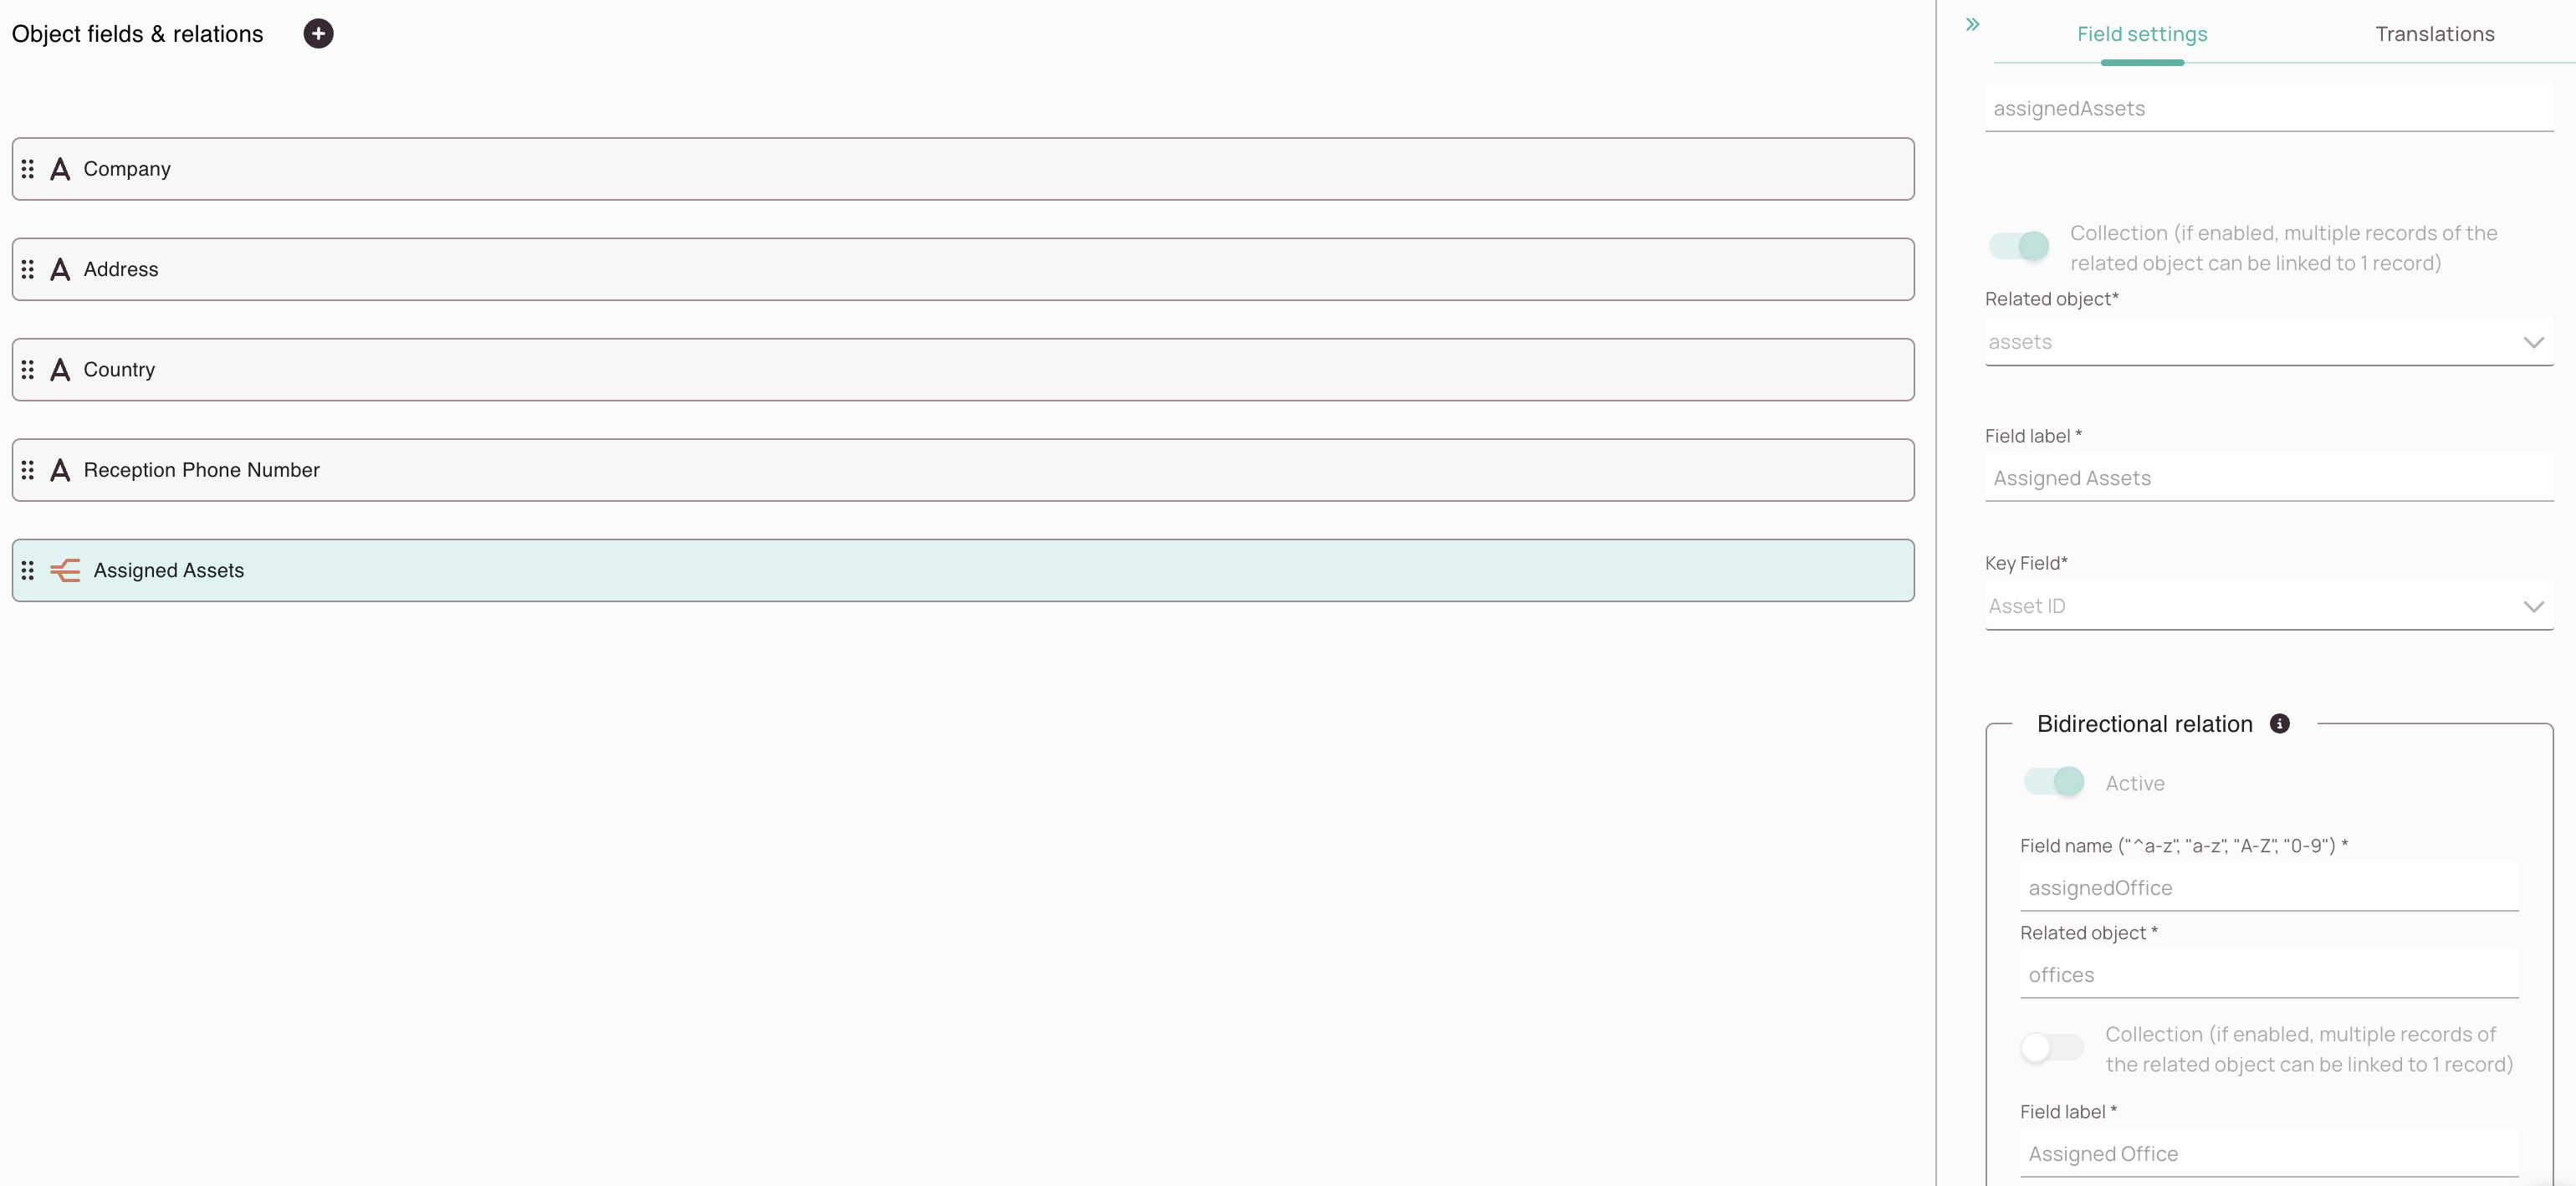
Tip: You can check the picture on the right side check if you are proceeding well with the creation of your first object fields. You may notice on the picture there is a strange looking field called "Assigned Office". Don't add it. - Click on Save & Close.
- Congratulations!
You have just created your first object successfully.
The "Assigned Office" field is not a simple field, it is a relation. What you have to know for now is that relation fields display values of another object (which we haven't created just yet). Therefore there is no need to add this relation for now, we will have a deeper look at relations very soon.
- Let's add some object fields again. Please add these fields: Company (Text field), Address (Text field), Country (Text field), Reception Phone Number (Text field).
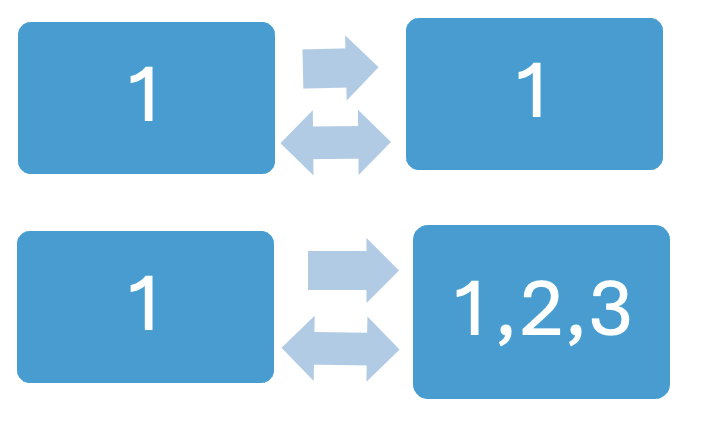
You can add relations inside objects. Relations have one big goal. To display values from other objects so one can easily access them. A relation field can display either one value or multiple values from another object. We call these either a 1:1 relation if it should display one value only or a 1:n relation if a relation field should display more than one value. These relations can be one-directional or bi-directional.
Let's take a look at our scenario as an example to understand relations better. We have just created an asset object and an office object.
An asset is always part of one office, so this would be a 1:1 relation.
One office can have multiple assets, so this would be a 1:n relation.
In conclusion, we can say that we need a relation in the Asset object and a relation in the Office object to achieve our goal and connect the dots between those two objects.
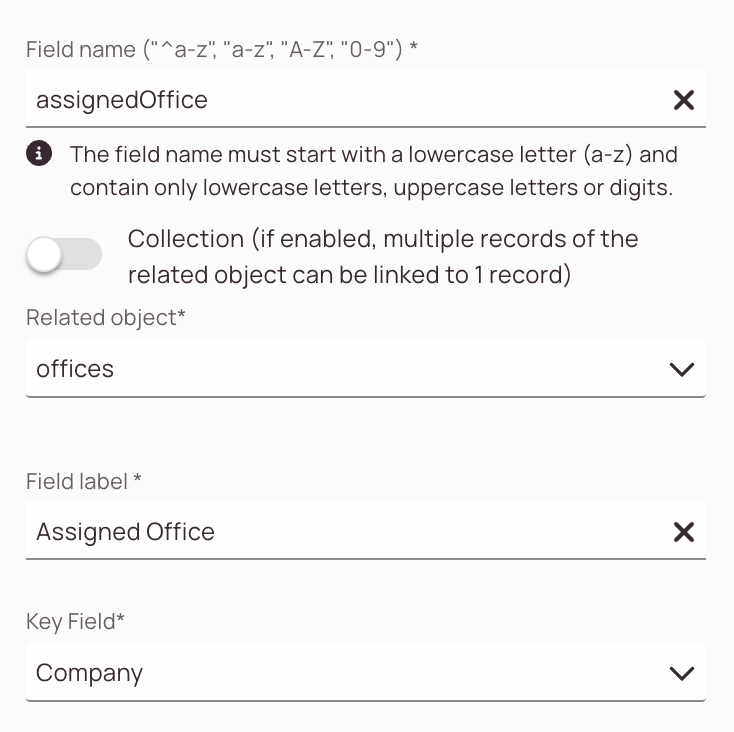
- Enter "assignedOffice" as a field name.
- Not select collection.
Remember: We want to achieve a 1:1 relation for this particular object. - Select "offices" as the related object from the dropdown.
- Enter "Assigned Office" as a field label.
- Select "Company" as a key field. The key field value of the other object that you select here will be used as a reference.
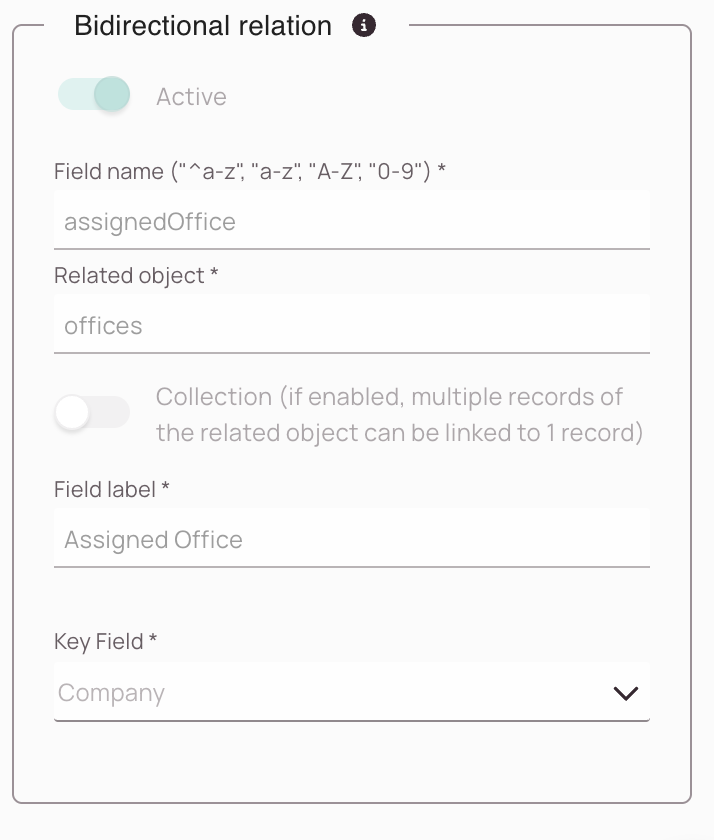
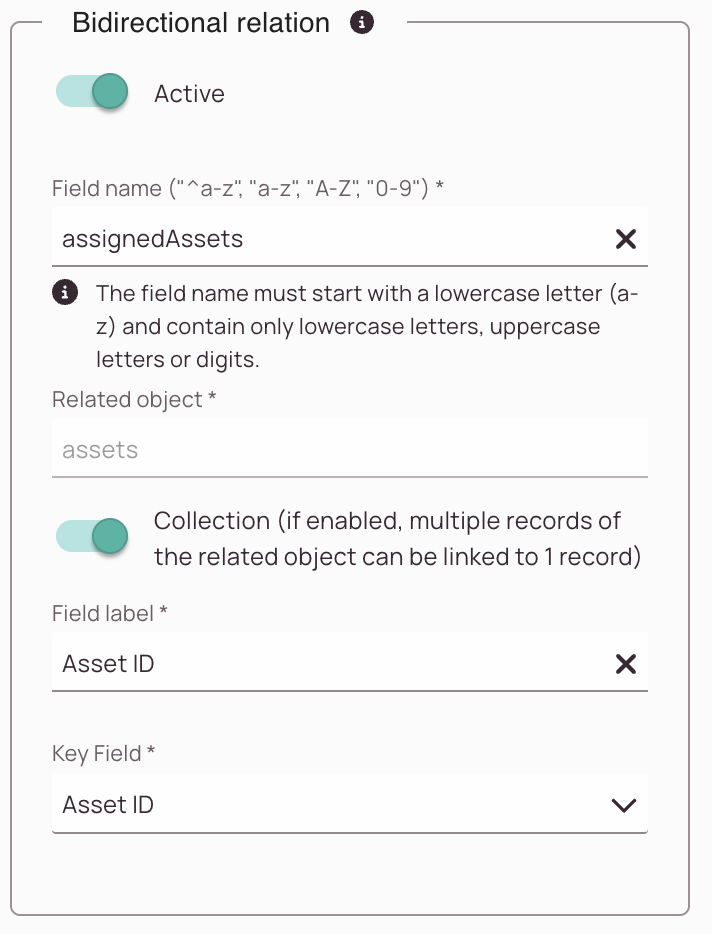
- We would like to create a bi-directional connection between our two objects. Therefore we select Active in the Bidirectional relation box.
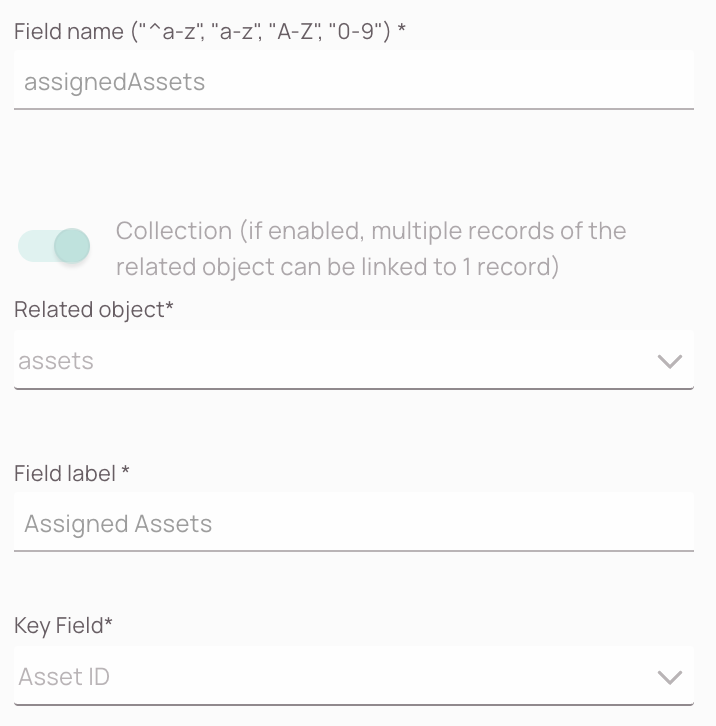
- Enter "assignedAssets" as a field name.
- The object that we want to relate to is the "assets" one.
- Since we have decided that an office can have multiple assets (1:n) we are required to turn on the collection toggle.
- Enter "Assigned Assets" as a field label.
- The key field to select here is "Asset ID"
- Click Save & Close.
- We have successfully created our first relation! What a milestone!
Now you would think that the next thing we had to do is to add a relation for the second object. But wait, didn't we just setup a bi-directional before? Yes, we did!
And because we have done just this, we didn't need to do it for the second object, as we already configured everything in the first object.
We can check the second object "offices" nonetheless, and what we should find there is the "Asset ID" relation already set!
Hooray, we got them married!
Please note that after clicking on Save, the system automatically creates the following for each new model:
- Workflow: A basic workflow will be created with just one workflow node. You will need to continue the configurations from there later on. For our scenario, two workflows are created: “ASSET_BASIC” and “OFFICES_BASIC”
- Workflow status field: There is no need to add a Status field to your object; it’s generated automatically and will be used by the workflow. They are not visible on the frontend.
- Project field: There is no need to add a Project field to your object; it’s generated automatically. They are not visible on the frontend.
- Default form (with “Action type: CREATE”): This form contains all your object fields, and if you don’t create a custom form, this default form will open by default when you create a new object record.
2. Configure Asset Lifecycle
We now have the contract object in the system, and in the next step, we’re going to configure what’s needed to process contracts in the system. The following requirements should be met, depending on the purpose you want to achieve:
- Being able to create records: The CREATE Asset, and CREATE Office form shall be in place
- Being able to edit objects: The EDIT Asset, and CREATE Office form shall be in place
- Being able to process assets, and offices, and update their status: Adjust Workflows
For illustration, we will configure the workflow with the following asset states and actions:

In the following steps, we’ll show you step-by-step how to further configure the asset process.
It's important to start configuring the process before you create any object records, as the default workflow does not contain any workflow buttons, so if you create records earlier, you won't be able to do anything with them later as they will use the workflow version available at record creation. You can start with a very simple workflow and work through it and can always make adjustments later if necessary.
2.1. Configure the Create Forms for your custom object
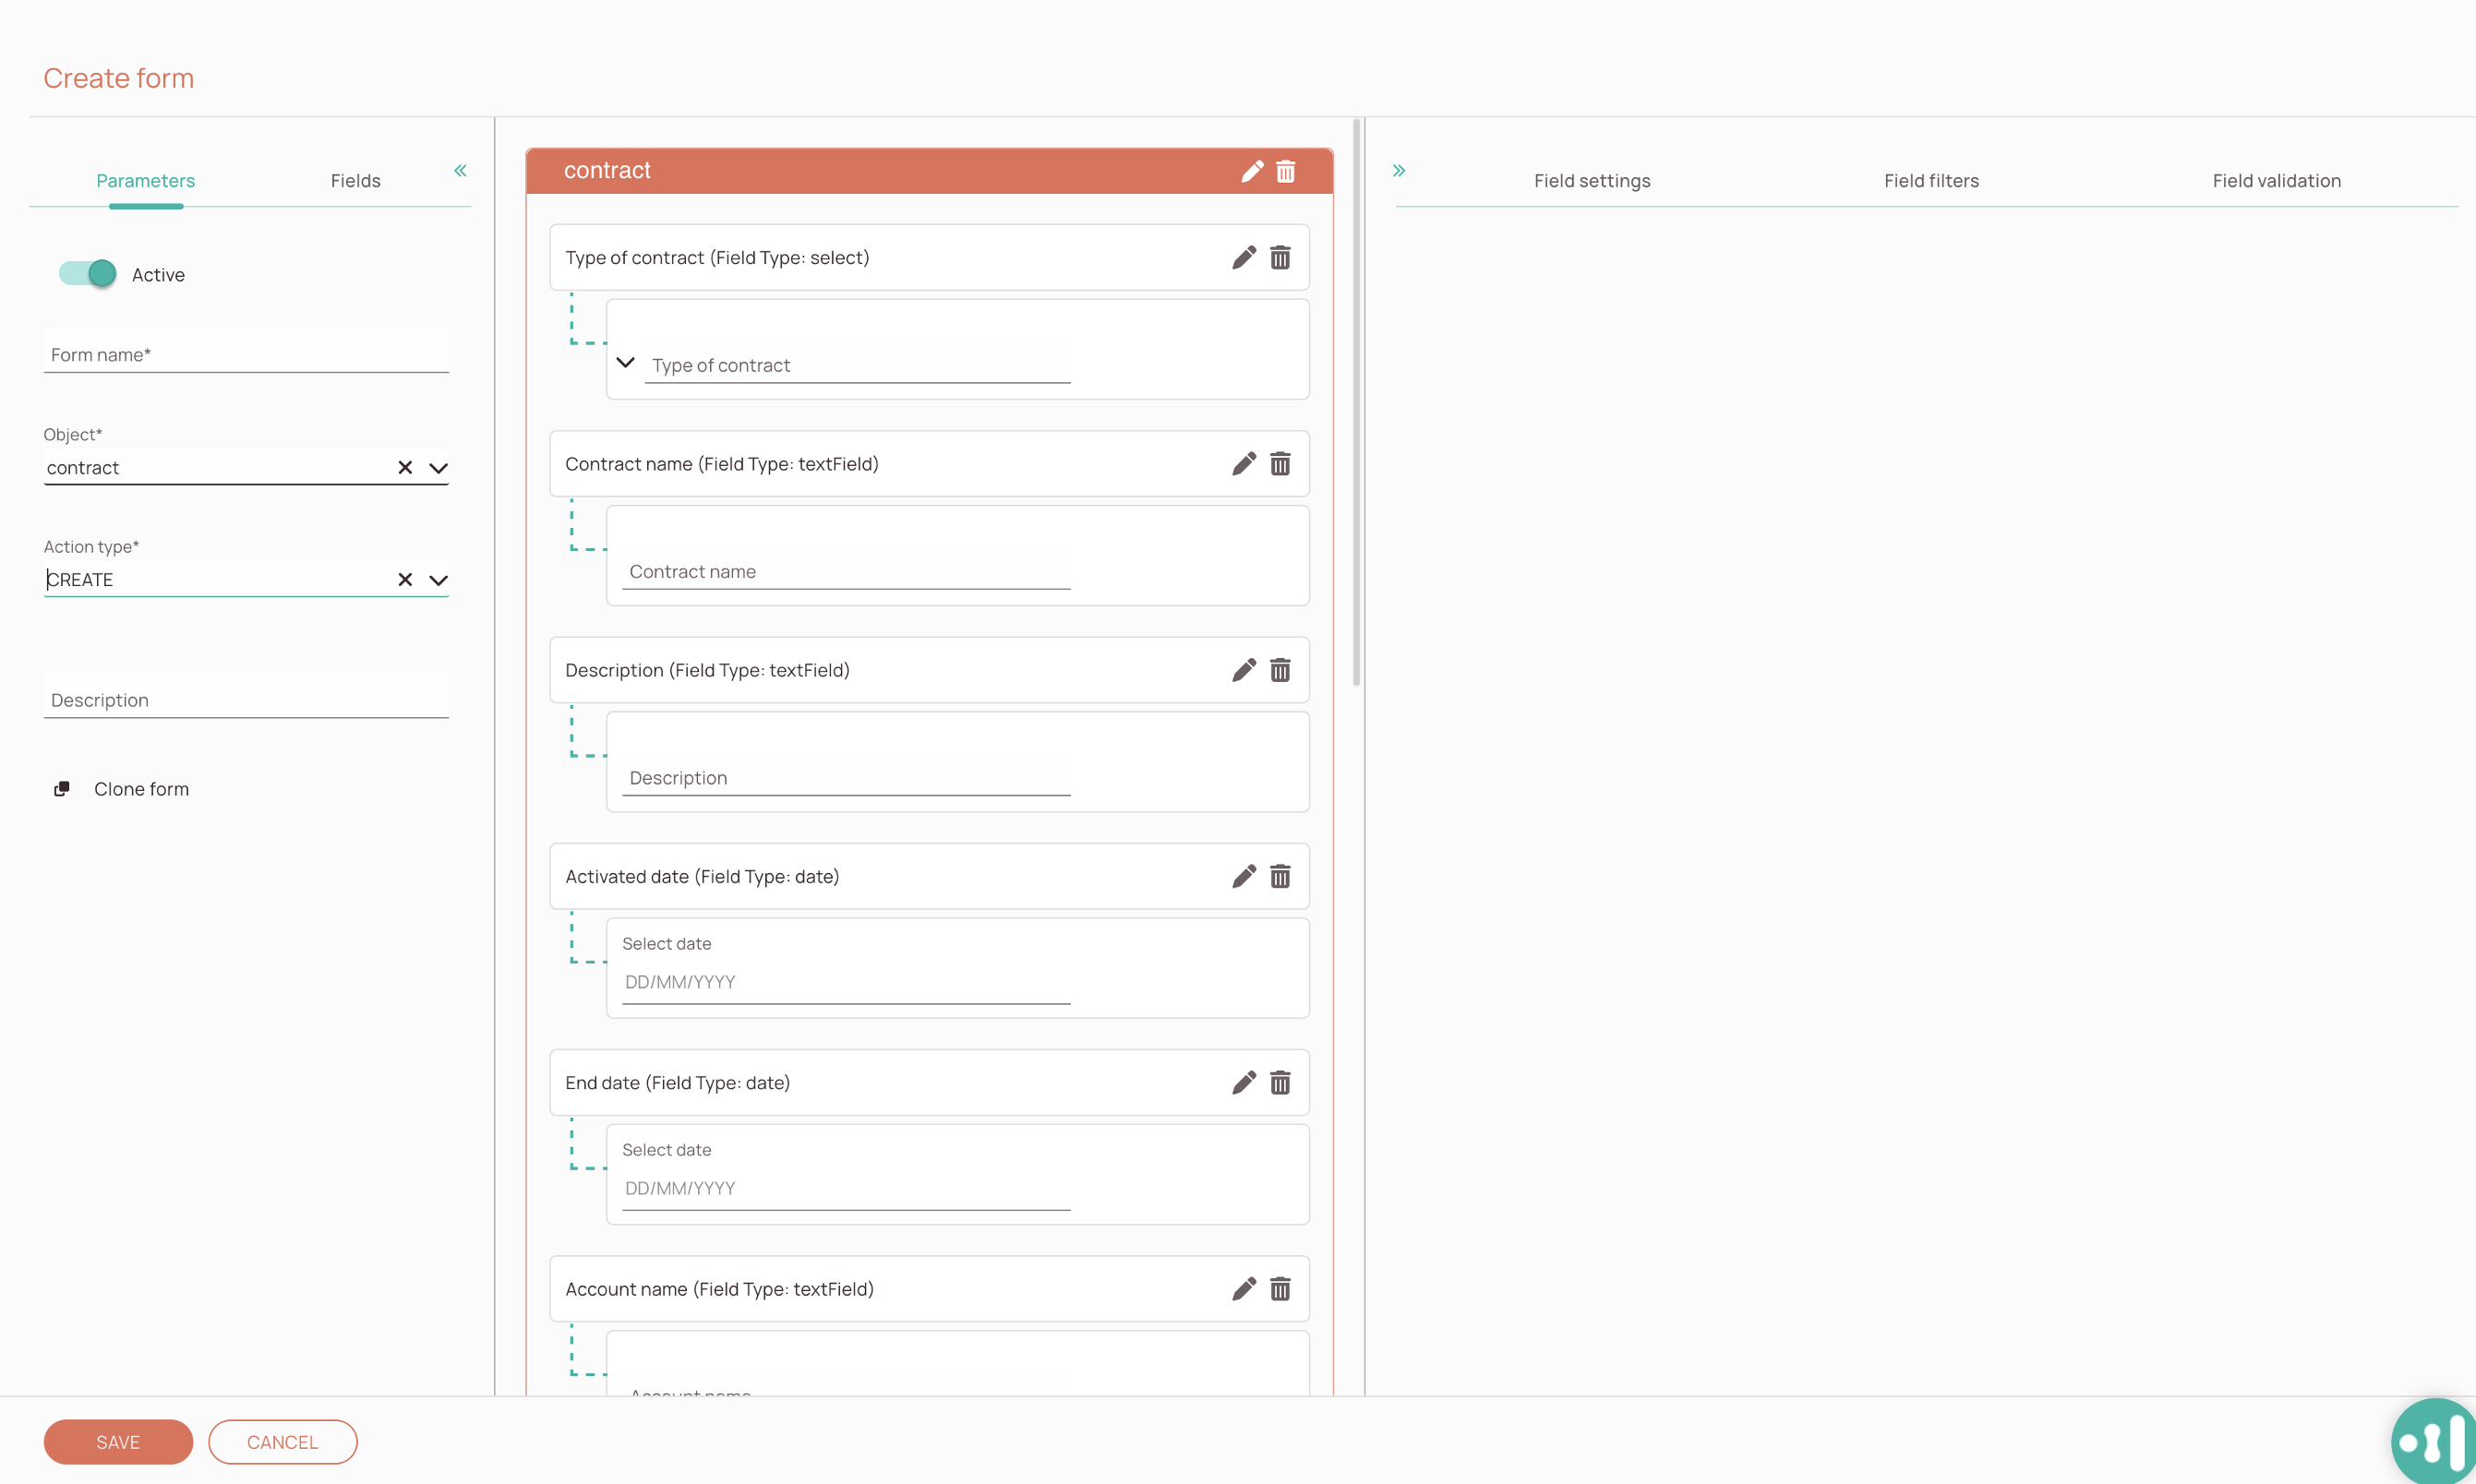
You can customize your "Create form" on the Forms page of the Admin panel, just as you can for tickets.
All you need to do now is add a new form inside the form creator, give it a name (yourname_create), load your object (yourname_contract), and select the "Create" action type. Your form will be pre-populated with your fields, and you can now adjust it. Then you simply save it, and it should appear in the forms list.
Note: If you do not create a custom create form, a default one will be used.
You can also create your own forms for other types of actions then "Create" on the Forms page, and use them later on for editing, and updating your object record's data.
- If you add additional fields after model creation, the default form will contain them out of the box.
- For the custom forms, however, if you need to update fields, the form has to be re-added again in the Models page.
2.2. Configure the Edit Forms which are used by Workflow Buttons
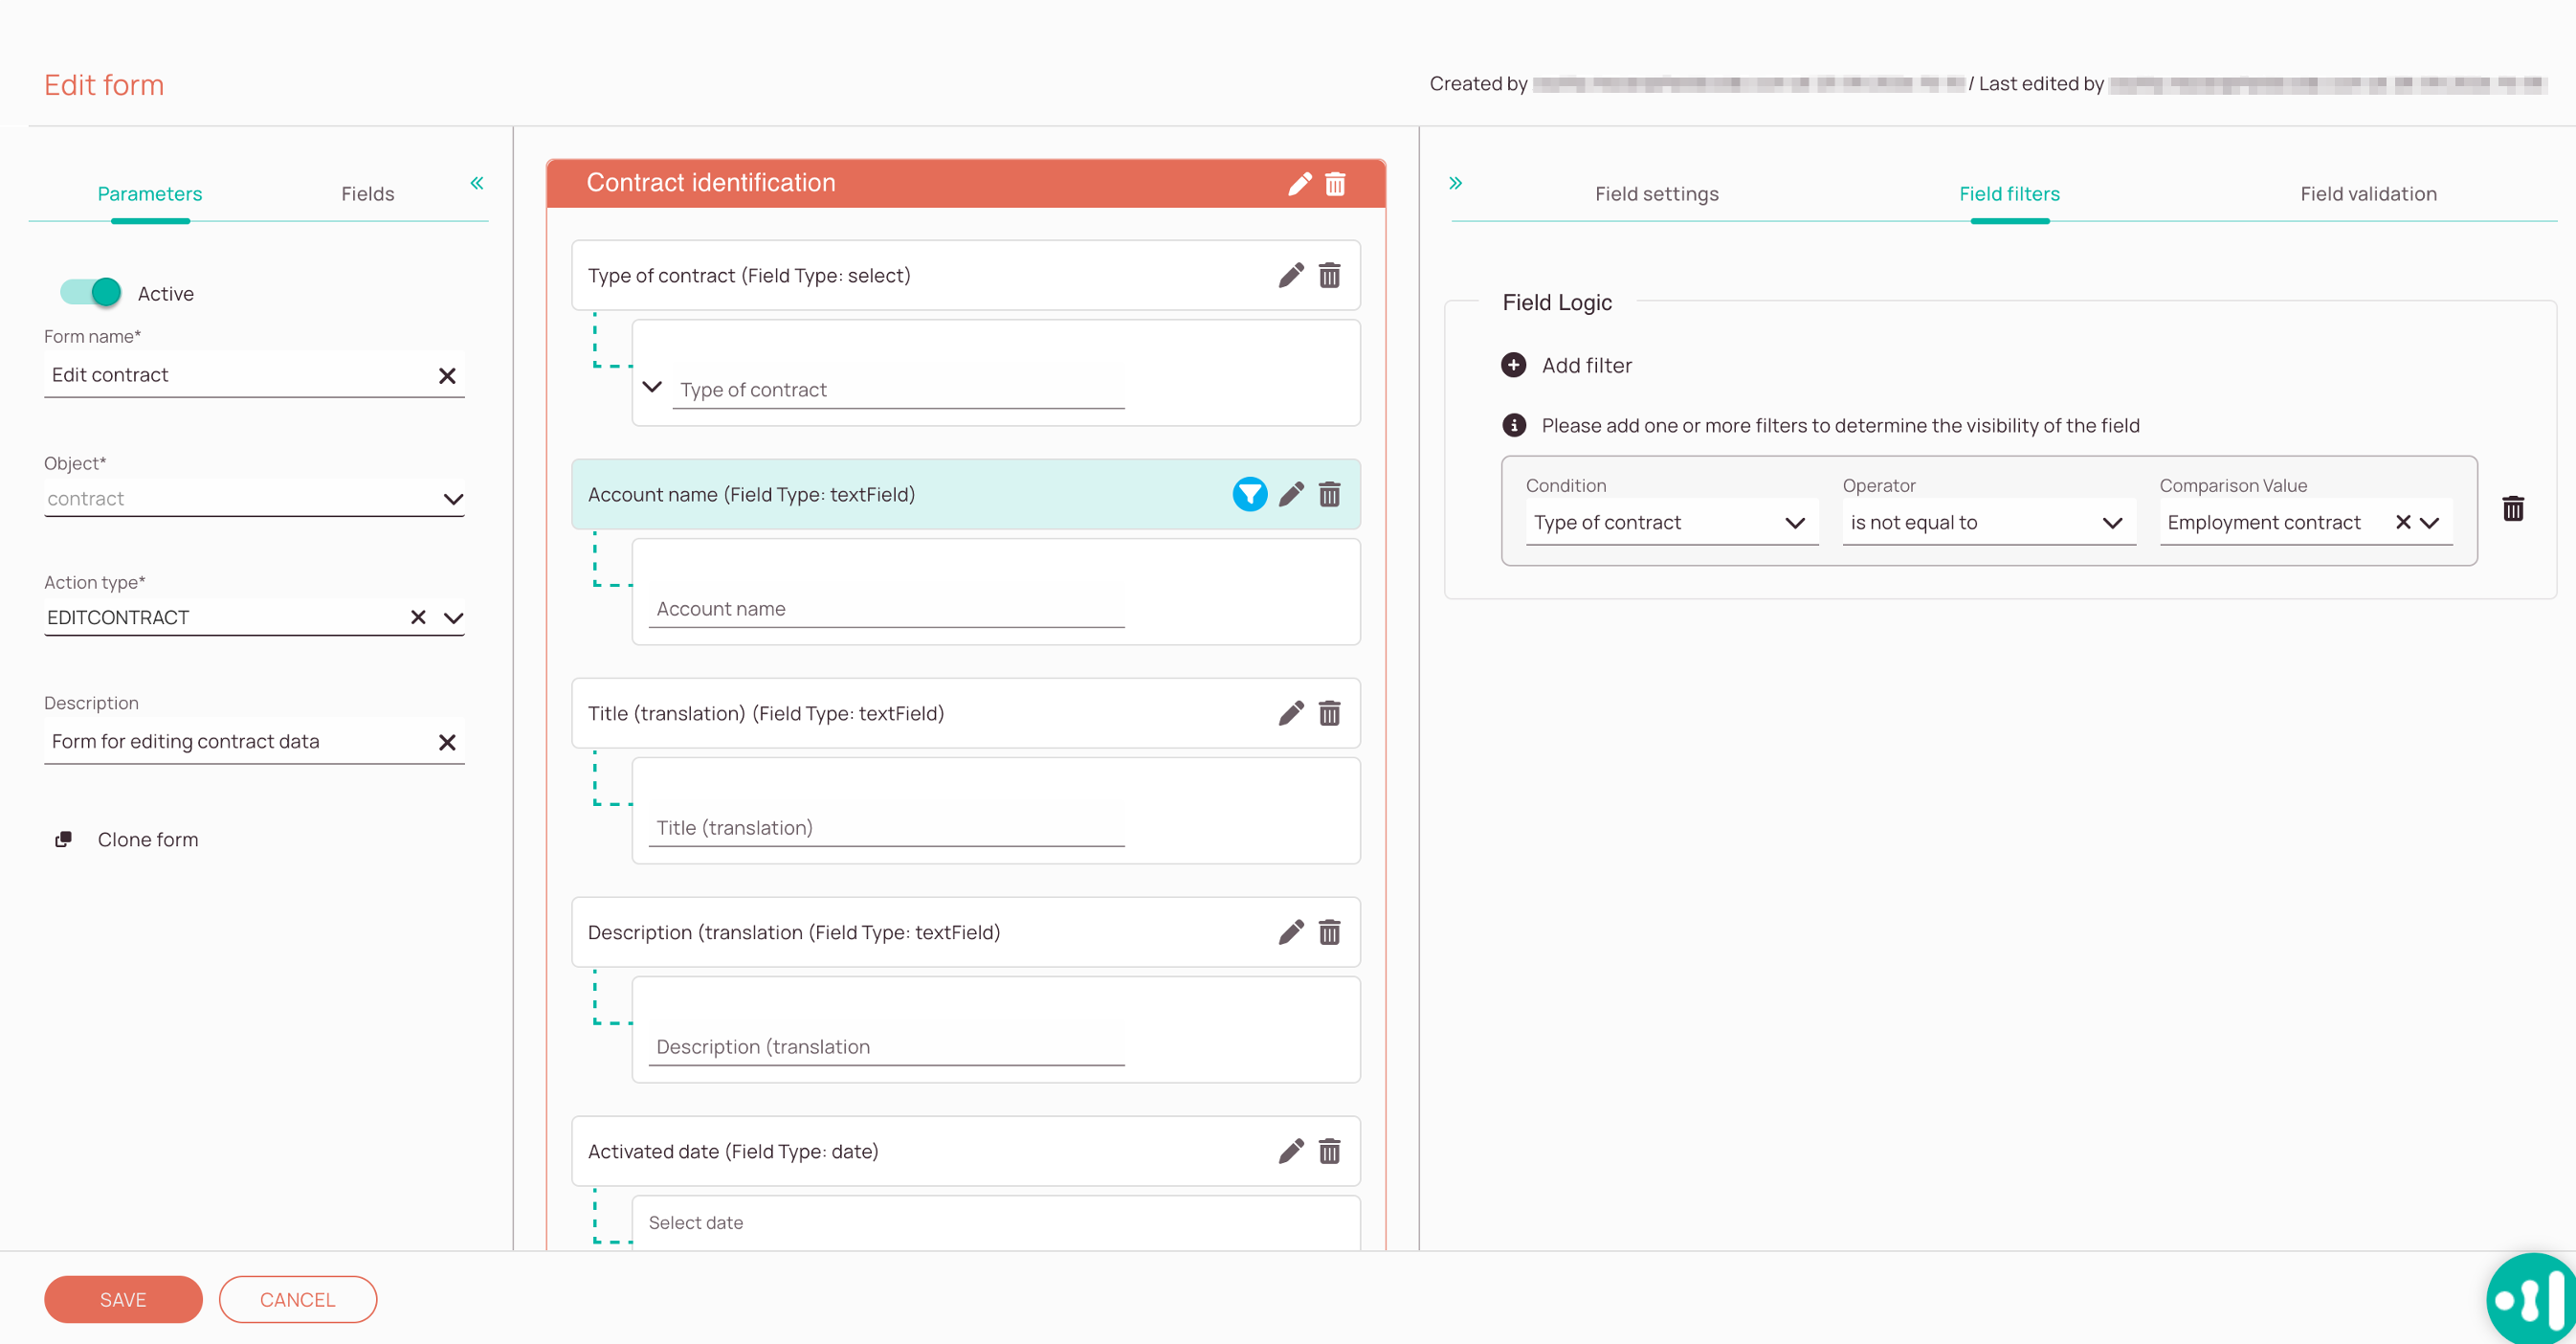
The easiest and often most convenient way to edit data fields on your objects is to use “Edit” forms:
- You need to specify the edit form(s) and the list of data fields available for editing.
- And then use a workflow button that can open an edit form. If you want to be more specific about which fields are editable during the lifecycle of the object, you can create forms for each purpose (e.g. a specific edit form when the asset is in a new state with relevant asset details and limit field editing to e.g. asset registration data when the asset has already moved in the workflow).
In this scenario, for simplicity’s sake, we will only specify one asset “Edit” form, which will be accessible for all asset statuses.
2.3. Configure the Asset Workflow
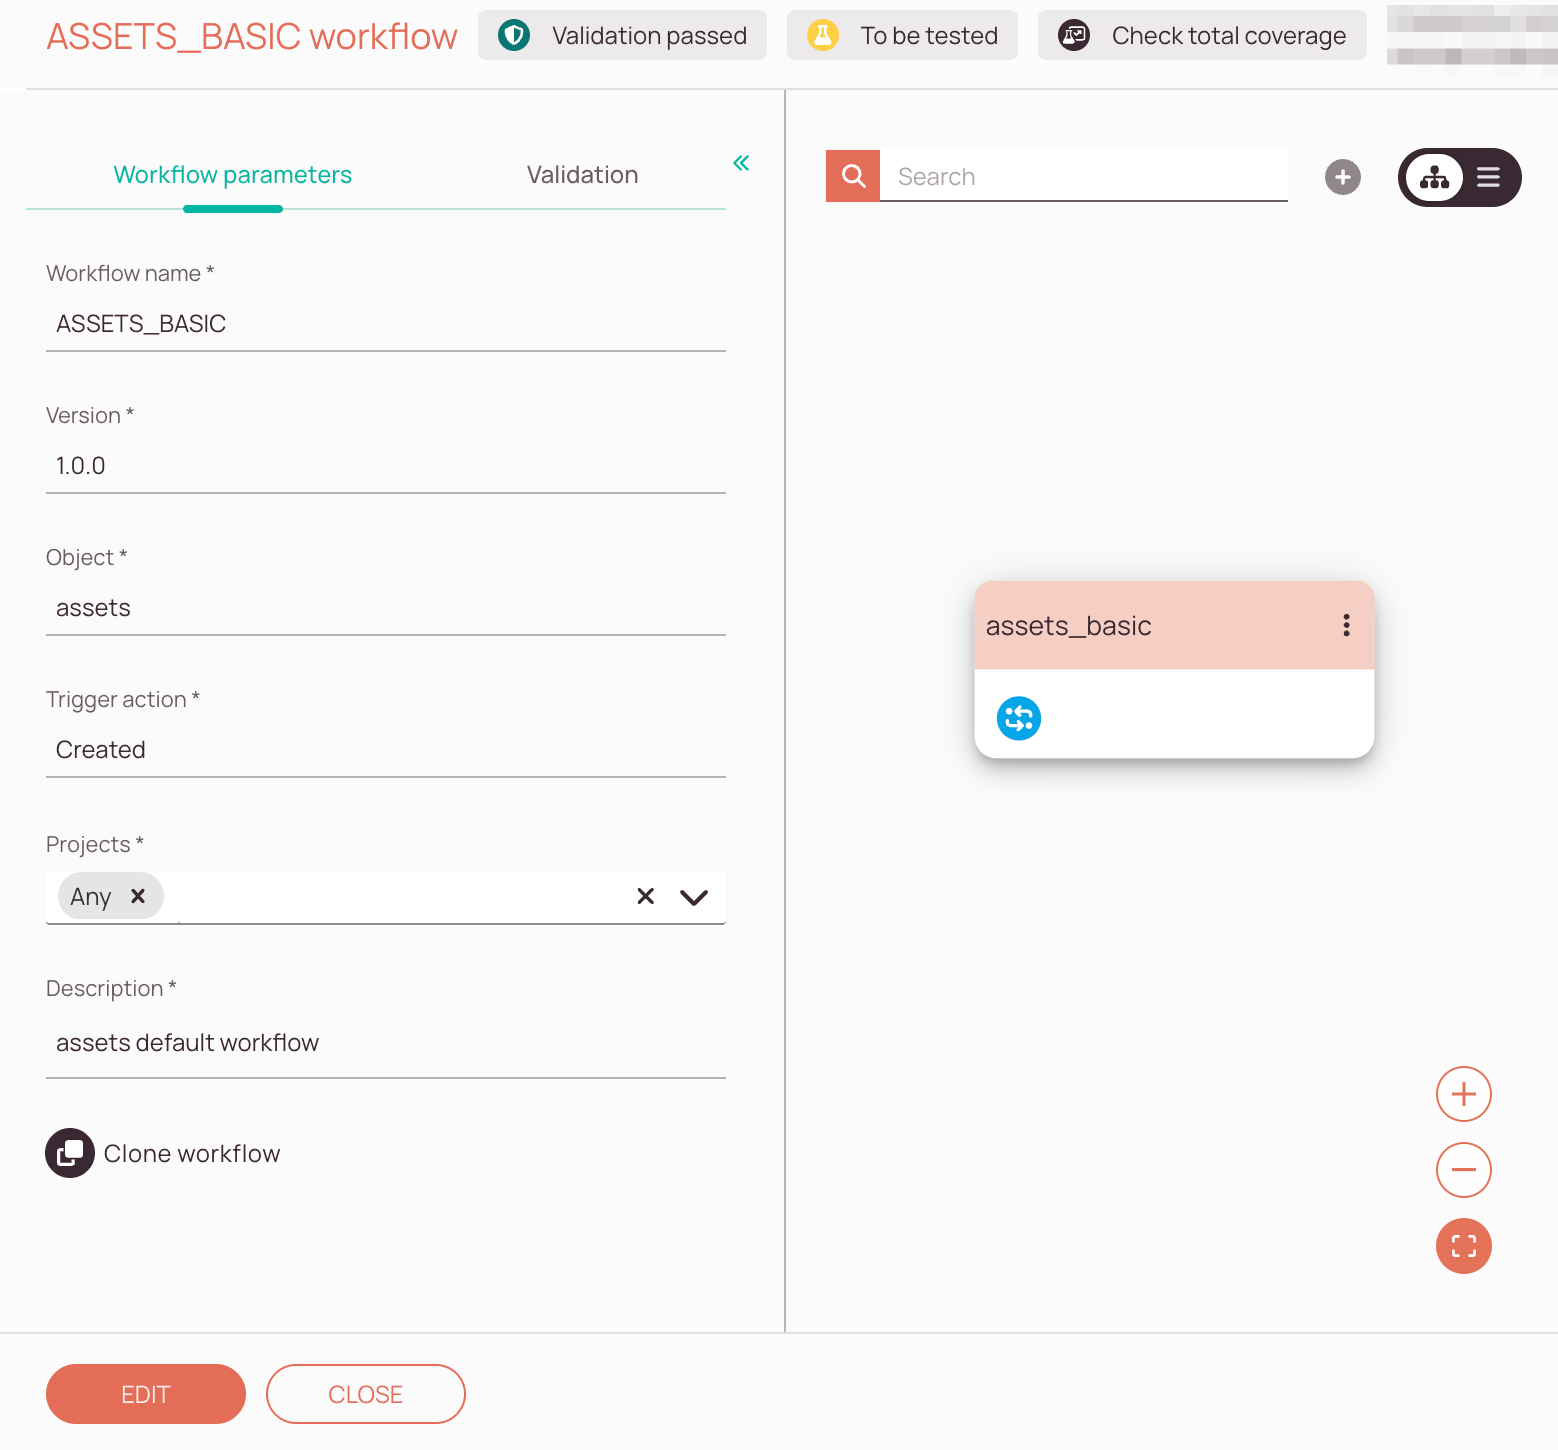
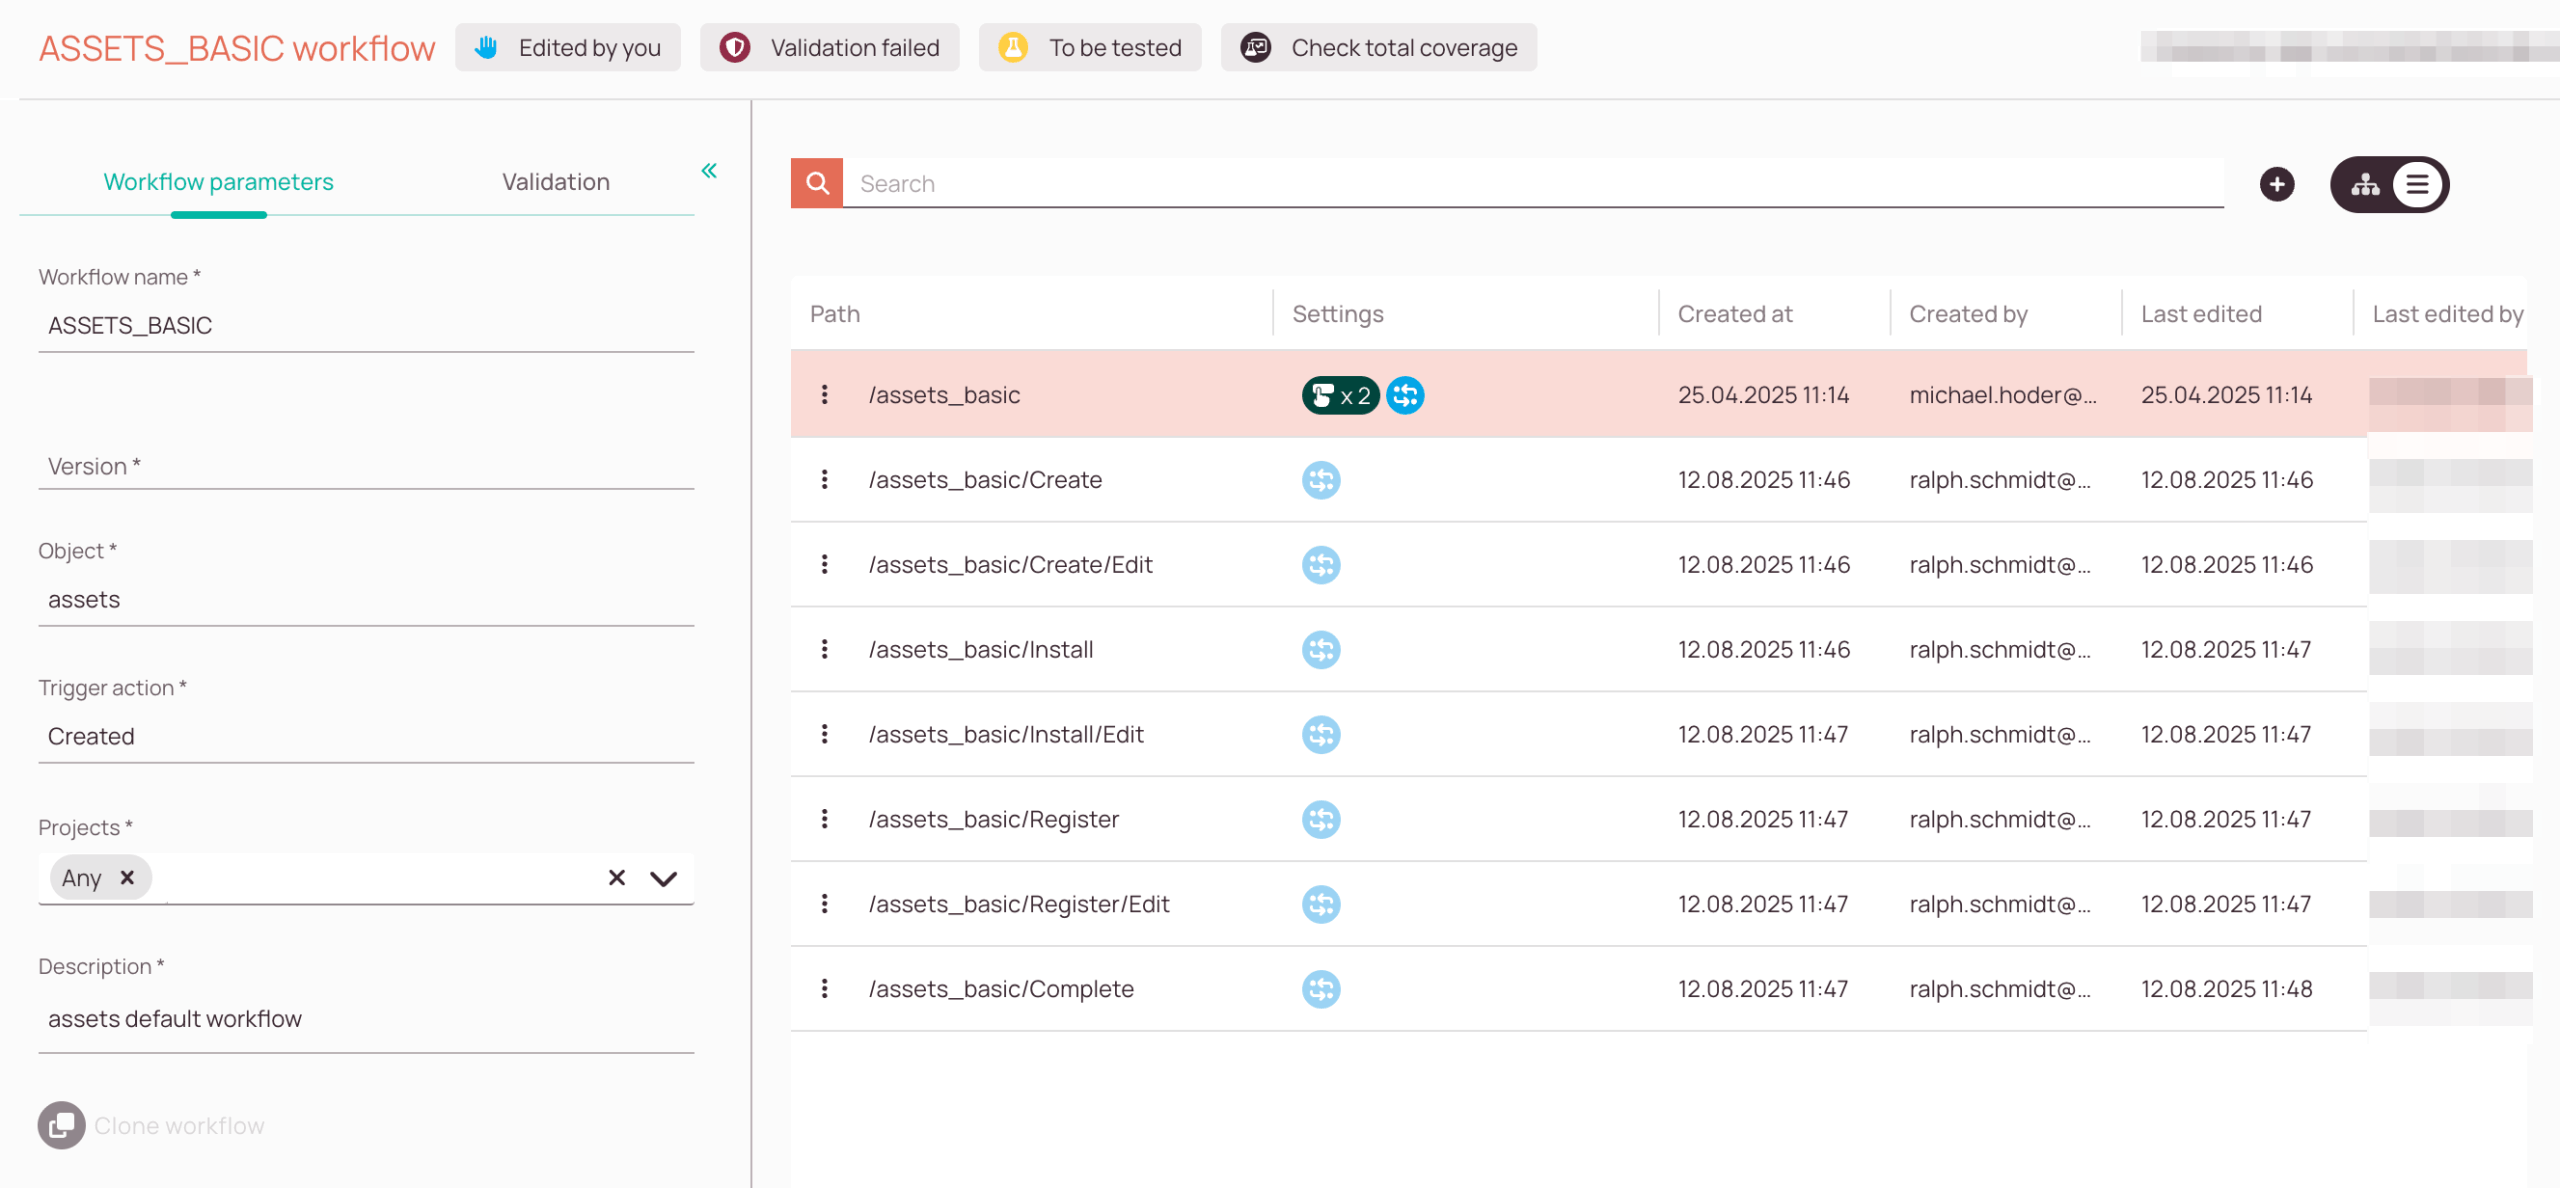
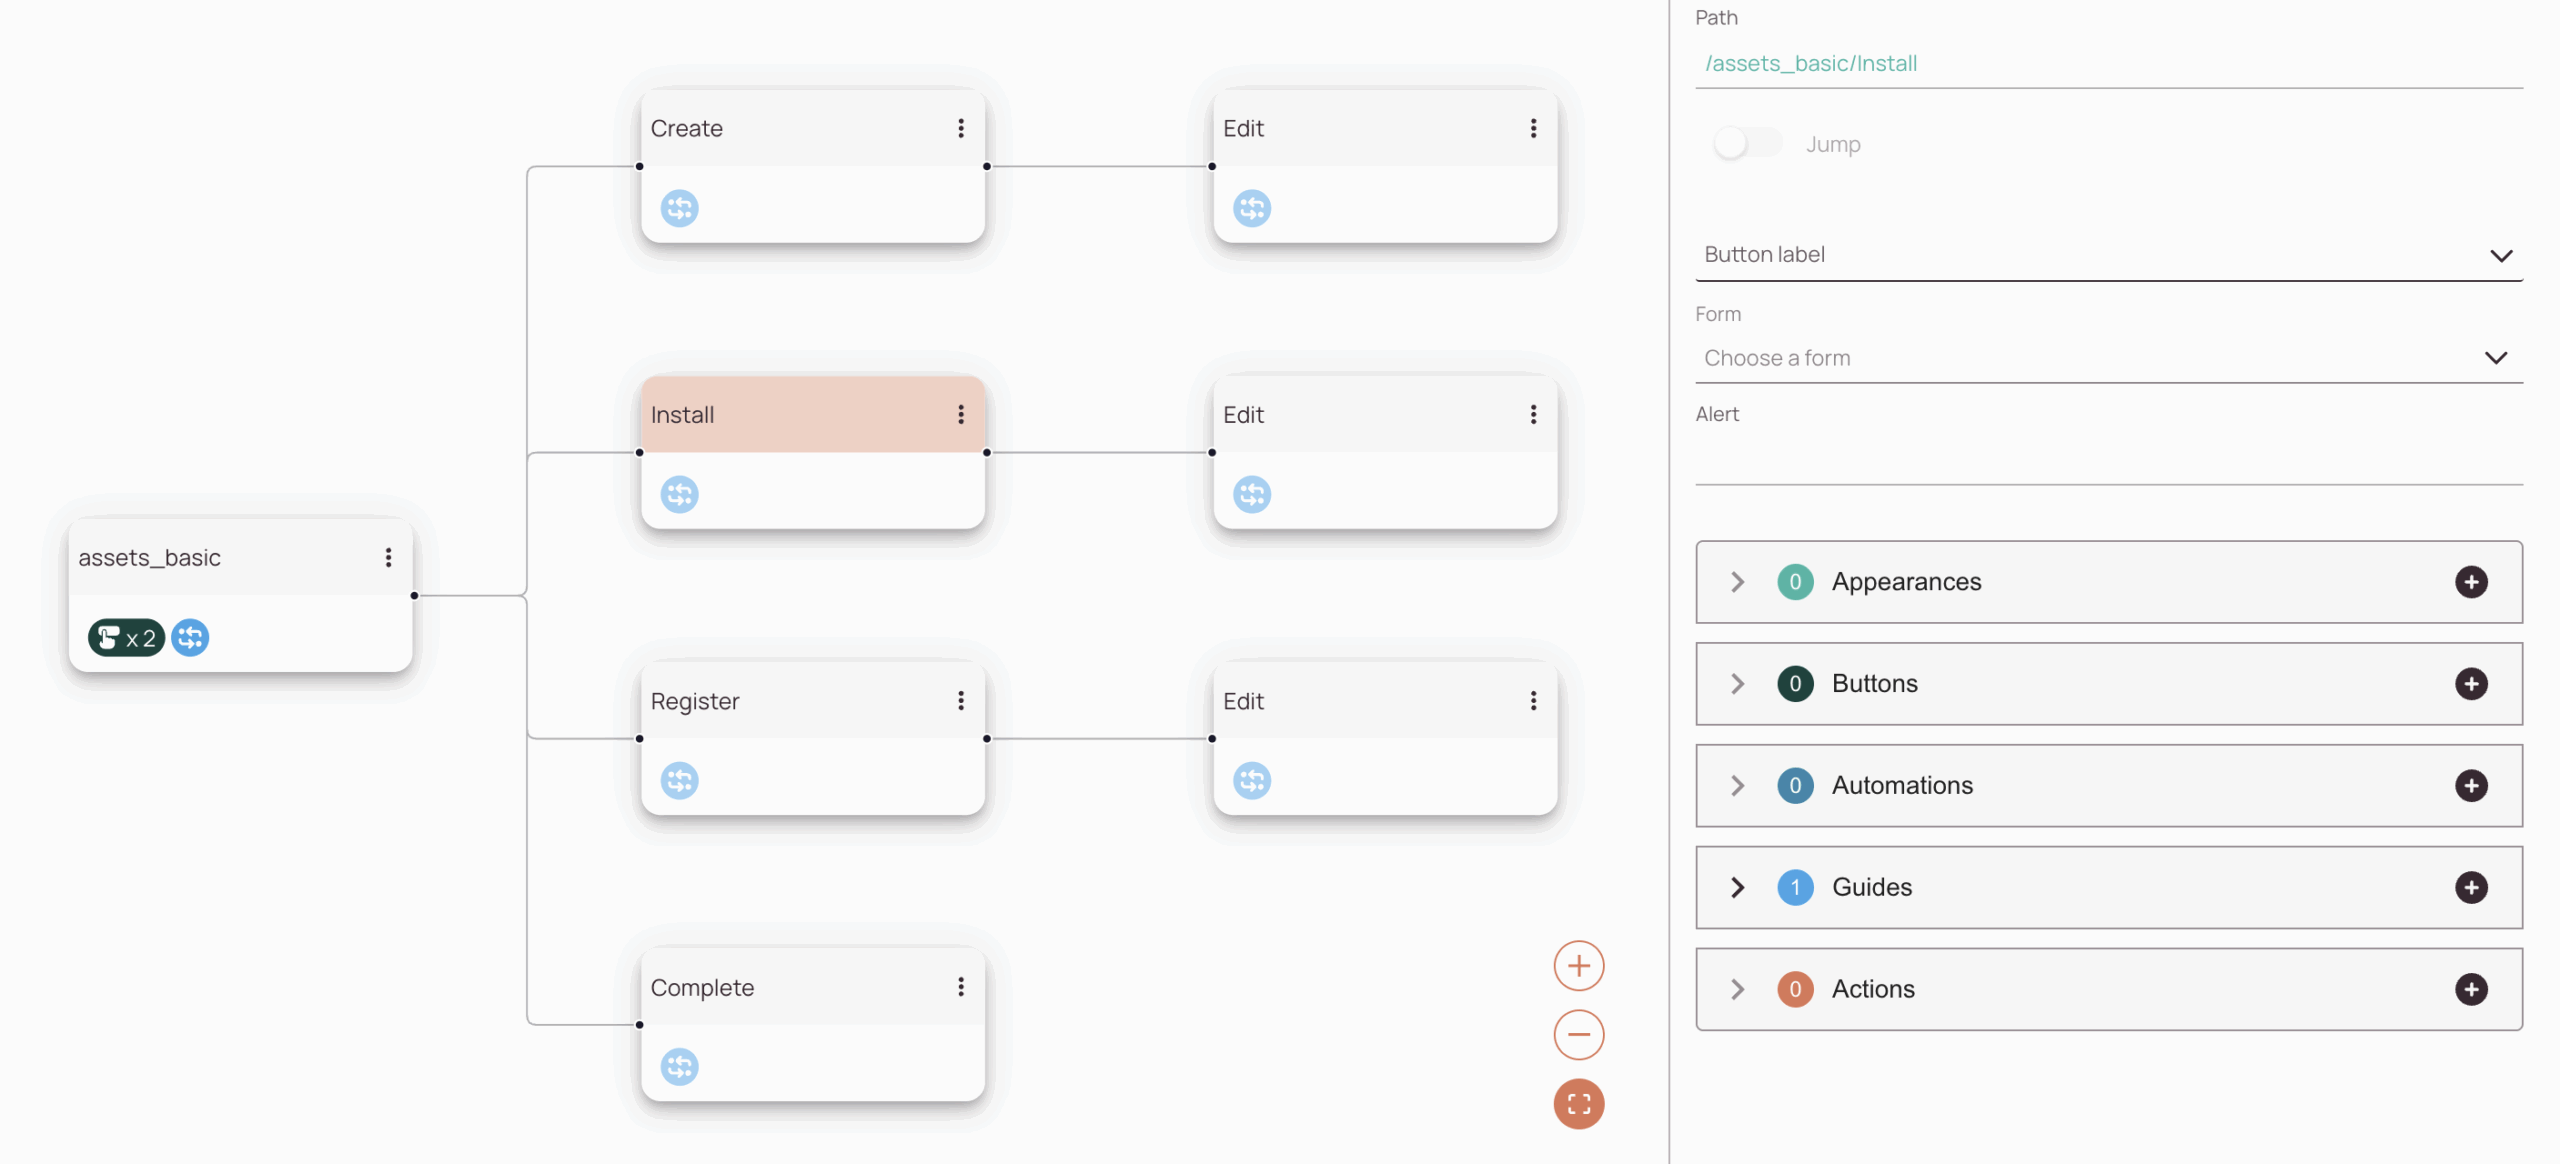
If you open the Workflows page, you will see that the ASSETS_BASIC workflow has already been created, with only one simple node.
You can check the workflow parameters for the ASSETS_BASIC workflow on the Workflows page.
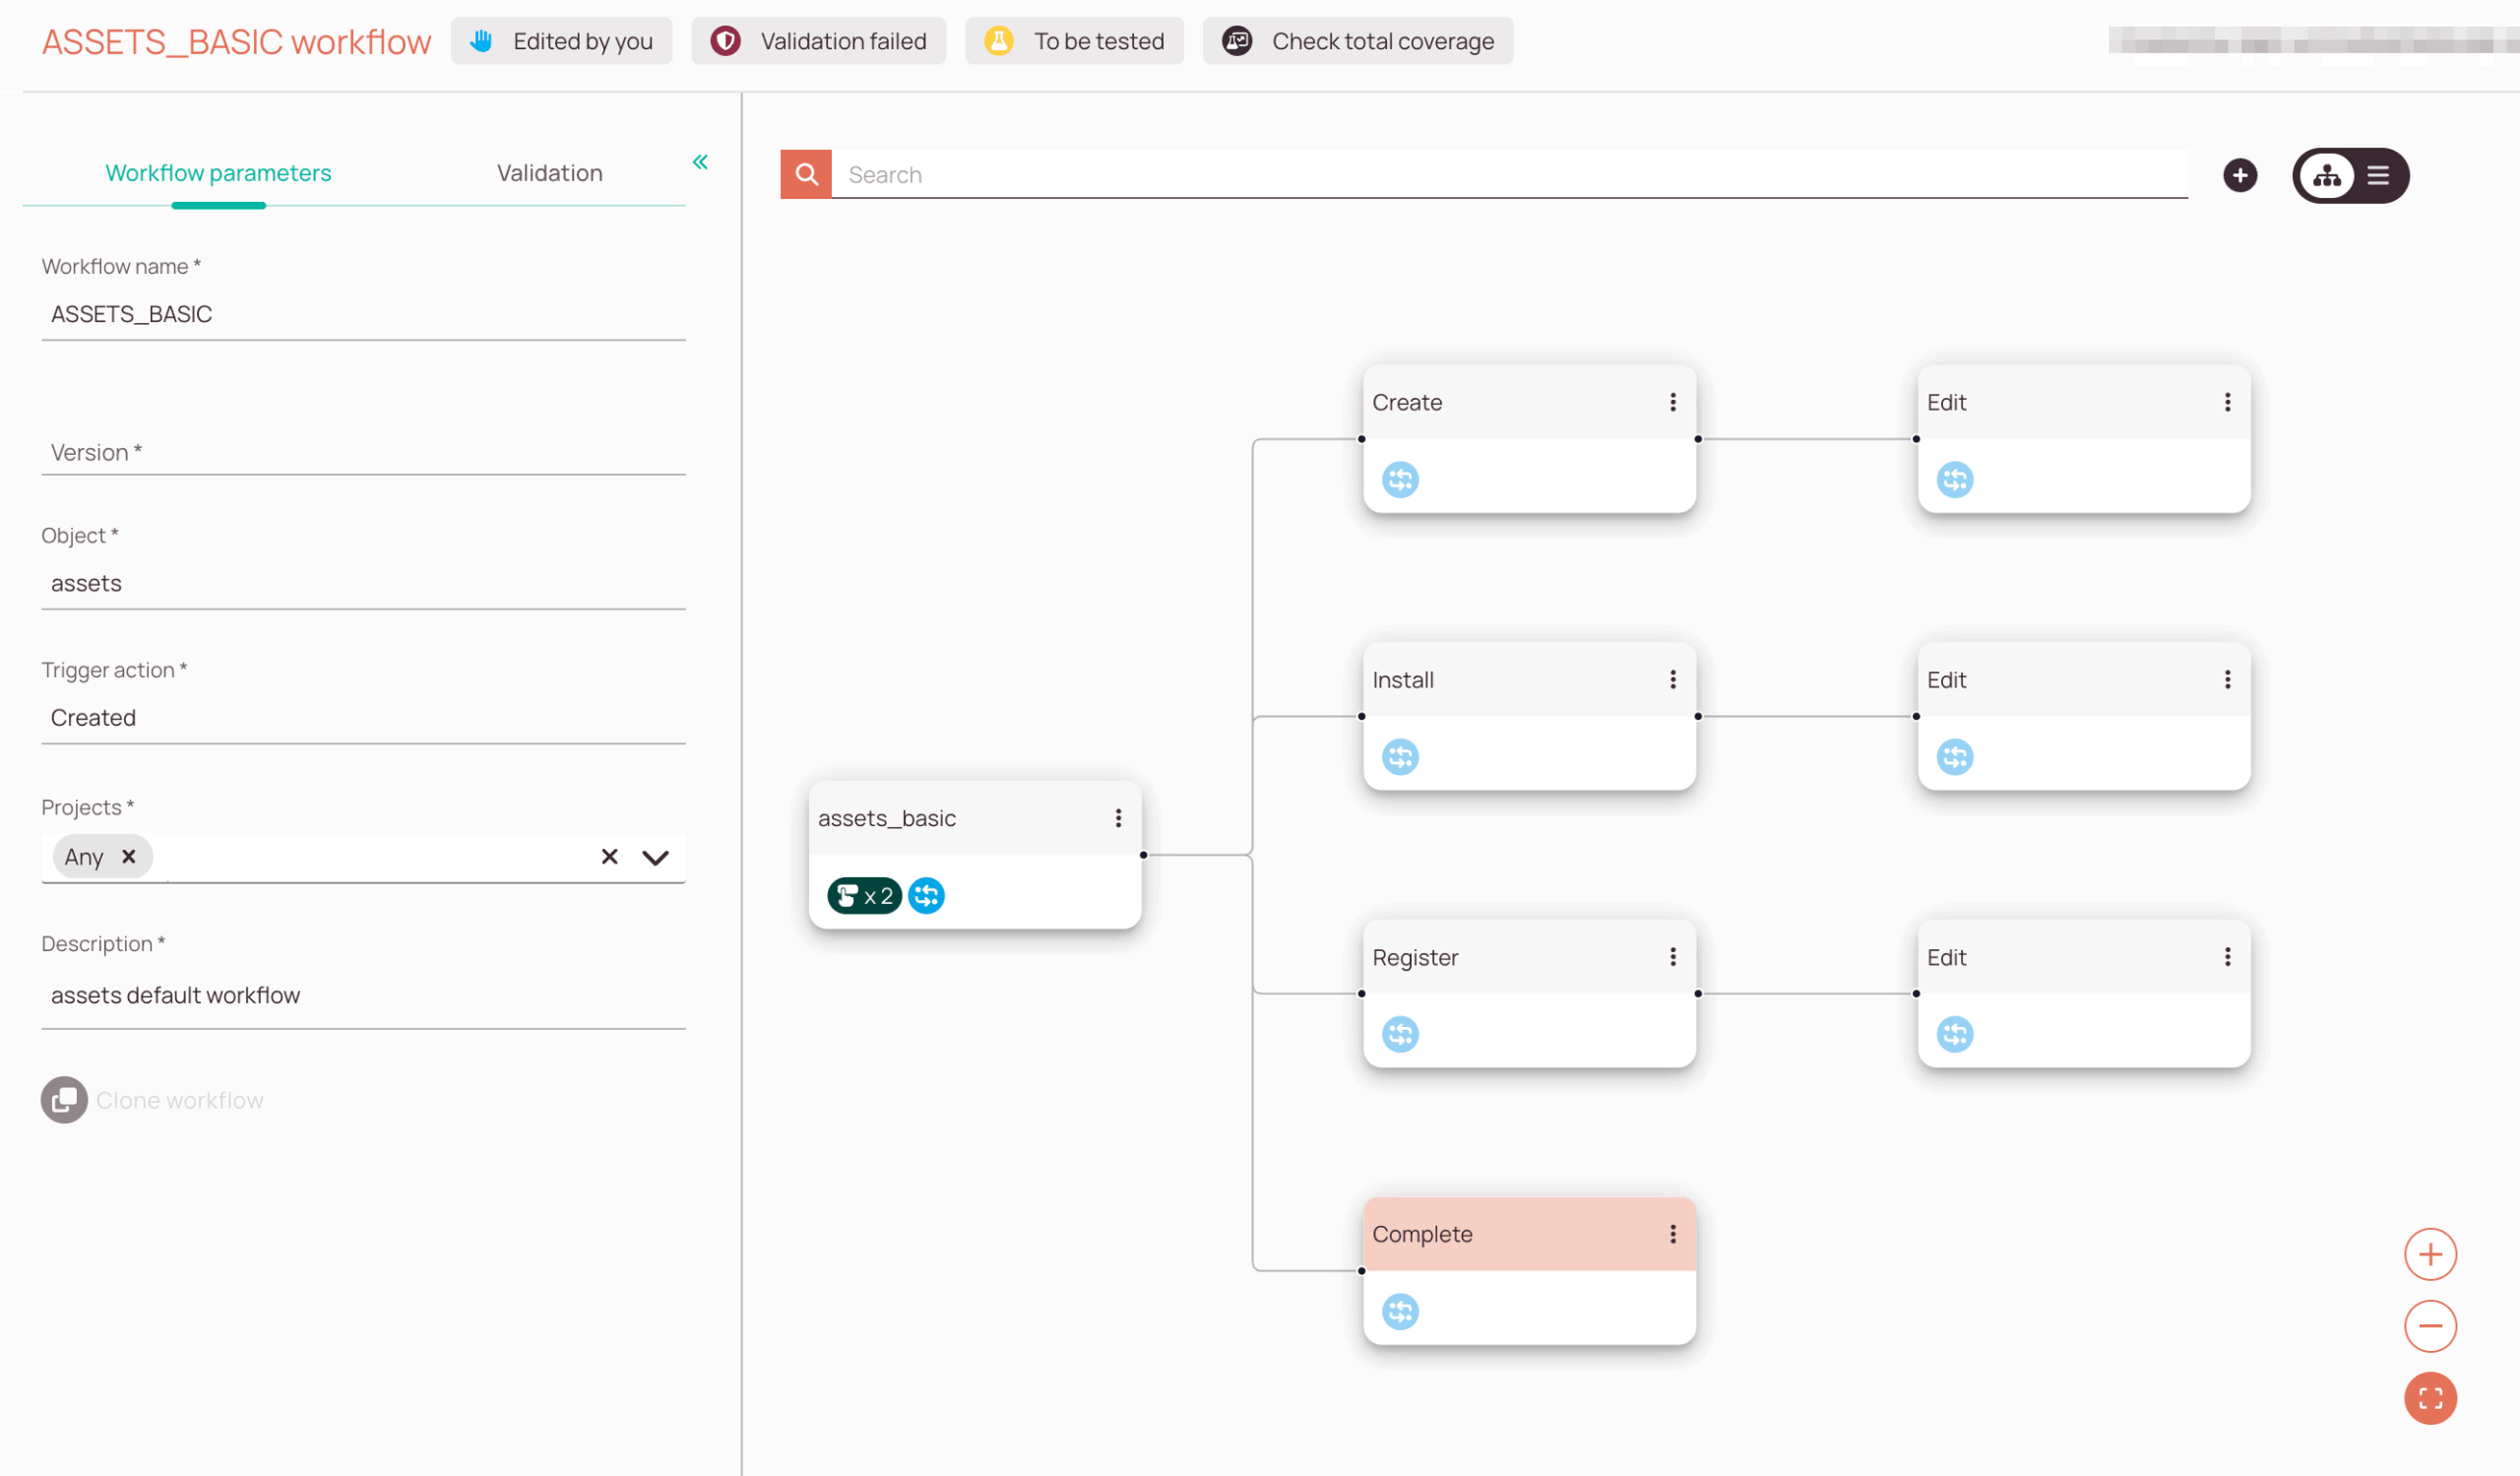
The workflow for the asset management scenario could for example look as follows in the system if you customize it further. Let's have a look on the tree view and the hierarchy view of the asset workflow.
On the right side, you can check the hierarchy view of our illustrative assets workflow.
3. Visual Configuration
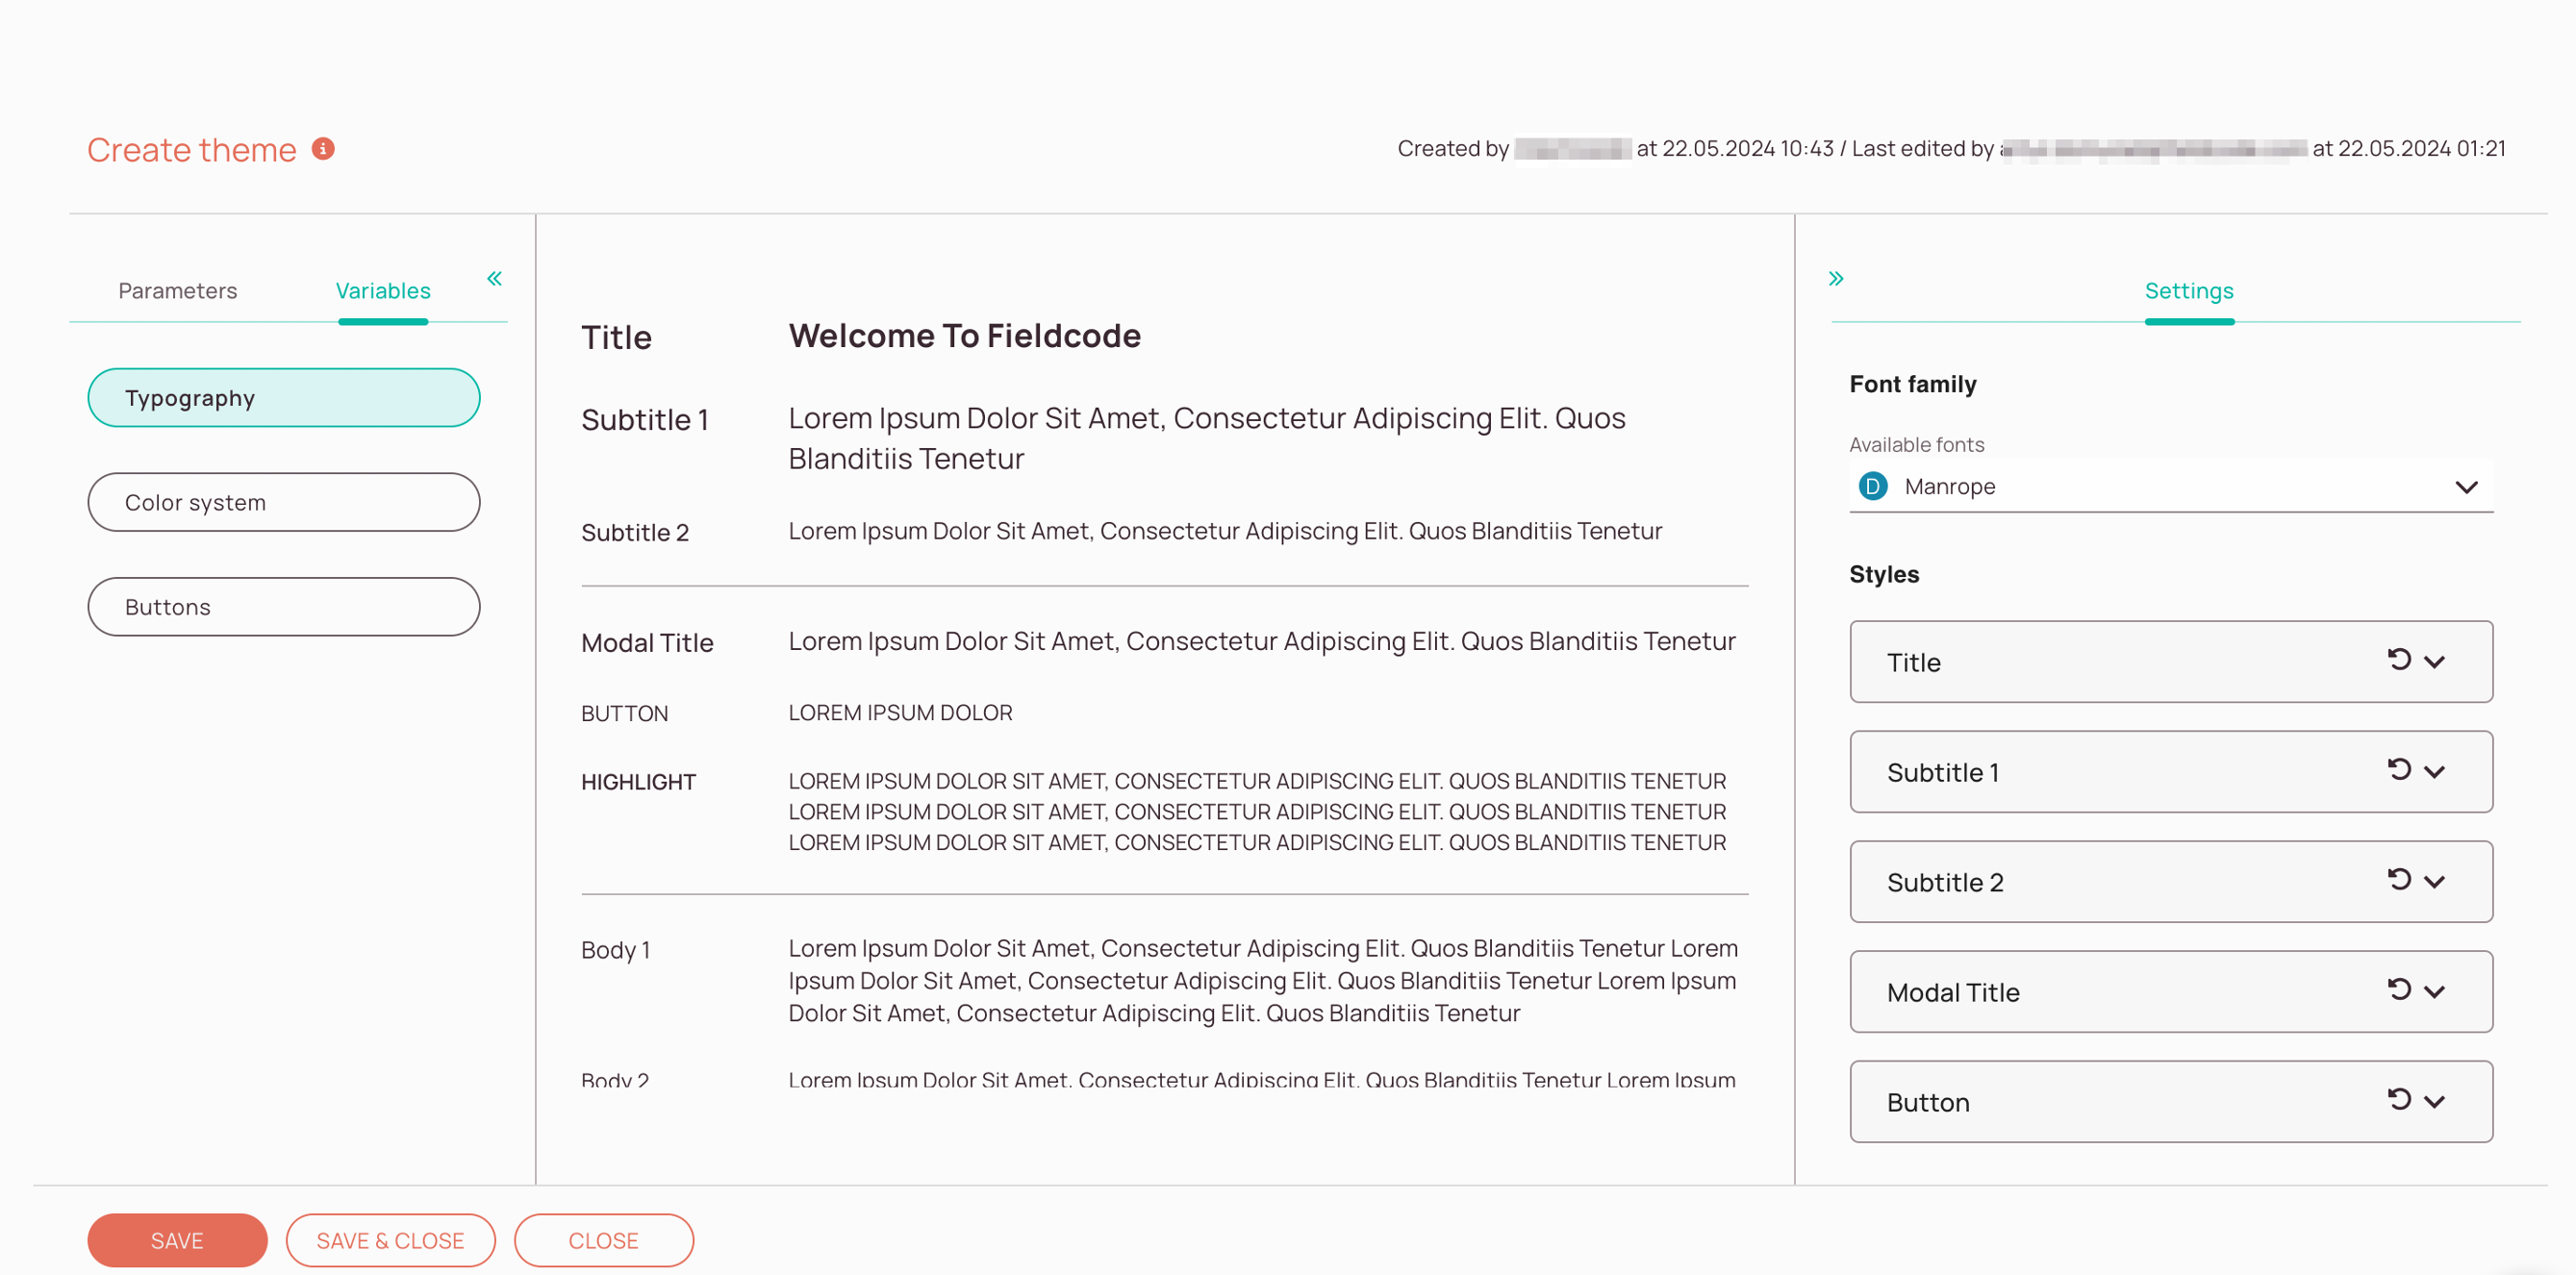
When you work with Fieldcode, you will notice that we apply certain styling standards to our user interface, including color palettes, fonts, and more. We’ve introduced themes that allow you to customize the styling to your liking.
Applying themes is limited at the moment, but our teams are working on more and more features around them, and we hope you'll be excited to see them in the future.
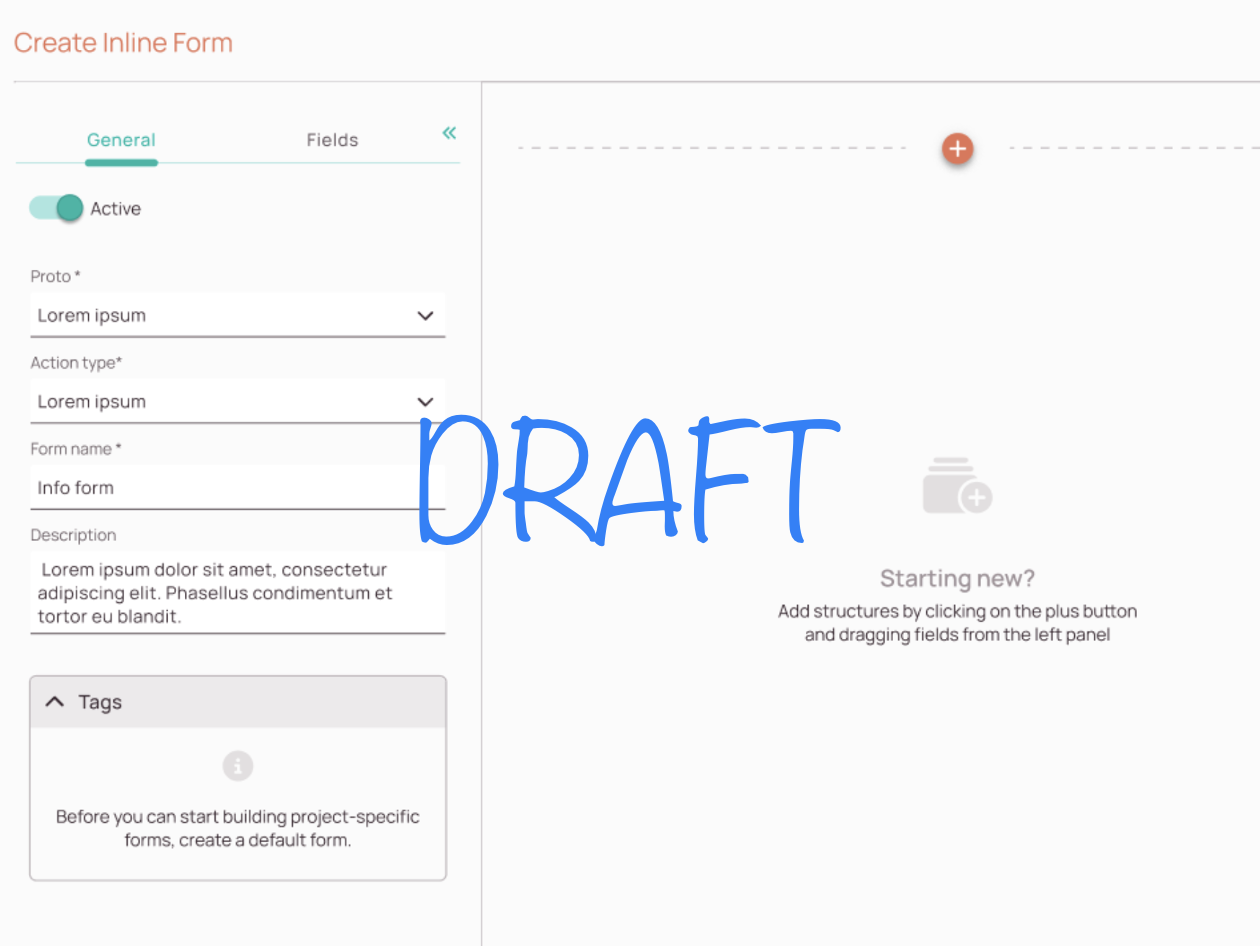
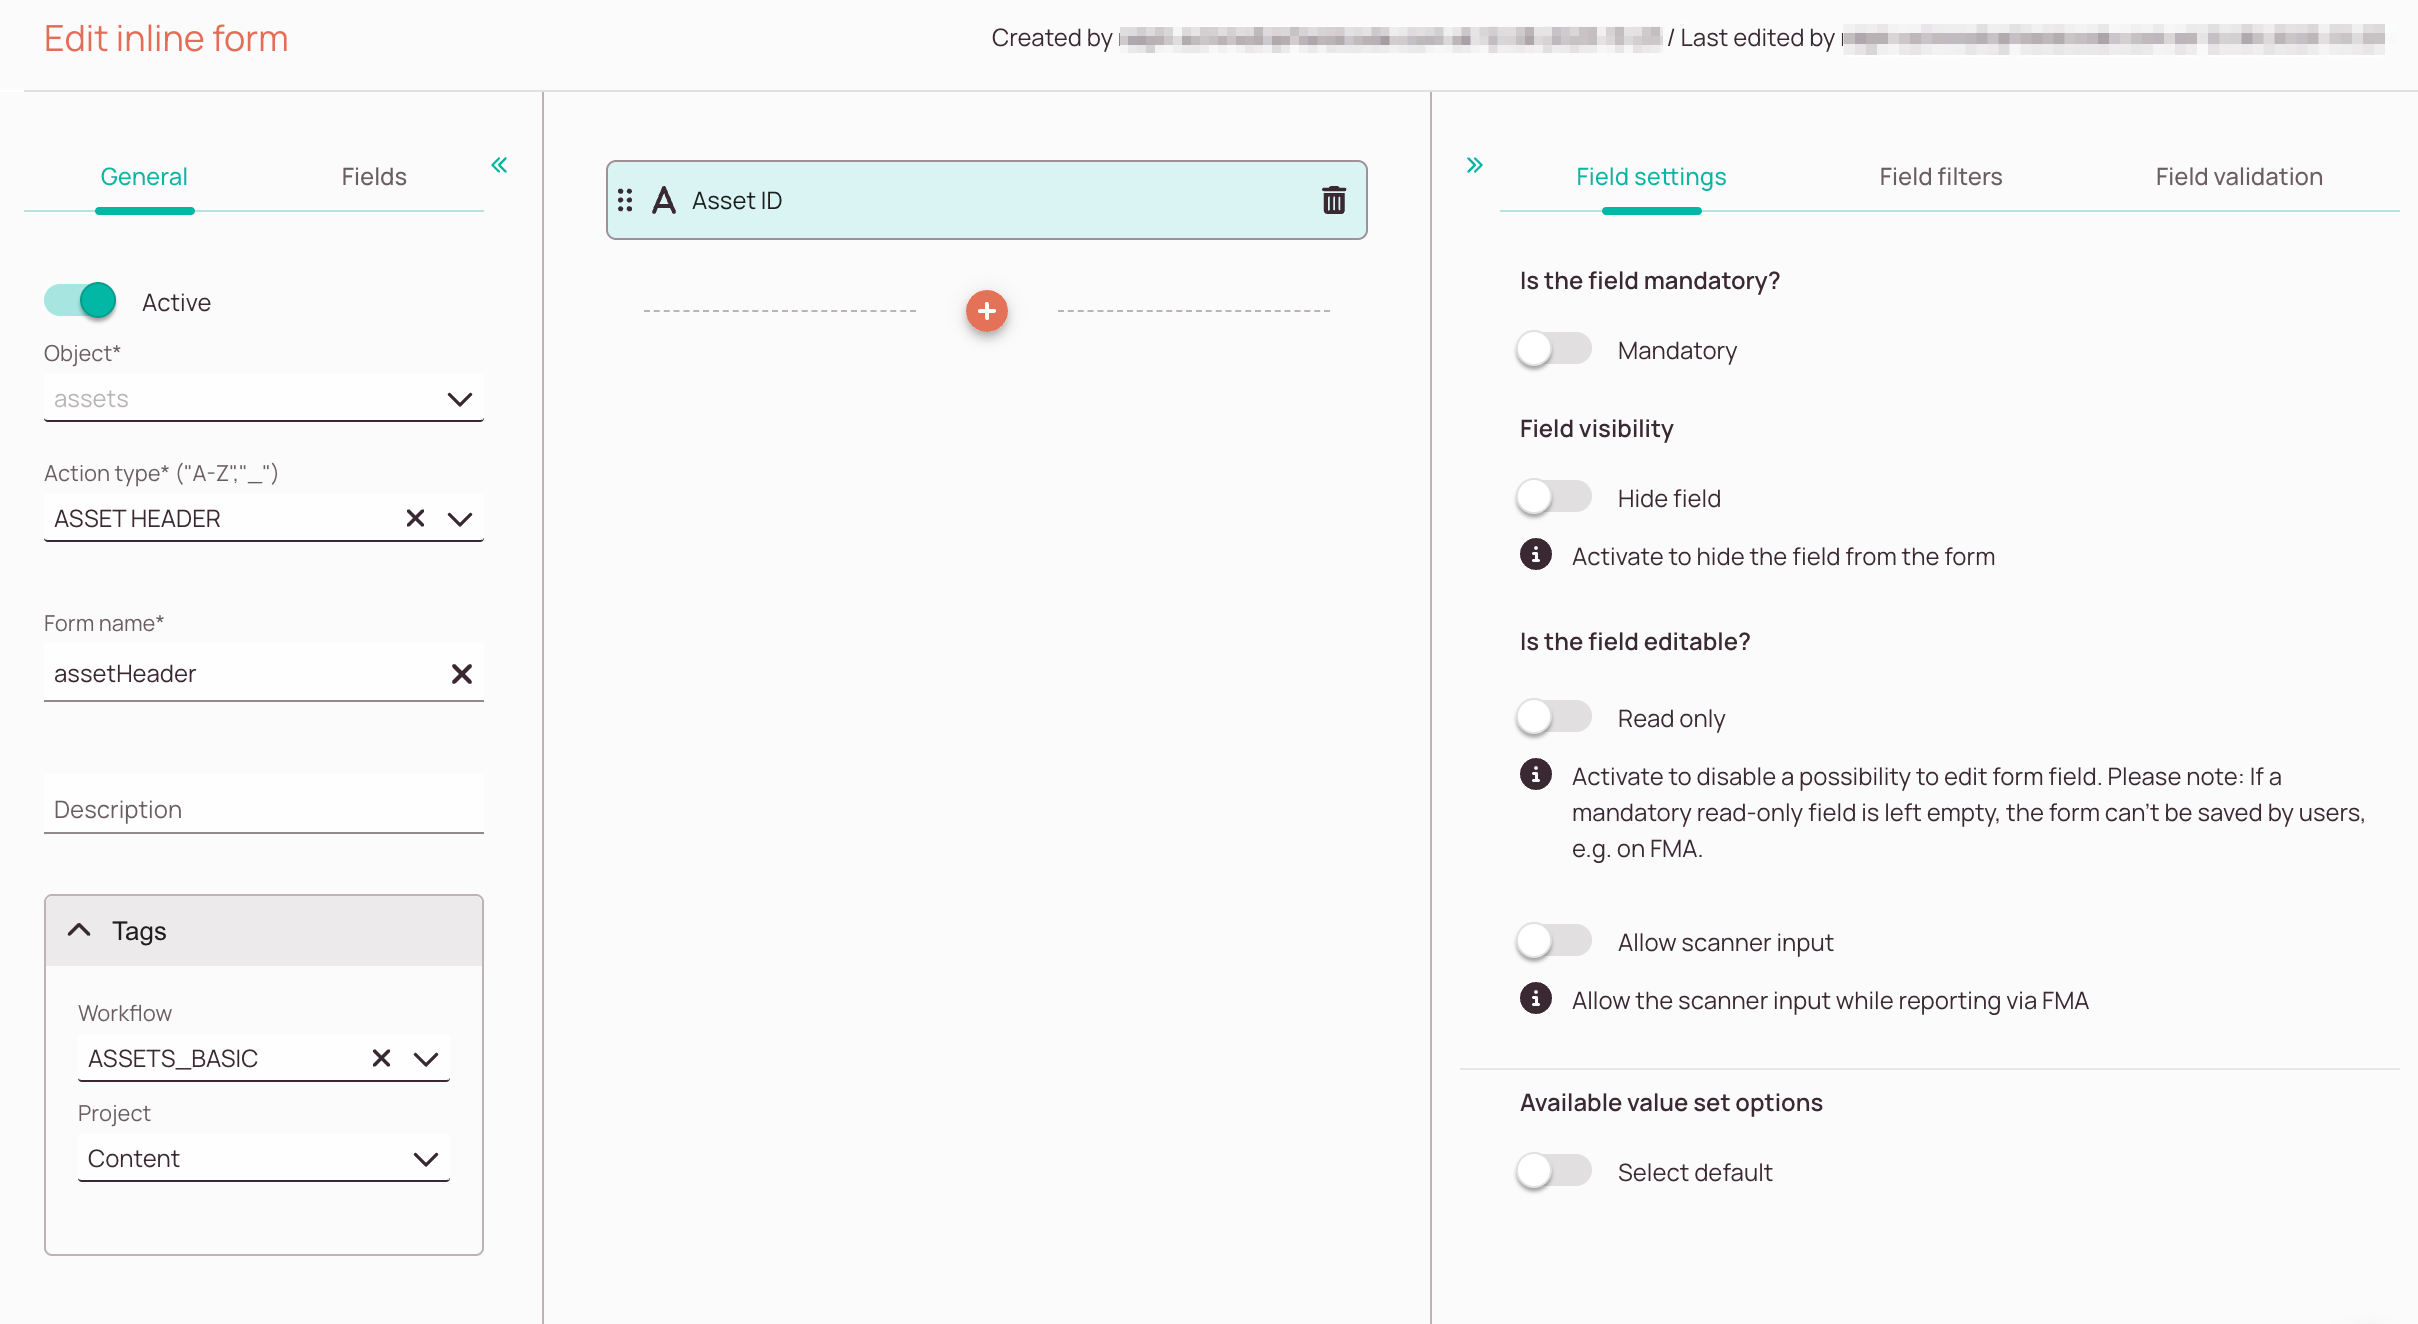
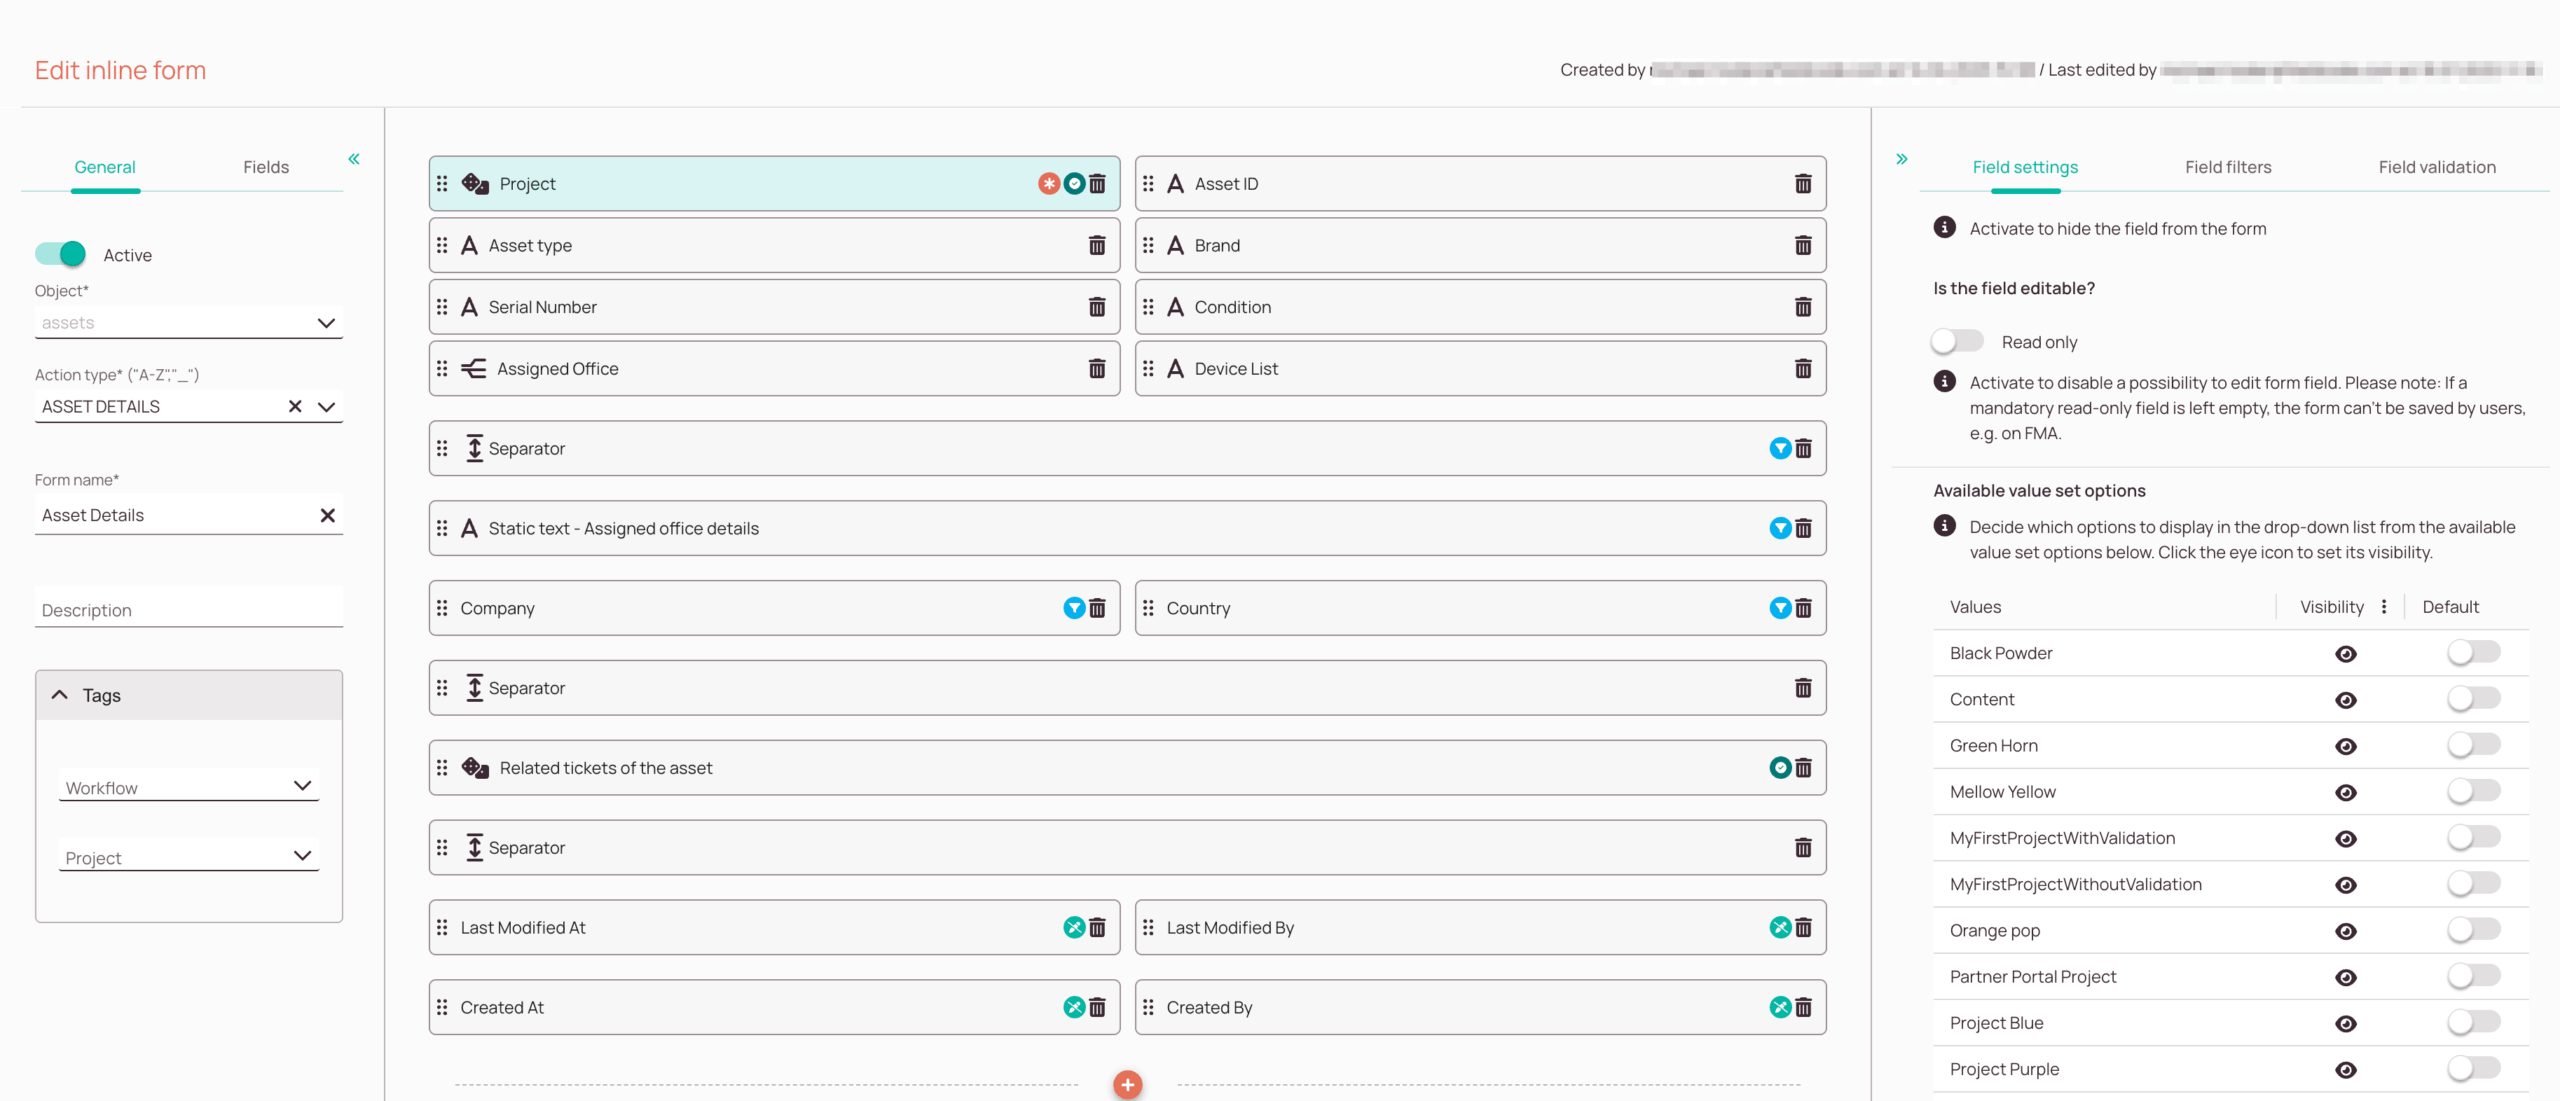
3.1. Create Inline Forms as building units of the layout
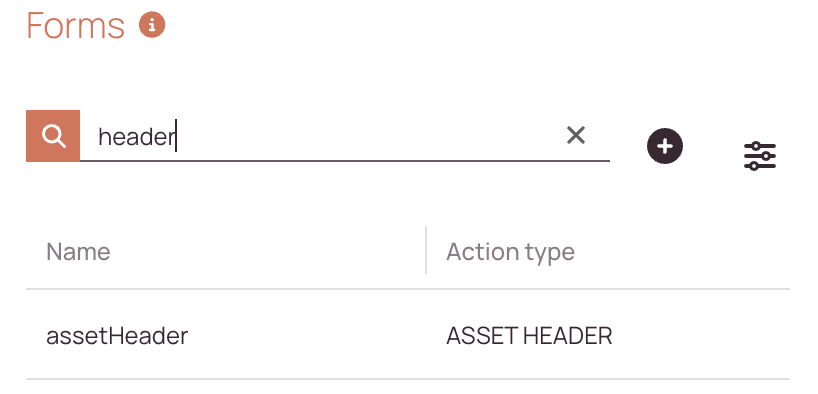
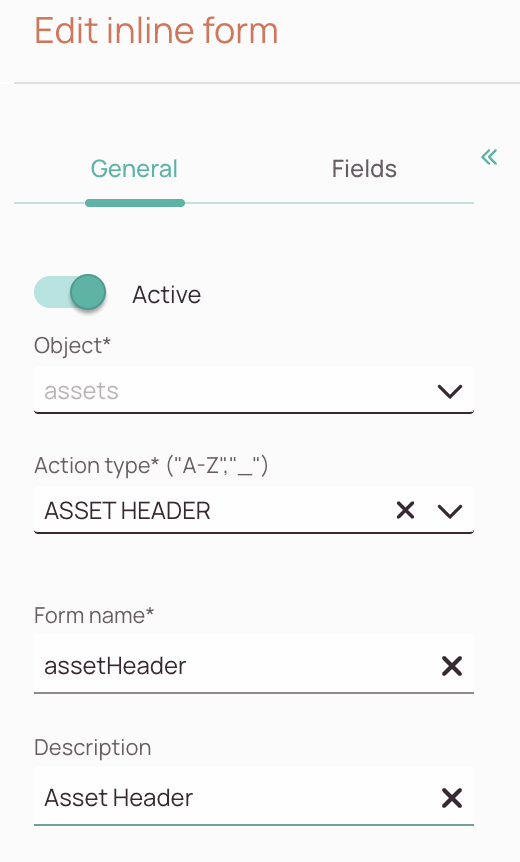
Inline forms provide the building blocks for the visual layout of your object records. An inline form is a unit of your object inside the X-Details component (such as a tab/sub-tab or header layout).
- Tags: Tags control the scope of the inline form. The first time you create an inline form under a specific action type for your object, you must leave the Tags untouched (empty), so that this is provided as the default layout. If you want to define a specific layout for a workflow or project, after you've created a default inline form, create another specific inline form with the same action type. This allows you to change the appearance even on a workflow or project level.
When you think about structuring the asset, you may realize the following building blocks make sense:
- Header: The header should be added to the header of the Asset Details component.
It will contain only the most important asset identification data. - Details: The overview should contain the general asset details.
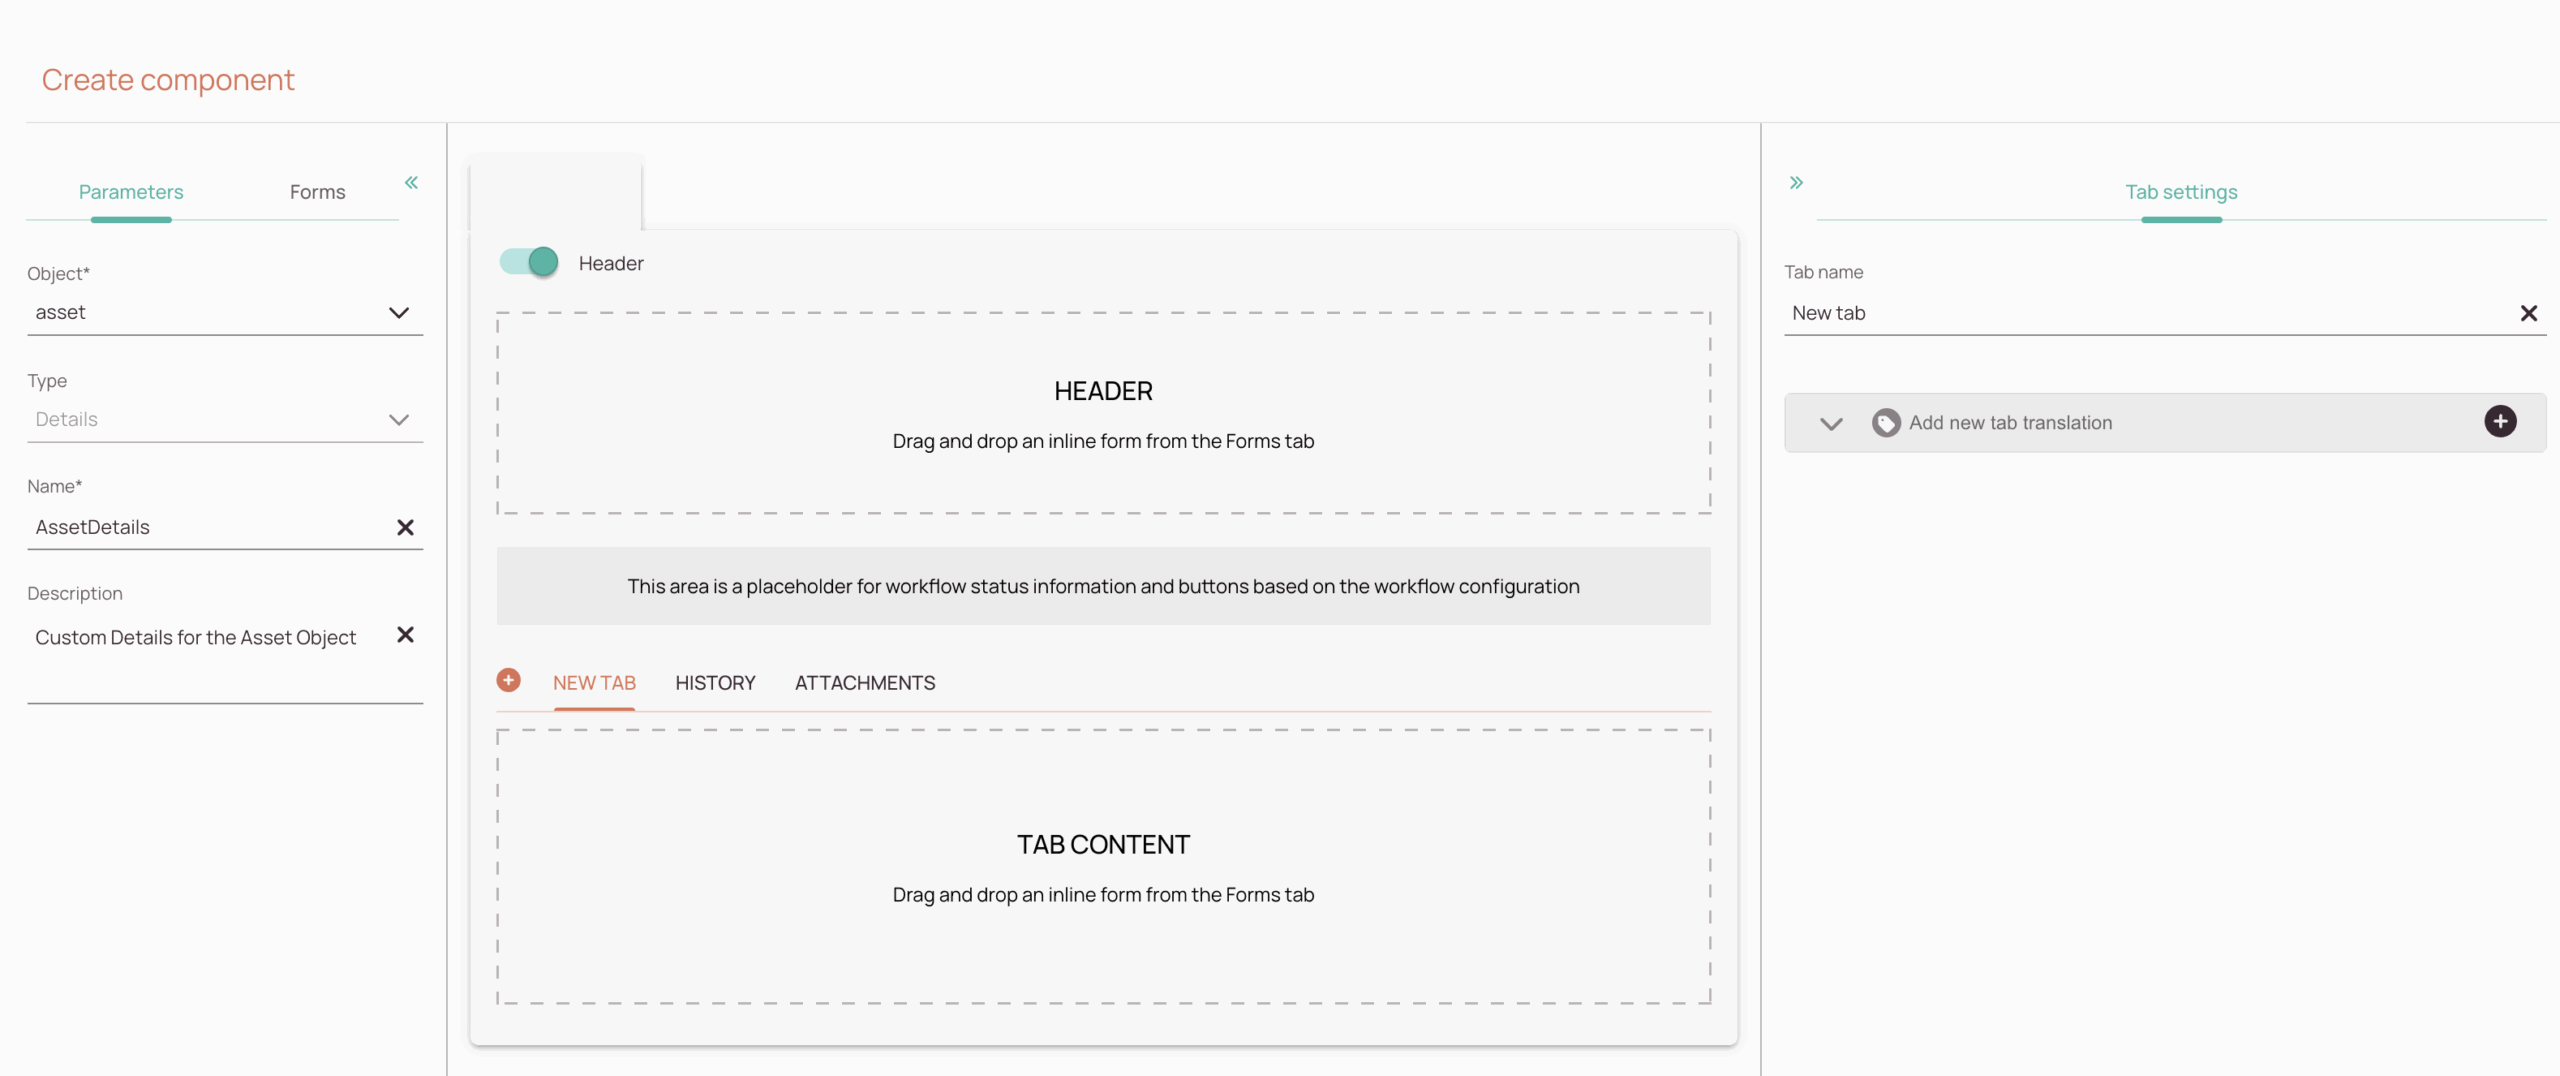
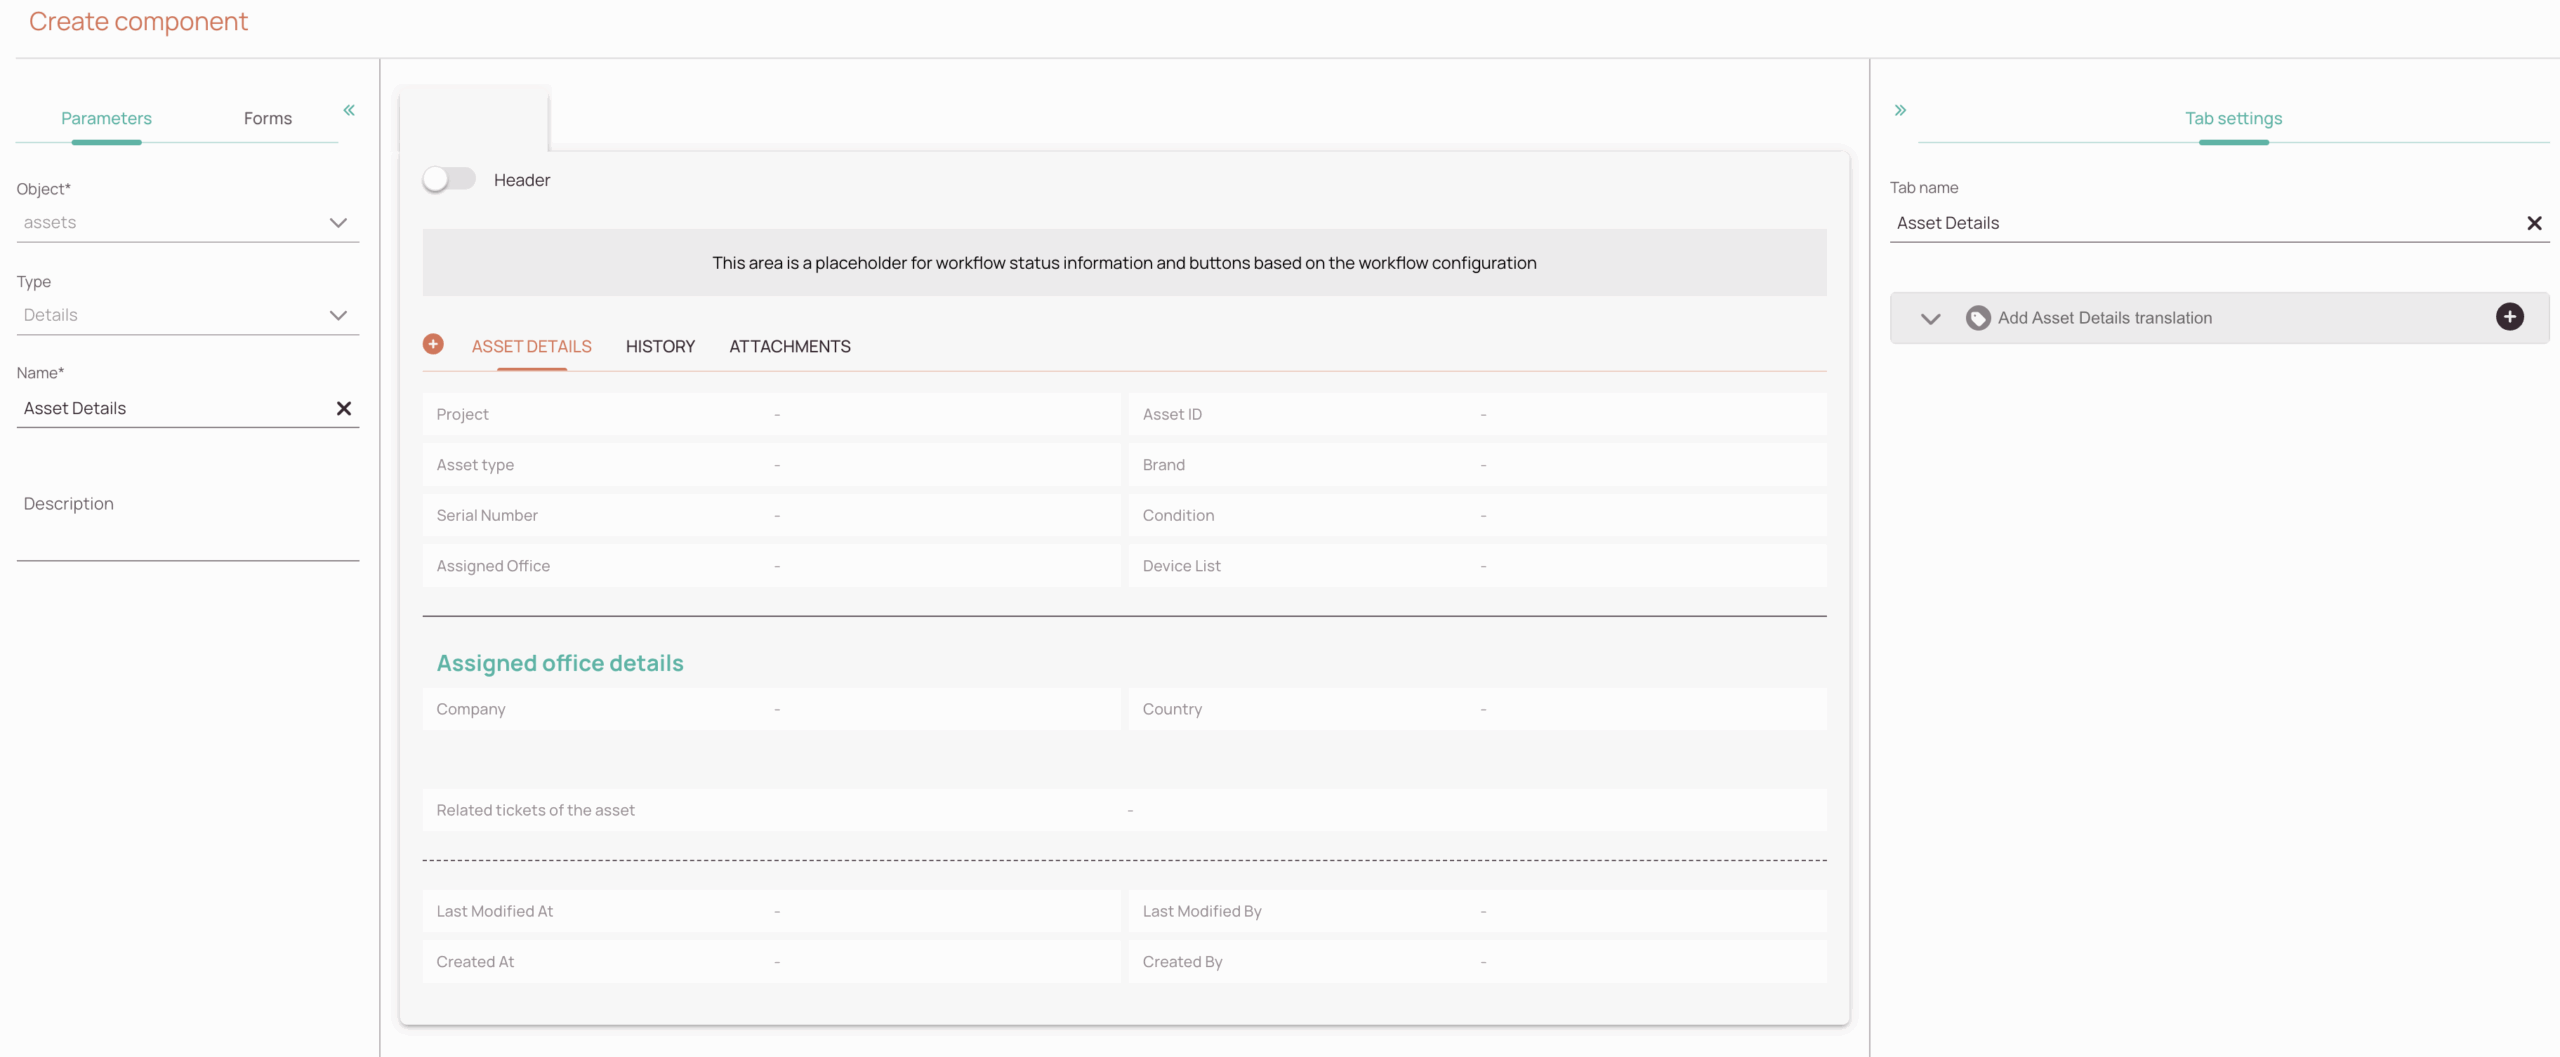
3.2. Design the Layout inside the Custom Create Component
To work with custom objects inside the Work place, we’ve introduced two components:
- X-Pool: It displays the object records with the columns made available in the pool in your object definition. To use the X-Pool component, you do not need to perform any additional tasks as it is provided out of the box.
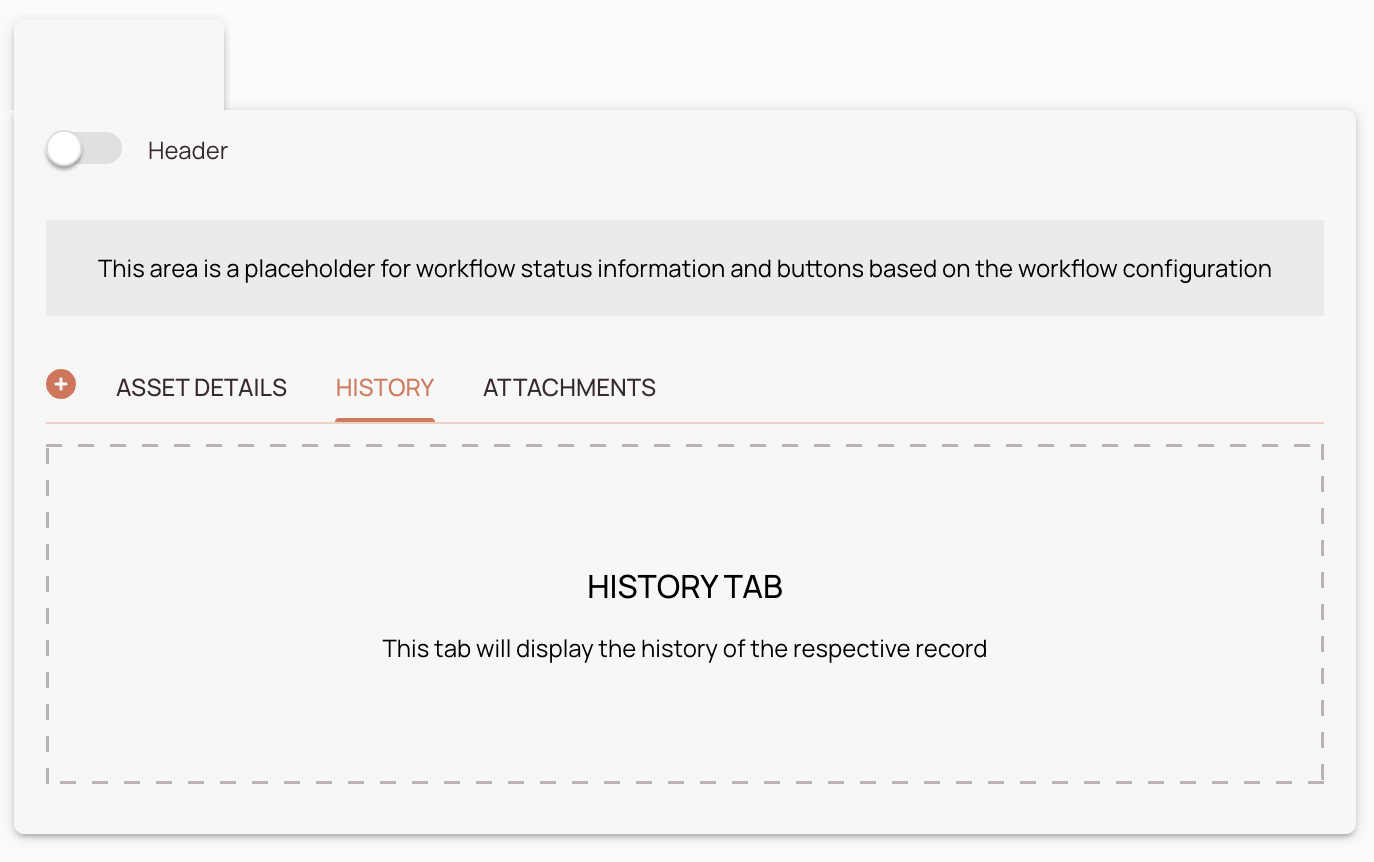
- X-Details: It displays the details of the object. The component is made up of inline form building blocks. To view the object details, you must build it by creating a new component.
The header section is available and you can add the inline header form there (toggle on), but if you don't need the header, just uncheck it and it won't show up in the X-Details View at all.
3.3. Create Custom View
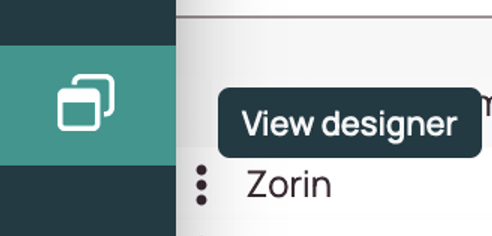
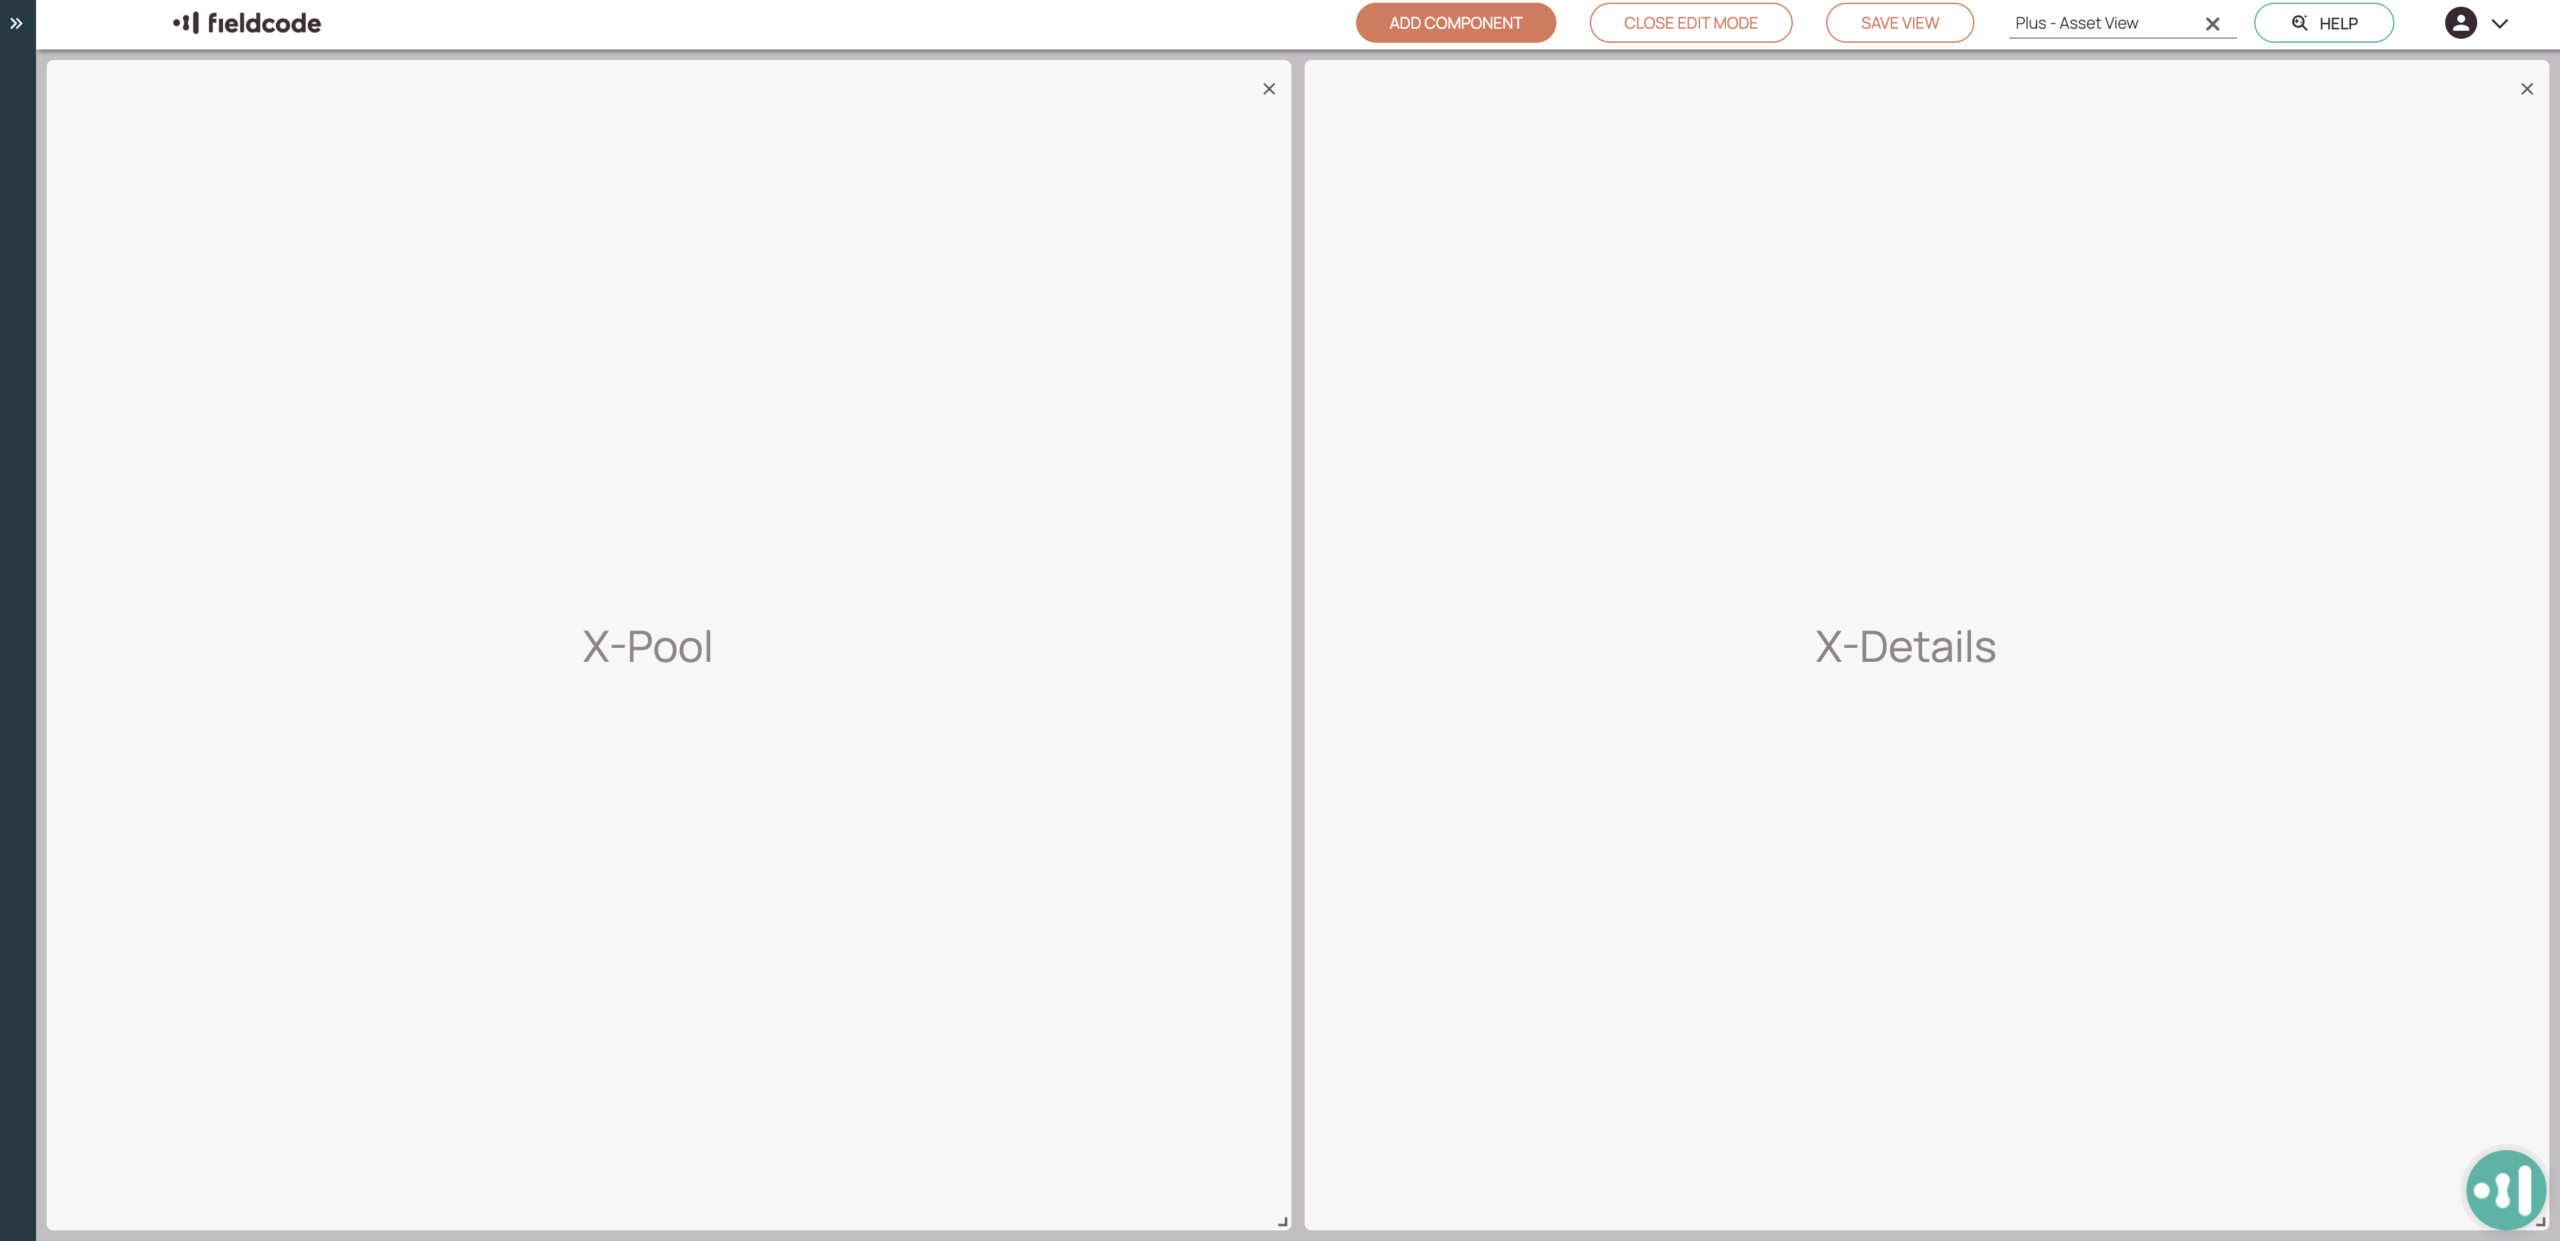
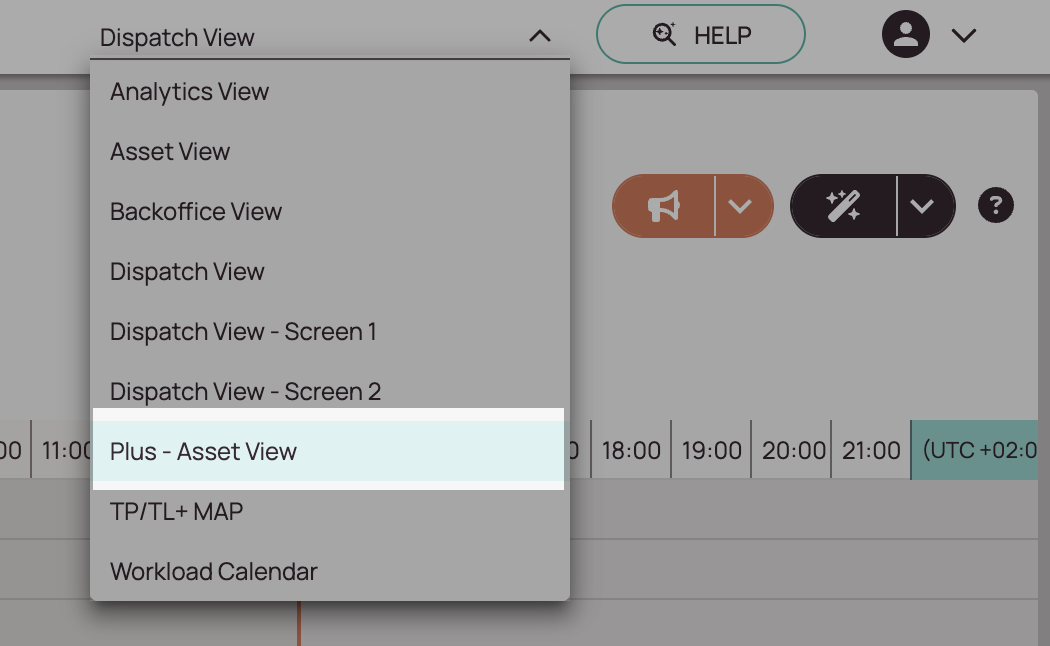
If you’ve been wondering where and how to view custom object records in Fieldcode, here’s the answer. Inside the Work place Views Designer, you can add the X-Details and X-Pool components and create your own custom objects view. X-Pool and X-Details are generic components that act as a container for all your objects. Of course, the layout and data content of your view will vary depending on your previous model and component settings.
So how do you add these components to the Work place now?
Let’s take a look:
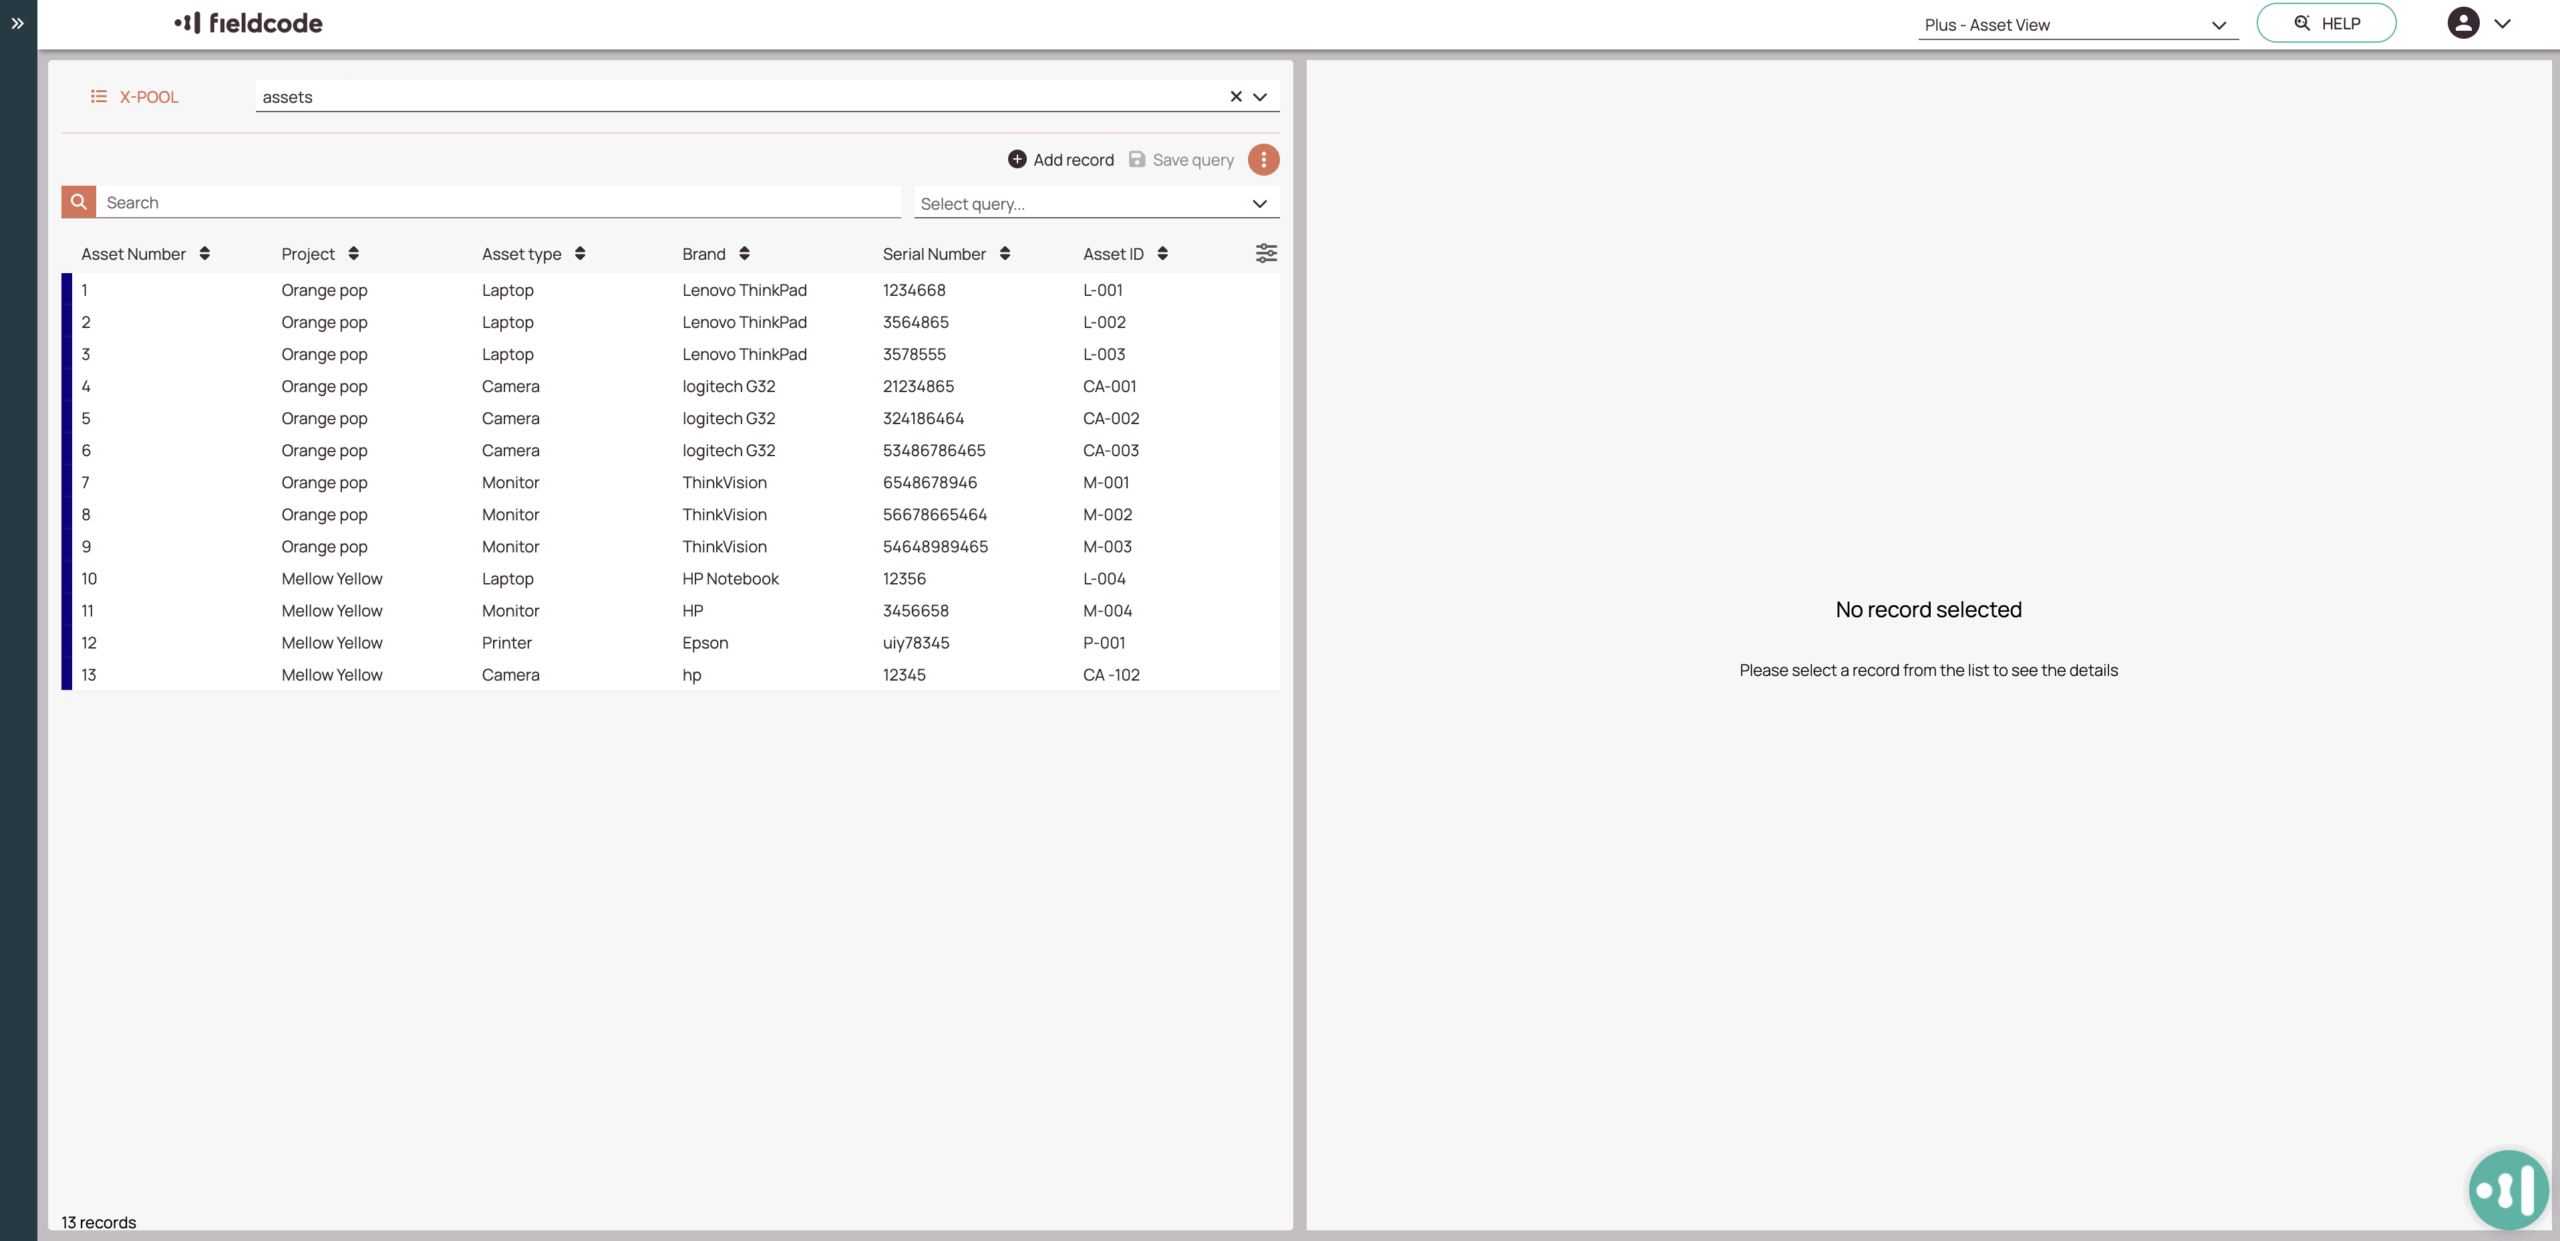
- Since you’ve just configured your object, you may not see any records just yet, but everything is now in place.
- In the picture above you see records. Why? Because we were already playing with our model 😉
- As you can see, the X-Pool column order corresponds to the field order set in the object.
- You can set the field order in the same way as you would in the Ticket Pool.
- Just with your entries now!
4. Start Working with Asset Object
Now it’s time to create object records and start earning the fruits of your configuration effort.
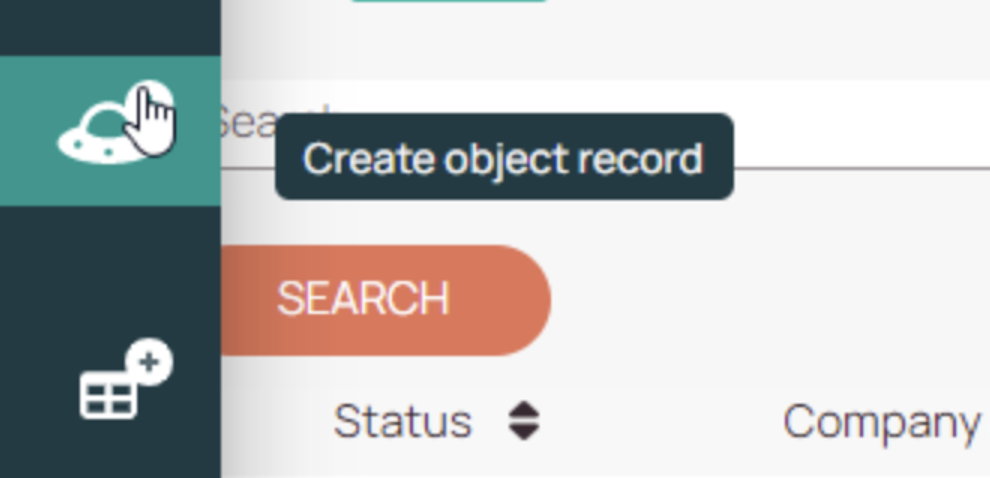
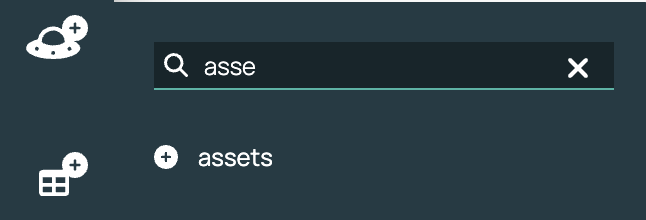
4.1. Create New Records for your Asset Object
4.2. Process the Asset Workflow
Custom objects are also available on the Workflow Monitoring page, so if you experience unexpected workflow problems, visit this page and check to troubleshoot issues.
5. Explore Additional Settings
You can do even more with your objects, for example by integrating automated actions or system connections. Let’s take a short, exemplary look at exploring additional options.
Please note that for further fine-tuning, you can also always contact Fieldcode Support.
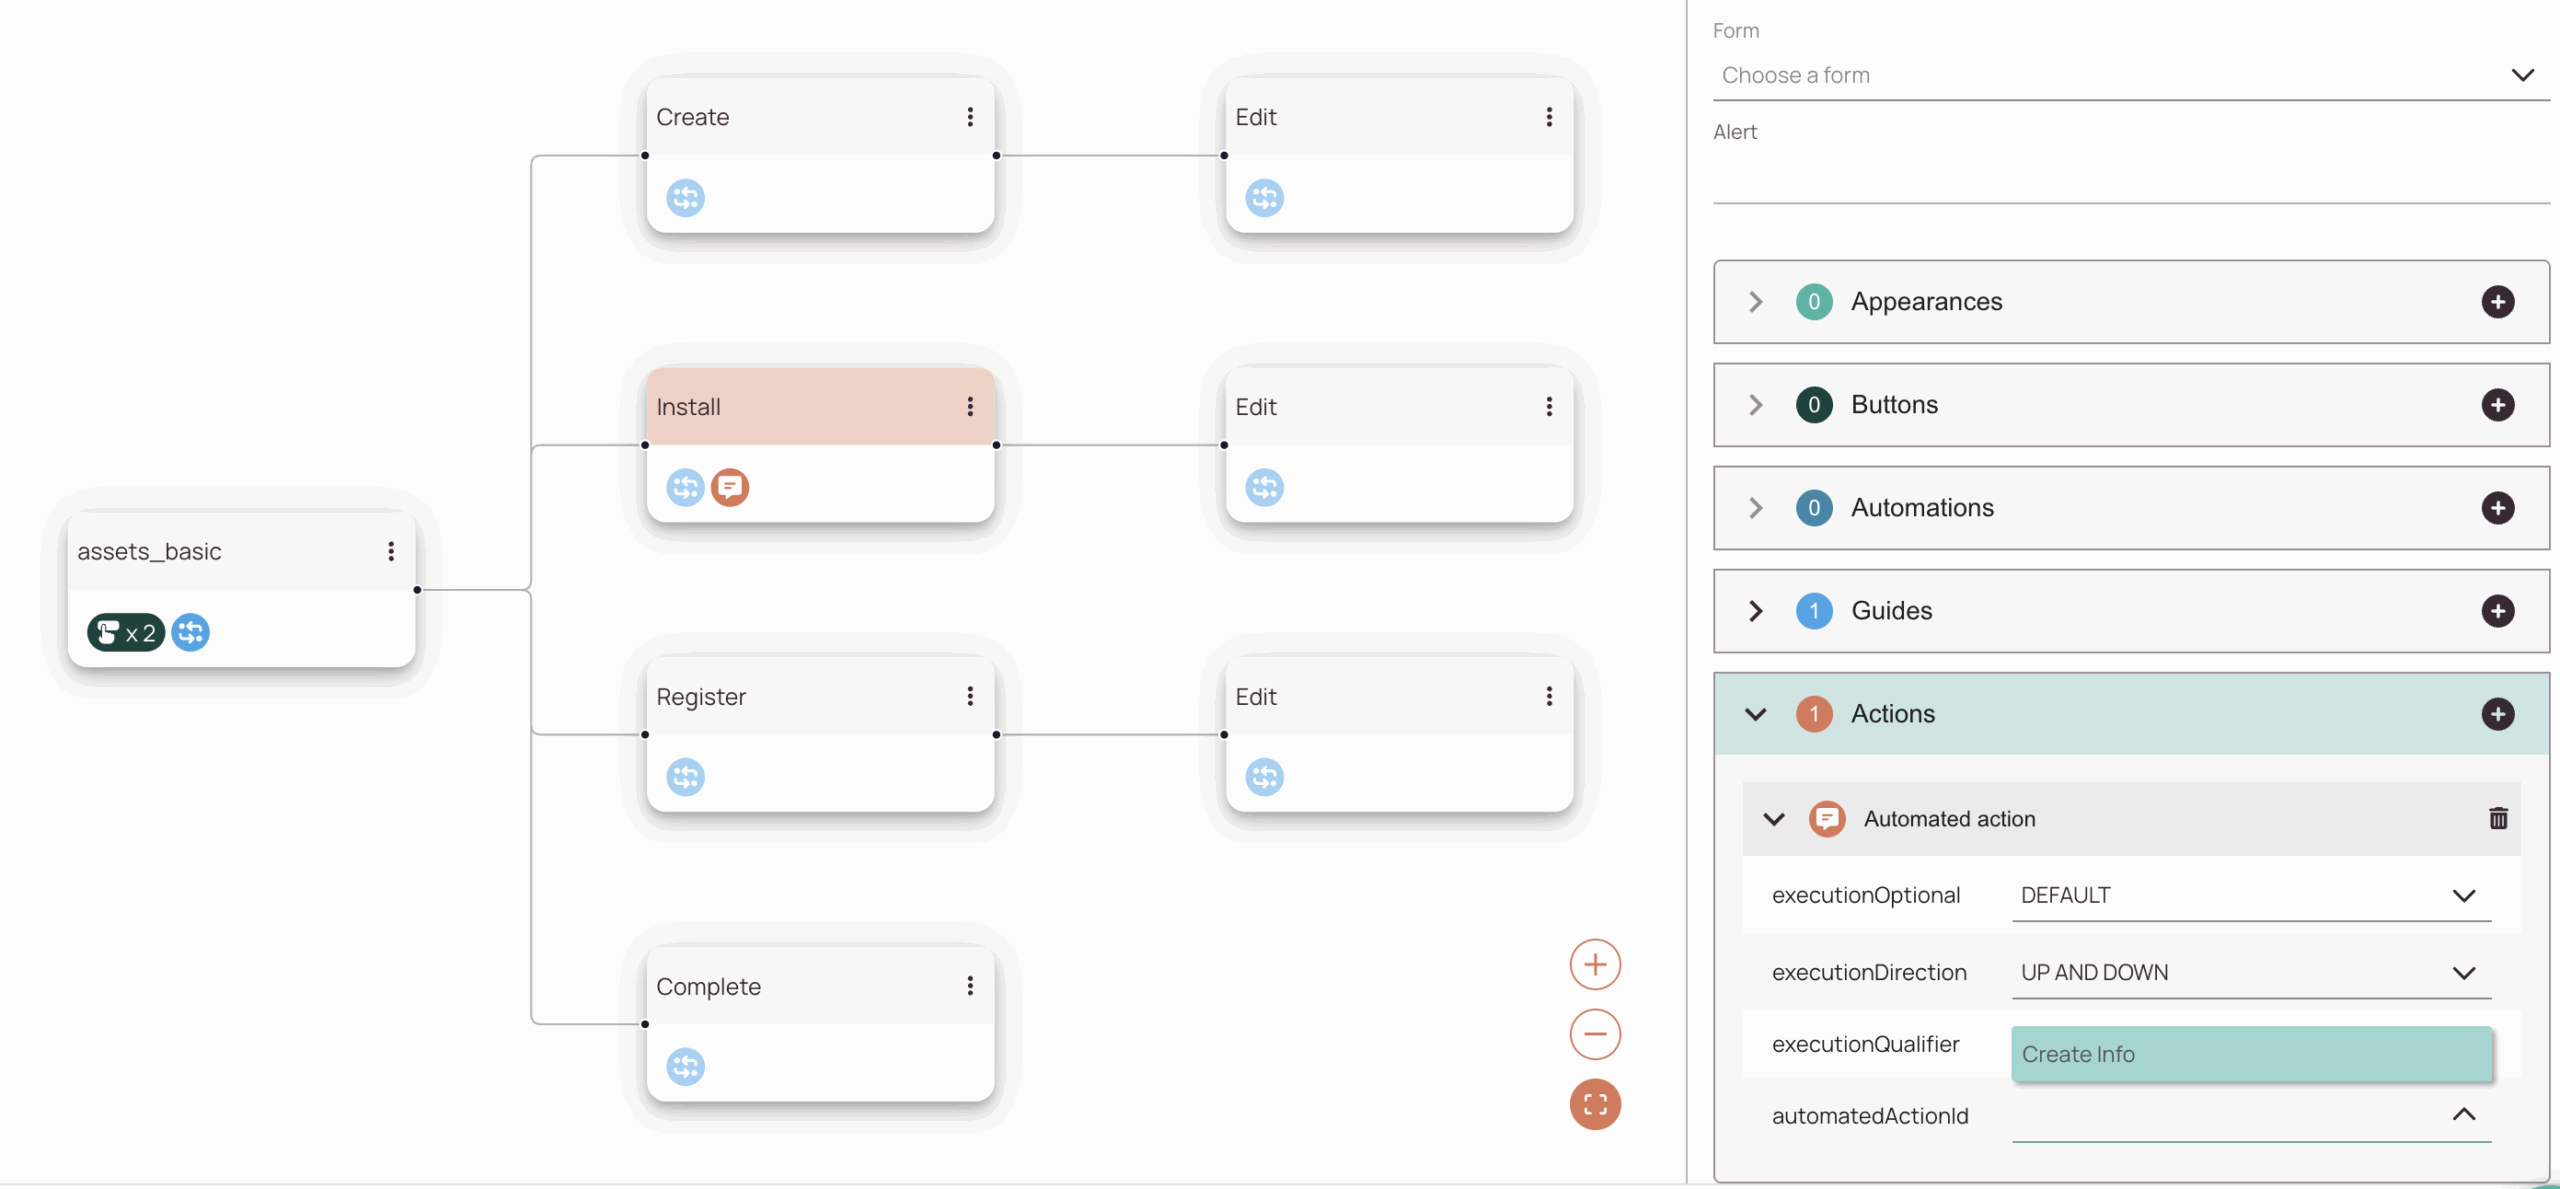
5.1. Integrate Automated Actions
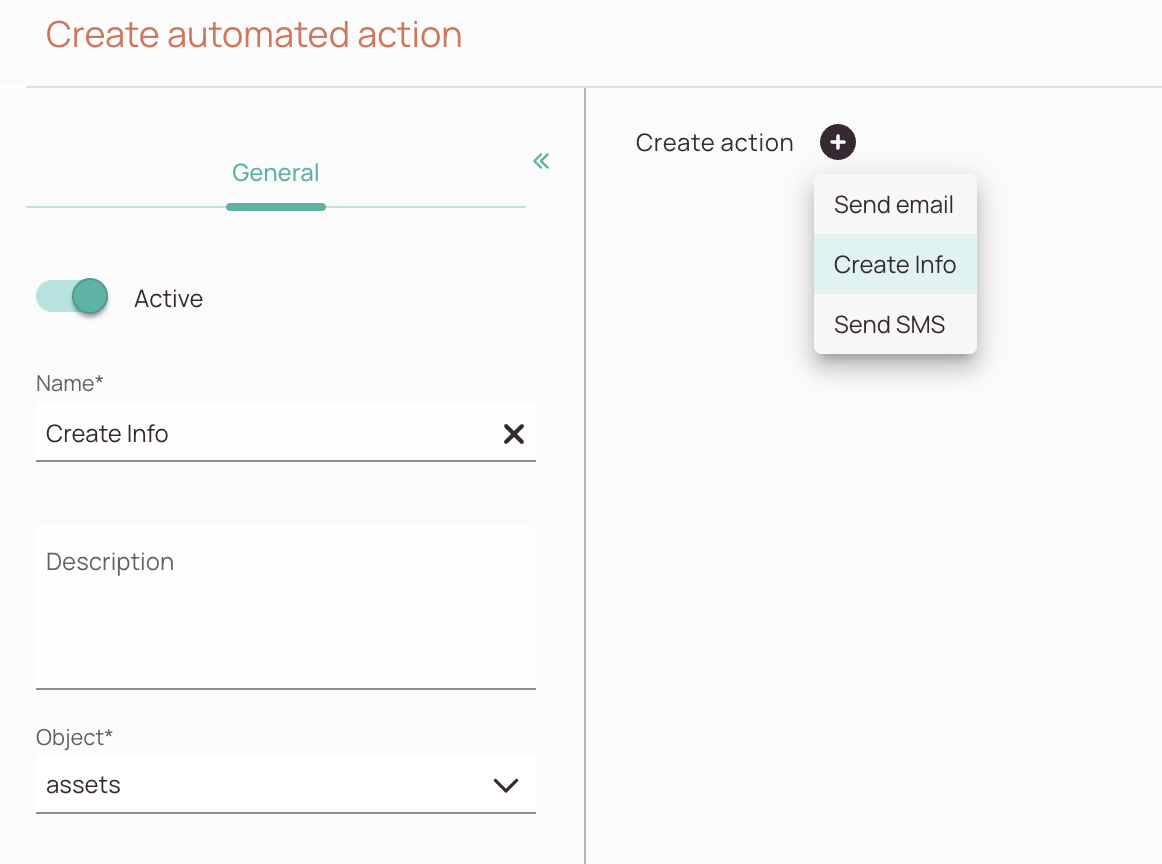
Under Automated Actions, you can configure the specific actions that will be executed by the workflow, so you can send emails, SMS, or add an ‘info’ to your item. The automated action must be created on the Automated Actions page and will then be triggered in the workflow as it is set up.
Don't forget that before you can save and execute an automated action, you need to test it. To do this, you need to have some object records already created.
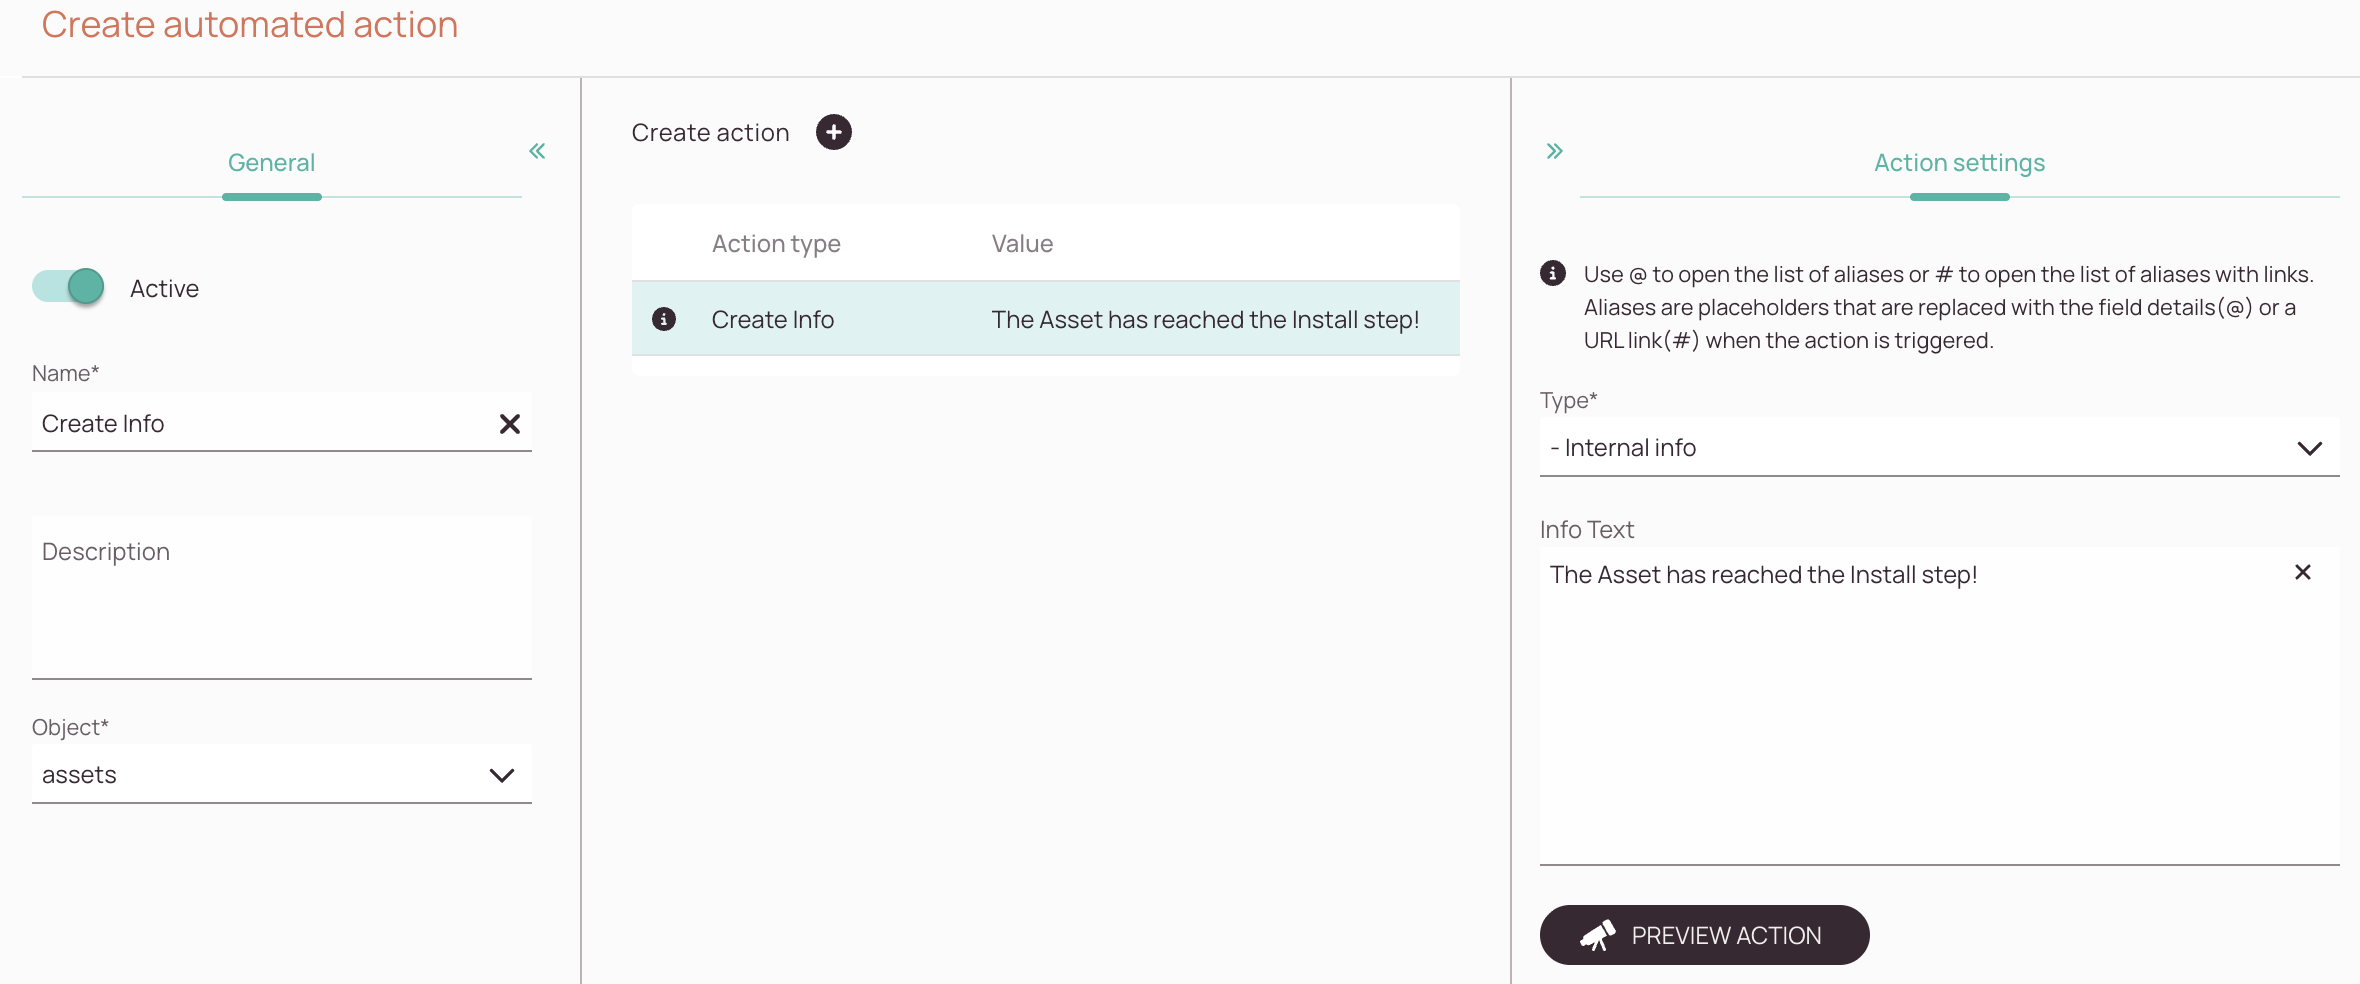
For our asset example, let’s create an action that can automatically create a object info about the asset when it is processed. This way, later on in the asset history, one is able to see the details related to the processing.
Open the Automated Actions page and click on the plus button:
Tip: You can implement automated actions directly into your workflow. This is the new and recommended way.
- Don't forget that before you can save and execute an automated action, you need to test it.
- To do this, you need to have some object records already created.
Once you have saved your action, it will be available for the asset workflow to trigger the execution of the action. You will need to go to the Workflows page and add the action to the asset workflow.
5.2 Integrate Dynamic Lists
You can automate data entry or reduce repetitive manual tasks by using lists.
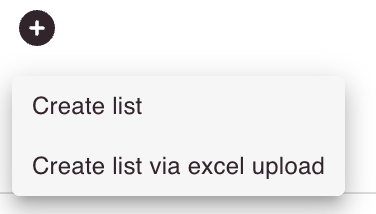
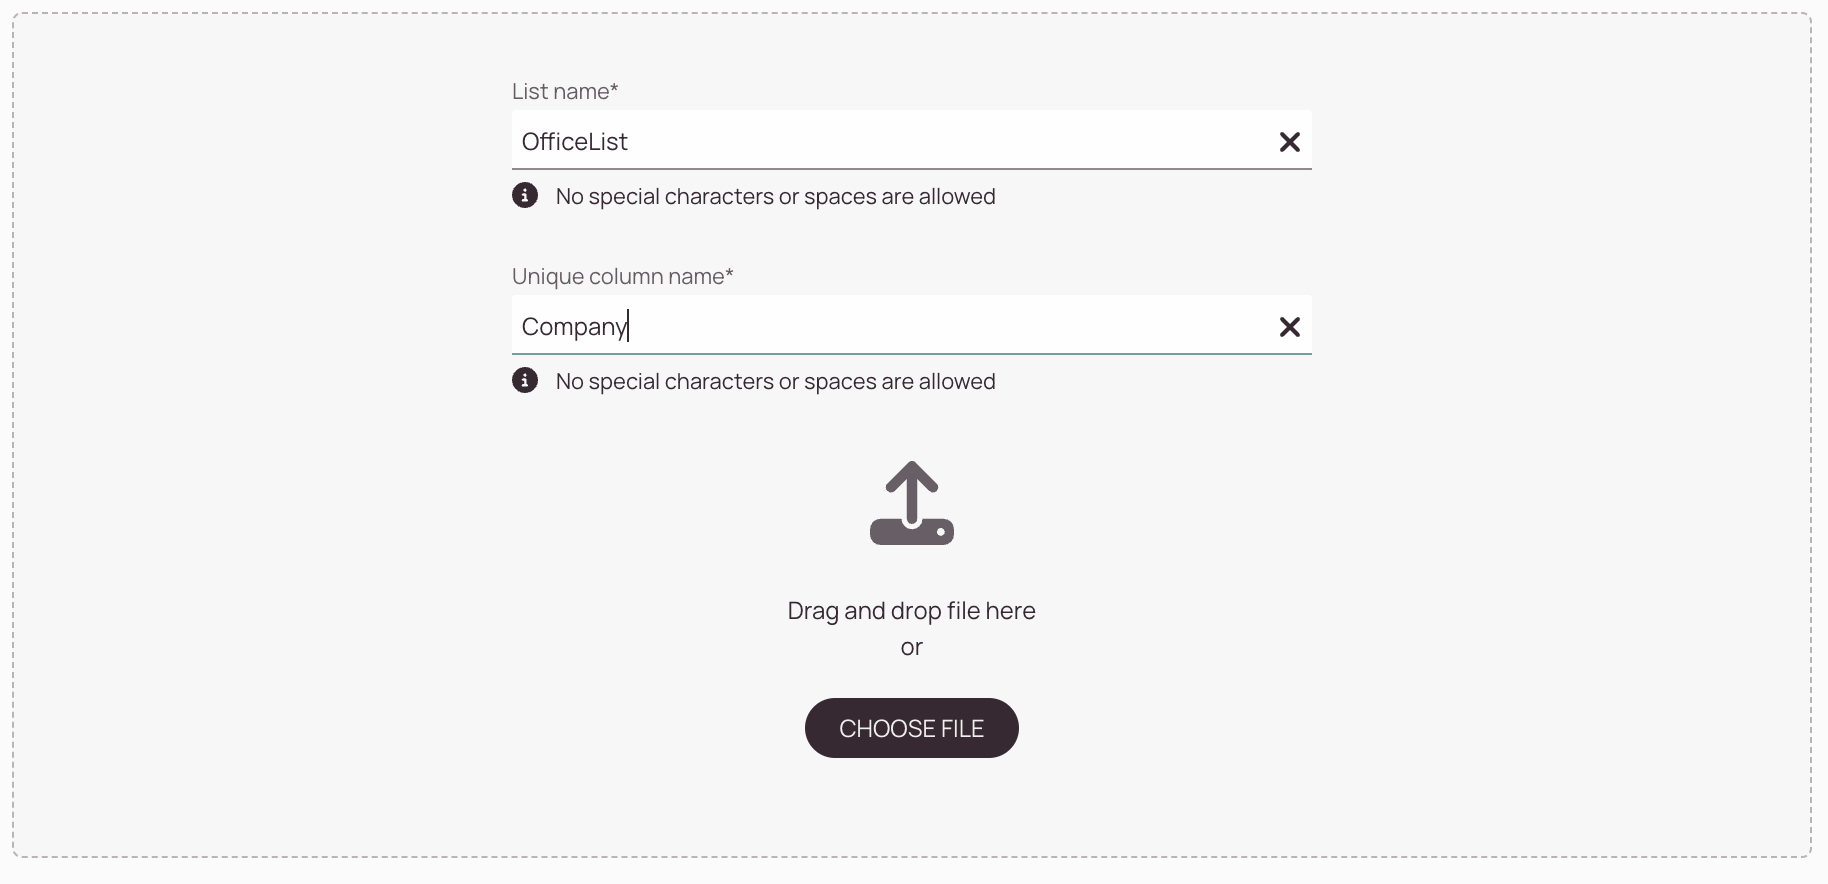
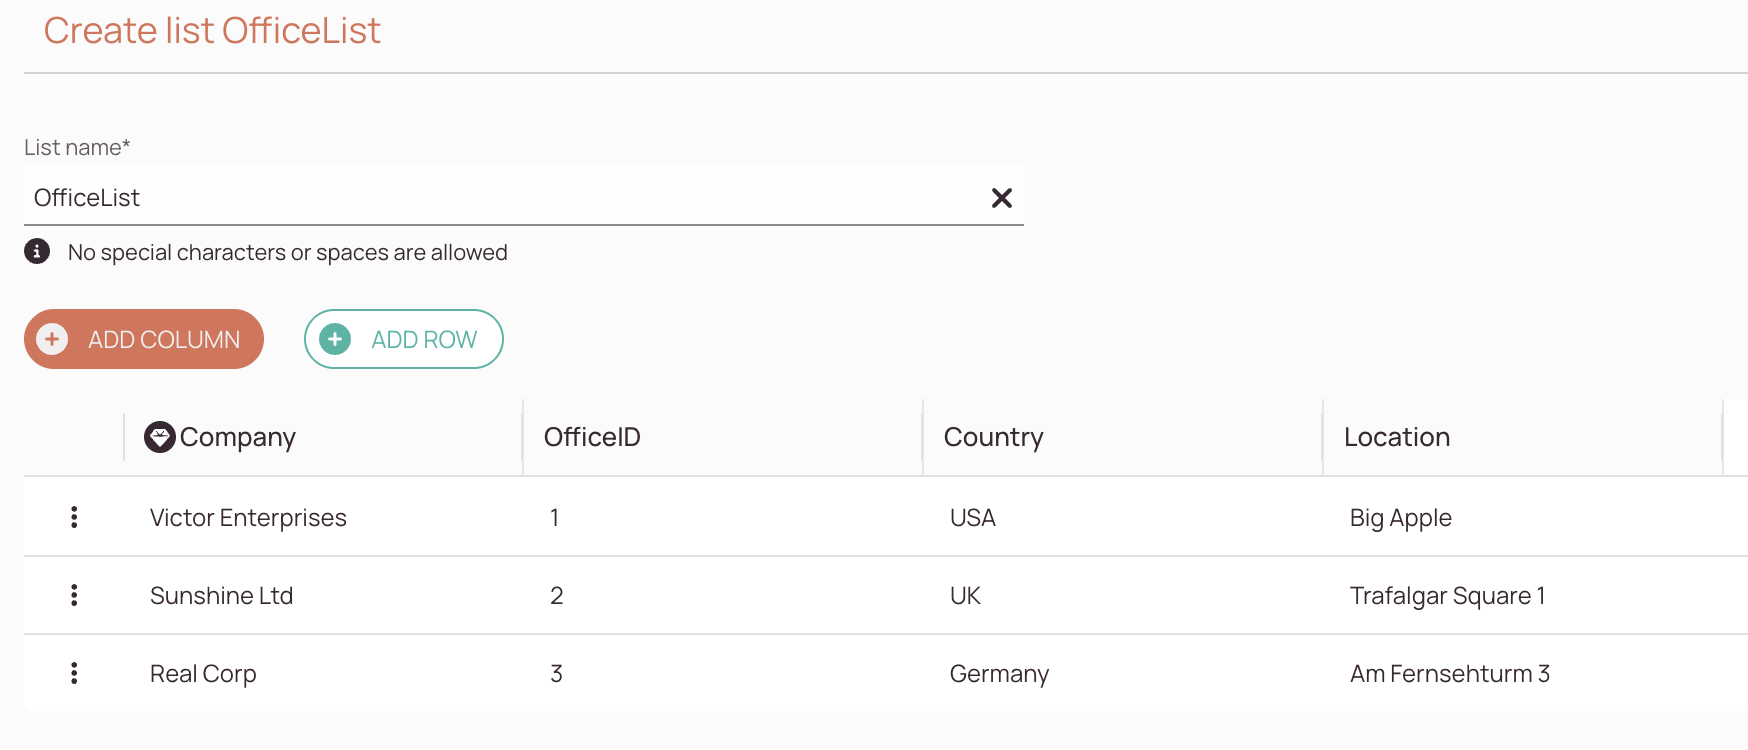
Imagine that in the world of assets, you often work with the same offices over time. You want to keep the office data consistent across multiple records, and if you’ve already filled in the office data once, you don’t want to fill it in again, you’d rather just want to reuse what you already have. Lists can help you achieve this. You could simply create a list of offices. Therefore you would prepare an Excel file and upload the data. Let’s check it out:
- Inside the Lists page click the Plus button and click on the Create list via excel upload button.
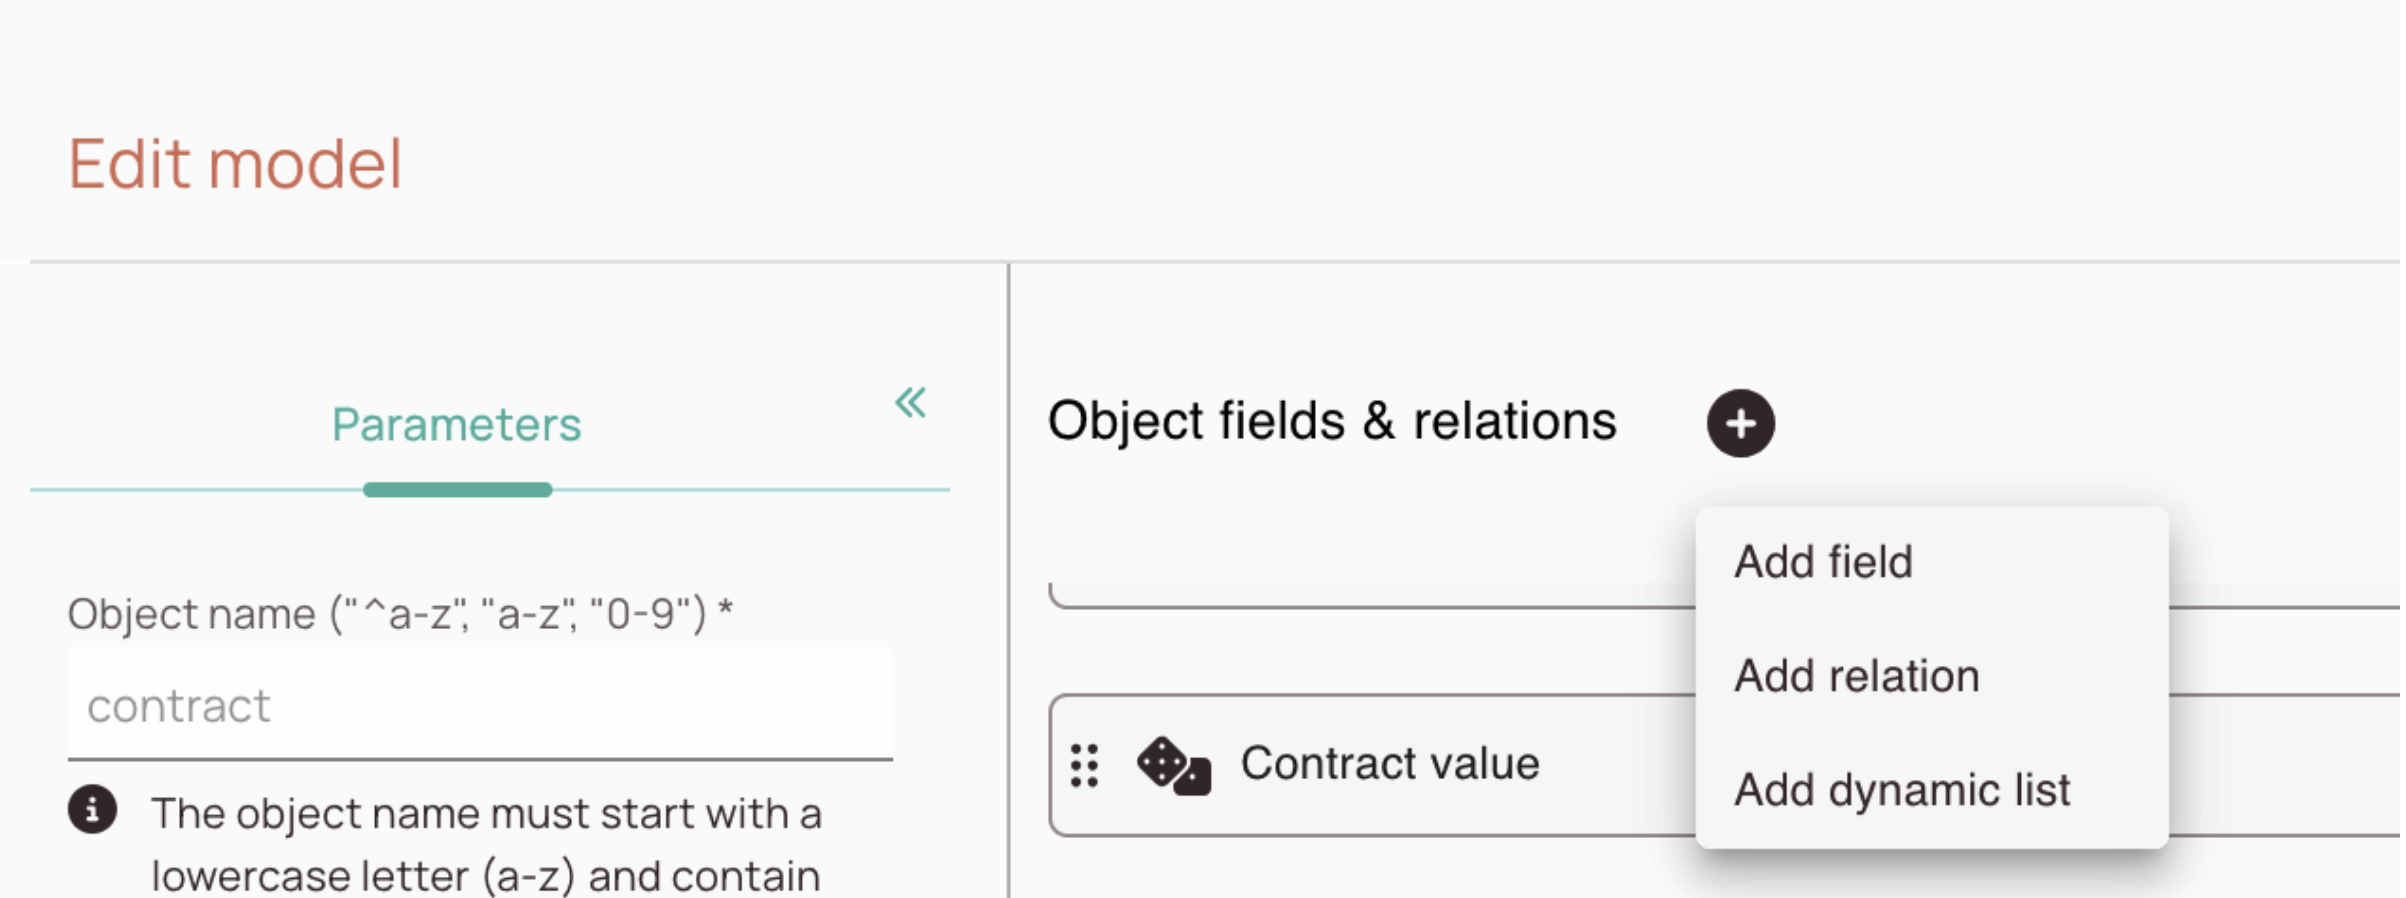
Now that the list is imported, the only thing left is to make it available for use. Therefore, we need to add our dynamic list to our asset object:
- On the Objects page, select your model from the list, and click on the Add dynamic list button.
5.3. Integrate Interface Connections
Under Construction!
You can learn more about interface connections meanwhile.
Related Topics
4.5 out of 5 stars
1 rating
| 5 Stars | 0% | |
| 4 Stars | 100% | |
| 3 Stars | 0% | |
| 2 Stars | 0% | |
| 1 Stars | 0% |

