Tip: You can use filters for better results
-
Latest News
-
Getting Started
-
Work Place
-
-
-
- Add Parts
- Assign Partners
- Interaction Buttons
- Workflow Buttons
- Ticket Info and COMS Buttons
- Schedule Tickets
- Edit Ticket Details
- Cancel Tickets
- Remove Tickets from the Ticket Clipboard
- Report Tickets
- Create Intervention Info
- Create Intervention Reports
- Cancel Appointments
- Clone Tickets
- Edit Privat Notes
- Inline Skill Editing
-
Admin Panel
-
Fieldcode FMA app
-
Customer Portal
We are currently still laying the groundwork for the whole Workflows section, so please treat all the following topics regarding workflows as a pre-read.
If you need custom workflows configured right now, please directly reach out to the Support.
About Workflows
Inside the Workflows menu, you can view all configured workflows for your account in detail (with permissions).
We call an object’s lifecycle the workflow. The workflow reflects all possible steps for an object and determines which actions are available. Initially, we provide you with a basic workflow that covers all standard Field Service Management use cases and helps you understand what is going on in every stage.
Inside the Admin panel go to Automations → Workflows.
Starting with a Business plan, you can add/delete nodes and clone workflows.
Free users can edit nodes in a limited way.
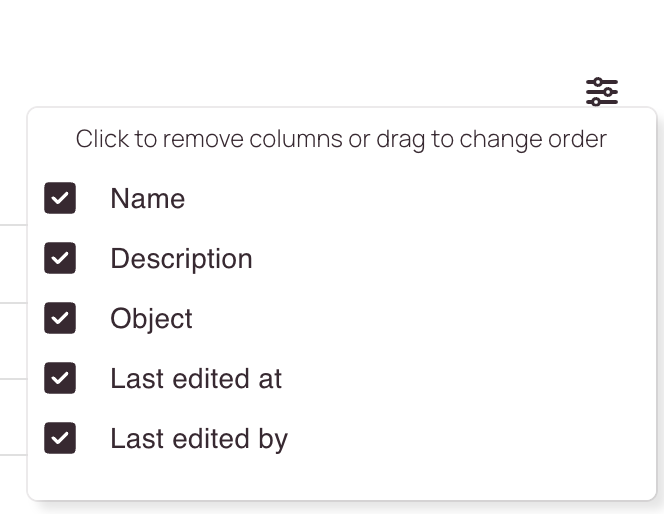
Recommended Columns
By default, not all information is displayed inside the workflow table because not every user may require it. Therefore, if you want to invest in a deeper understanding of workflows, we recommend turning all columns on.
About Workflow Versioning
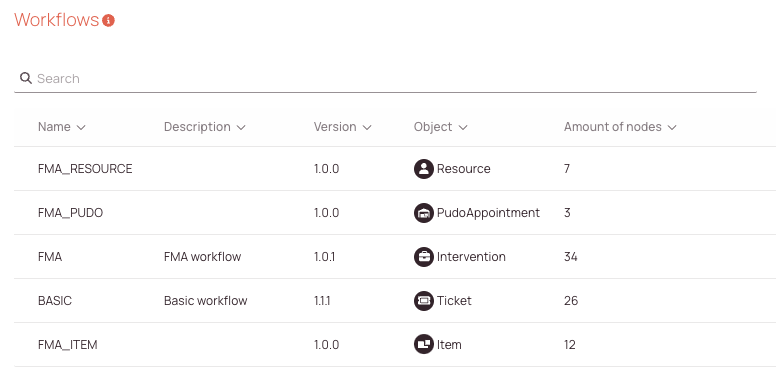
The workflow table displays all default workflow objects inside a table, including all their consecutive versions.
The first thing you see when you open the Workflow menu is all the currently configured workflows for your account.
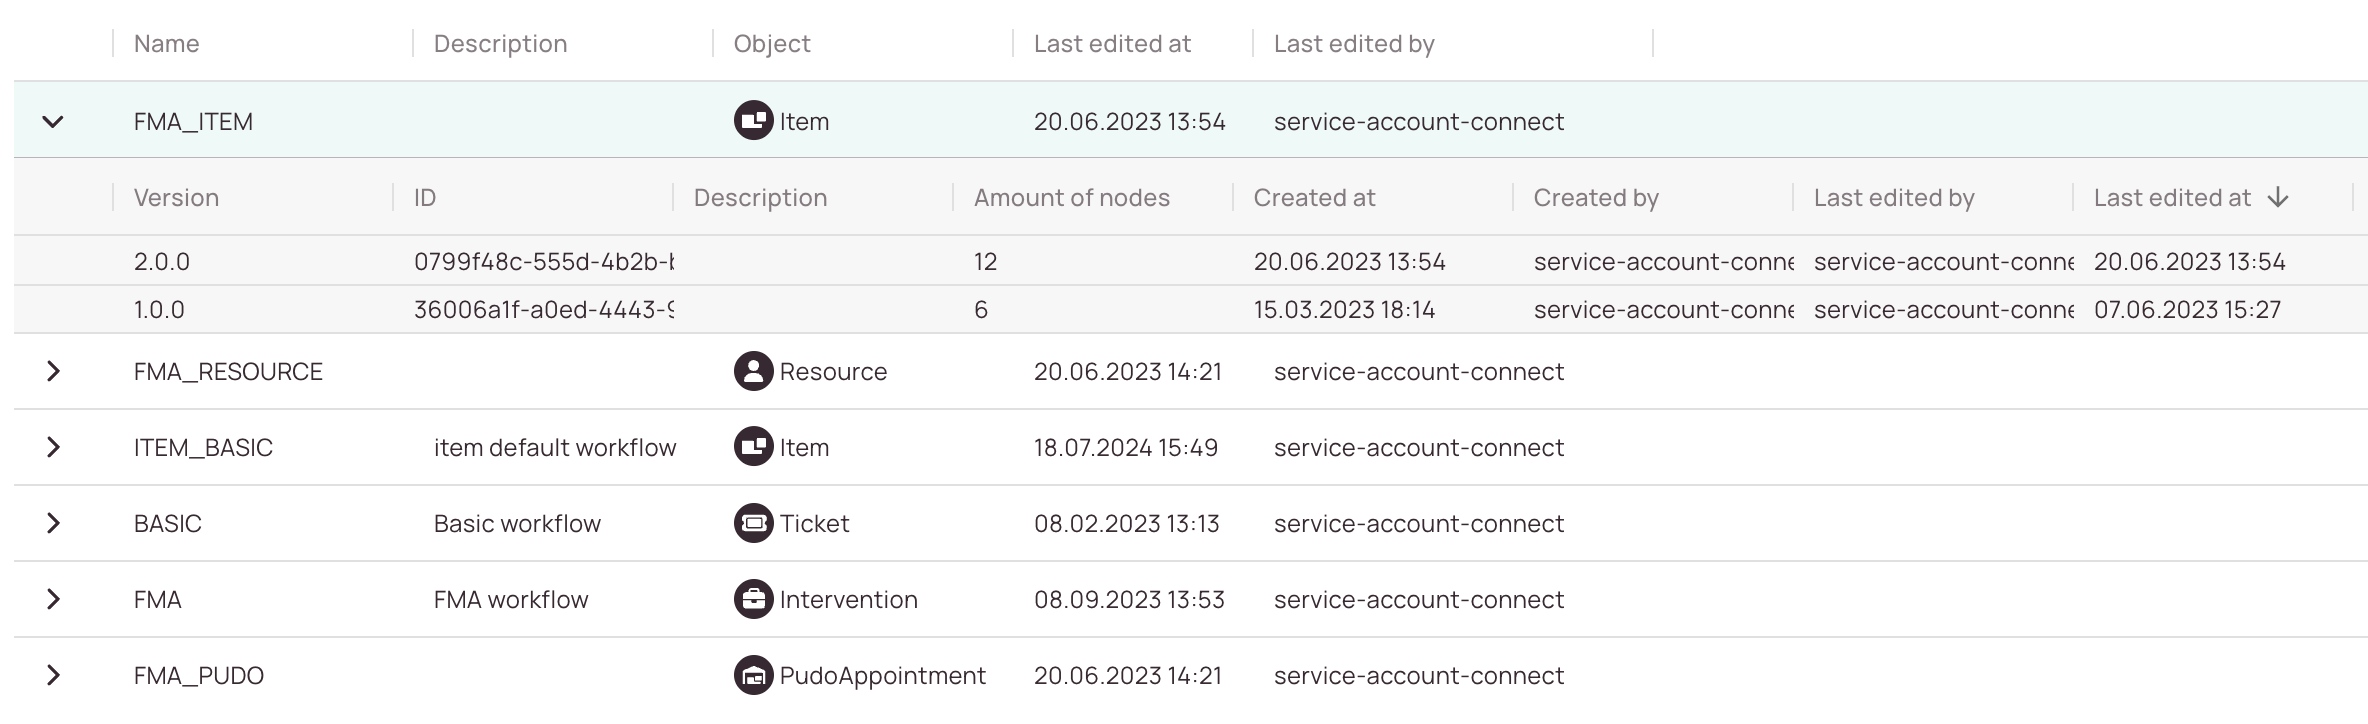
Once you expand on a workflow by clicking the expand arrow button, you will see further version and node details.
Let's take a look at the FMA_Item workflow for example. Version jumps will always increment in 1.0.0 steps if you or someone else does edits.
Workflow Table Explained
The workflows table contains all currently configured workflows for your account. By default, you will only see the further below mentioned default workflow objects. However, if you own an Enterprise subscription, you may also see other workflow objects (because you created them or someone else did).
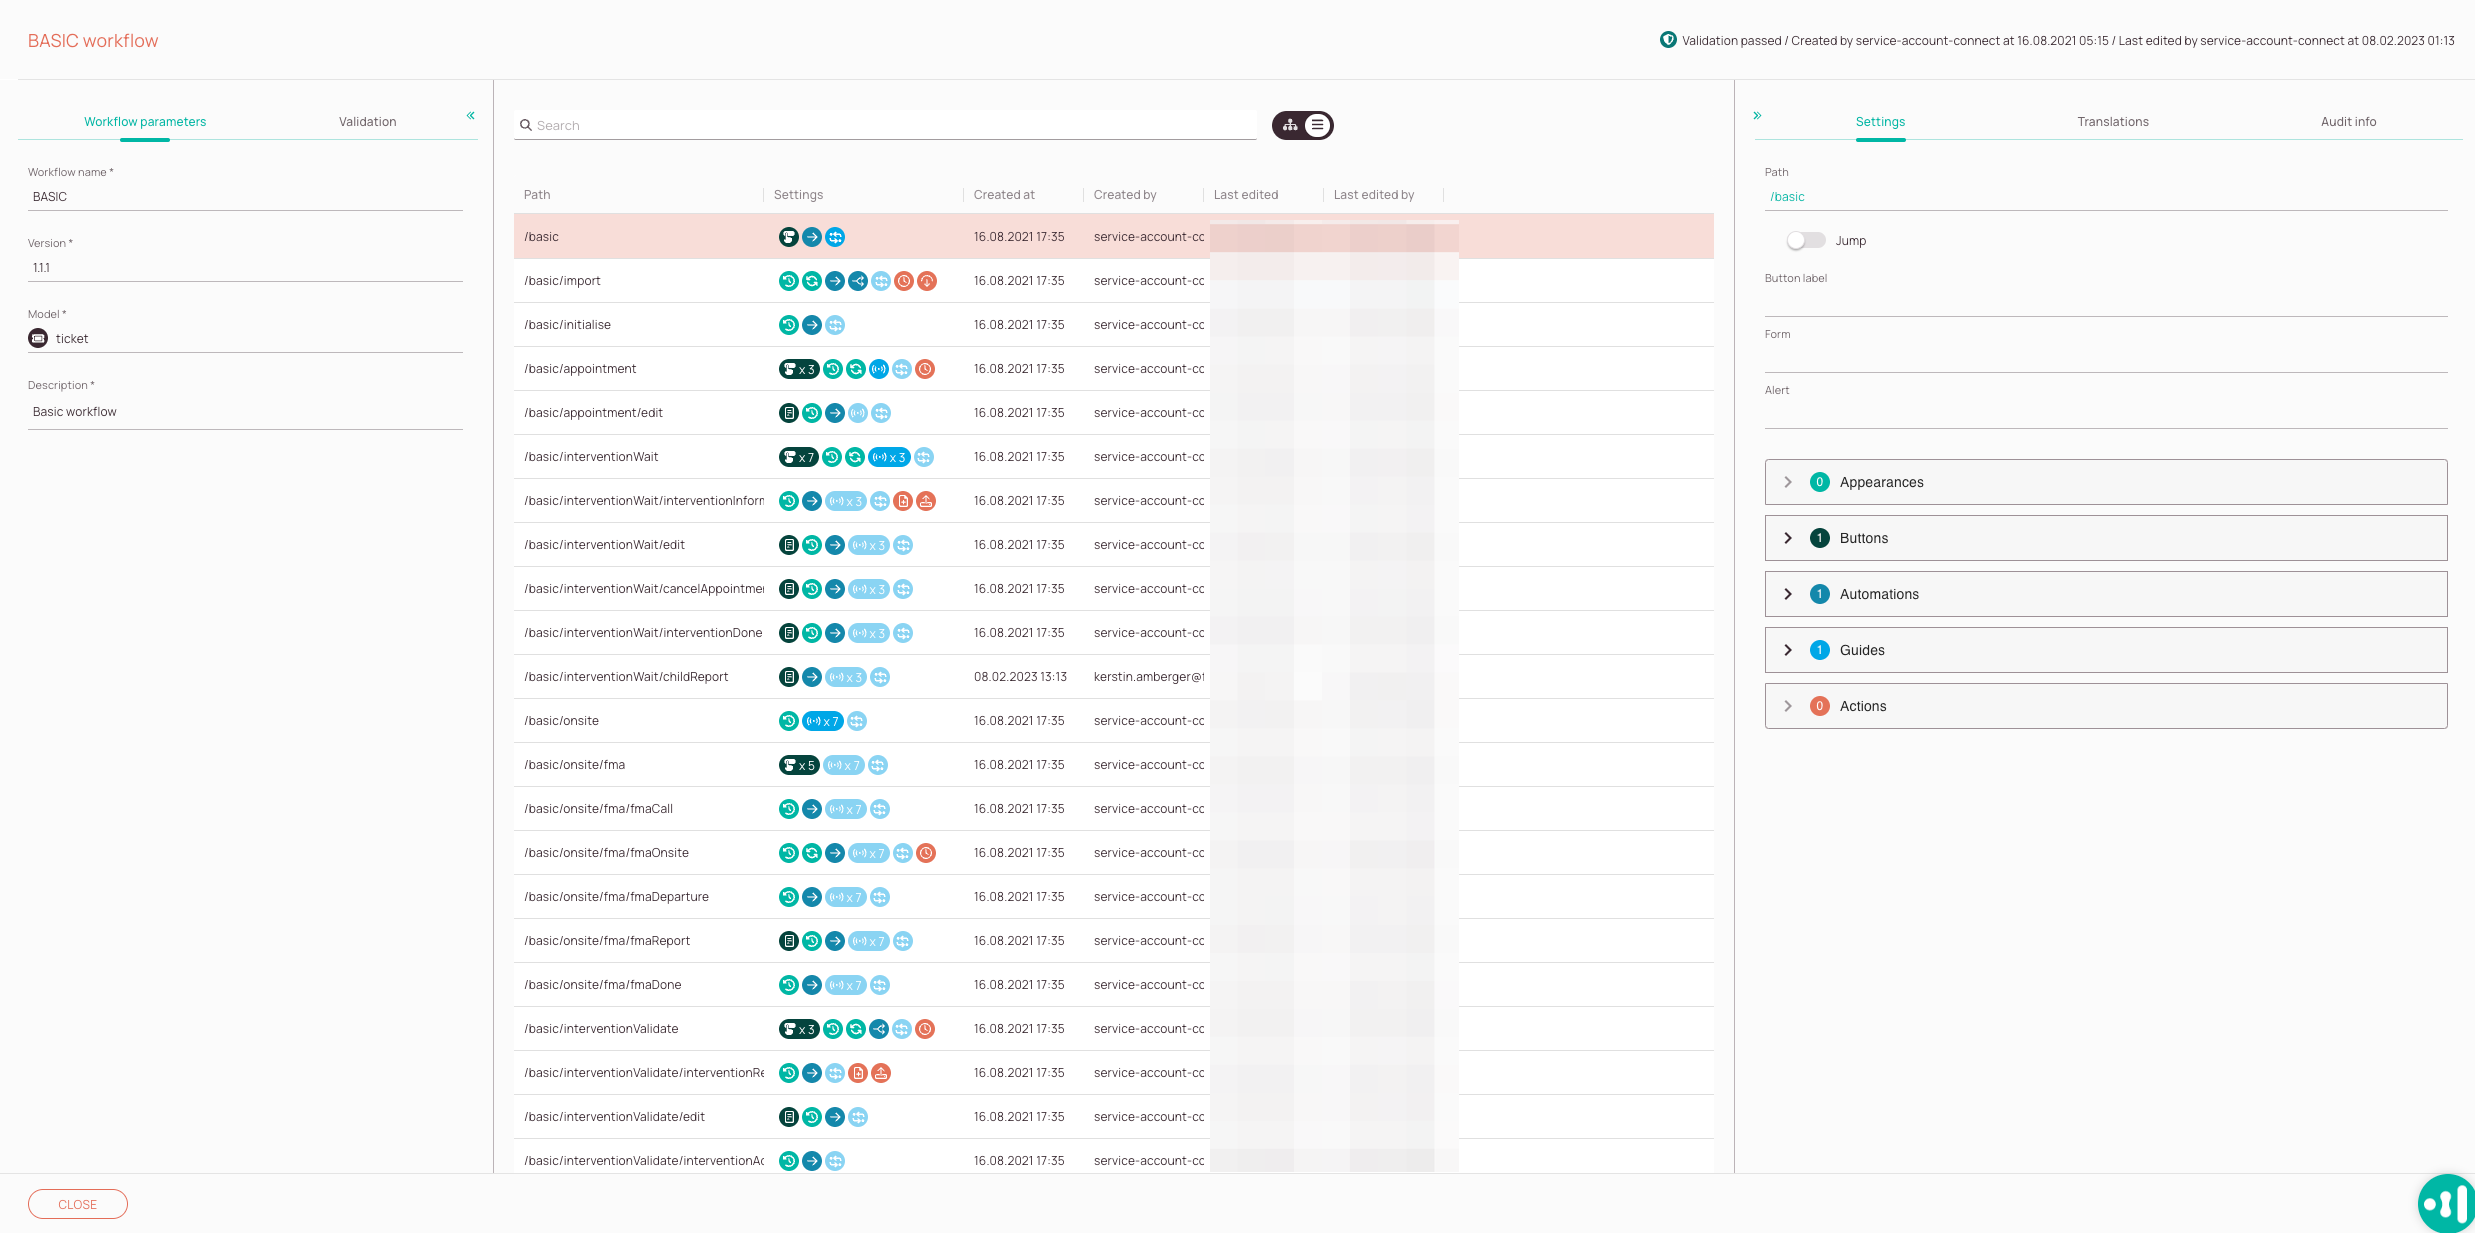
The Workflow table is clustered in a three-pane layout. We are discussing all options and tabs in the following topics.
-
Workflow Parameters tab: The parameters tab allows you to set basic options, such as the name, displays the version, the object type and a detail description.
-
Validations tab: The validations tab allows you to identify issues with your workflow and helps you to troubleshoot.
-
Workflow node search: Gives you to the option to search for a specific node by entering a search keyword.
-
View changer: Gives you the option to change between a workflow hierarchy view and list view. The Workflow path hierarchy view gives you a better understanding of how a selected workflow can move around by displaying children, siblings etc.
-
Workflow node view: You can check all the paths of a selected workflow, configured settings for each node, node creation dates, node creators, node last edit date and times, and which user last edited a certain workflow node in this section.
-
Validations Notifications: This notification gives you a hint of whether your selected workflow is performing flawlessly.
-
Settings tab: You can check Appearances, Buttons, Automations, Guides, and Actions of a particular workflow node.
-
Translations tab: The translation tab gives you the option to edit workflow path localizations for different languages. What you can do with it for example, is to add translations for the history tab as when a workflow changes in some way it is always displayed inside the History tab.
-
Audit info tab: The audit info tab summarizes by whom a workflow path was created initially and who last edited it.
Workflow Icons Explained
Stay tuned!
5 out of 5 stars
1 rating
| 5 Stars | 100% | |
| 4 Stars | 0% | |
| 3 Stars | 0% | |
| 2 Stars | 0% | |
| 1 Stars | 0% |