Tip: You can use filters for better results
-
Latest News
-
Getting Started
-
Work Place
-
-
-
- Add Parts
- Assign Partners
- Interaction Buttons
- Workflow Buttons
- Ticket Info and COMS Buttons
- Schedule Tickets
- Edit Ticket Details
- Cancel Tickets
- Remove Tickets from the Ticket Clipboard
- Report Tickets
- Create Intervention Info
- Create Intervention Reports
- Cancel Appointments
- Clone Tickets
- Edit Privat Notes
- Inline Skill Editing
-
Admin Panel
-
Fieldcode FMA app
-
Customer Portal
We are currently still laying the groundwork for Fieldcode Plus, so please treat this topic as a pre-read.
If you need Fieldcode Plus configured right now, please directly reach out to the Fieldcode Support.
About Automated Actions
The automated actions menu allows you to automate the process of spreading information from the Work place and offers many more options. One purpose of automated actions, for example, is to send out information automatically from the Work place, e.g., via automatic emails or Ticket info updates that reach end users in an automated way.
You can think of automated actions as a sandbox for creating automation inside the Work place. The most common use of automated actions is automatically sending relevant ticket information and updates to your end users.
By smartly configuring automated actions, dispatchers are not burdened with unnecessary work, resulting in less organizational effort and allowing dispatchers to focus on more important work. Our solution engineers can help you configure automated actions to fully meet and match your exact business requirements.
Which businesses can benefit from automated actions?
- Any company and branch can benefit from automated actions, it doesn’t matter if it is a small company or a large corporation.
- However, large companies may have more processes that need to be automated and therefore may feel the positive impact of automated actions more.
- Companies and branches that aim to give customers the most crucial information regarding tickets in a structured and organized way.
- Companies and branches that wish to rely on automated information spreading.
- Companies and branches that wish to rely on automated processes.
Benefits of automated actions:
- Automated actions are relatively simple to configure.
Automated actions can have a huge positive impact on day-to-day operations, saving time for dispatchers. - End users can easily keep track of their tickets by clicking a link, which is initiated with the help of automated actions.
- There is no additional manual effort required to send information such as emails, SMS, and ticket information when automated actions are properly configured.
Ticket automated actions are divided into three types:
- Custom automated actions -> Automate processes with more custom settings
- Workflow based automated actions -> Automate processes for your custom workflows
Yes, every automated action also automatically creates a history entry, to make every automated action traceable and comprehensible.
The following automated actions are available for FREE plans (SMTP config required):
- Send the end user an email about appointment time and date
- Send the end user an email about the appointment cancellation
- Custom automated actions -> Create ticket info actions/Send email actions (SMTP config required)
- Workflow-based automated actions
- Full automation capabilities (eg. ticket automated actions)
Preconfigured automated actions:
- Admin panel/Navigation menu: Automations/Page: Automations
Custom automated actions:
- Admin panel/Navigation menu: Automations/Page: Automations
Custom object automated actions:
- Admin panel/Navigation menu: Automations/Page: Automations
- Admin panel/Navigation menu: Dynamics/Page: Objects
About Workflow-Based Automated Actions
With workflow based automated actions you can automatize processes for your customized workflows. They basically work the same as ticket automated actions, with the only difference, being that they will only apply to your custom workflows.
You can think of automated actions as a sandbox for creating automation inside the Work place. The most common use of automated actions is automatically sending relevant information and updates to your end users.
By smartly configuring automated actions, model users are not burdened with unnecessary work, resulting in less organizational effort and allowing model users to focus on more important work. Our solution engineers can help you configure custom object automated actions to fully meet and match your exact business requirements.
Inside the Admin panel go to Automations → Automated Actions
1. Creating Workflow-Based Automated Actions
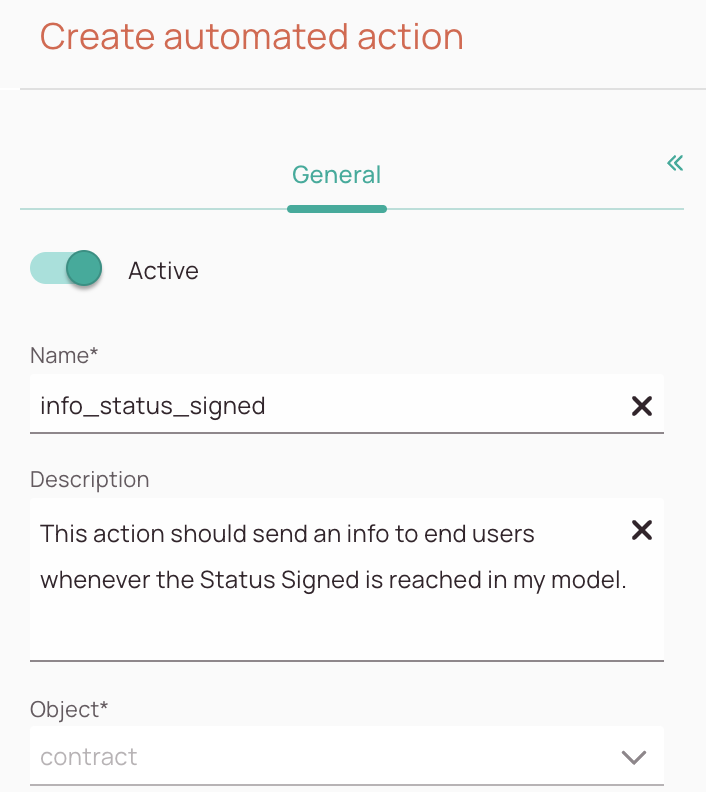
- Decide if your action should be directly active in the system after creation. If you want your action to be directly active, switch the active switch to the right. If you are just preparing the action for now toggle the active switch to the left.
- Enter a name for your custom object automated action. Please avoid special characters and use underscores as connectors, otherwise you may run into the issue, that you cannot save your action.
- (Optional) - Enter a description for your new custom object automated actions. If you make your description clear and distinctive now, you will make it easier to distinguish between different actions.
- Select the object from the object dropdown. The action will only apply for this specific model.
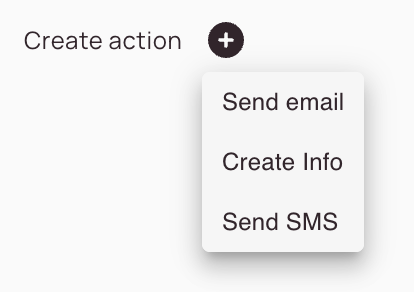
You can select between three different action types and even define multiple actions per object if desired:
- The Send email action sends out an email to a dedicated email audience. You can customize the email contents and use aliases by typing "@".
- The Create Info actions creates an ticket info. You can customize the ticket info contents and use aliases by typing "@".
- The Send SMS action sends out an email to a dedicated SMS audience. You can customize the email contents and use aliases by typing "@".
1.1 Send email action
This section is not finished yet, stay tuned!
The send email action will send an email (for a selected custom object) at a specific workflow trigger point. This specific workflow trigger point has to be configured inside Workflows (Coming later).
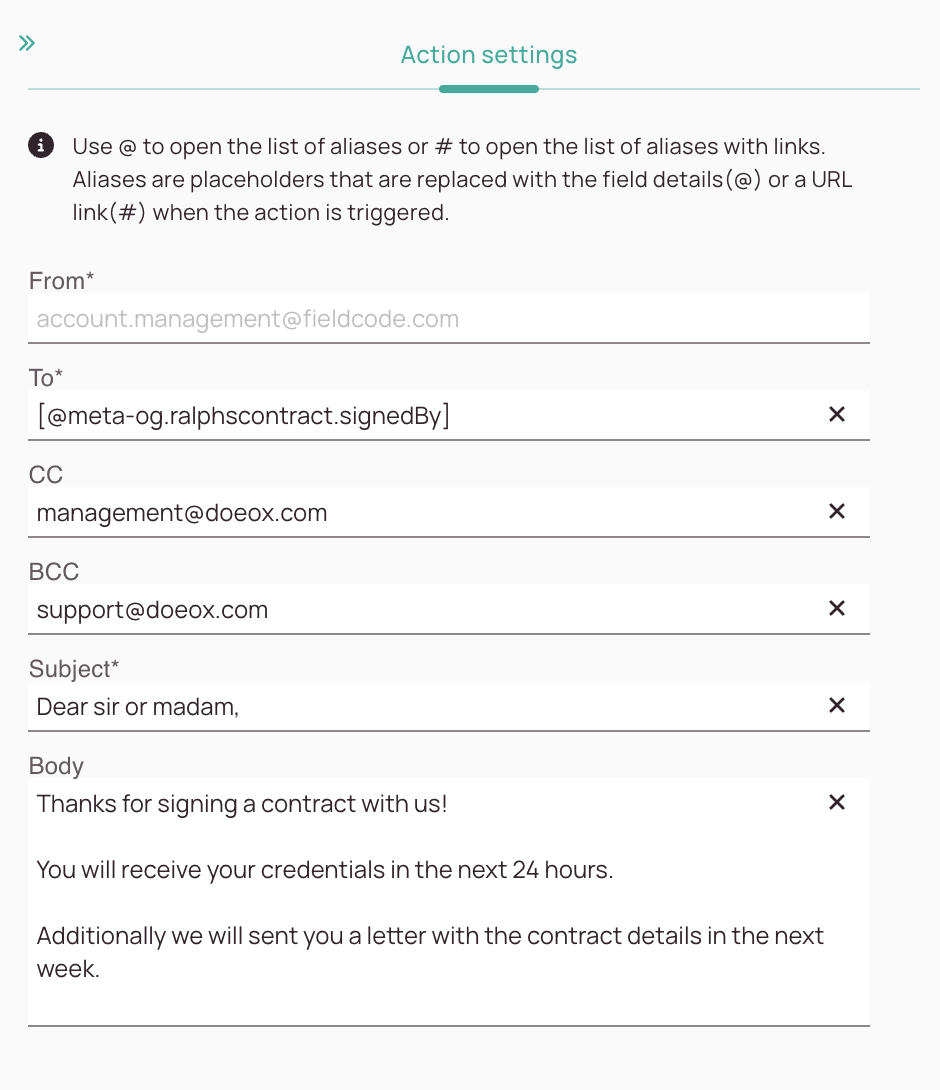
Inside the email action, you can configure Aliases. Aliases are placeholders that are replaced with field details(@) or a URL link (#) when the action is triggered.
- The From field should be already pre-filled with either the default Fieldcode sending address or, preferably, the SMTP email address. Therefore no need to fill this field.
- Enter a recipient address or addresses to which the email should be sent. You could also enter an alias or aliases here to ensure that the field details will be filled in automatically by the system.
- (Optional) - Enter carbon copy address.
- (Optional) - Enter blind carbon copy address.
- Enter the subject of the email.
- Enter the email content.
1.2 Create info action
This section is not finished yet, stay tuned!
The create info action will create info (for a selected custom object) at a specific workflow trigger point. This specific workflow trigger point has to be configured inside Workflows (Coming later).
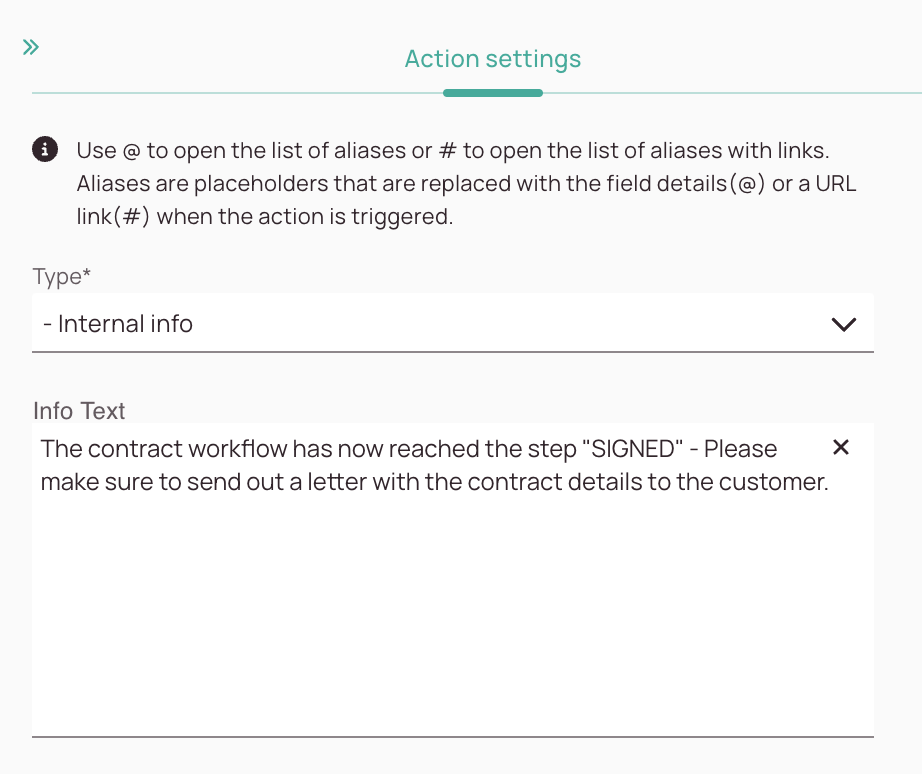
You can select between different info types.
Inside the info action, you can configure Aliases. Aliases are placeholders that are replaced with field details(@) or a URL link (#) when the action is triggered.
- Select an info type. You can pick an existing template or even use your own configured templates. You can customize your templates in value sets.
- Enter the info text, that should be displayed when this action is triggered.
- Click Save.
1.3 Send SMS action
This section is not finished yet, stay tuned!
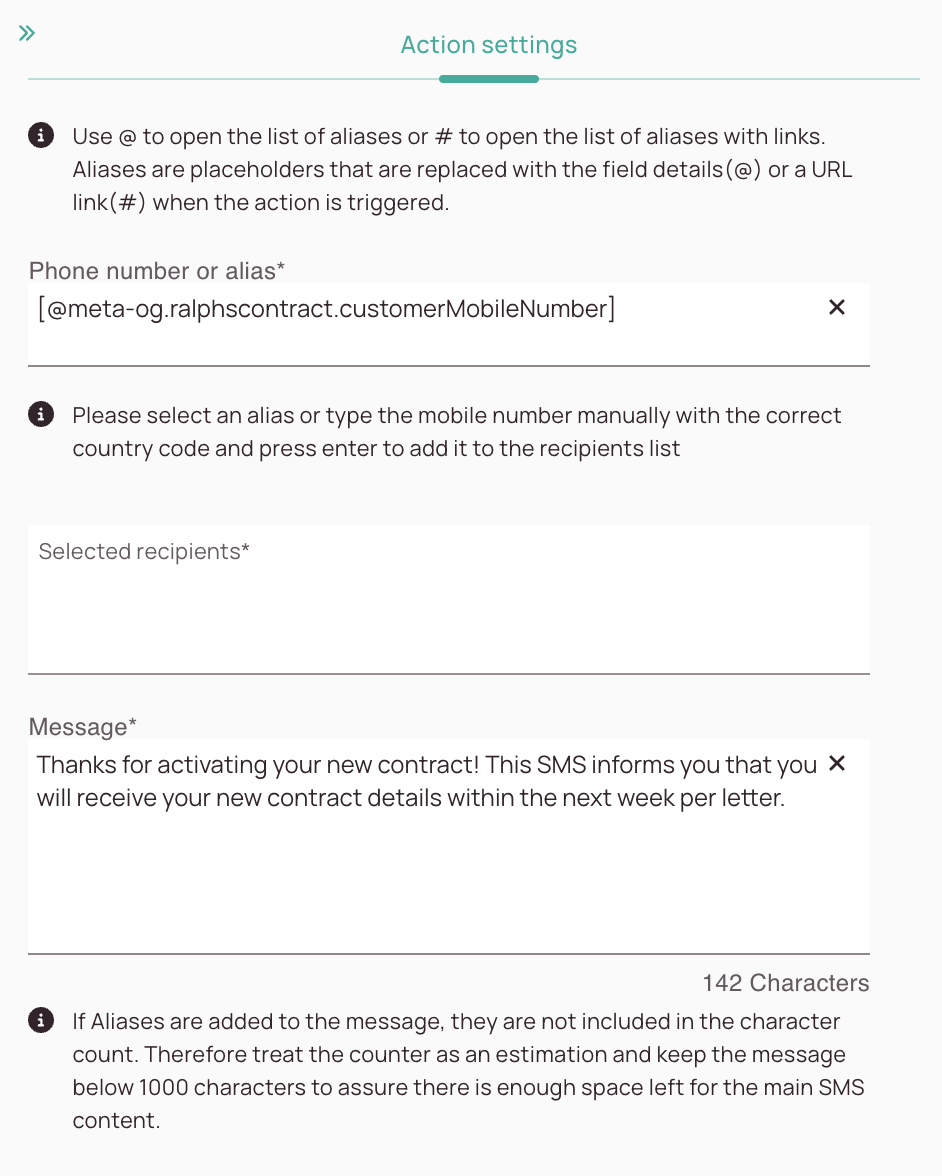
The Send SMS action will send an SMS (for a selected custom object) at a specific workflow trigger point. This specific workflow trigger point has to be configured inside Workflows (Coming later).
Inside the SMS action, you can configure Aliases. Aliases are placeholders that are replaced with field details(@) or a URL link (#) when the action is triggered.
- Enter a phone number, or use an alias to configure from whom the SMS should be sent.
- Enter a phone number, multiple phone numbers, or/and aliases to configure SMS recipients. You can add multiple phone numbers by inserting a comma between numbers. Do not forget the country code.
- Enter the SMS message content. Try not to make the message longer than 300 characters.
2. Testing Actions
This section is not finished yet, stay tuned!
0 out of 5 stars
| 5 Stars | 0% | |
| 4 Stars | 0% | |
| 3 Stars | 0% | |
| 2 Stars | 0% | |
| 1 Stars | 0% |

