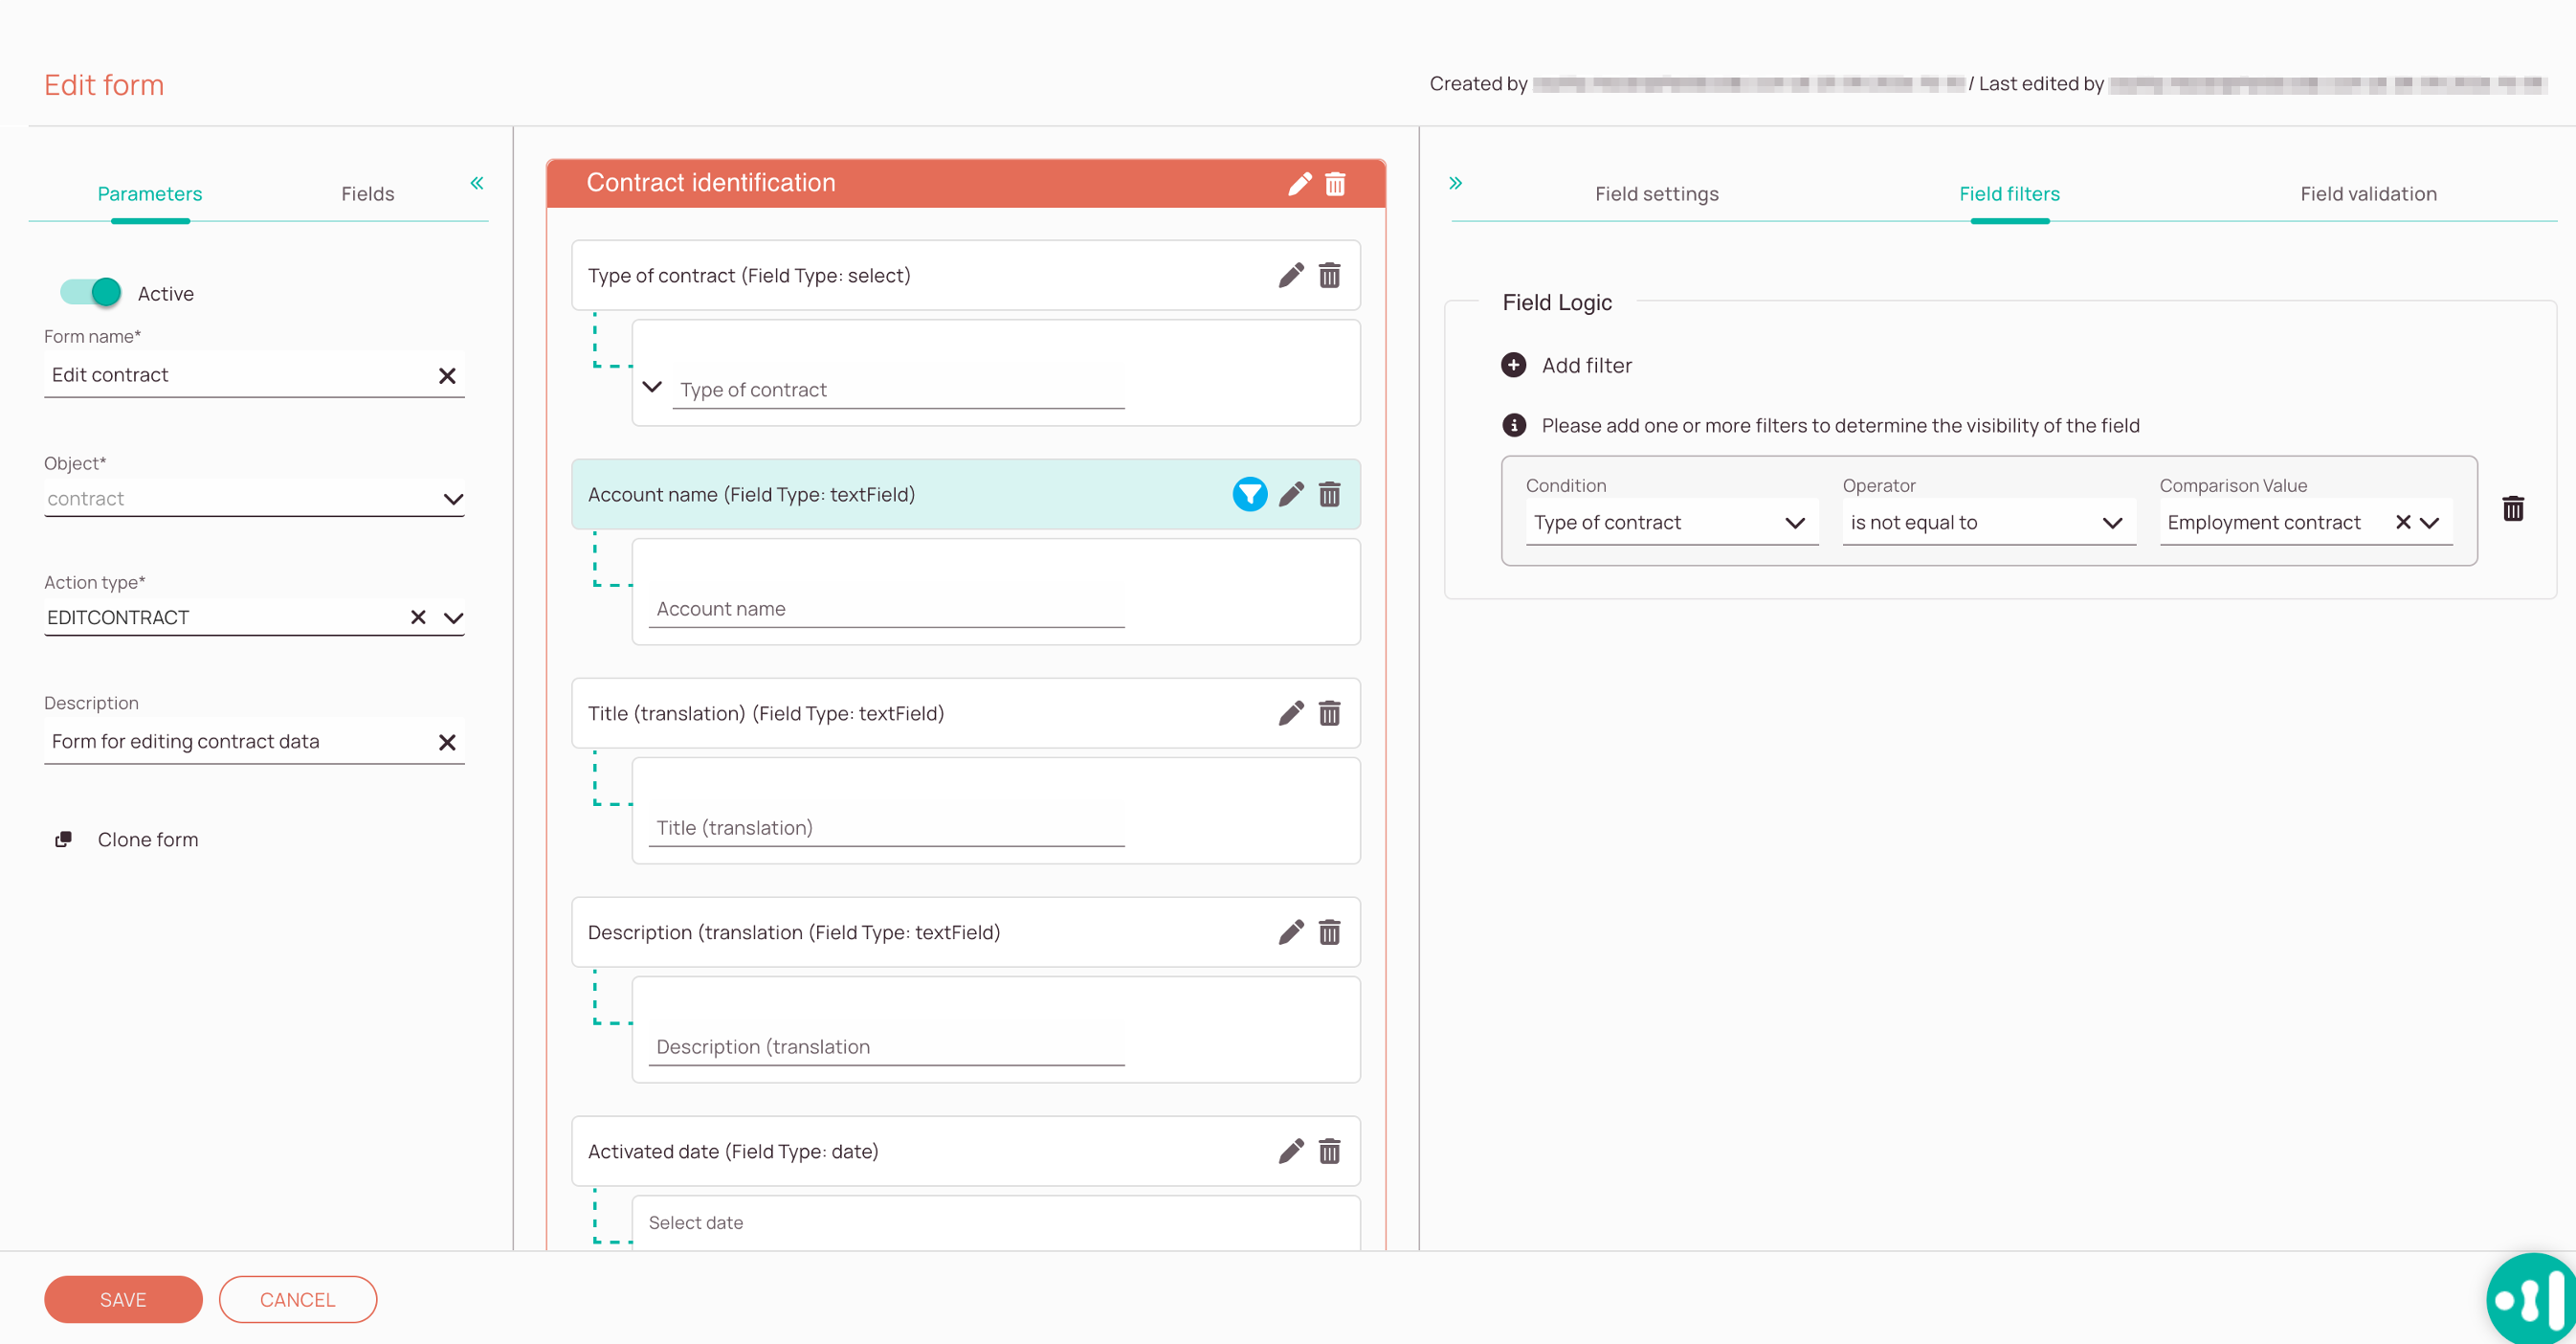
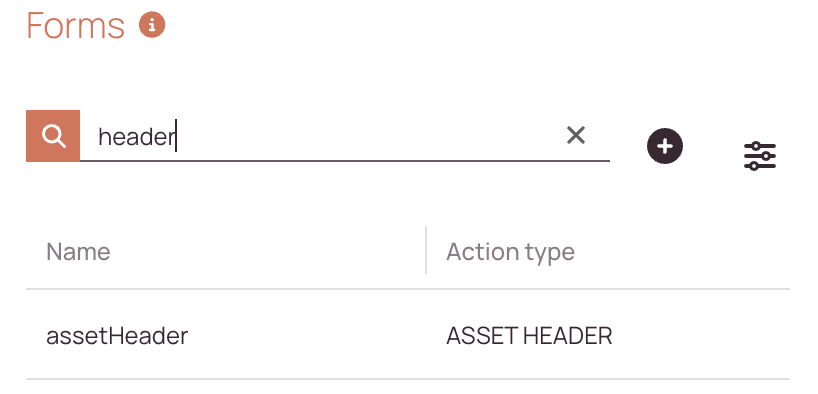
Tip: You can use filters for better results
Fieldcode Plus permissions:
Please be advised that adequate permissions must be set to access all the Fieldcode Plus-related features.
Admins do not have Fieldcode Plus permissions by default, so one has to grant access to Plus first.
Required Enterprise permissions:
- Admin panel/Navigation menu/Fieldcode Plus
- Admin panel/Navigation menu/Automations
- Work place/Fieldcode Plus
- Objects; Custom Fields; Forms; Components

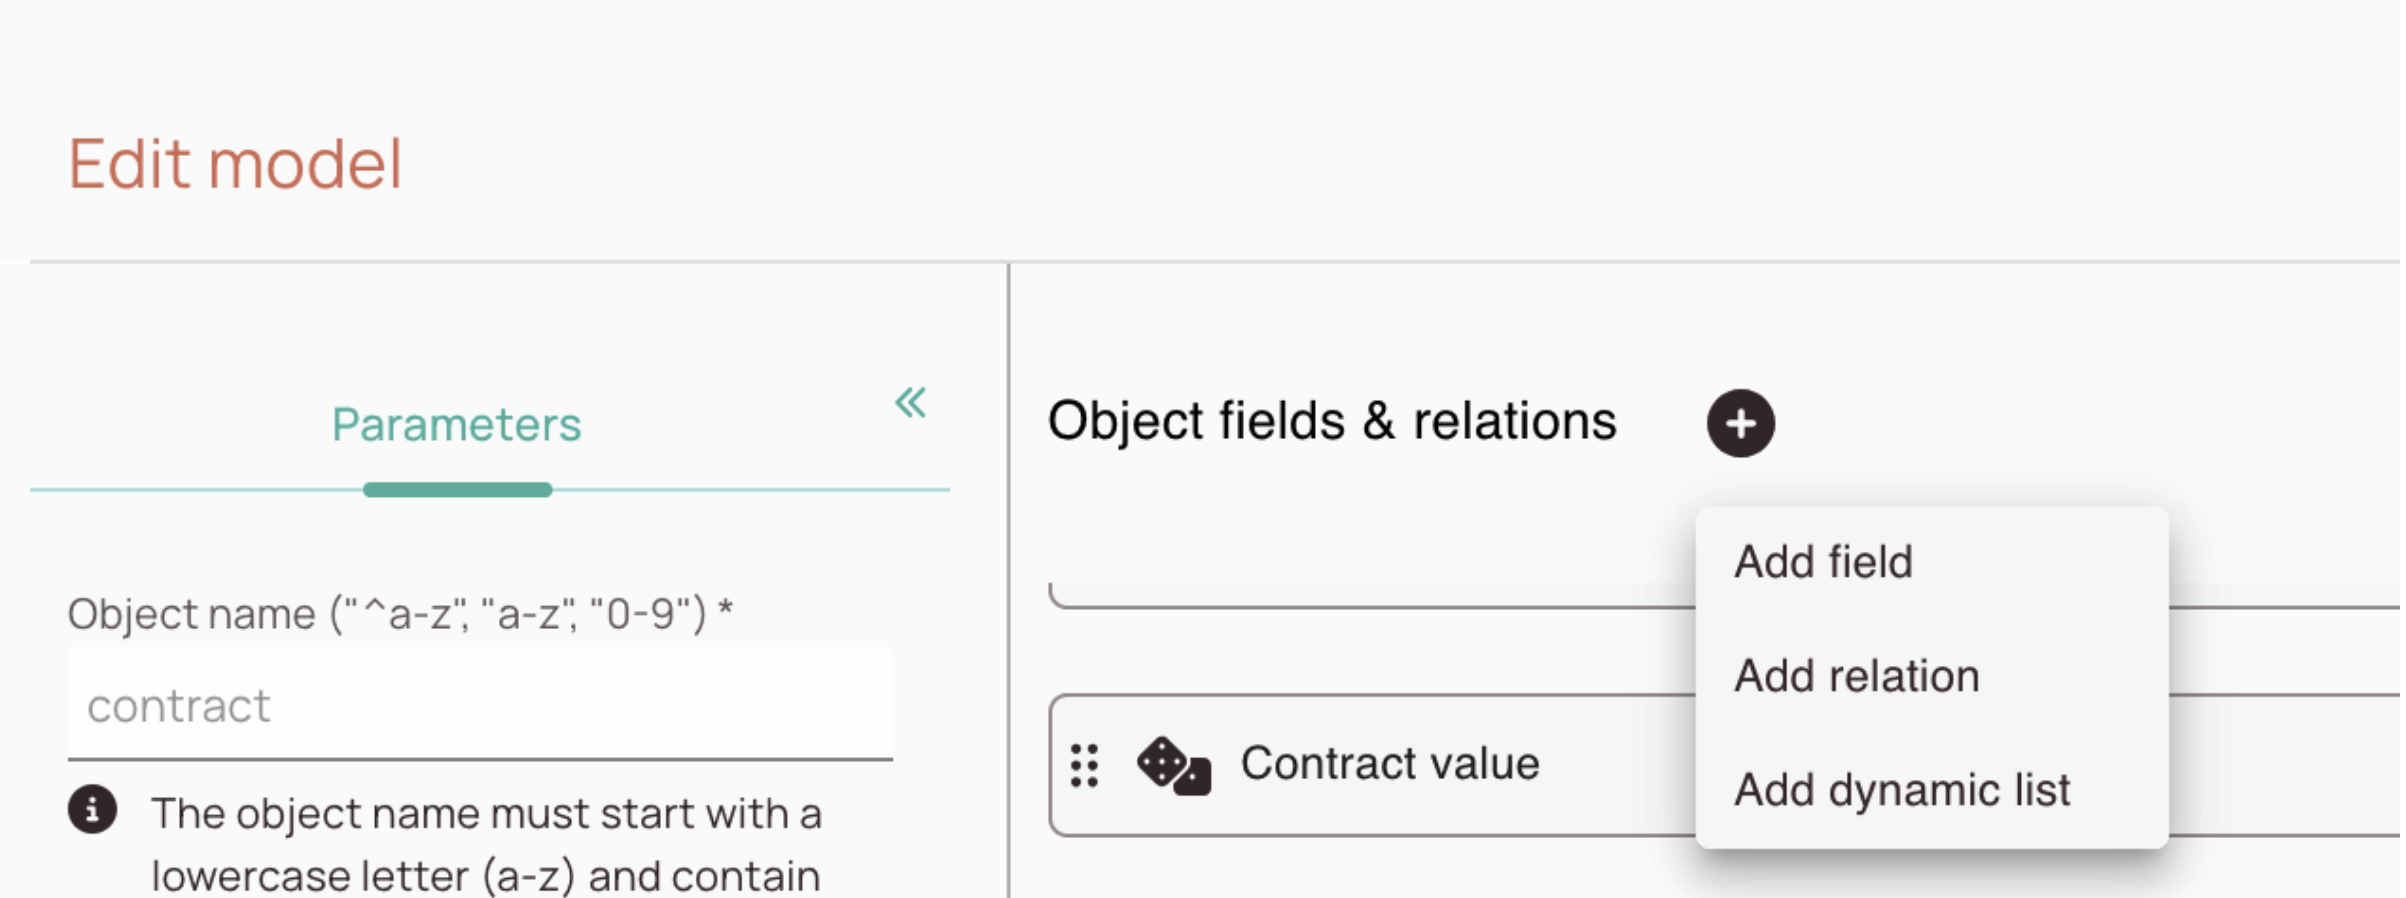
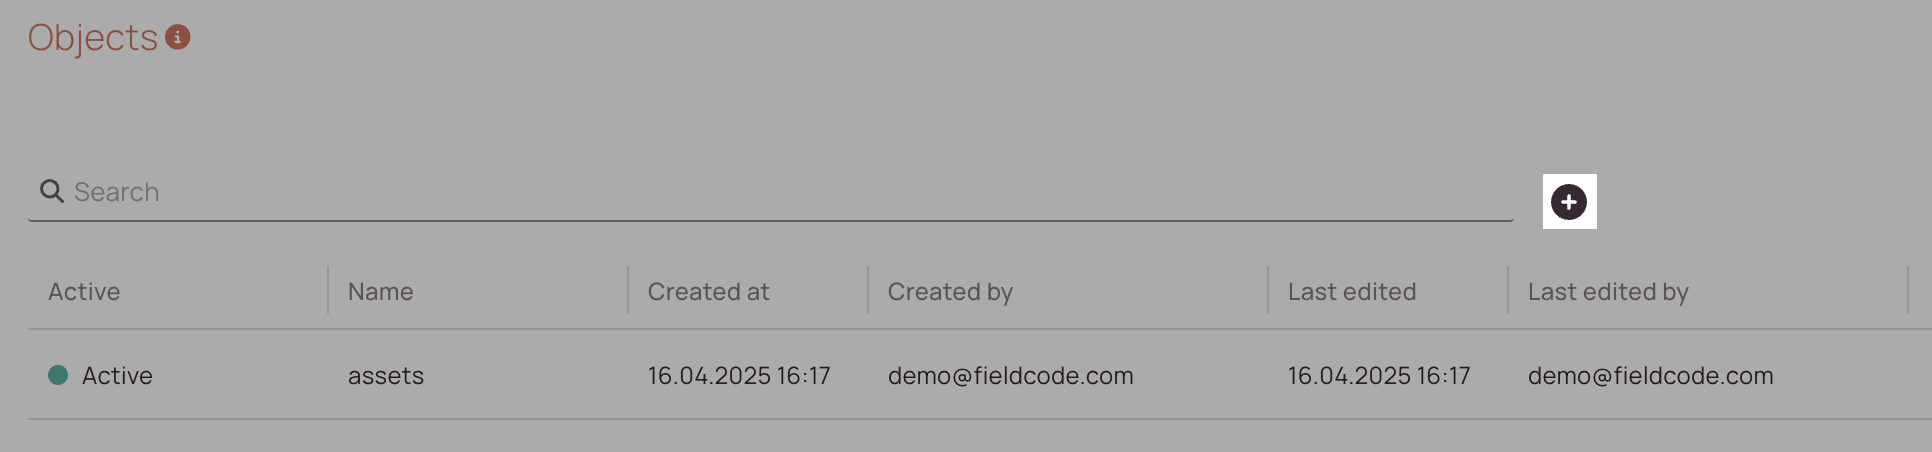
- Open the Admin panel and click on Objects.
- Inside the Objects page, click on the plus button to configure your contract object.
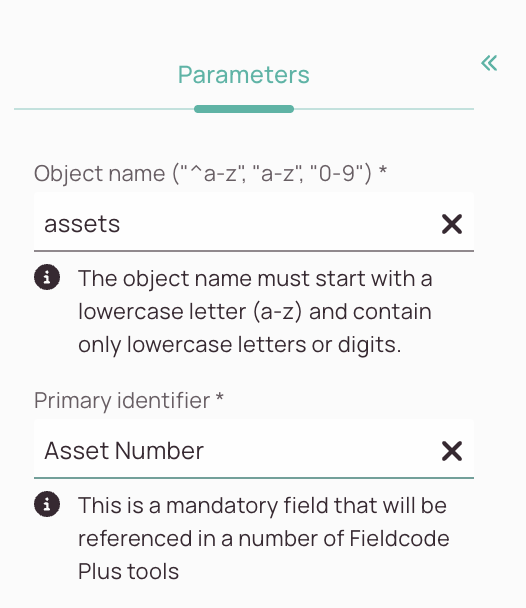
- Enter the object name in the Parameters section and name it "assets".
- Enter "Asset Number" as a primary identifier.
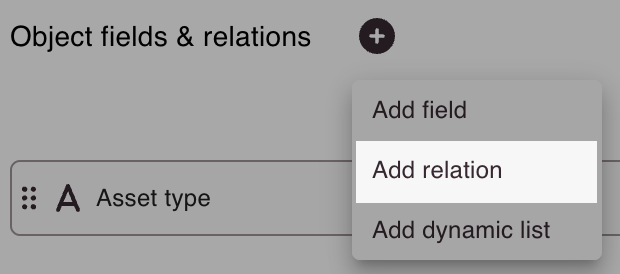
- What we do now, is to start to add some object fields by clicking on the plus button inside the middle section.
- The fields you add should all be available inside the X-Pool and should all be searchable inside the X-Pool, luckily, both toggles are activated by default.
The X-Pool, by the way, is a custom component, which you will create later (3.2). - Let's create our first field!
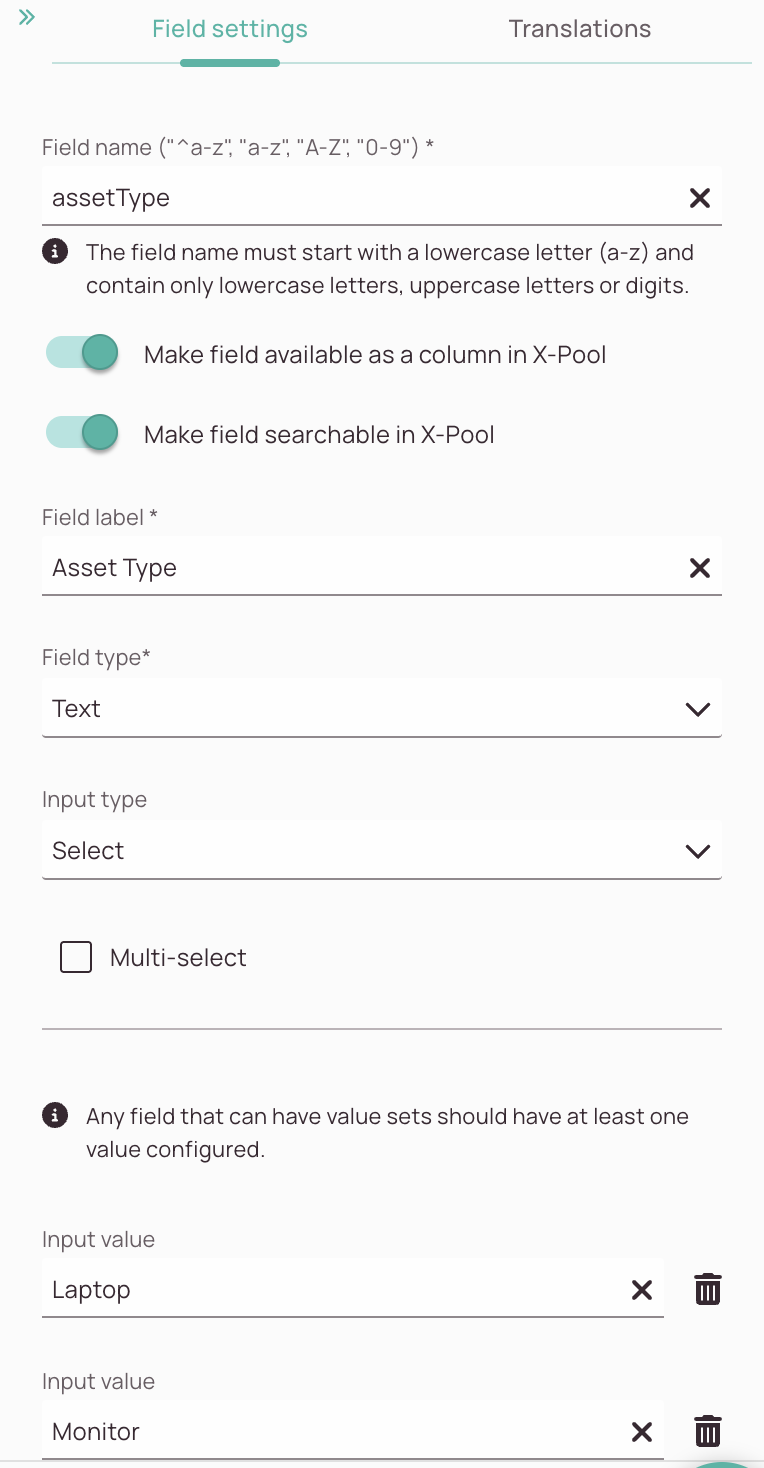
Enter "assetType" as a field name. - Enter "Asset type" as a field label.
- Select "Text" as a field type.
- Select "Select" as an input type.
- Do not check the "Multi-select" checkbox. The user should only have the possibility to select one value for this particular field.
- Start to add these values: Laptop, Monitor, Tablet, Printer, Phone, Mouse, Headset, Keyboard, Desktop.
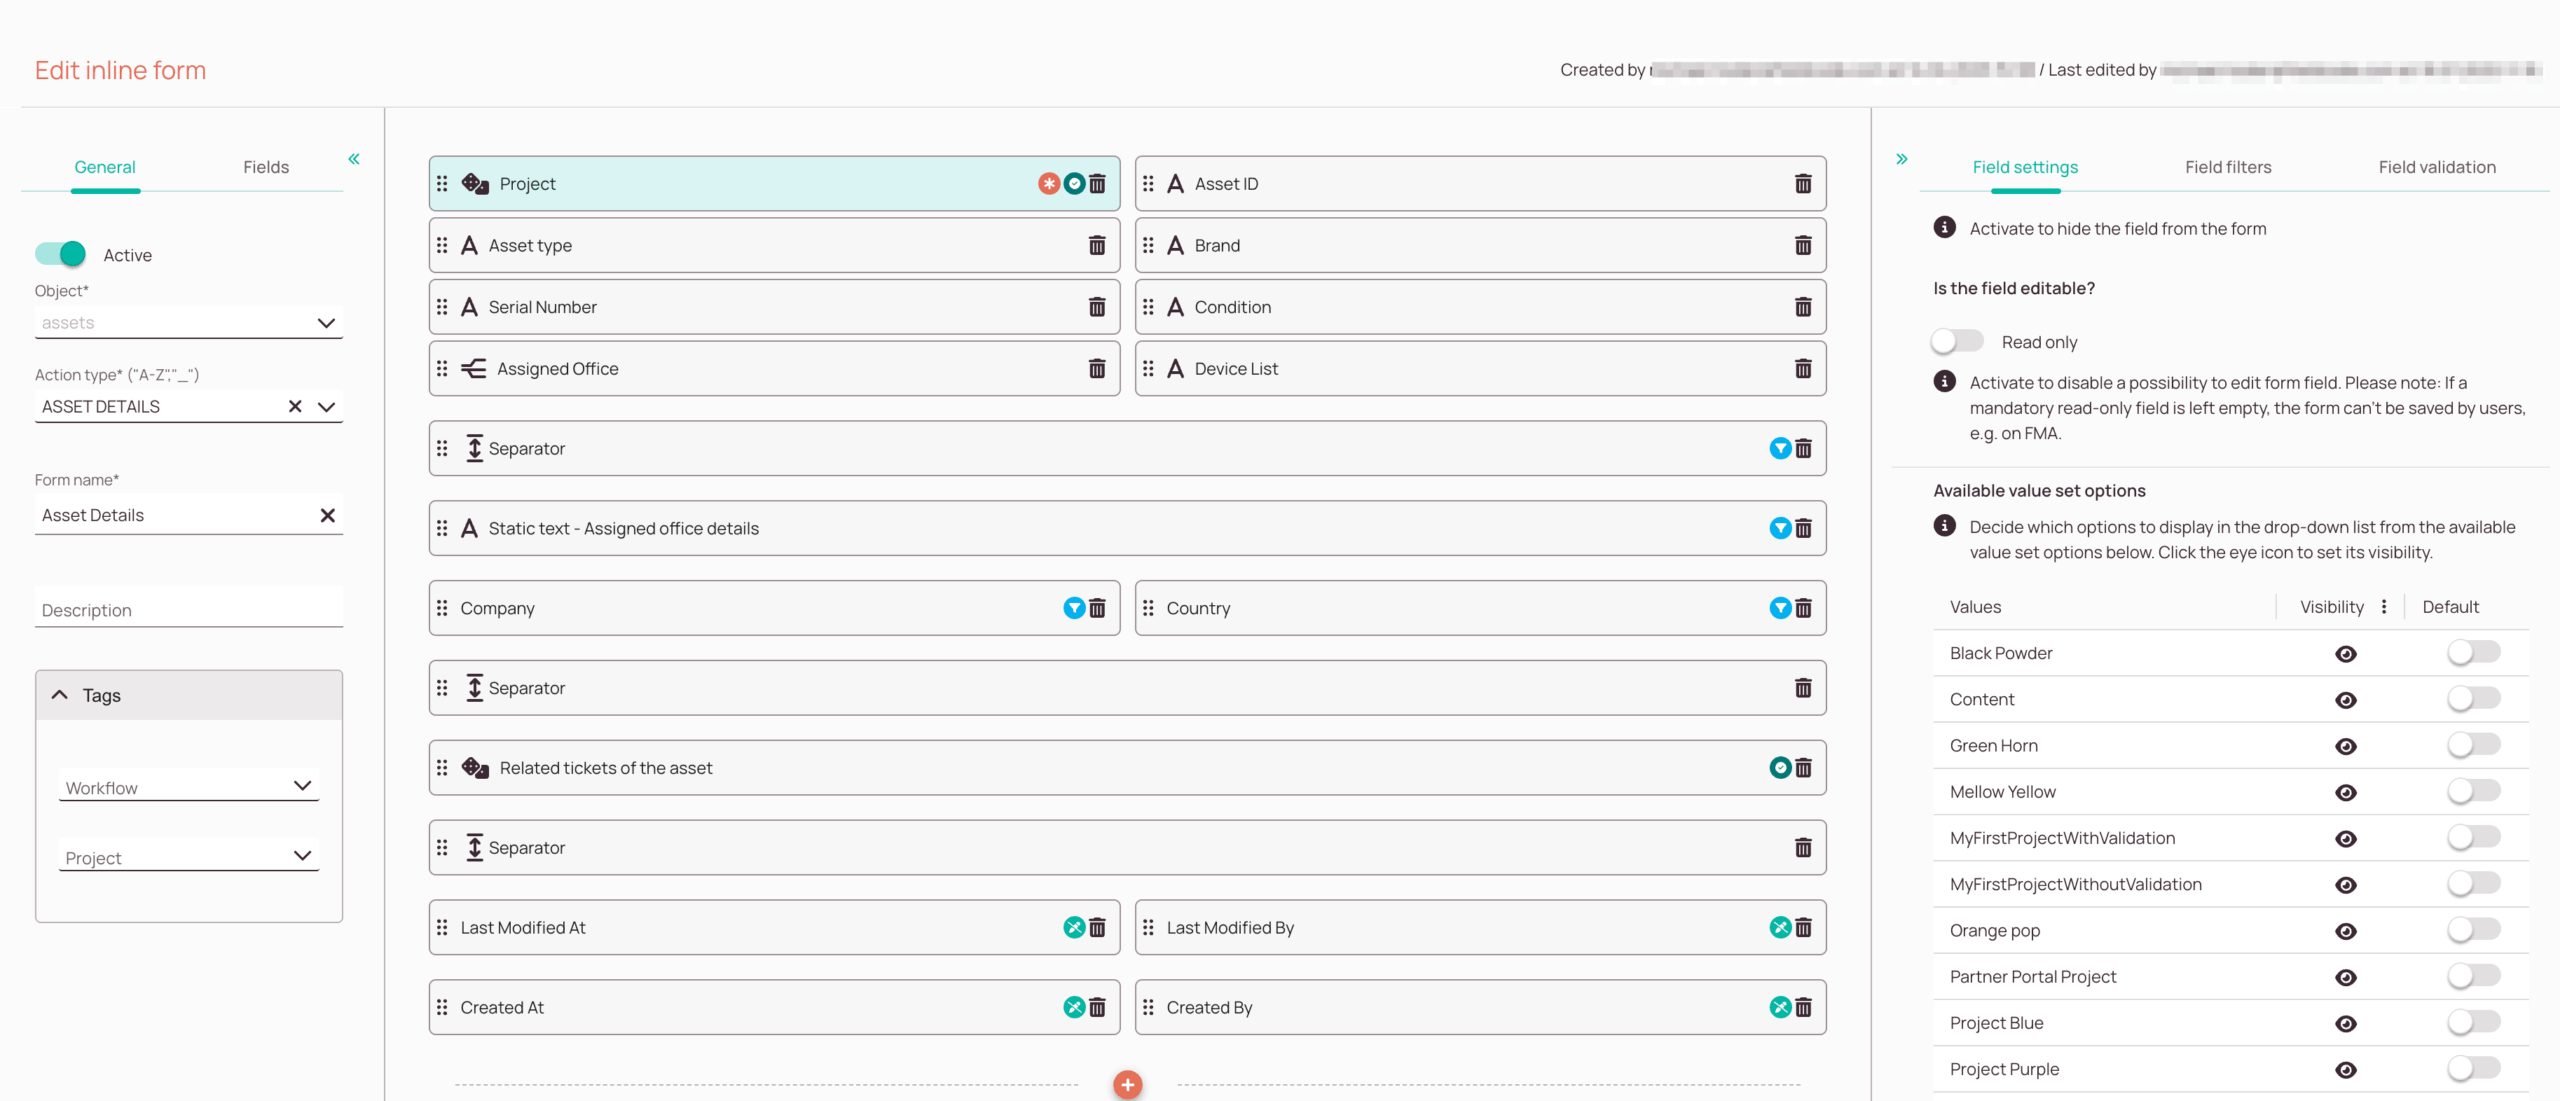
- Let's add more fields since one field is simply not enough for our sophisticated asset object. Let's also add these following fields: Asset Type (Text field), Brand (Text field), Serial Number (Text field), Asset ID (Text field), Condition (Text field; Radio; Values: New/Used).
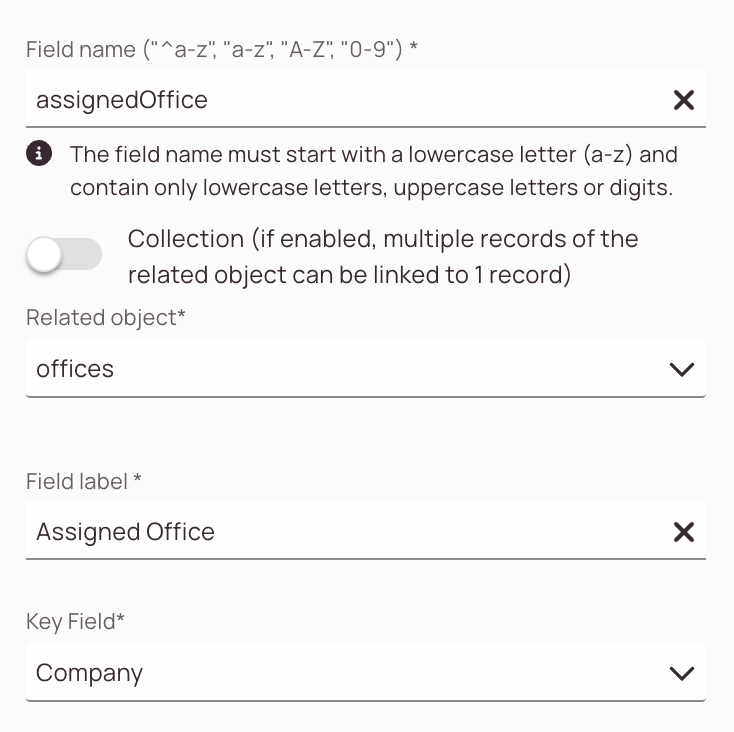
Tip: You can check the picture on the right side check if you are proceeding well with the creation of your first object fields. You may notice on the picture there is a strange looking field called "Assigned Office". Don't add it. - Click on Save & Close.
- Congratulations!
You have just created your first object successfully.
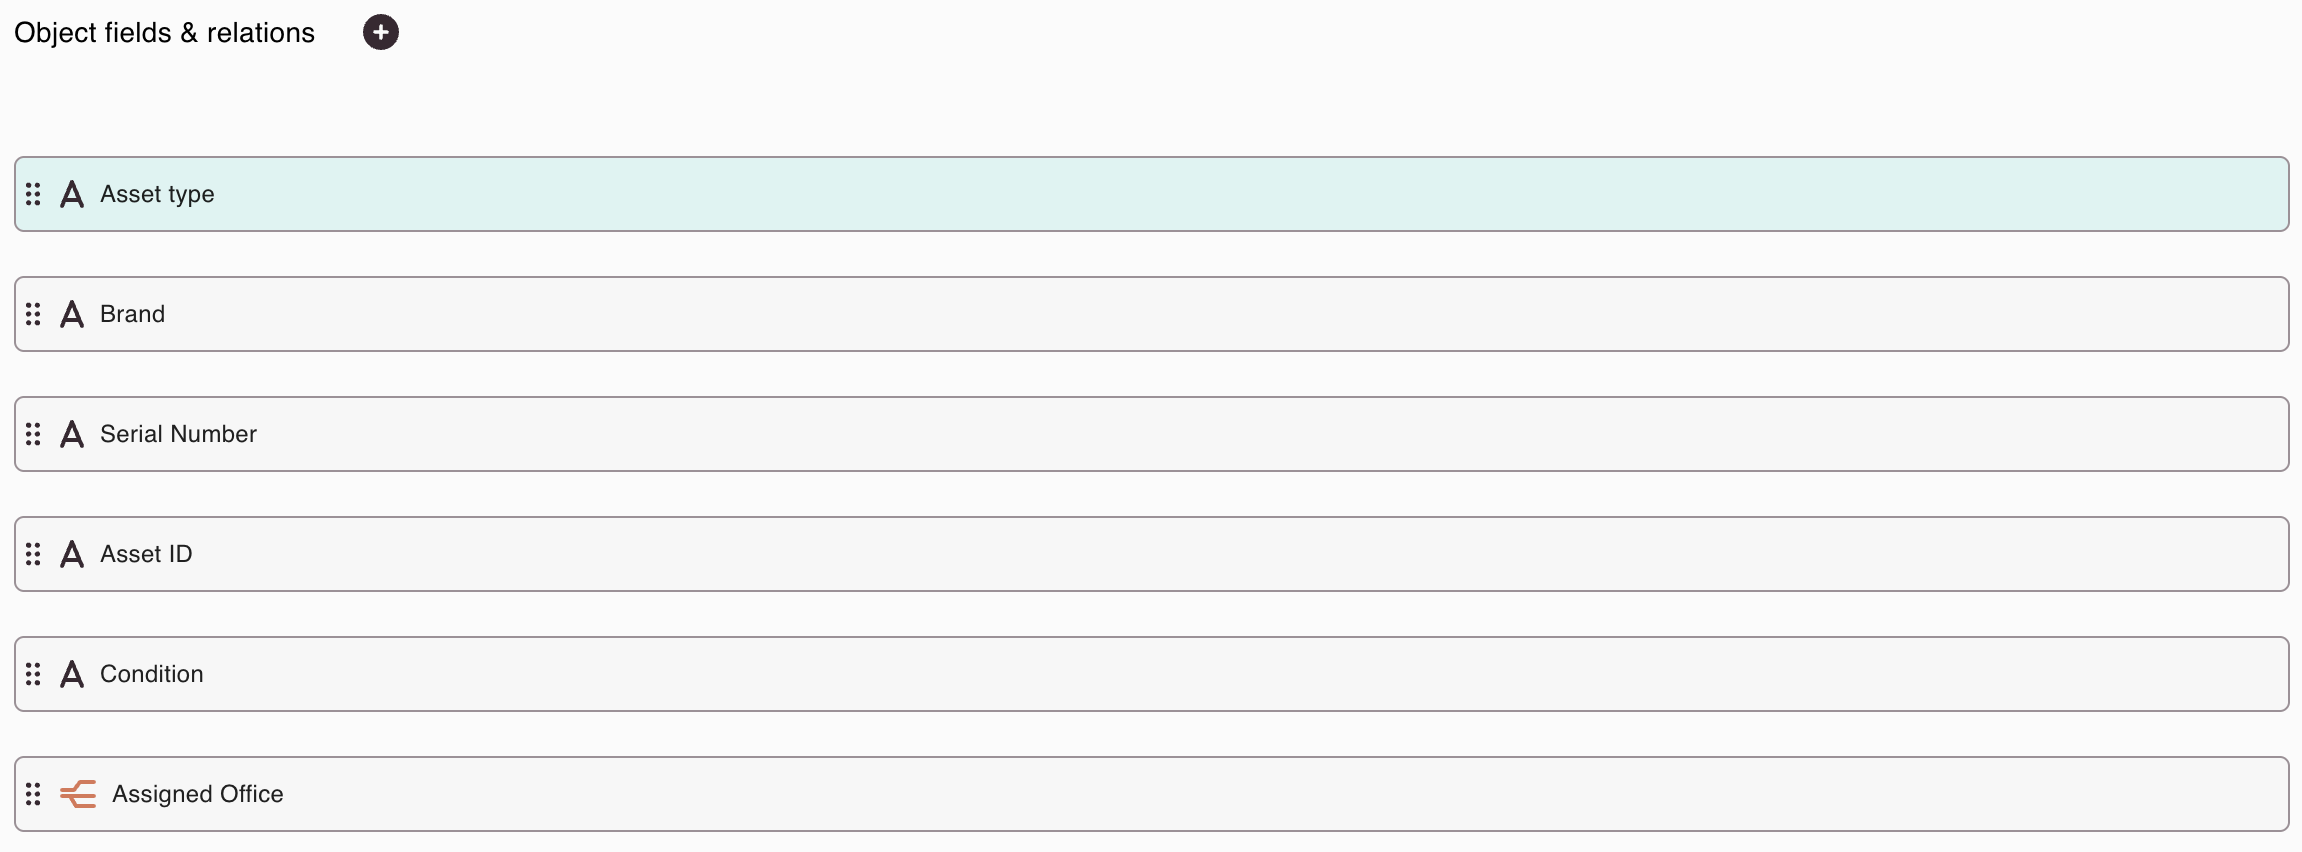
The "Assigned Office" field is not a simple field, it is a relation. What you have to know for now is that relation fields display values of another object (which we haven't created just yet). Therefore there is no need to add this relation for now, we will have a deeper look at relations very soon.
Relations seem to have a lot of different settings! Bidirectional relation. That sounds somewhat complicated, doesn't it? Well, it really isn't. Just have a bit of patience, we will cover the relation topic immediately after the creation of our second object.
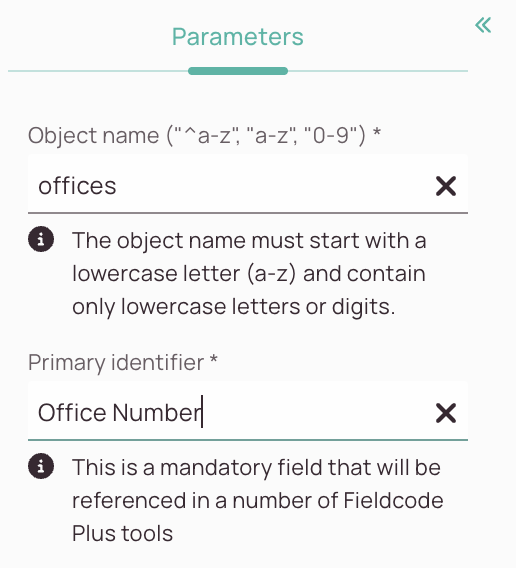
- Time for our second object! In the Object main menu, click on the plus button to add another object.
- Enter the object name in the Parameters section and name it "offices".
- Enter "Office Number" as a Primary identifier.
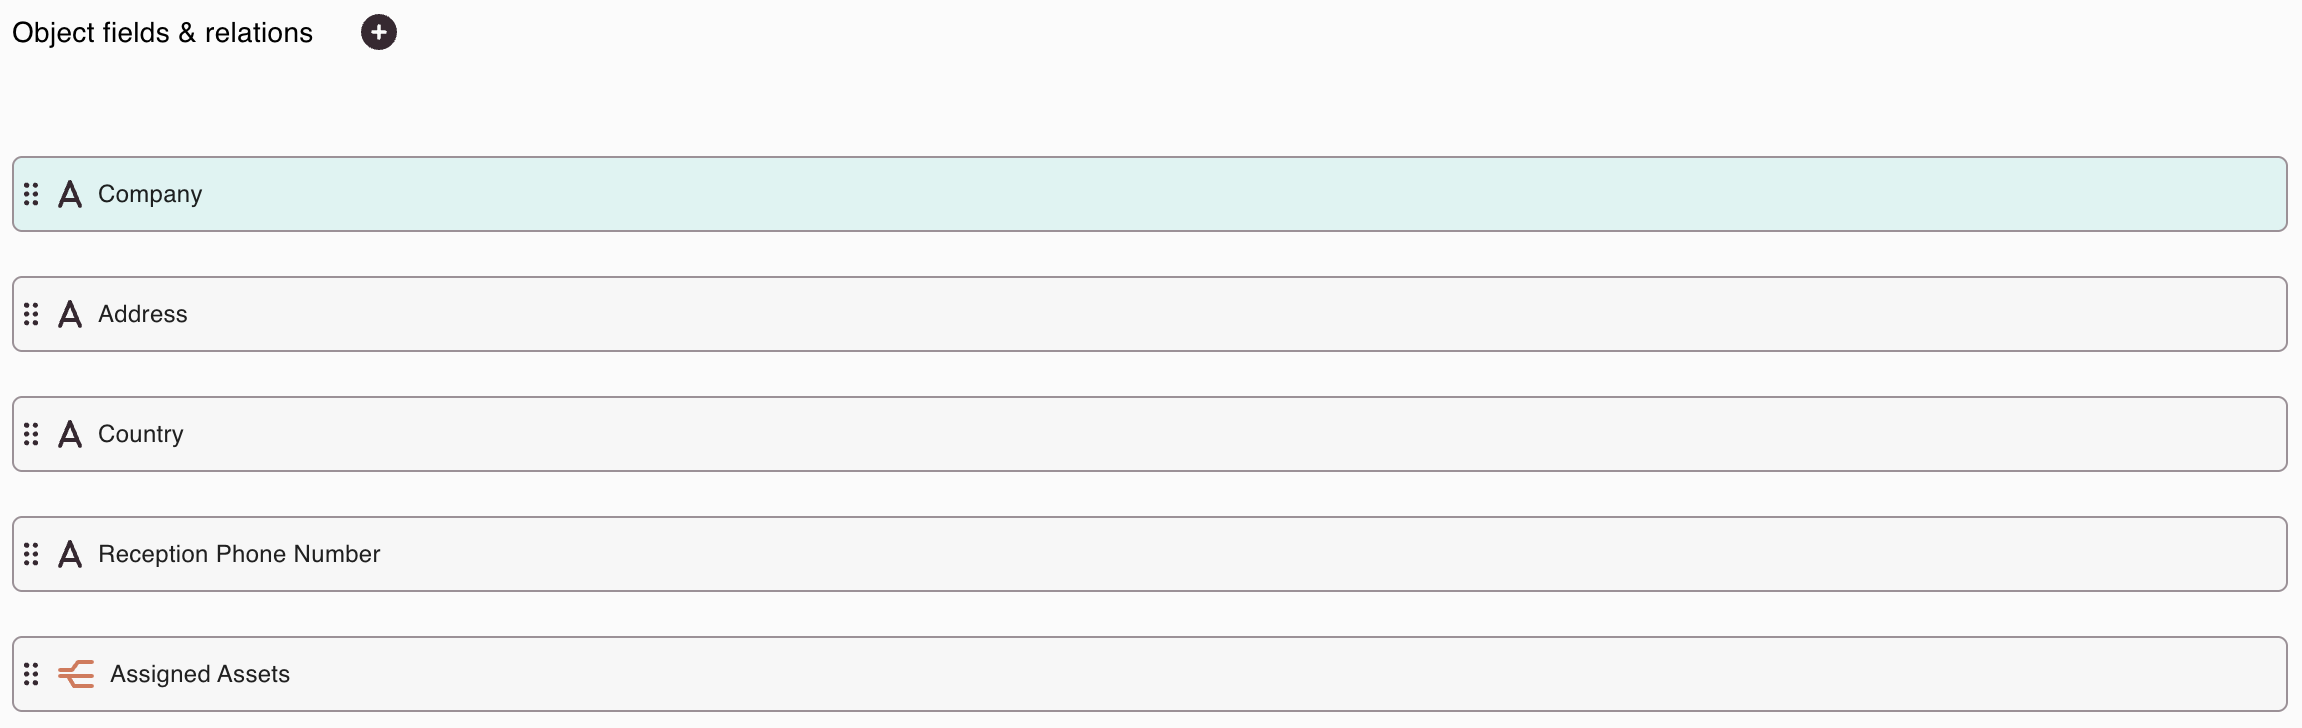
- Let's add some object fields again. Please add these fields: Company (Text field), Address (Text field), Country (Text field), Reception Phone Number (Text field).
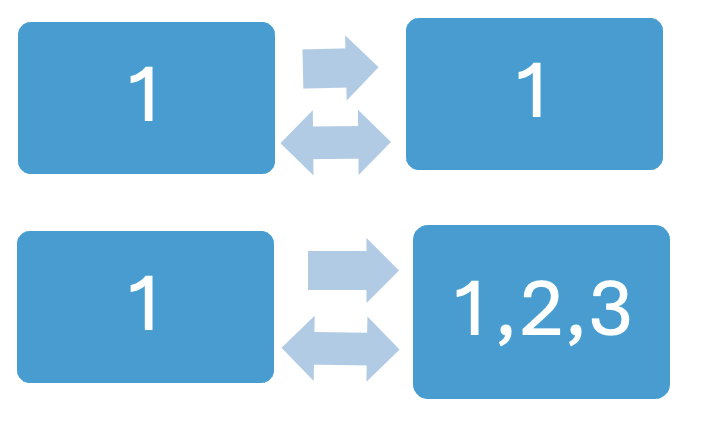
Let's take a look at our scenario as an example to understand relations better. We have just created an asset object and an office object.
An asset is always part of one office, so this would be a 1:1 relation.
One office can have multiple assets, so this would be a 1:n relation.
- Let's start with our asset object. Our goal is to display the assigned office for assets.
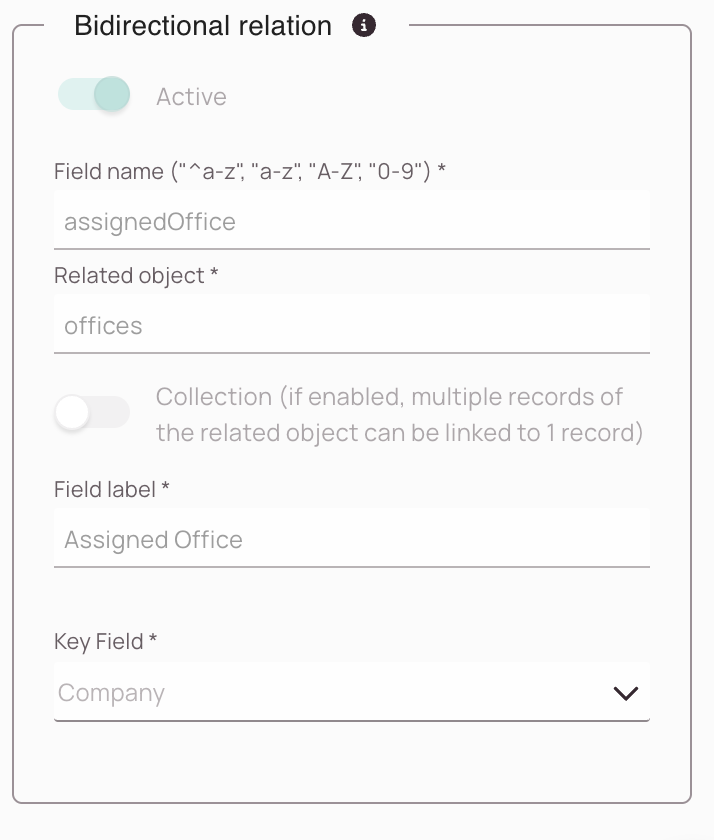
- Enter "assignedOffice" as a field name.
- Not select collection.
Remember: We want to achieve a 1:1 relation for this particular object. - Select "offices" as the related object from the dropdown.
- Enter "Assigned Office" as a field label.
- Select "Company" as a key field. The key field value of the other object that you select here will be used as a reference.
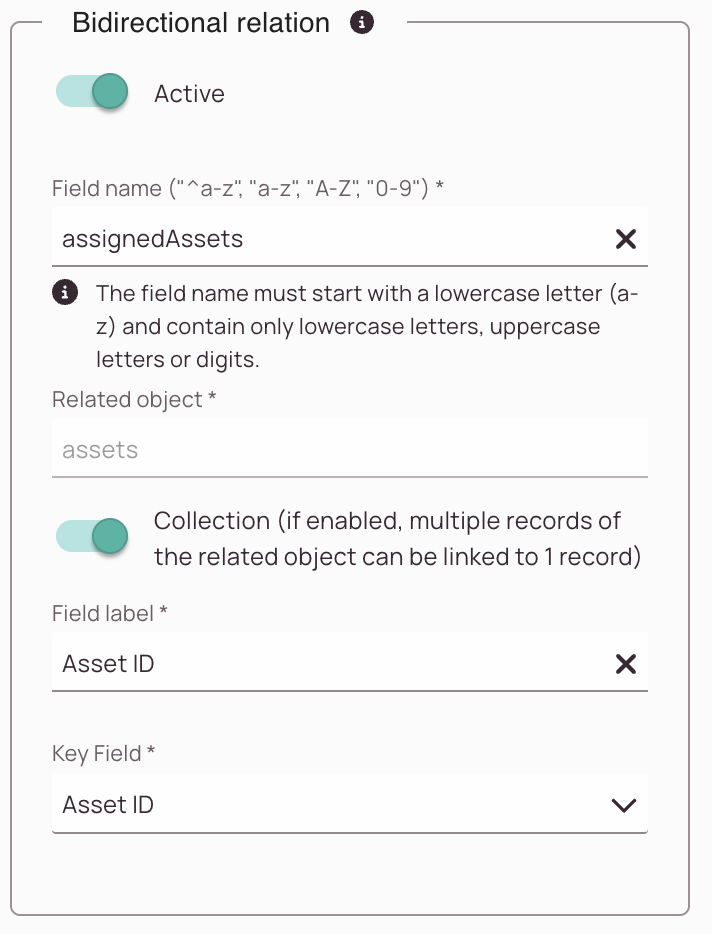
- We would like to create a bi-directional connection between our two objects. Therefore we select Active in the Bidirectional relation box.
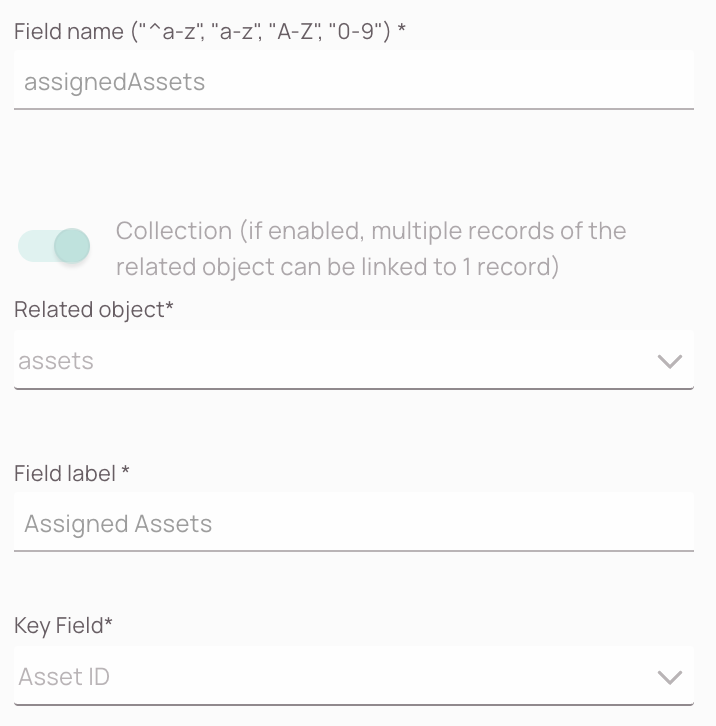
- Enter "assignedAssets" as a field name.
- The object that we want to relate to is the "assets" one.
- Since we have decided that an office can have multiple assets (1:n) we are required to turn on the collection toggle.
- Enter "Assigned Assets" as a field label.
- The key field to select here is "Asset ID"
- Click Save & Close.
- We have successfully created our first relation! What a milestone!
Now you would think that the next thing we had to do is to add a relation for the second object. But wait, didn't we just setup a bi-directional before? Yes, we did!
And because we have done just this, we didn't need to do it for the second object, as we already configured everything in the first object.
We can check the second object "offices" nonetheless, and what we should find there is the "Asset ID" relation already set!
Hooray, we got them married!

You can customize your "Create form" on the Forms page of the Admin panel, just as you can for tickets.
All you need to do now is add a new form inside the form creator, give it a name (yourname_create), load your object (yourname_contract), and select the "Create" action type. Your form will be pre-populated with your fields, and you can now adjust it. Then you simply save it, and it should appear in the forms list.
Note: If you do not create a custom create form, a default one will be used.
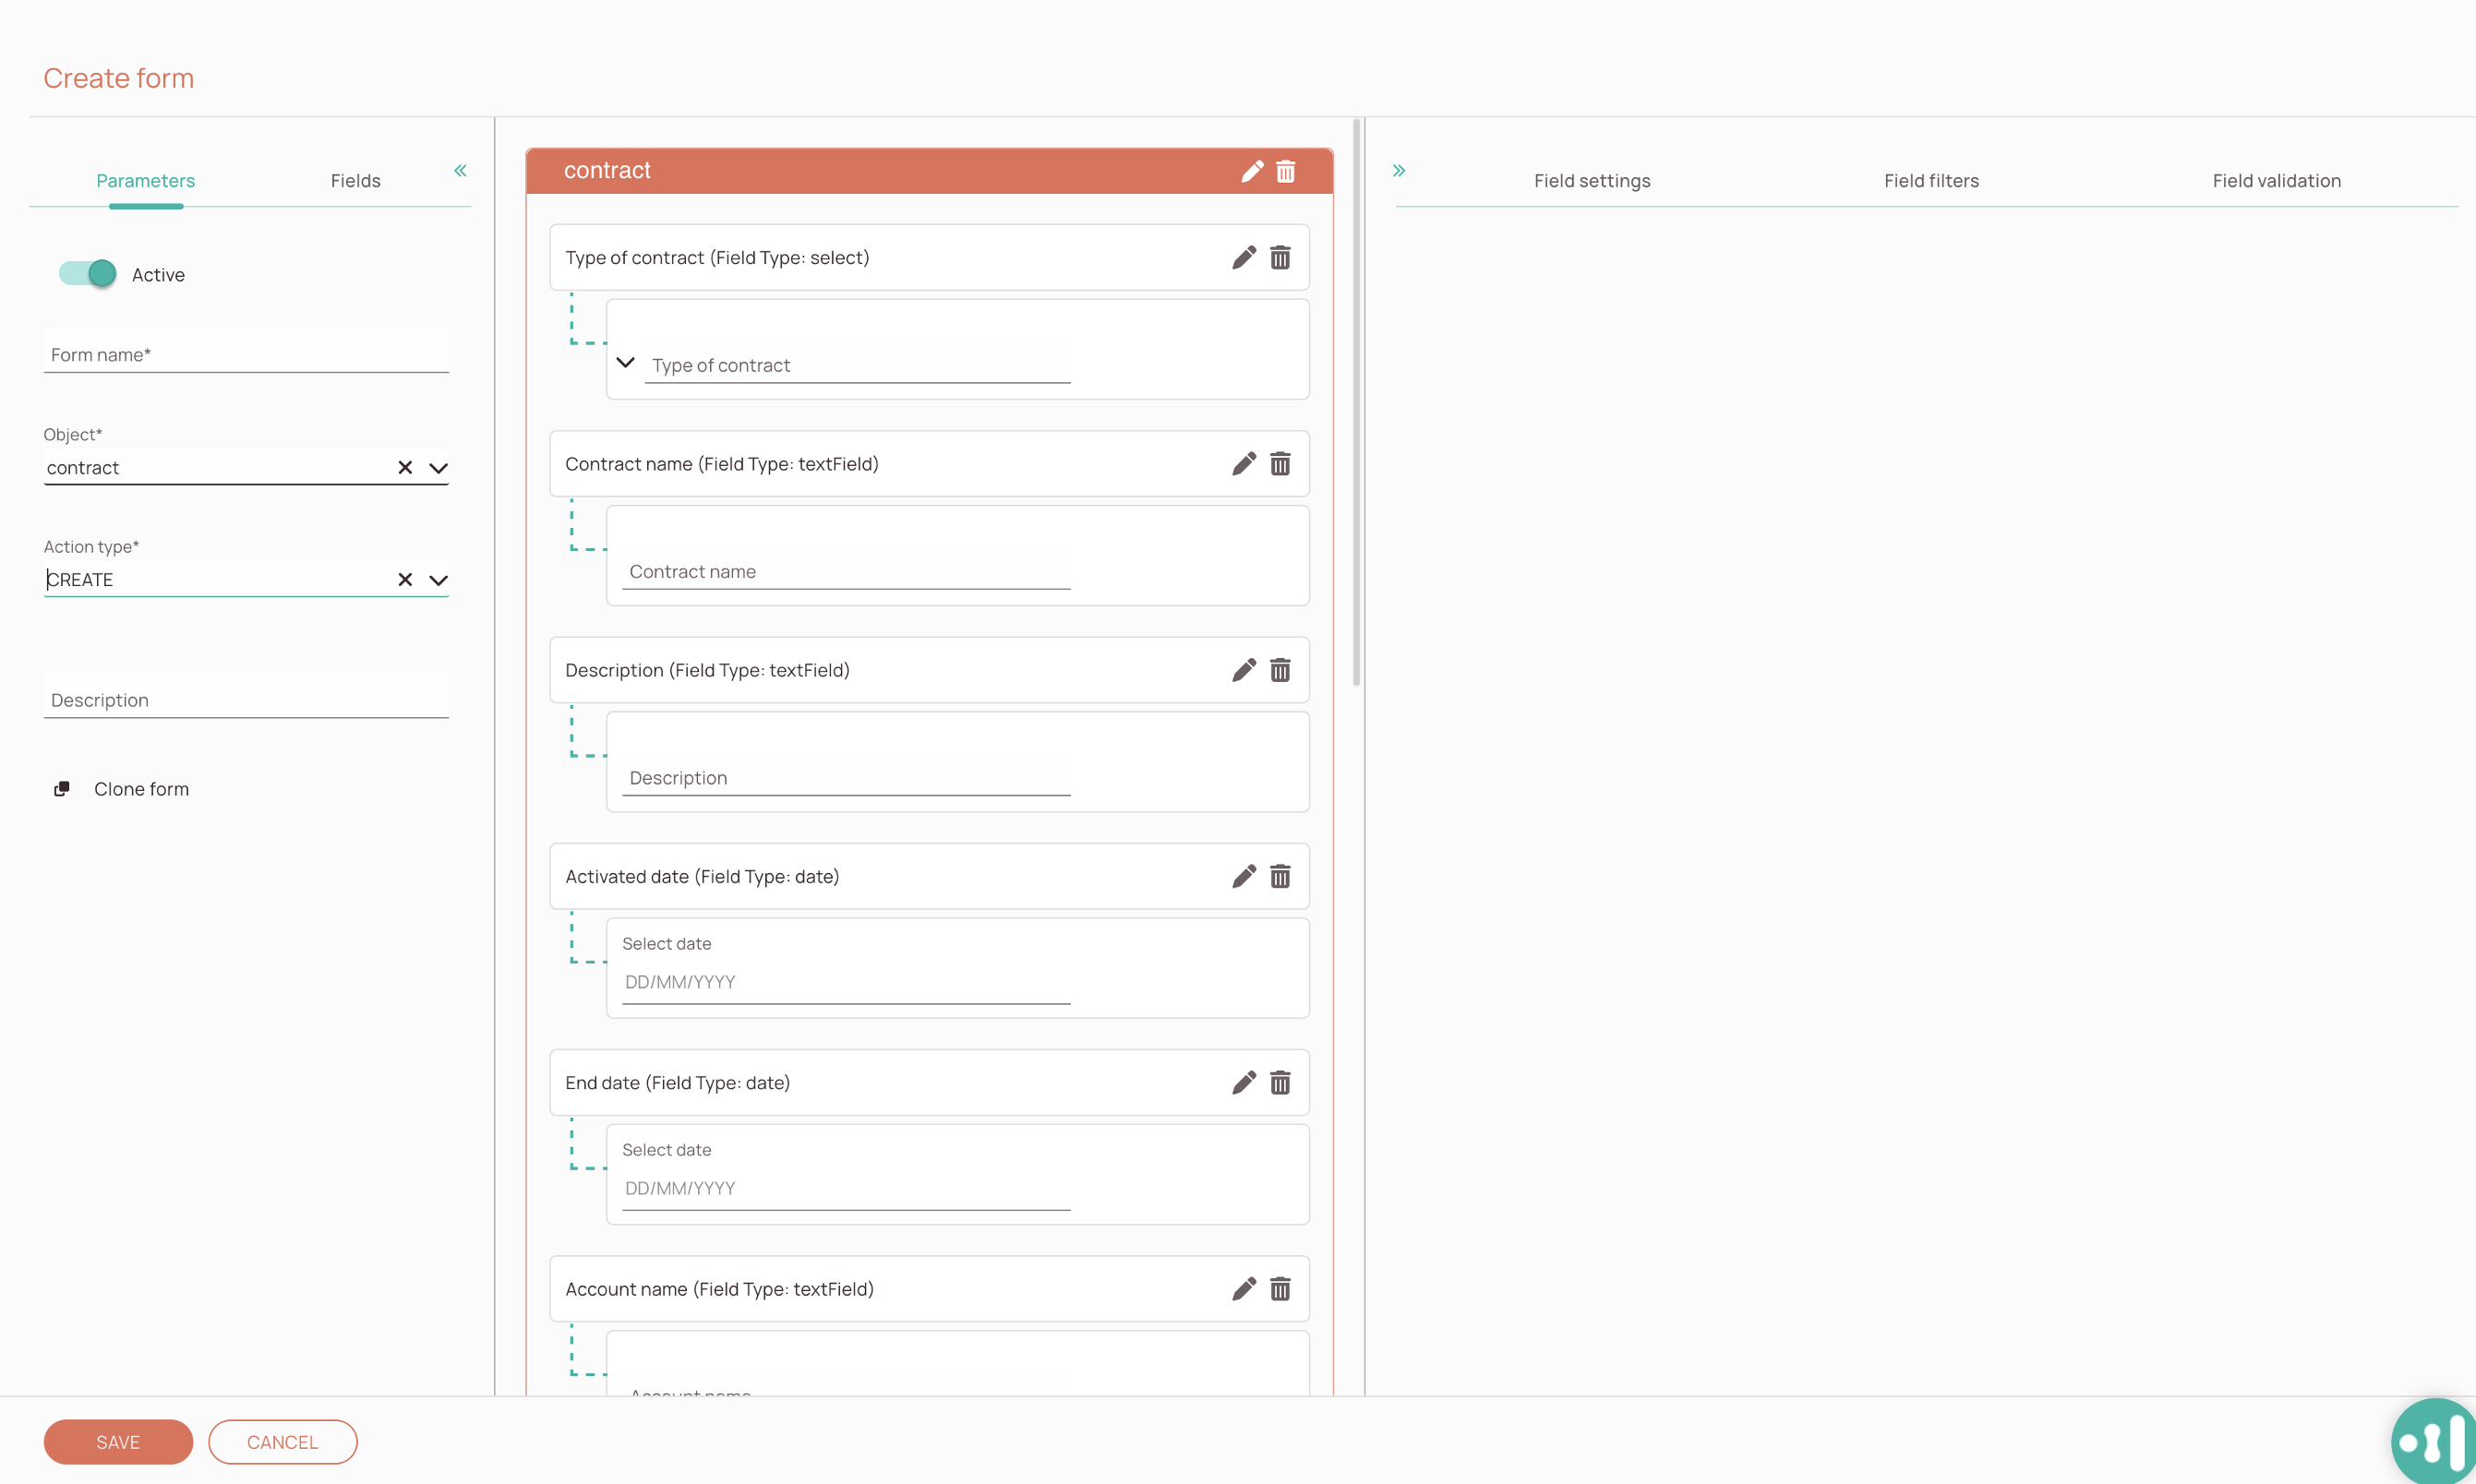
As usual, you have to select the "Object" contract, which will bring you all the fields available under contract.
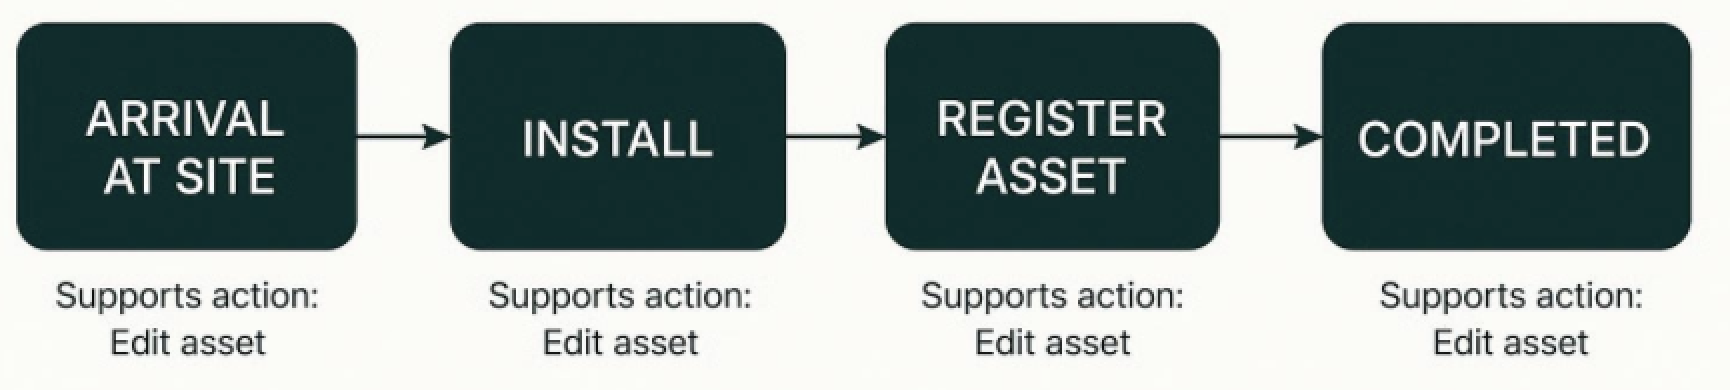
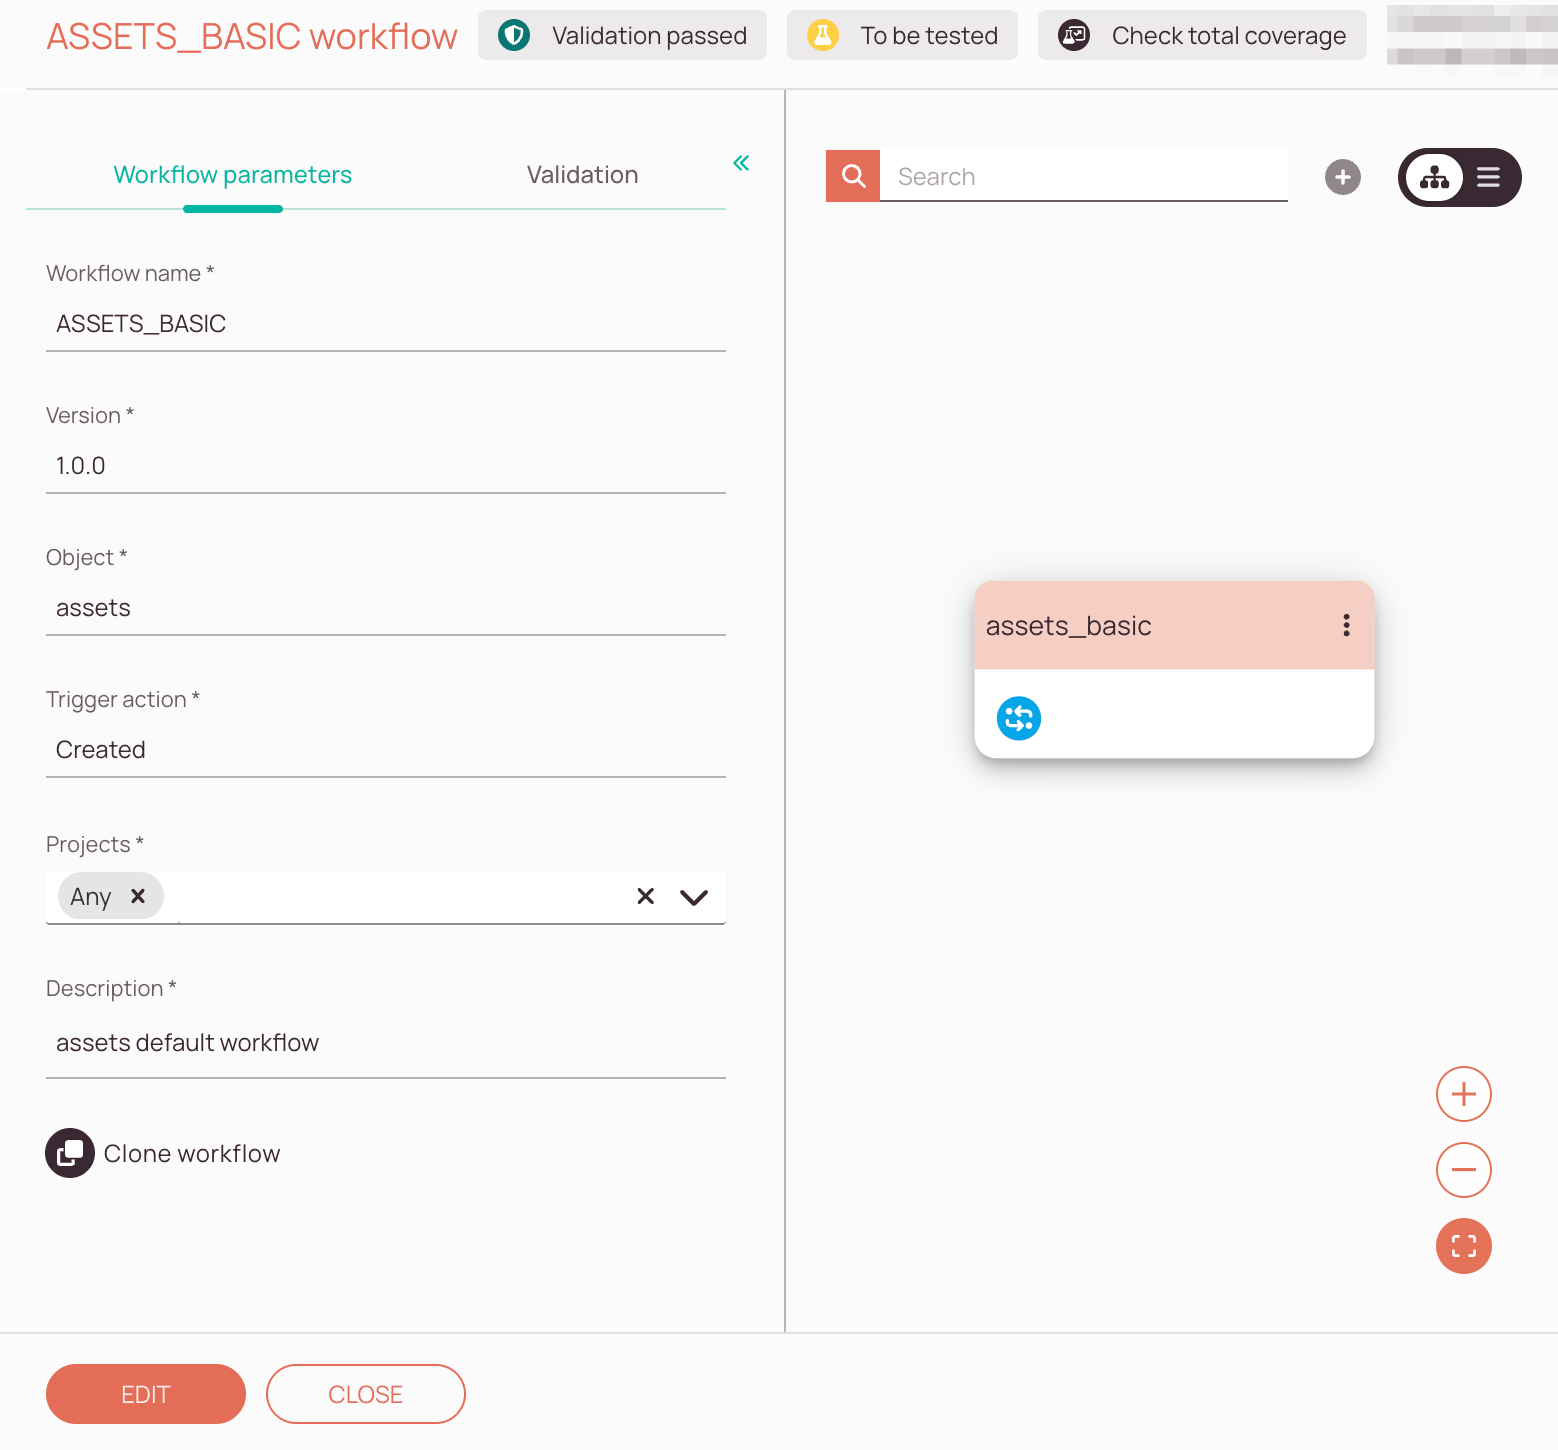
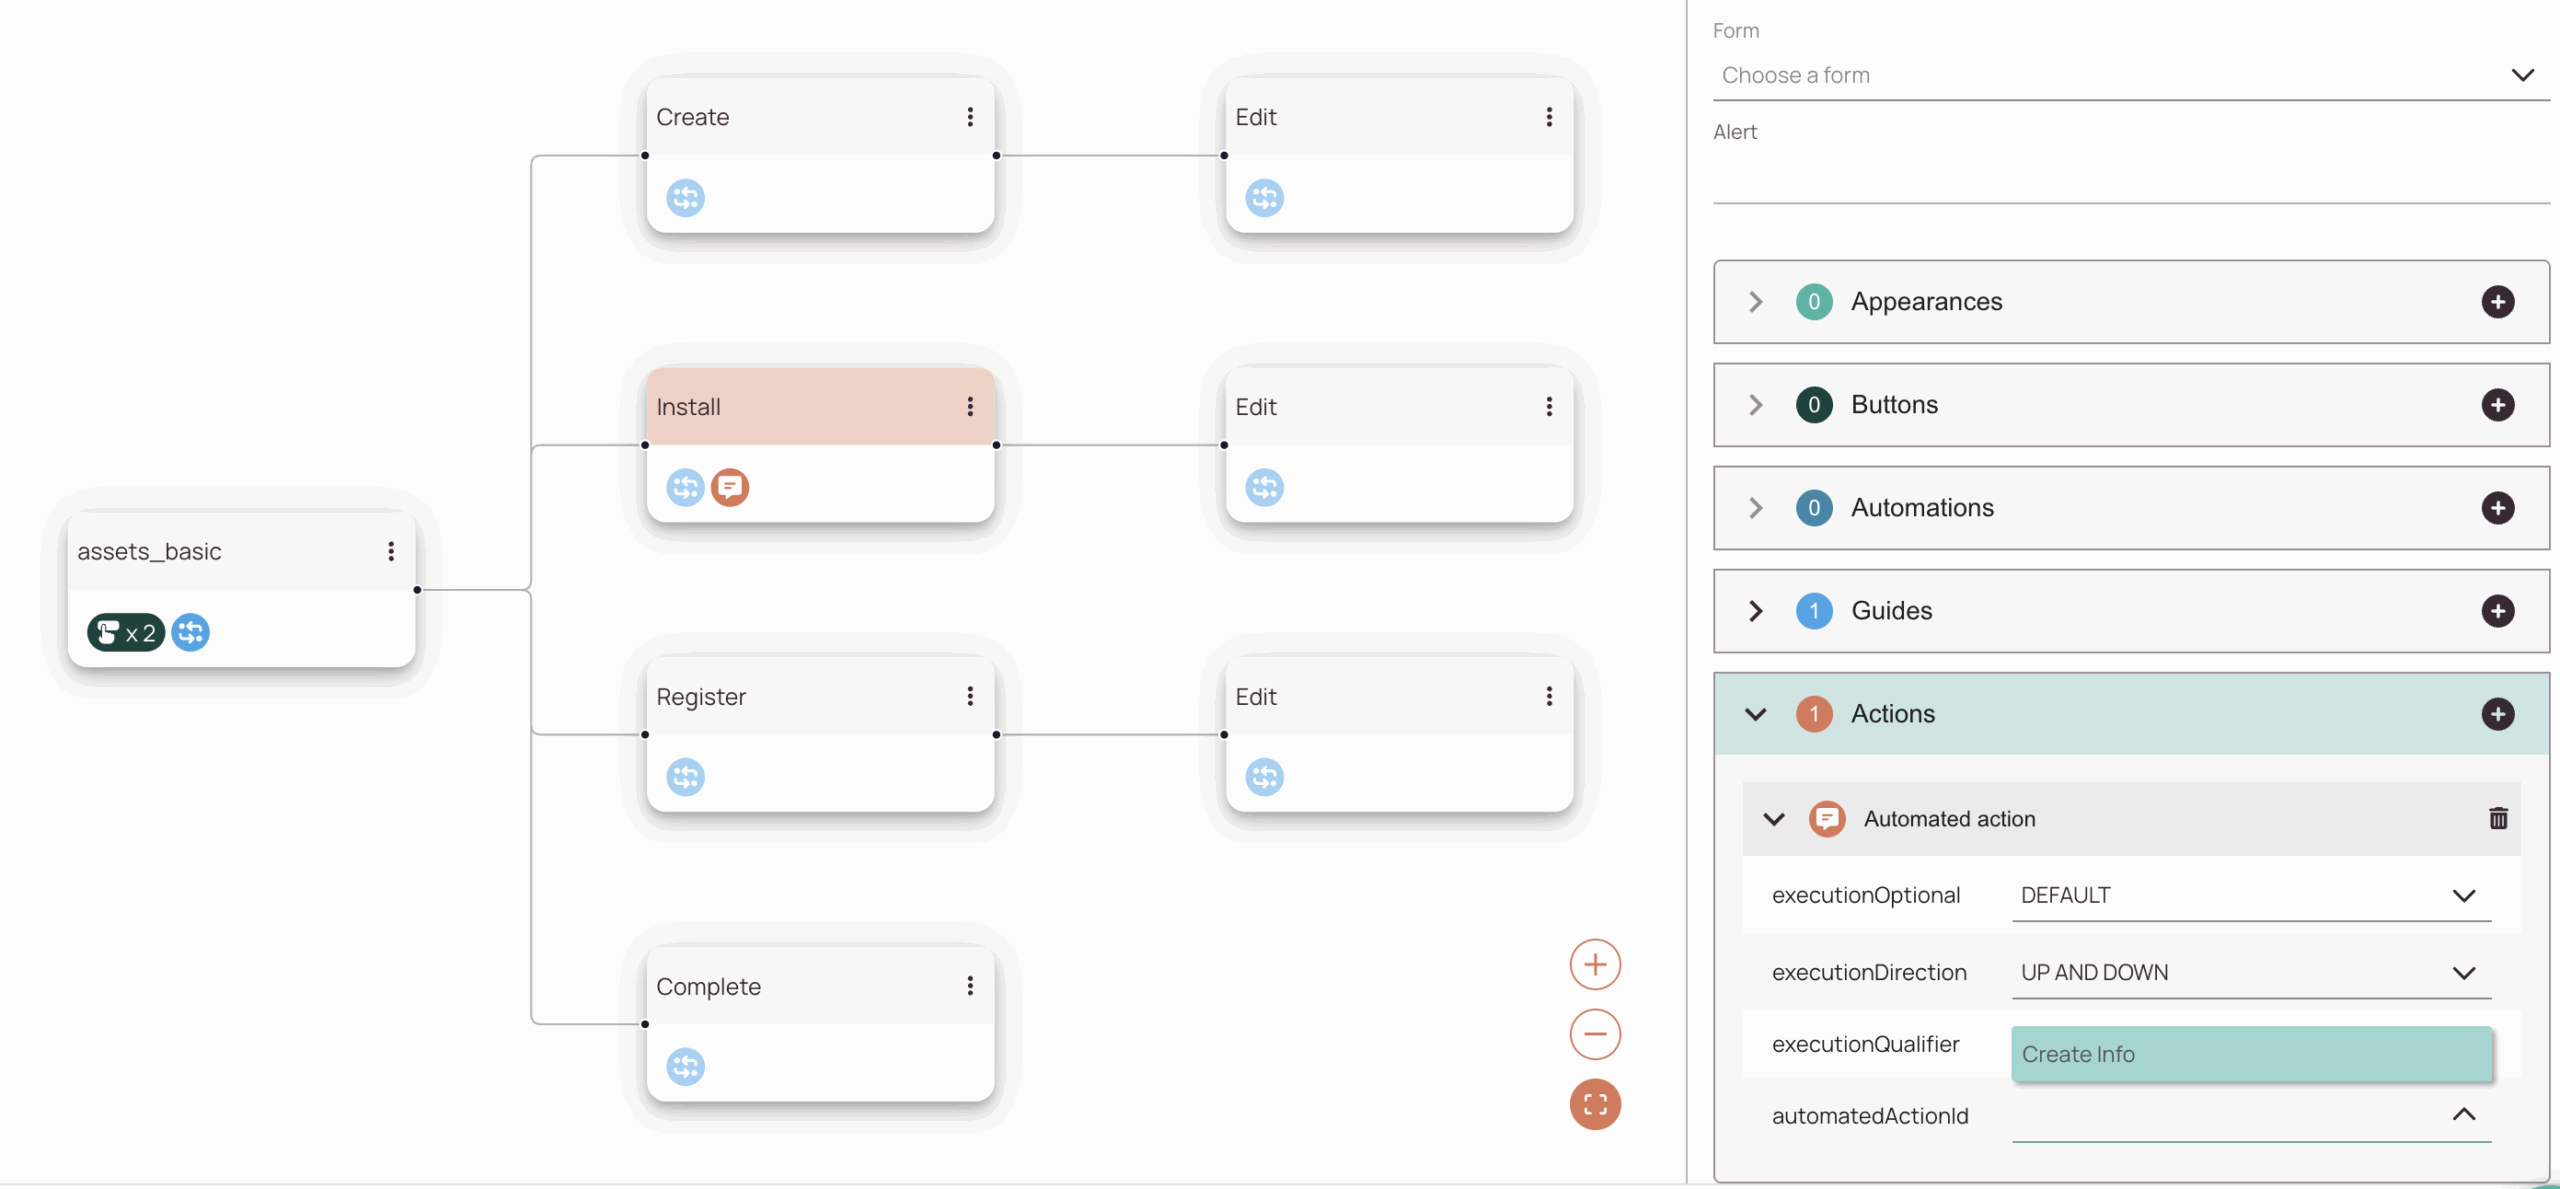
If you open the Workflows page, you will see that the ASSETS_BASIC workflow has already been created, with only one simple node.
You can check the workflow parameters for the ASSETS_BASIC workflow on the Workflows page.
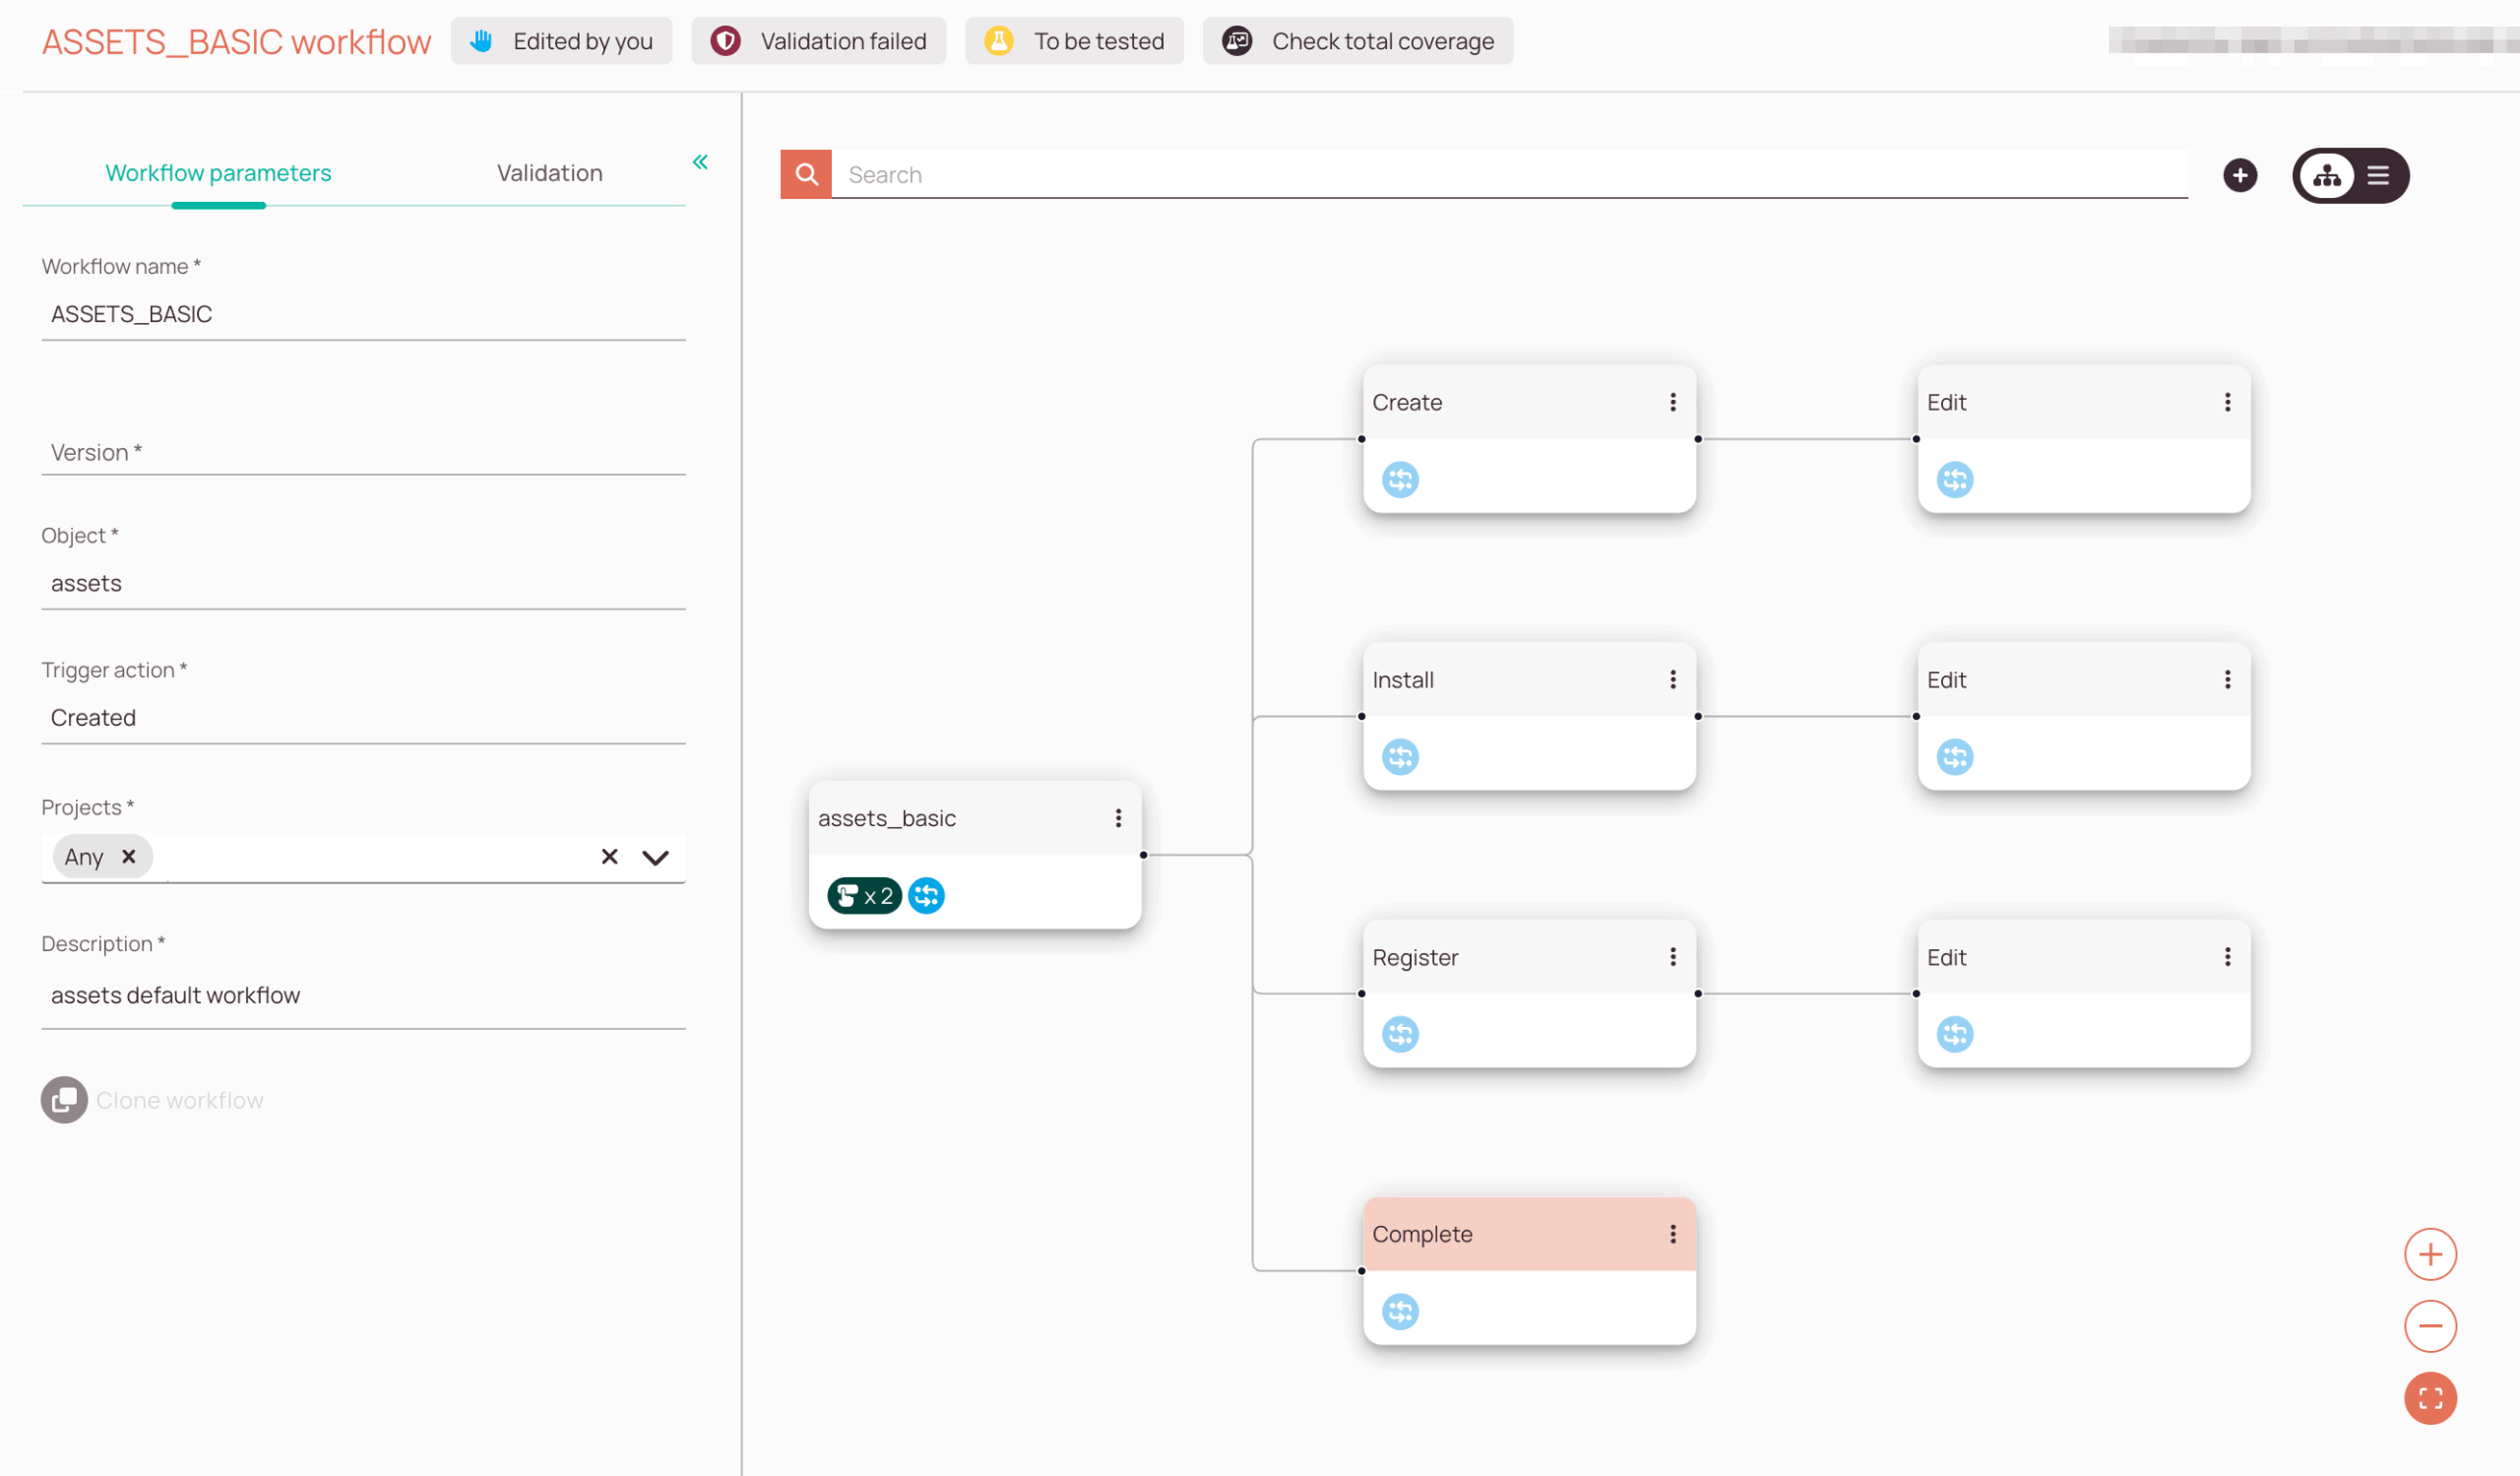
The workflow for the asset management scenario could for example look as follows in the system if you customize it further. Let's have a look on the tree view and the hierarchy view of the asset workflow.
On the right side, you can check the hierarchy view of our illustrative assets workflow.
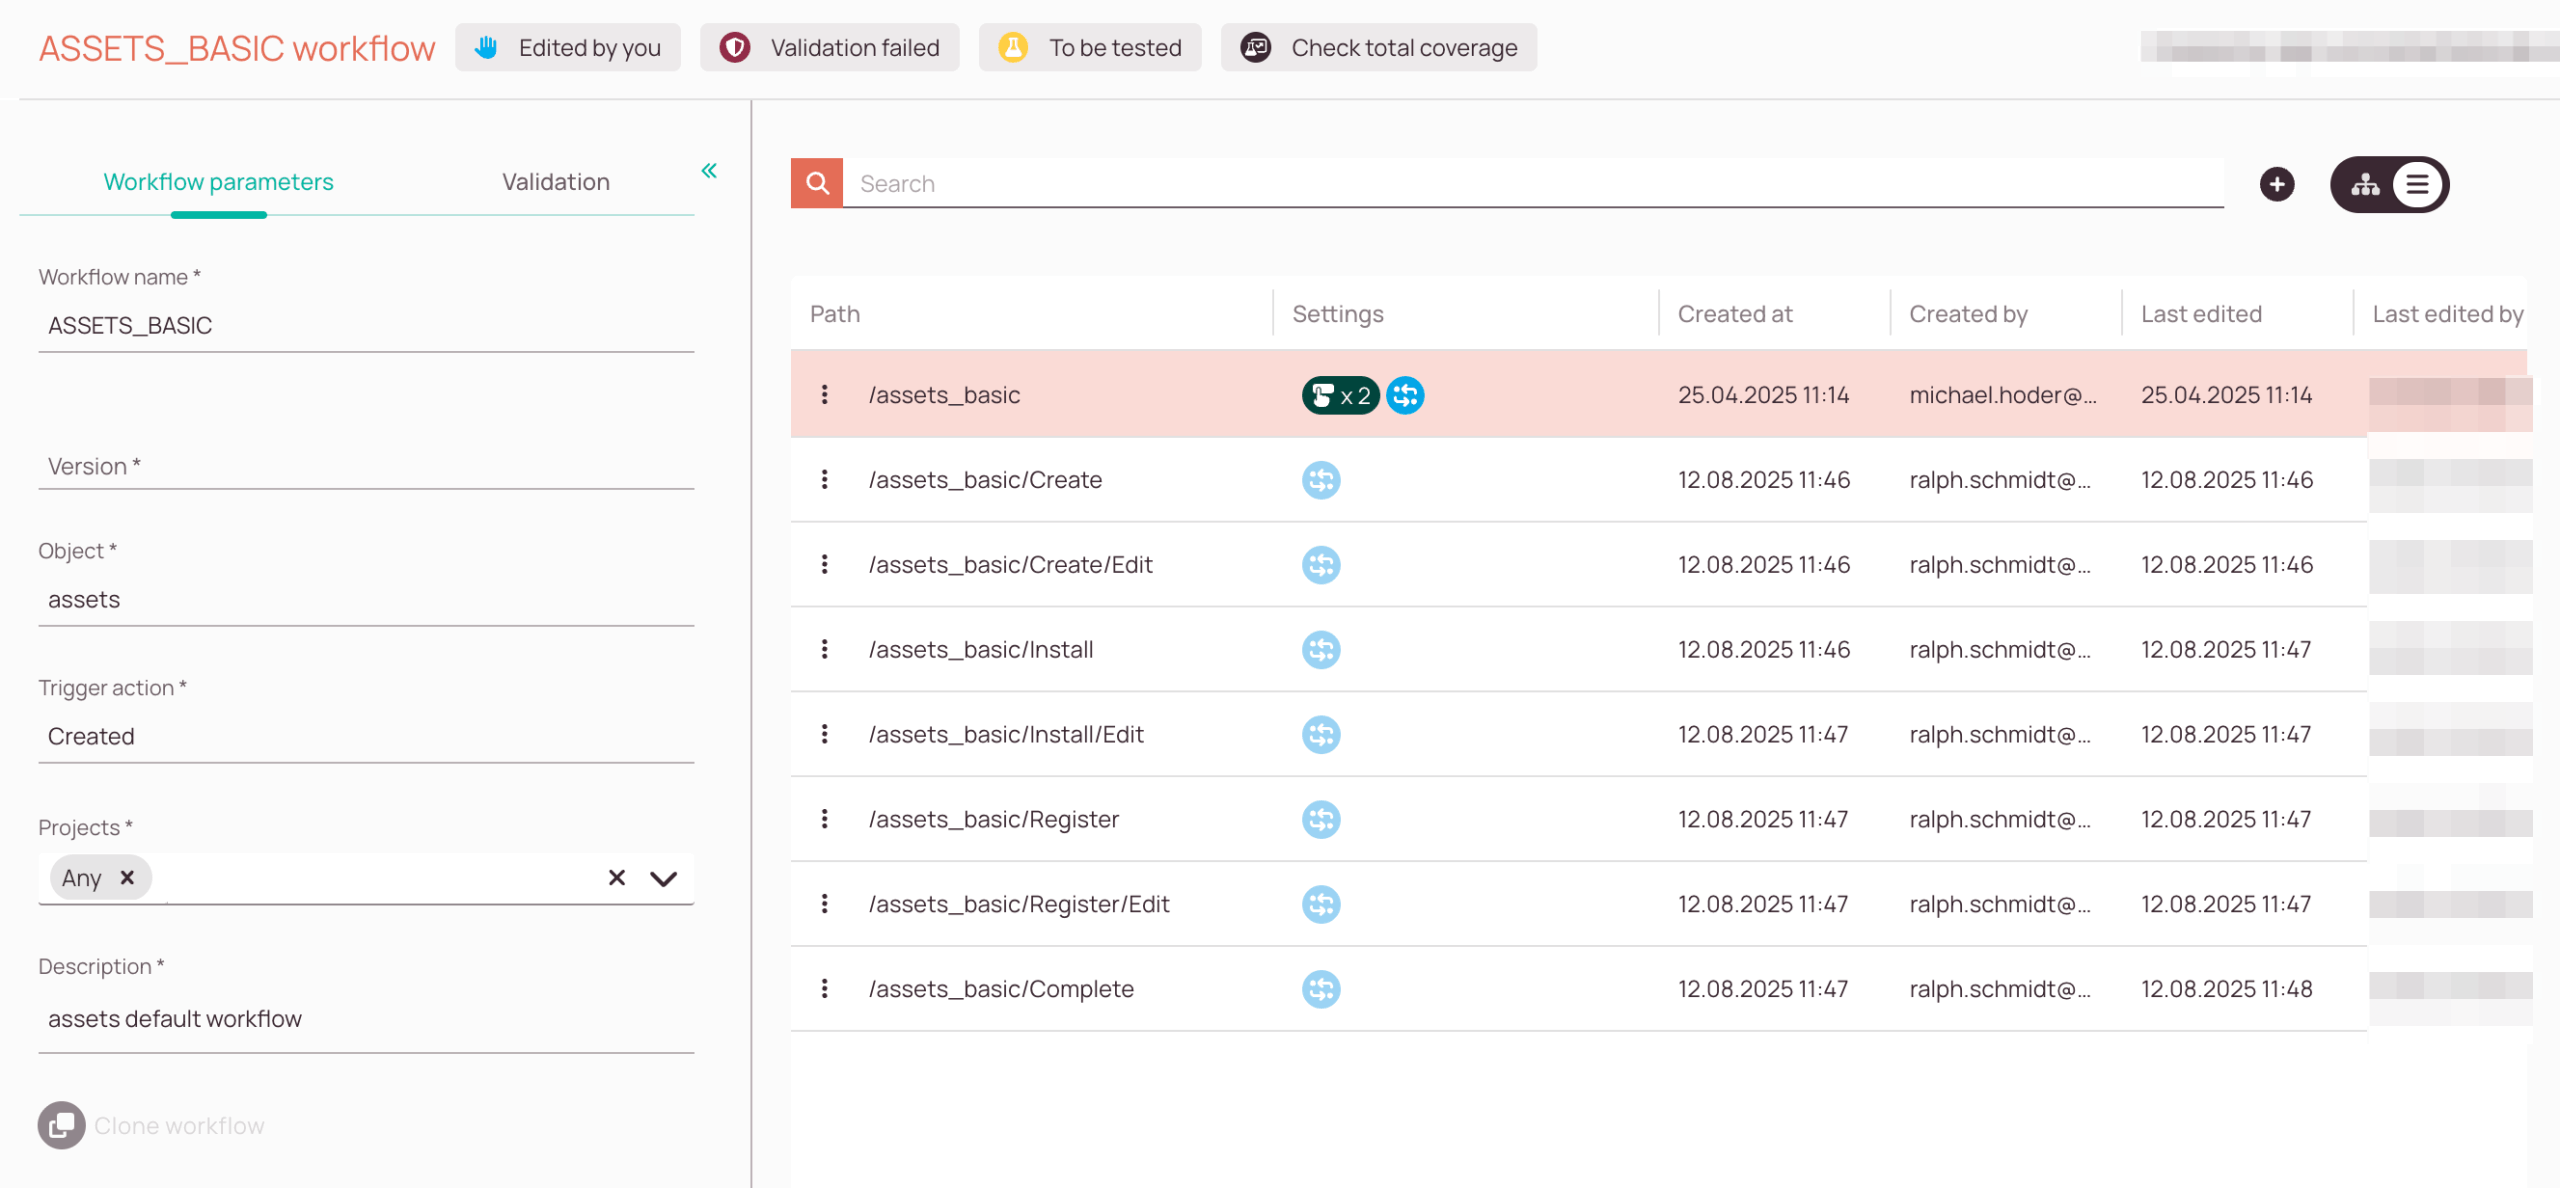
On the right side, you can check the list view of our illustrative assets workflow.
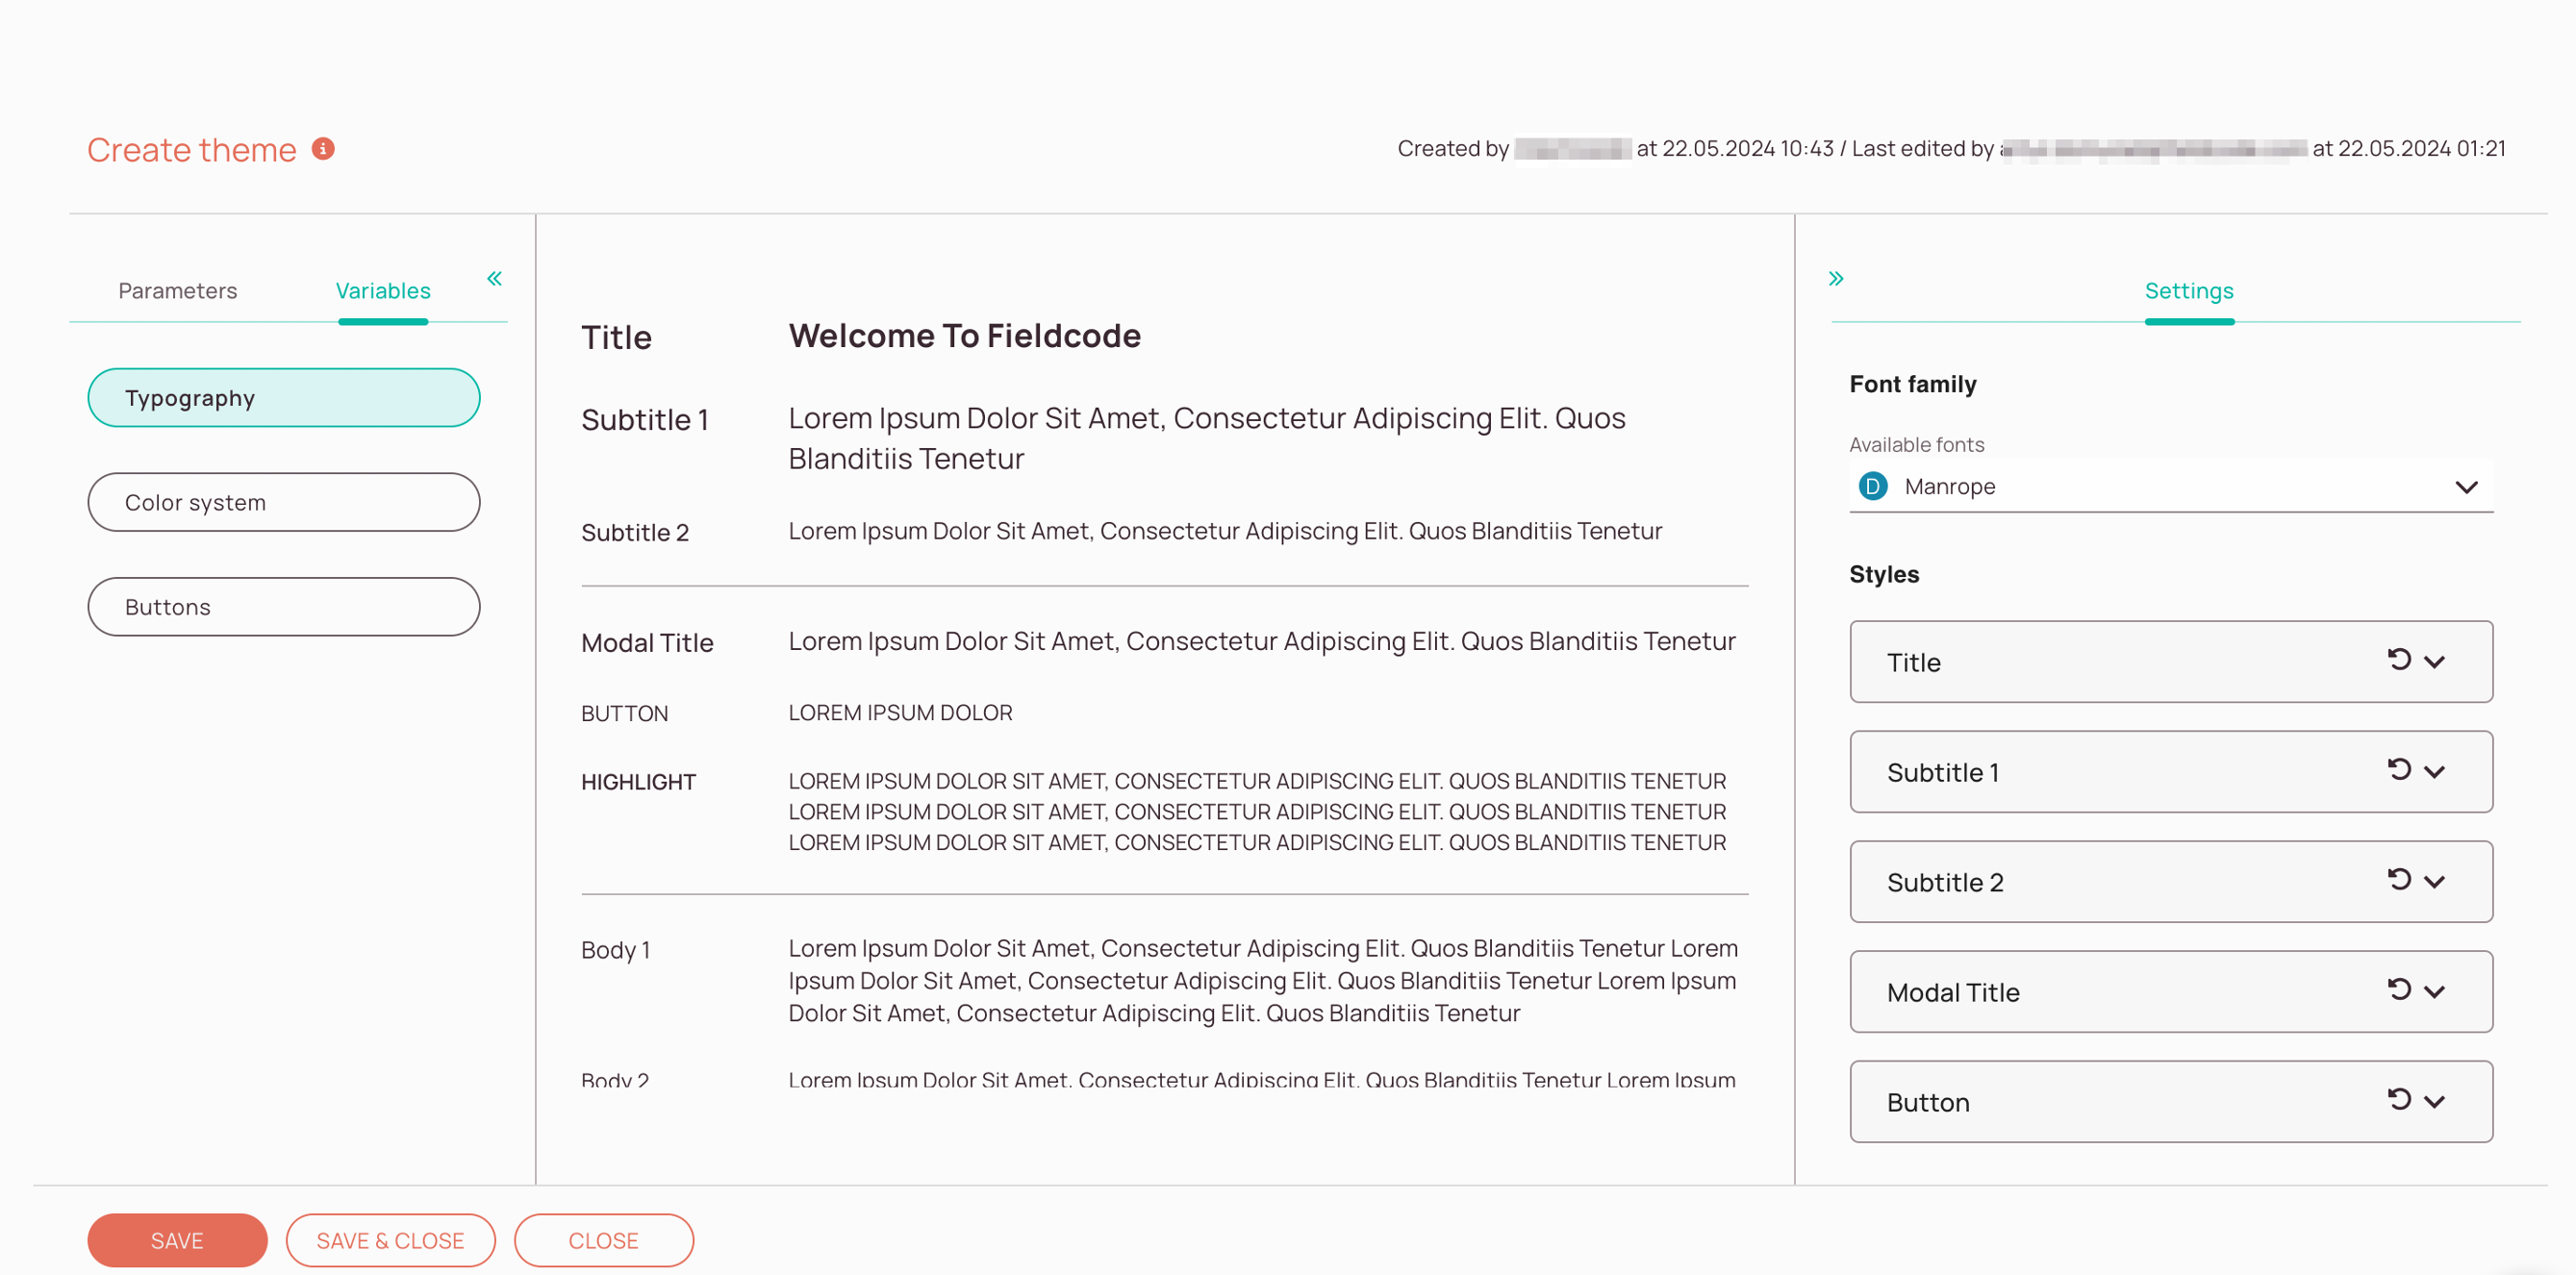
You will find the default Fieldcode theme when you open the Themes page.

You cannot edit the default theme, but you can create your own.
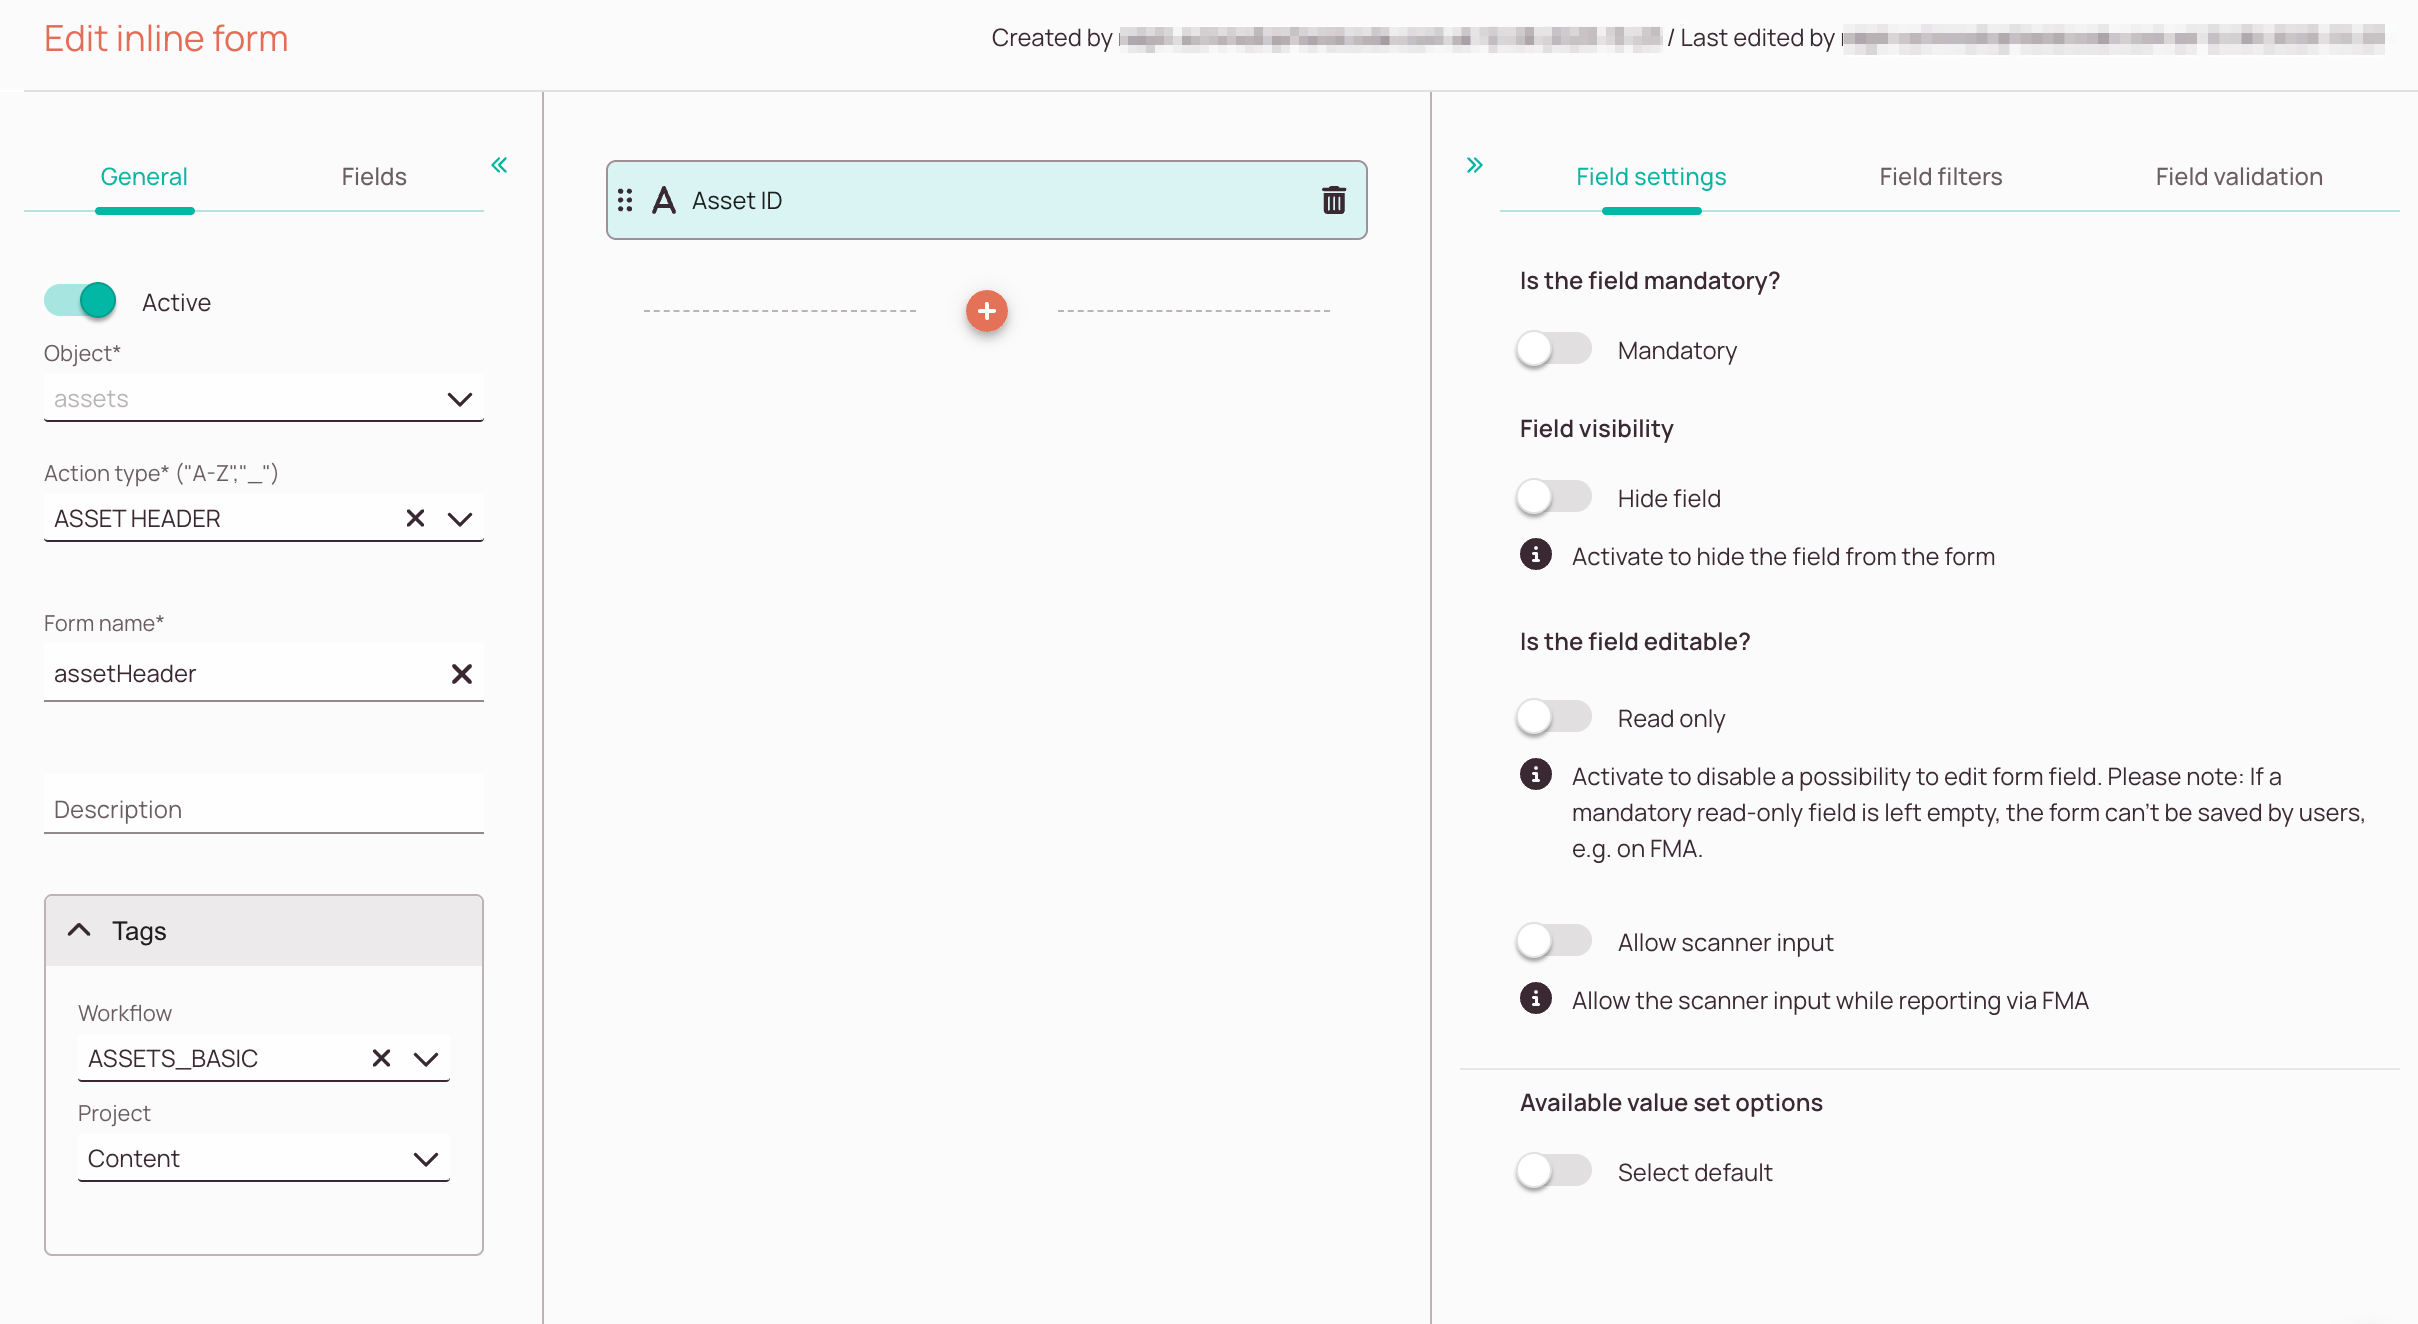
- Form name: You can define the form name to identify the correct form later when you look at the list of your custom forms. For example, the name "AssetProjectAssetsHeader" can work for the asset object header for the "ProjectAssets" project.
- Action type: Defines the purpose of the inline form's building block. For example, for a asset details header, the action type is "HEADER".
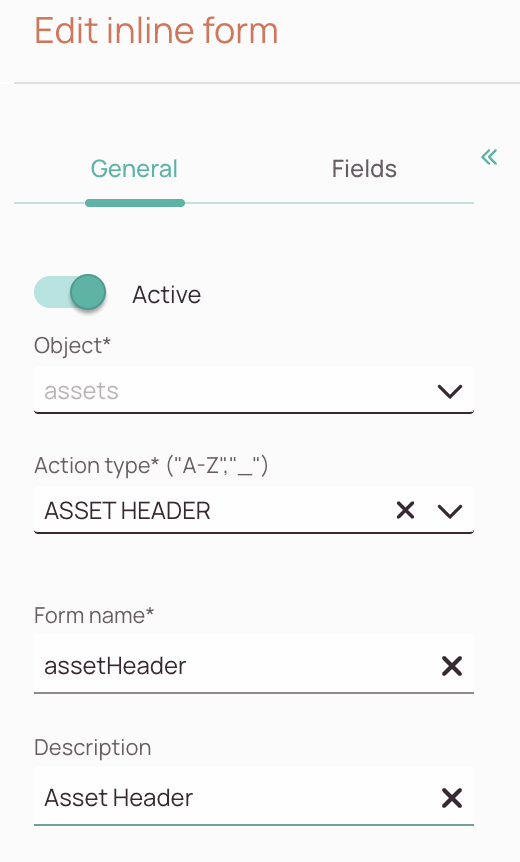
- Tags: Tags control the scope of the inline form. The first time you create an inline form under a specific action type for your object, you must leave the Tags untouched (empty), so that this is provided as the default layout. If you want to define a specific layout for a workflow or project, after you've created a default inline form, create another specific inline form with the same action type. This allows you to change the appearance even on a workflow or project level.
Action type: HEADER:
Action type: DETAILS:
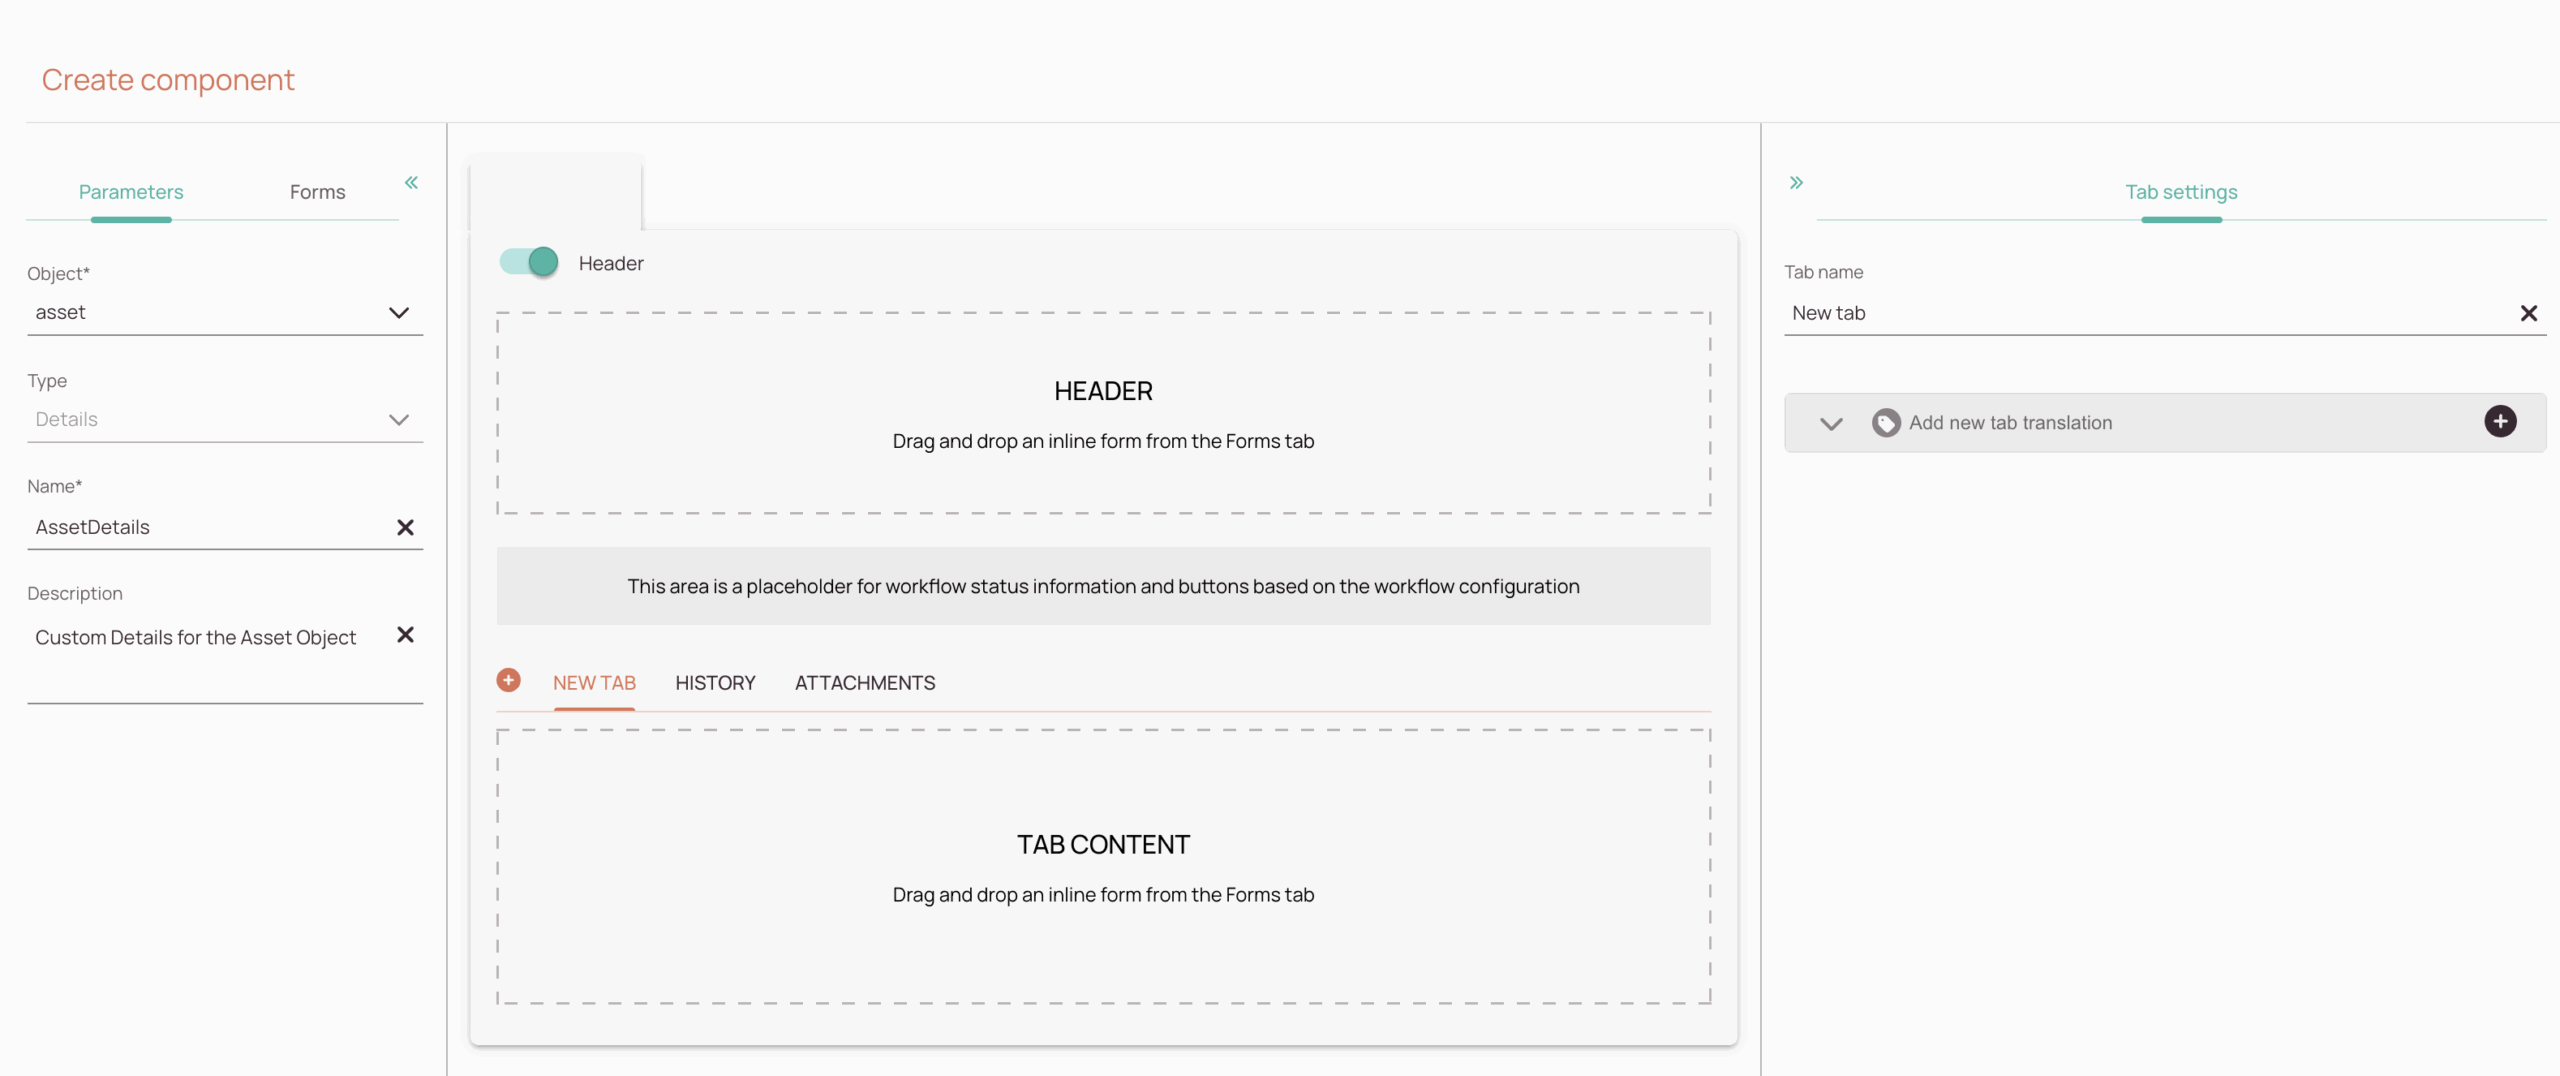
- Open the Create Component window, and select the asset object.
- Then check out the Forms tab, you should see the list of inline forms already created for the asset
(eg. Header and Details). - Drag & drop them in the middle section to build your details.
- Example of how the Details Component for your assets could look ->
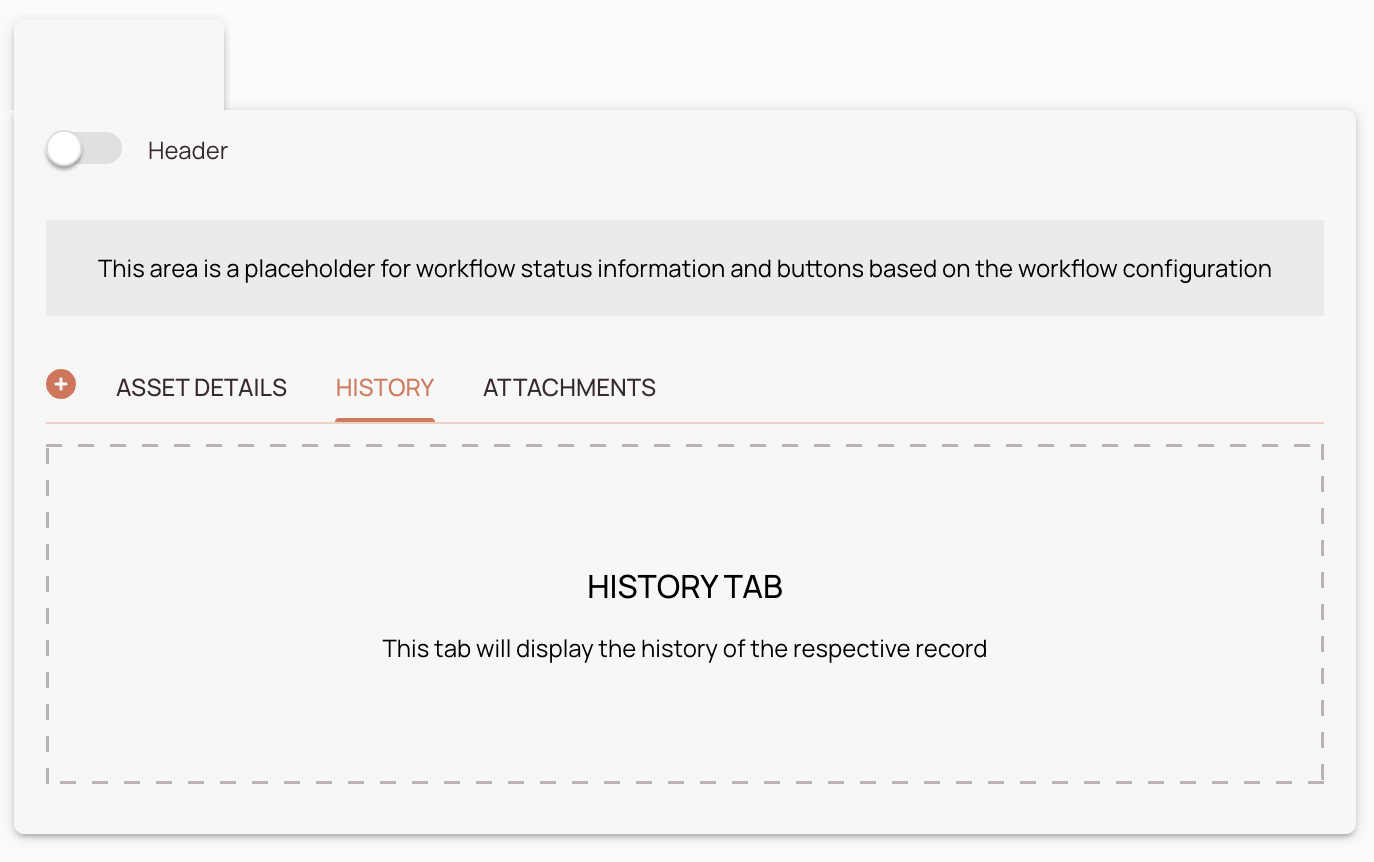
- On the right side, you can rename your tab to match its content.
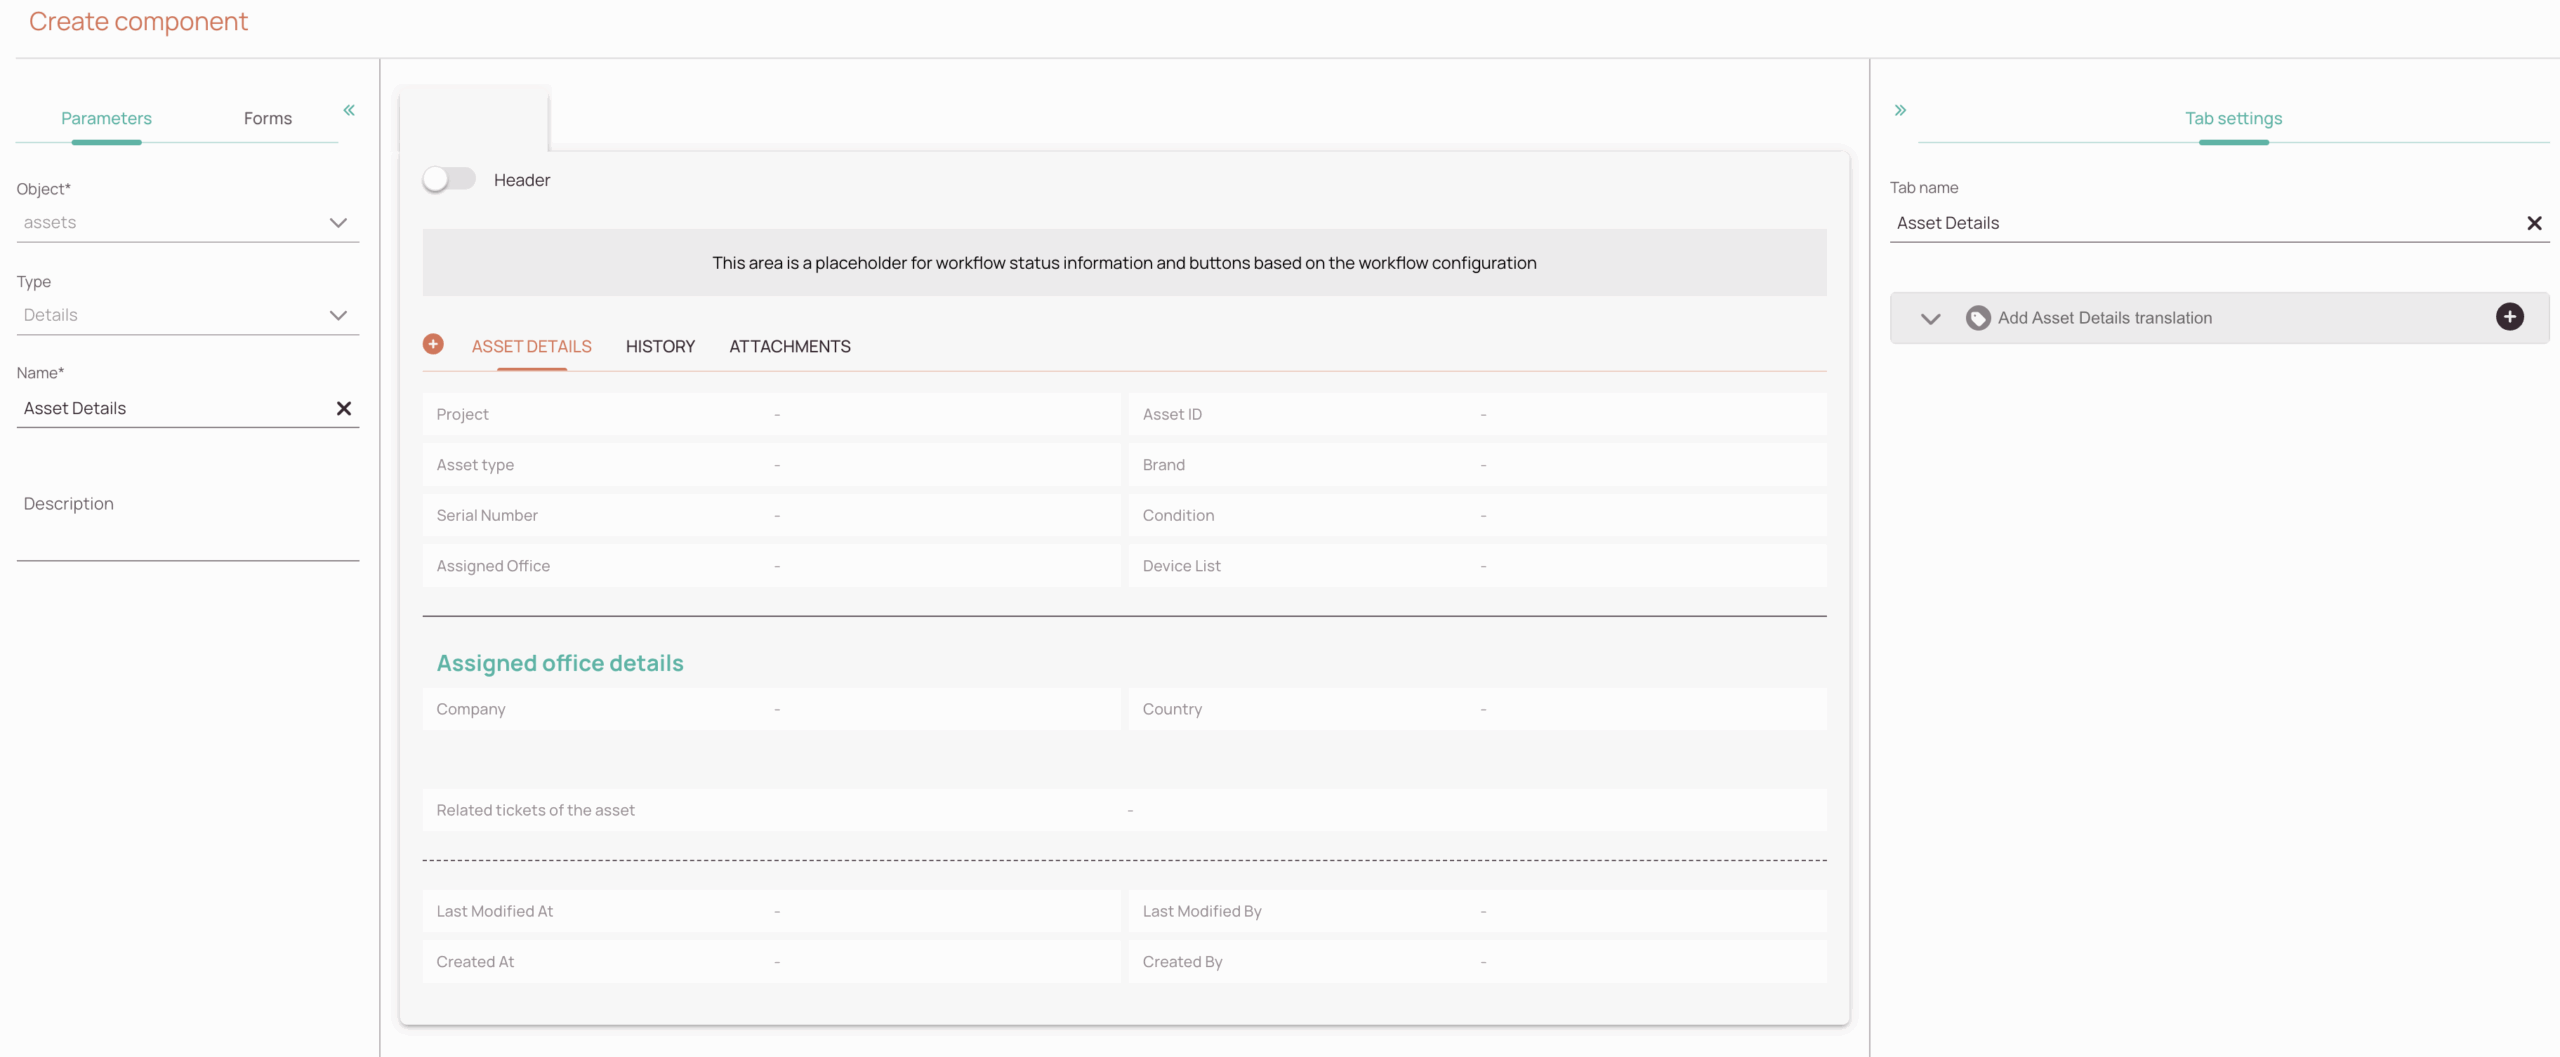
- The History tab is provided by default and is an integral part of the component, you can't remove it, but you can reorder the tabs by simply dragging and moving them.
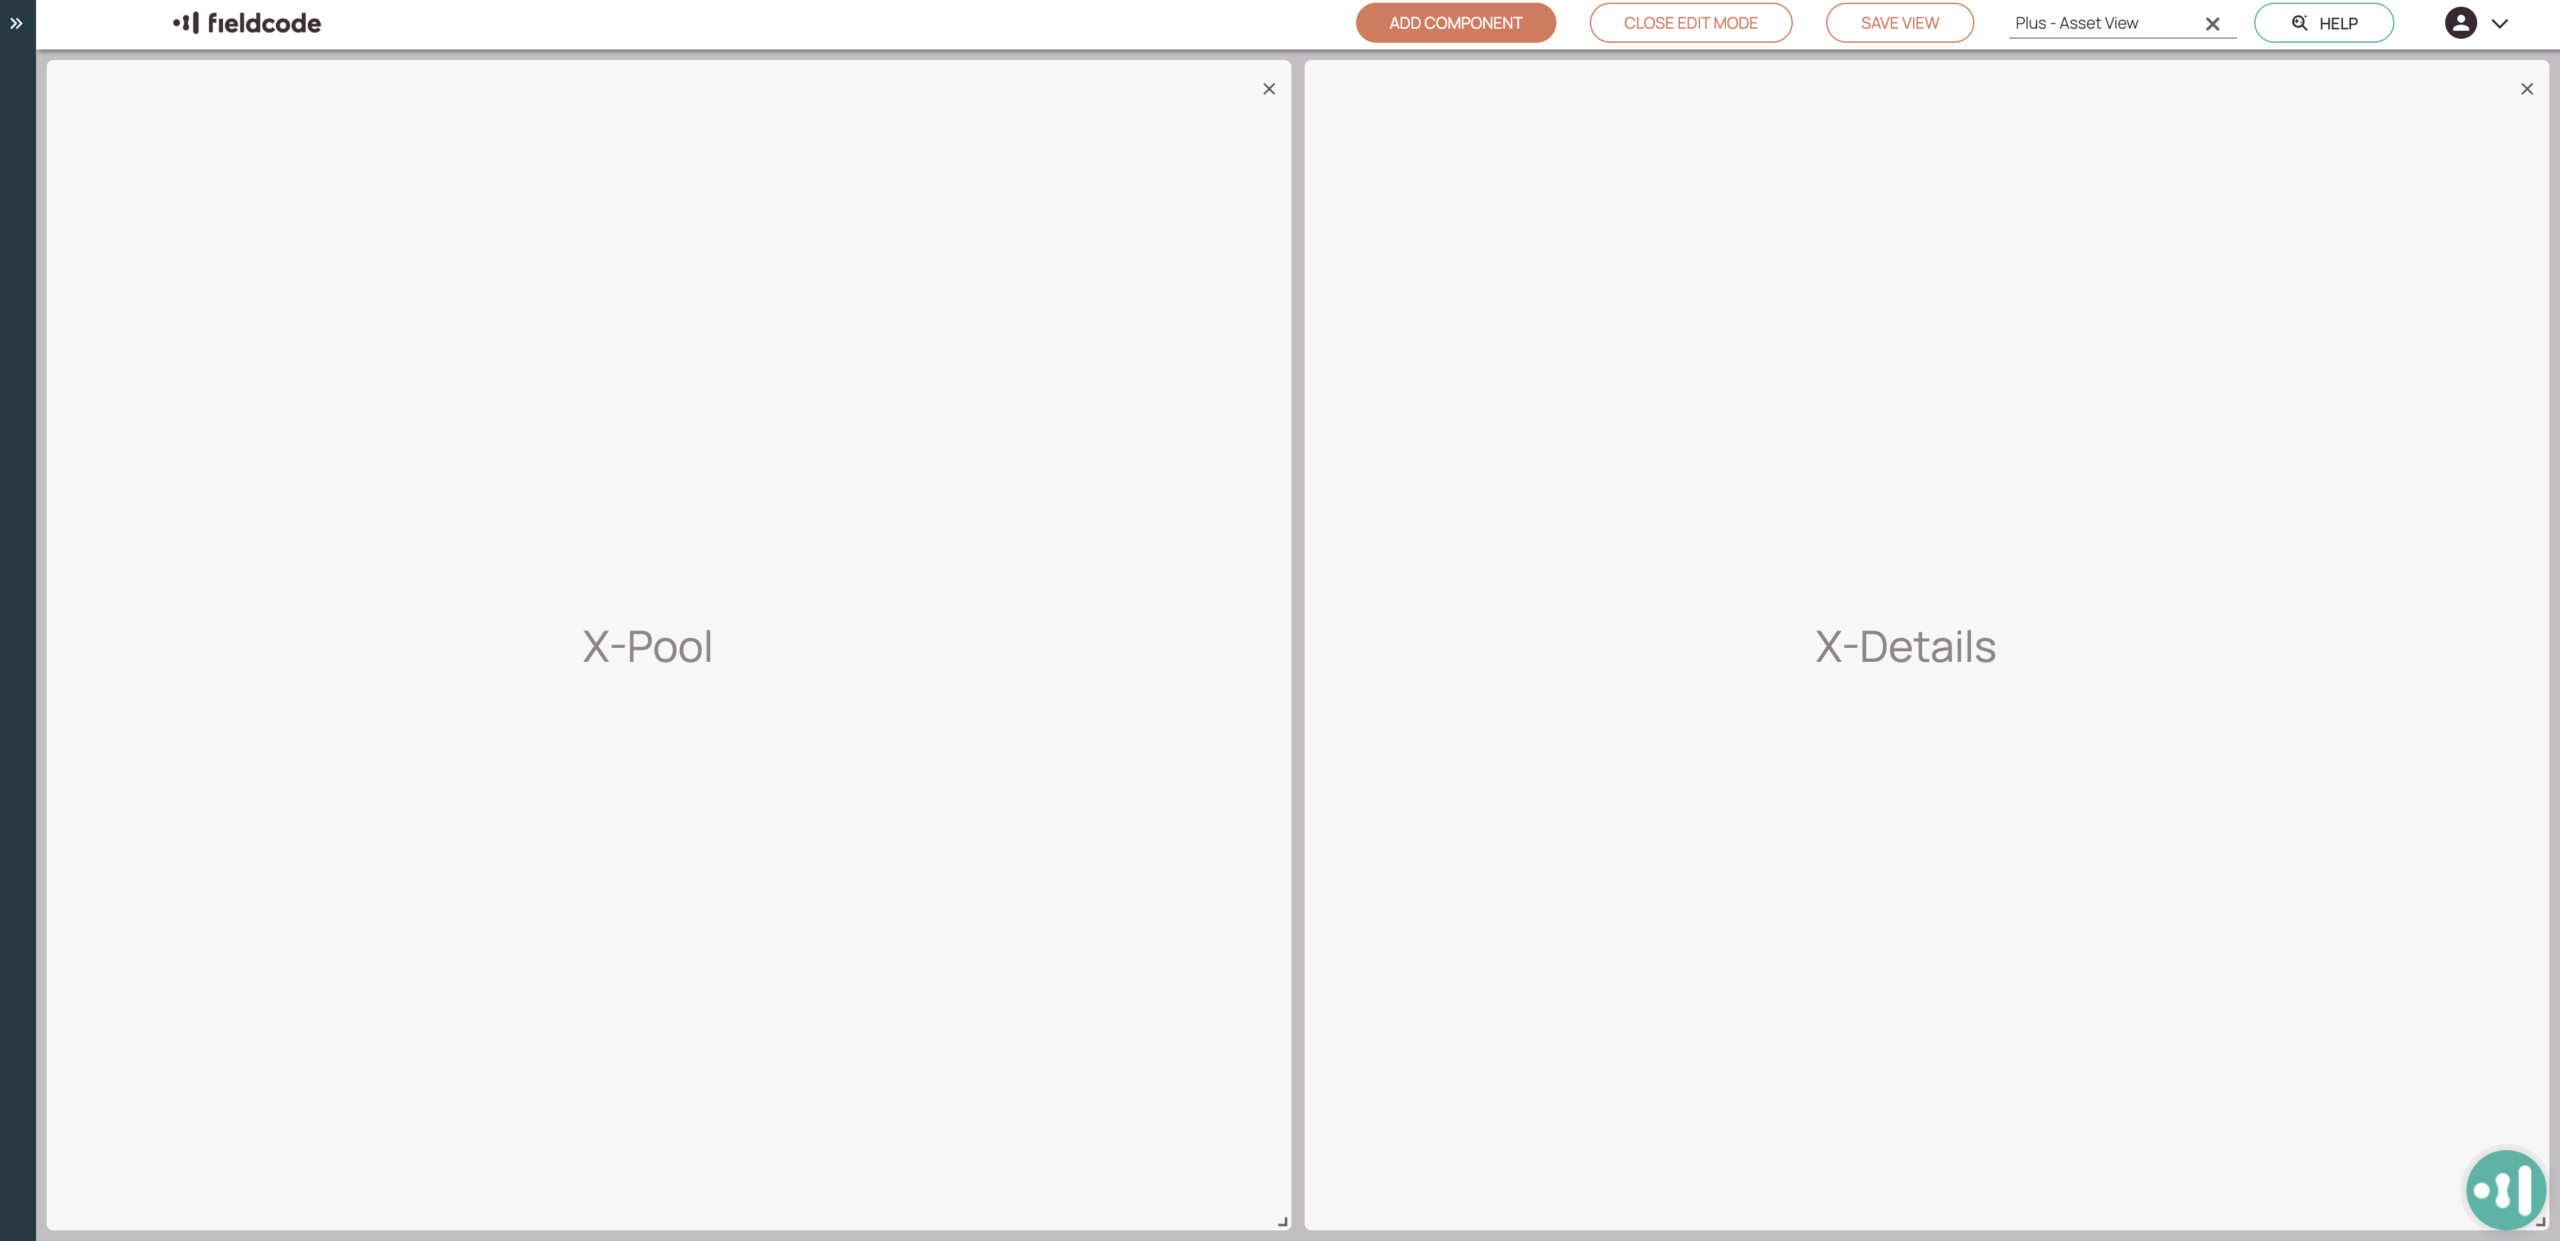
Open the View Designer inside the Work place and create a new view:
Select X-Pool and then X-Details from the list of components:

We recommend the following setup, which can be adapted to your usual screen resolution and the amount of data to be displayed:
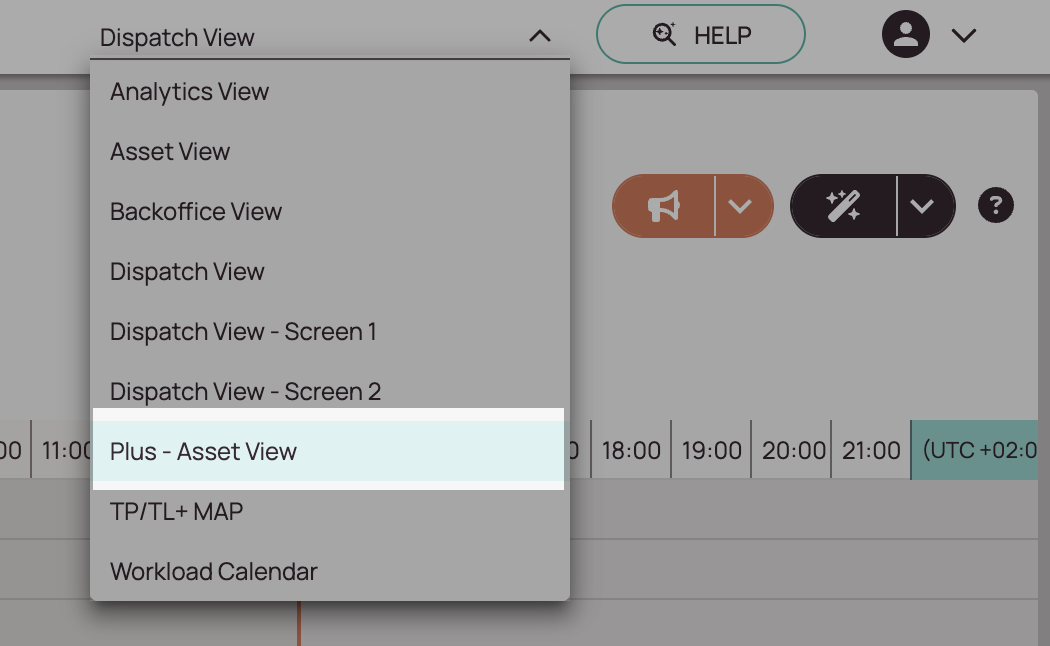
After you create the view, you should be able to select this view inside your Work place:
- To see the records created for your custom object, you have to select your model from the X-Pool Dropdown.
- Click on a record to open the X-Details.
Simply click on the Create Object Record menu inside Work place:
It opens the CREATE form of the custom object. If you haven't configured a create form, it opens the default form with all the fields of your object. Select the asset object:
Select the project which is assigned to your object:
Tips:
- You can create records directly from the X-Pool
- If you create a record from there, you are not required to select the asset first
- This can save you some time

Now you can check again if you are satisfied with your Custom Create Form and start creating your first records if so!

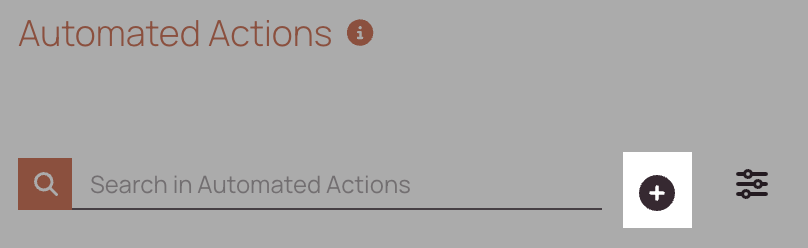
Open the Automated Actions page and click on the plus button:
Tip: You can implement automated actions directly into your workflow. This is the new and recommended way.
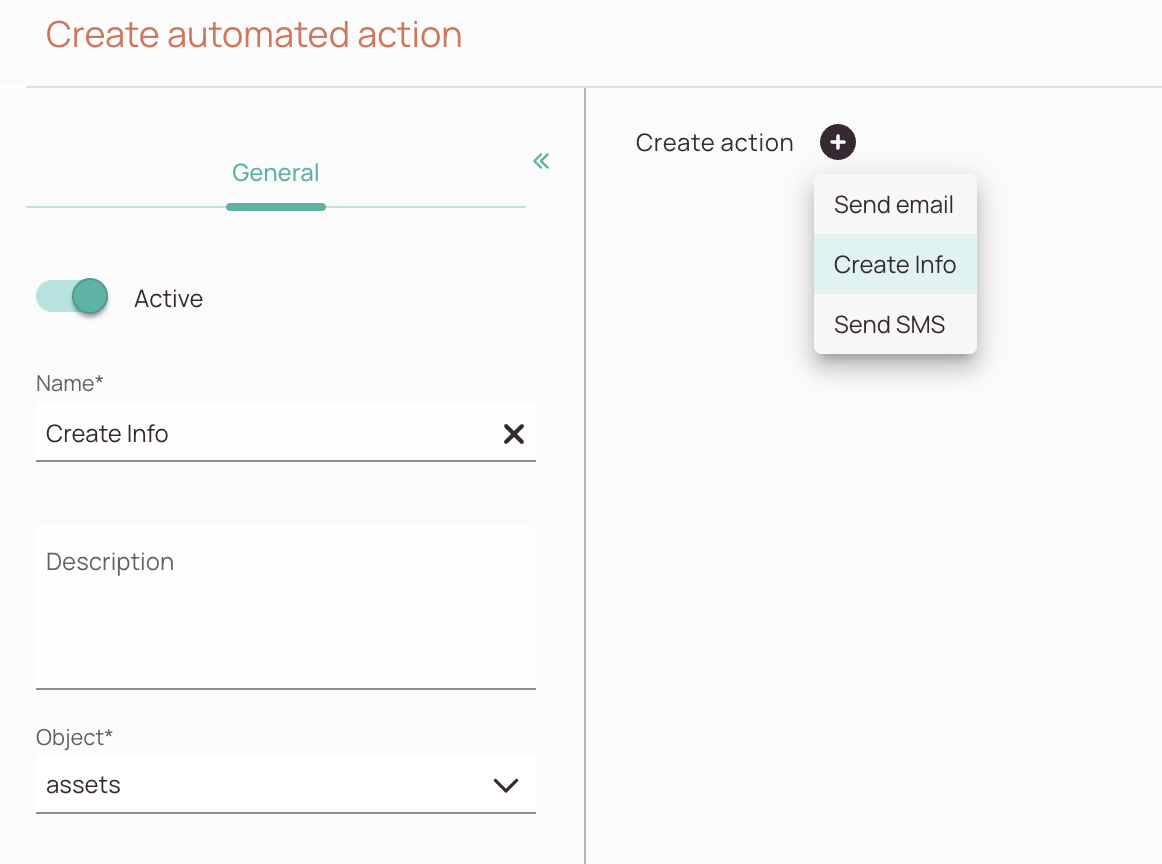
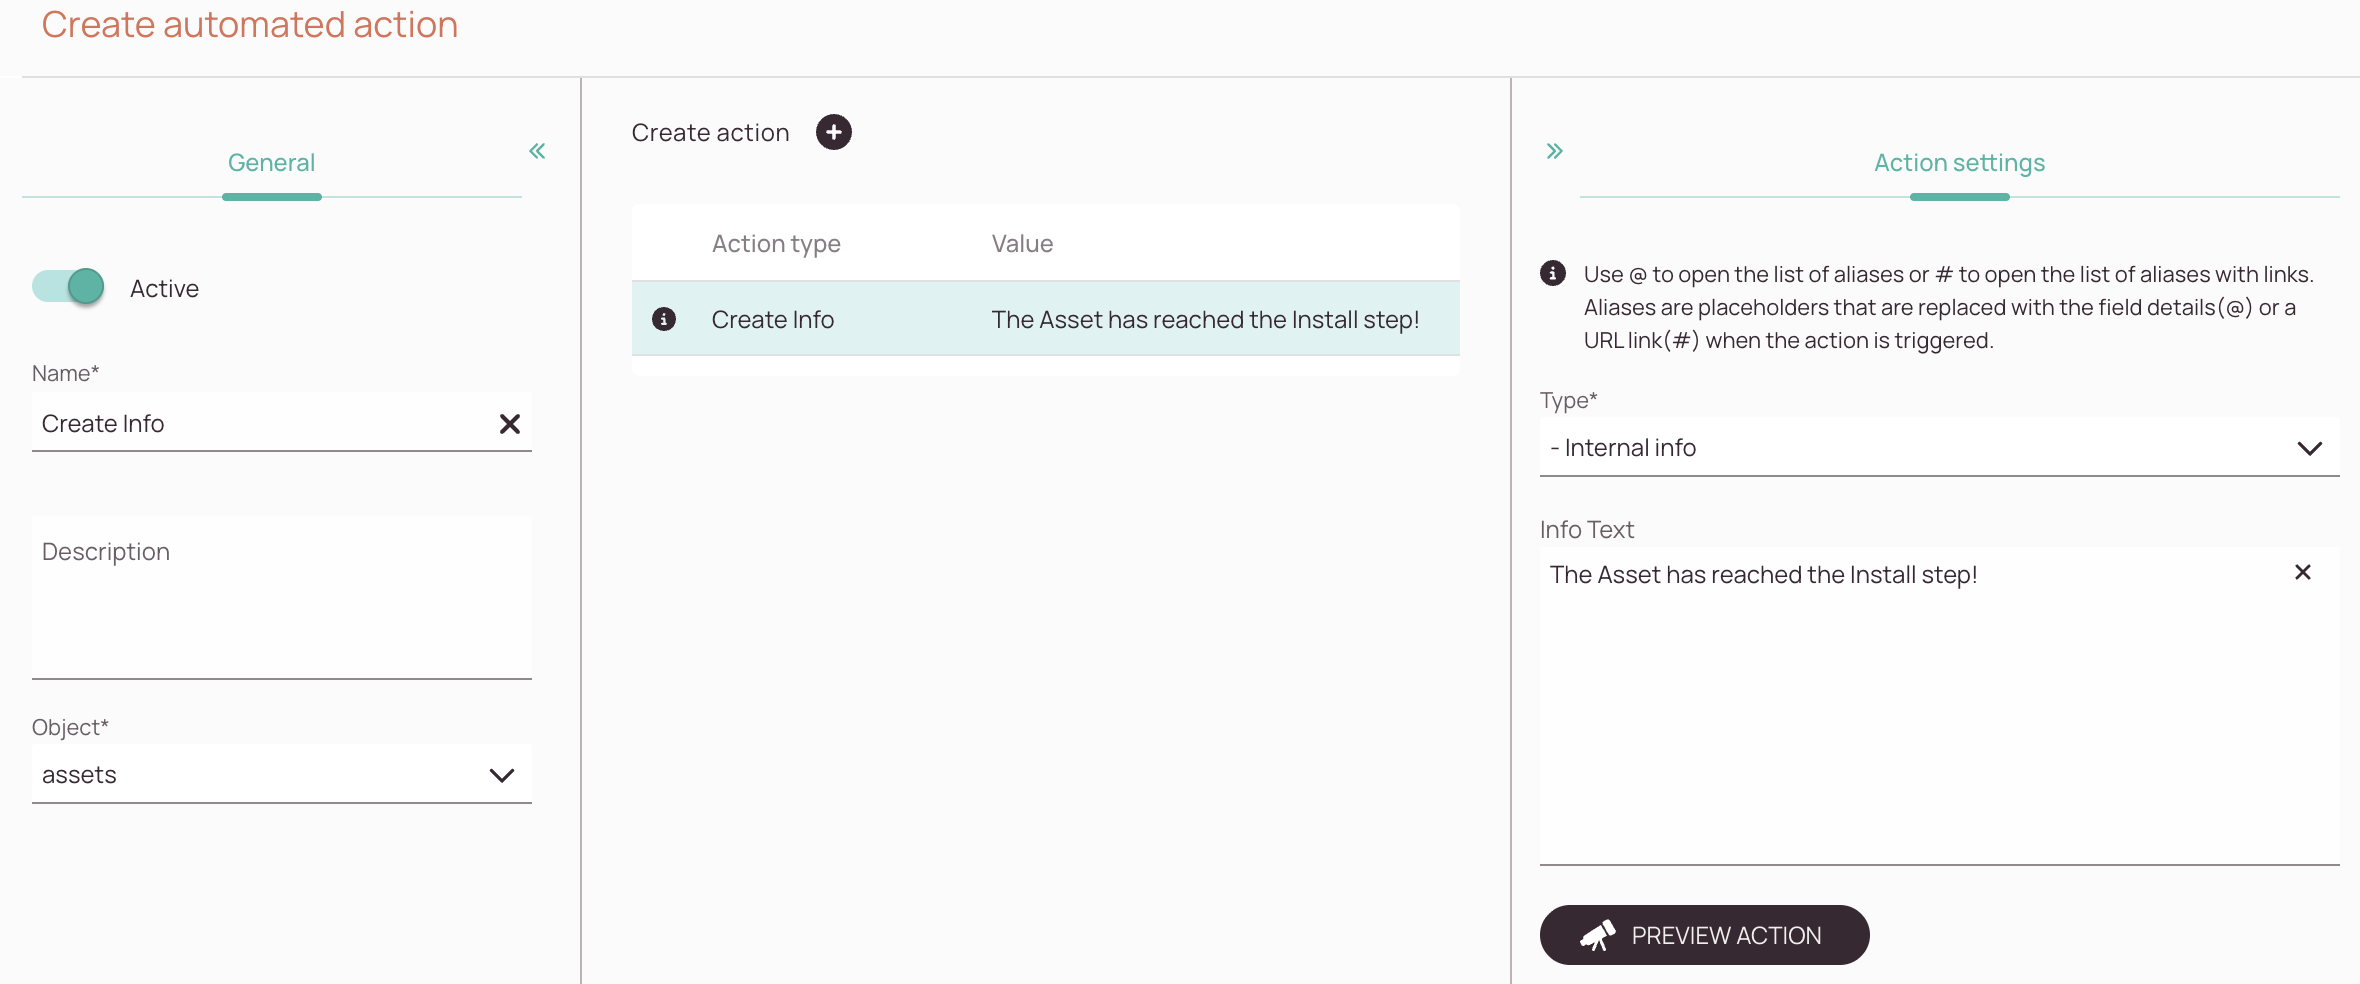
Once you've selected the object, select the Create info action. Enter the name for your action and select the asset object from the dropdown.
Enter the details of the information you want to add. In our example we want to display a internal info for when the installation step is reached by a asset.
Workflow Before:
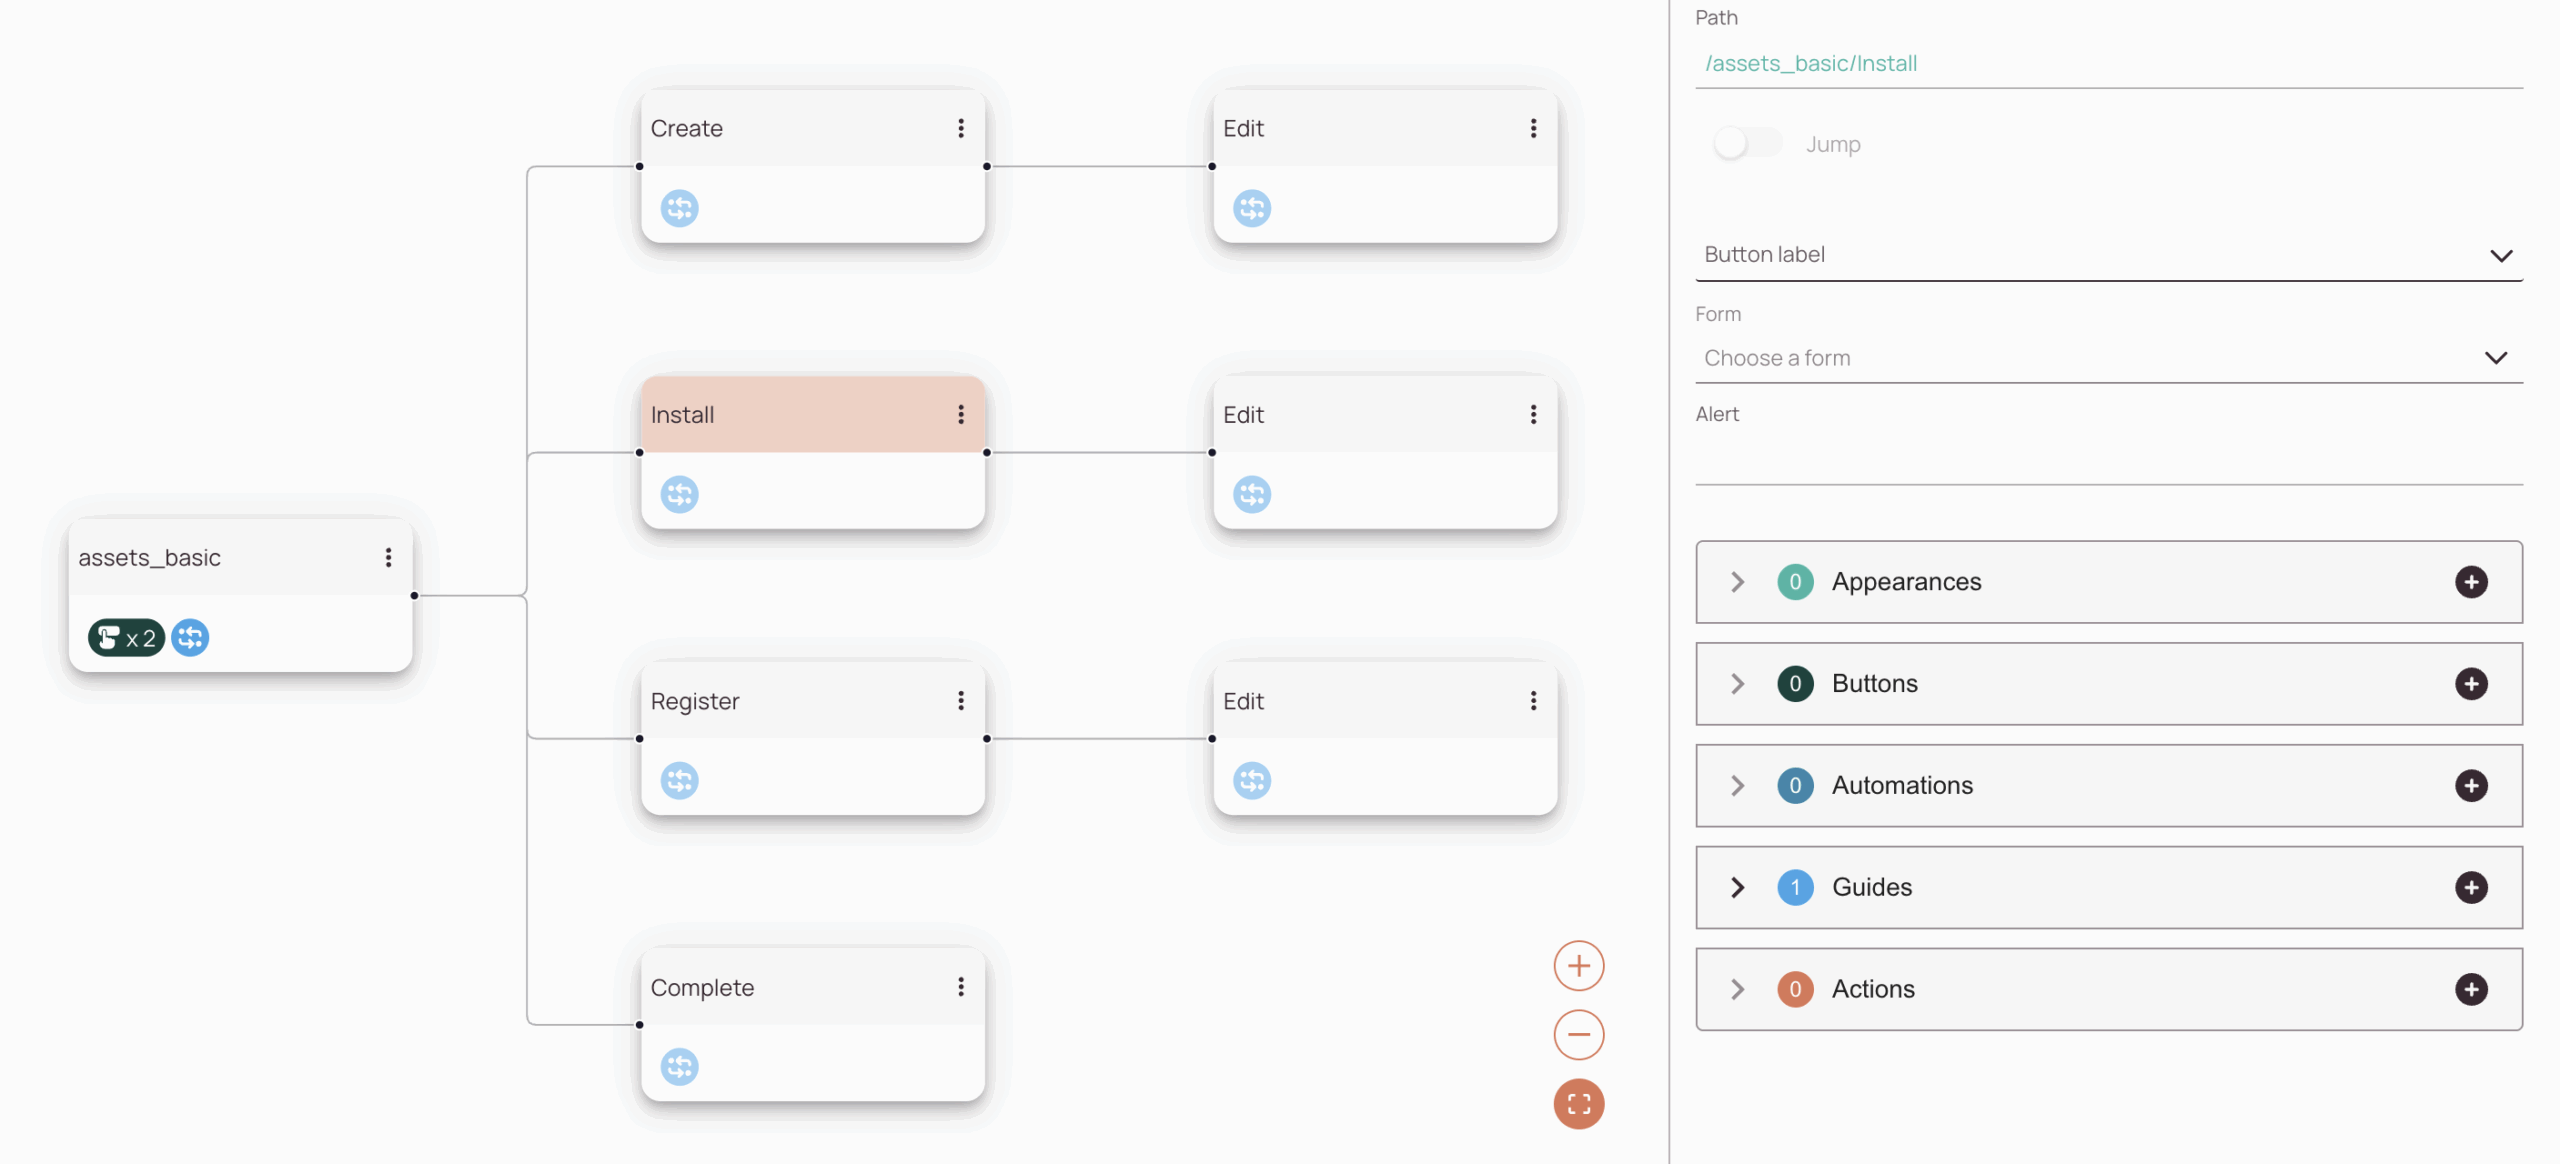
Workflow After:
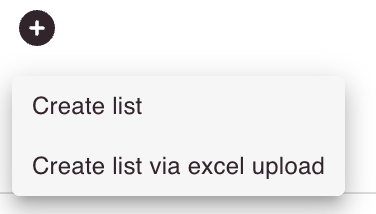
- Inside the Lists page click the Plus button and click on the Create list via excel upload button.
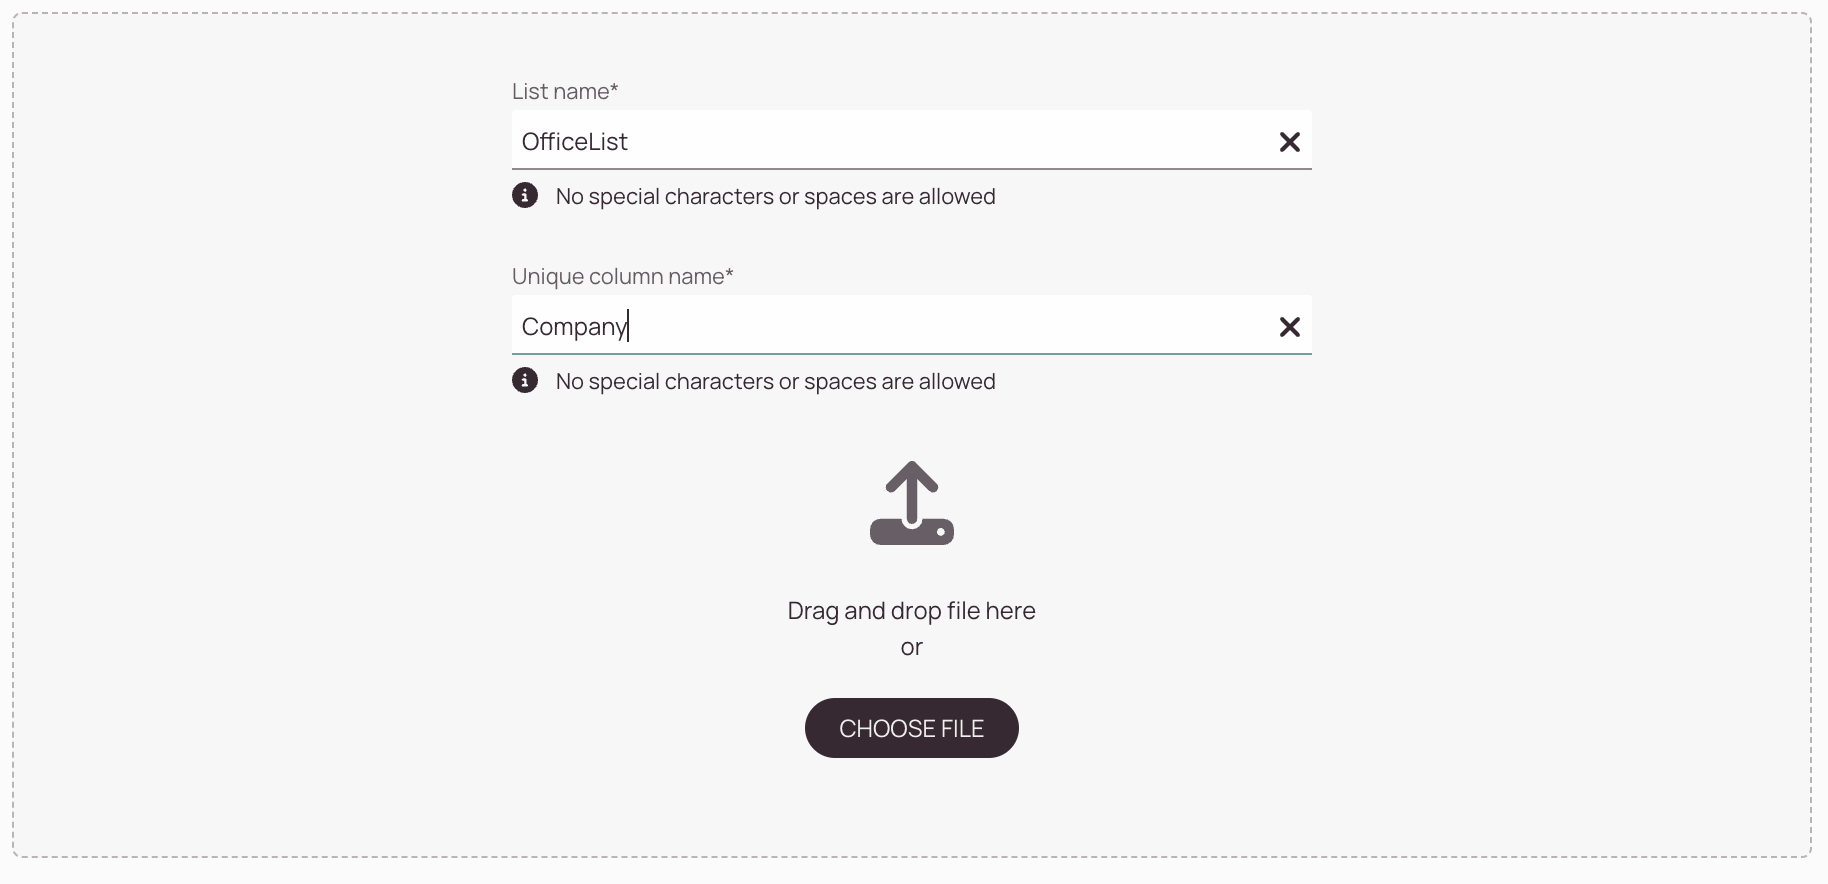
- Click on the Choose File button and select the companies list.
- Enter "OfficeList" as a name.
- Enter for example "Company" as a unique column name.
- Click on the Save button.
This is how the imported list could look like:

Now that the list is imported, the only thing left is to make it available for use. Therefore, we need to add our dynamic list to our asset object:
- On the Objects page, select your model from the list, and click on the Add dynamic list button.