Tip: You can use filters for better results
-
Latest News
-
Getting Started
-
Work Place
-
-
-
- About Buttons
- Action Buttons
- Schedule Tickets
- Ticket Info and COMS Buttons
- Add Parts
- Assign Partners
- Remove Tickets from the Ticket Clipboard
- Inline Skill Editing
- Create Intervention Info
- Create Intervention Reports
- Cancel Tickets
- Cancel Appointments
- Clone Tickets
- Edit Ticket Details
- Edit Privat Notes
- Report Tickets
- Close Tickets
-
Admin Panel
-
FMA 2 App
-
Customer Portal
About Communications
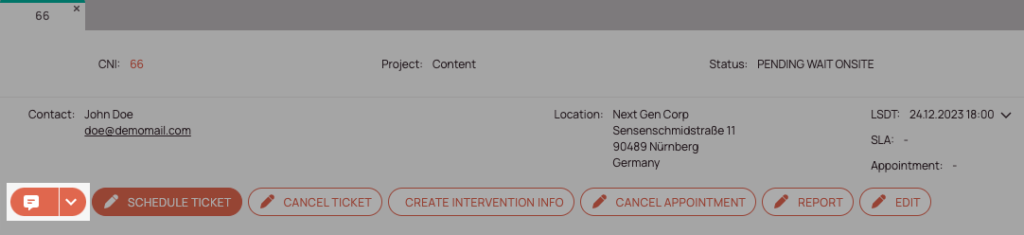
The communications workflow button inside the Ticket Details gives you the option to communicate with your target audience in different ways.
- Ticket Info: Create and send ticket-related messages.
- Email: Send emails directly from the ticket.
- SMS: Available for Enterprise users.
These tools help inform specific audiences about ticket-related events, delays, or updates.
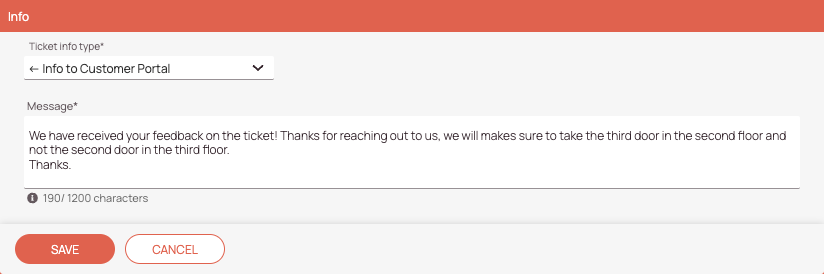
Ticket Info Types
Ticket info messages are used to communicate updates between different roles (e.g., dispatcher, engineer, customer). Some messages require acknowledgment to confirm they’ve been seen. Below is a detailed breakdown:
<- : Outgoing
-> : Incoming
| Ticket Info | Description | Creation | Visibility | Acknowledgement |
|---|---|---|---|---|
| Custom Ticket Info | Freely configurable | Work place | Work place | ❌ No |
| Engineer delay | Notification about engineer delay | FMA, Work place | FMA, Work place | ✅ Yes |
| Incoming Info from connected system | Info from connected systems addressed to Work place | Connected System, Work place | Work Place, Connected System | ✅ Yes |
| Incoming Info from Customer Portal | Info from customers | Customer Portal | Work Place, Customer Portal | ✅ Yes |
| Info from dispatcher to engineer | Message intended for engineer (not visible to customers) | Work place | Work place, FMA | ❌ No |
| Info from engineer to dispatcher | Message intended for dispatcher (not visible to customers) | FMA, Work place | FMA, Work place | ✅ Yes |
| Internal info | Message intended for internal communication | Work place, FMA | FMA, Work place | ❌ No |
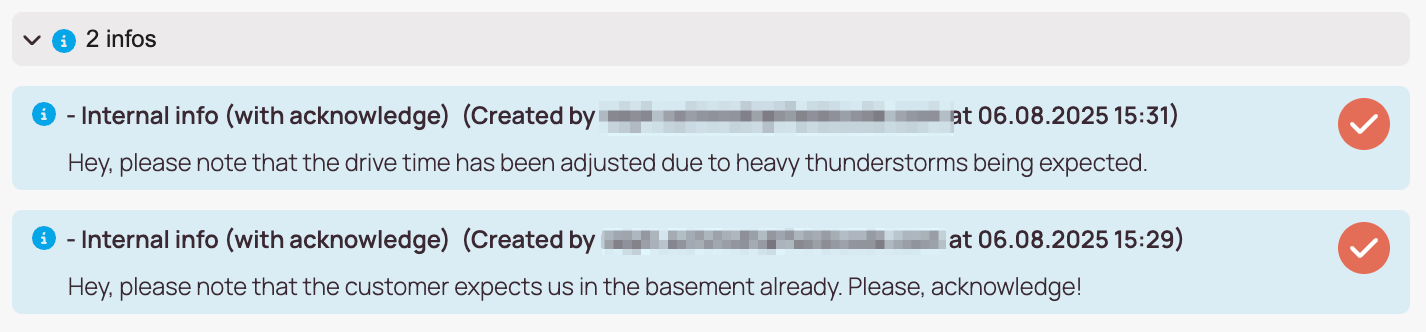
| Internal info (with acknowledge) | Message intended for internal communication with the option to acknowledge | Work place, FMA | FMA, Work place | ✅ Yes |
| Outgoing Info to connected system | Info addressed to a connected system | Work place | Connected system, Work place | ❌ No |
| Outgoing Info to Customer Portal | Info addressed to customers | Work place, FMA | Customer Portal, Work place | ❌ No |
Acknowledgements
Some Ticket Info types require acknowledgment from users. These are typically used to confirm that important messages have been seen and that appropriate follow up action has been taken. It is recommended to take any actions requested in the Ticket Info be completed before acknowledging, to prevent them from being forgotten.
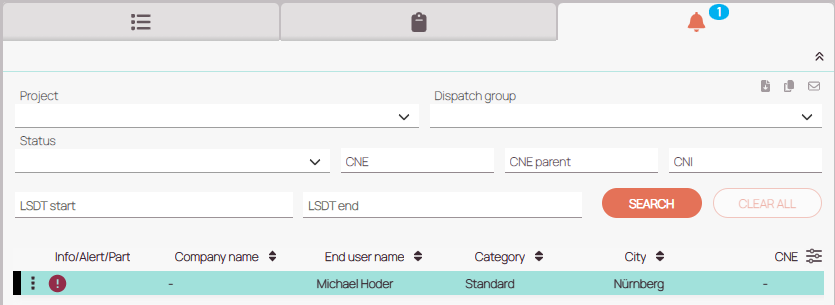
A list of all tickets with information requiring acknowledgement can be found by clicking on the Ticket Info tab in the Ticket Pool. It is marked with a bell icon and will have a number displaying how many tickets have unacknowledged information.
Ticket Info of all typescan be found in the History tab in the Ticket Details.

Sending Ticket Info
In addition to using the Ticket Info workflow button (as explained above), Ticket Info can also be added from the FMA by selecting the Add Info button, or via Automated Actions.
Templates can also be created to expedite the process for sending common messages.
Sending Emails
If you want to send emails via the ticket details, you must first configure your SMTP email settings for your account.
You can use aliases when creating and sending emails by typing the "@" command inside a field. This will reveal an alias dropdown.
HTML formatting is supported inside COMS and email templates.
You may not be able to see a "Preview" with the HTML formatting for now, however, when emails are sent out the HTML formatting will be visible to end customers.
Please pay attention to use the correct HTML declaration and scheme for emails in the body field:
				<!DOCTYPE html>

<html lang="en" xmlns="http://www.w3.org/1999/xhtml" xmlns:o="urn:schemas-microsoft-com:office:office">
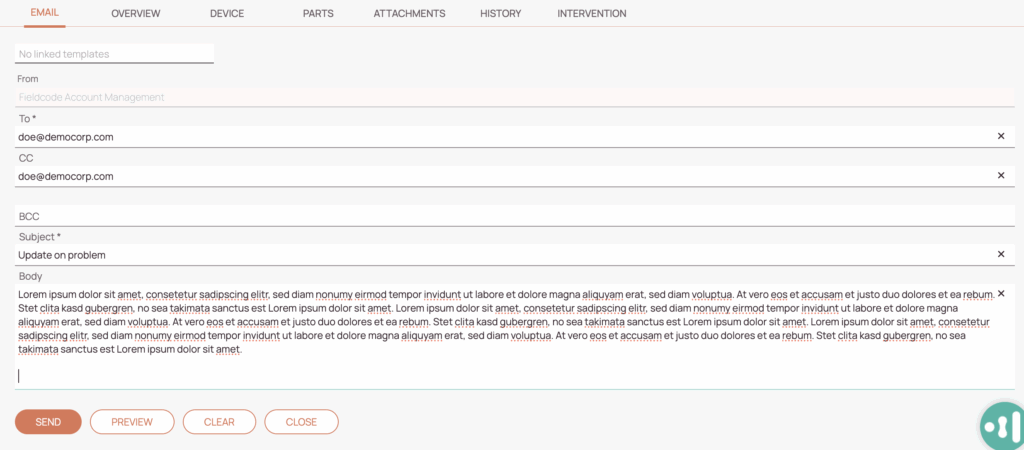
The email interaction (which can be activated by using the COMS interaction button) allows you to send mail or bulk emails to customers. Email templates that were configured by using email templates in the Admin panel can also be used in this tab for communicating with your customers.
- Click on the COMS button.
- Select Email from the list.
- (Optional) – Select a template.
Email templates can be created inside Admin Panel -> Process -> Email templates. - If you have selected a template fields should be already pre-filled and only small manual changes might be still required.
- Enter a recipient email address in the To field.
You can also enter multiple recipients by using a semi-colon. - (Optional) – Enter a Carbon Copy recipient.
You can also enter multiple recipients by using a semi-colon. - (Optional) – Enter a Blind Carbon Copy recipient.
You can also enter multiple recipients by using a semi-colon. - Enter a email subject in the subject field.
- Enter the email content in the body field.
- (Optional) – Click on the preview button to check how your final result will look.
- (Optional) – Clear all fields by clicking the clear button. This may come in handy if you mess up some fields.
- Click on Send to send out the email from within the Work place.
Important Notes for the the Email Feature:
- Requires SMTP configuration (see SMTP setup guide).
- Supports HTML formatting and aliases (@ command).
- Email templates can be used to standardize communication.
Sending SMS
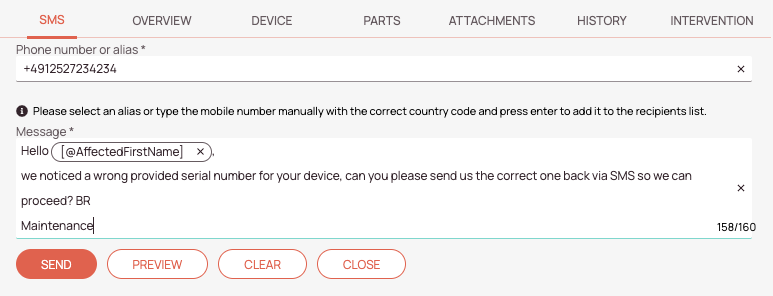
The SMS button (which can be activated by using the COMS button inside the Ticket Details) allows you to directly send out SMS from Work place. SMSes are mostly useful for external communication.
- Click on the COMS button.
- Select SMS from the list.
- Enter a valid phone number or alias into the phone number or alias field.
You can enter multiple phone numbers or aliases by using a comma. - Enter a message into the message field.
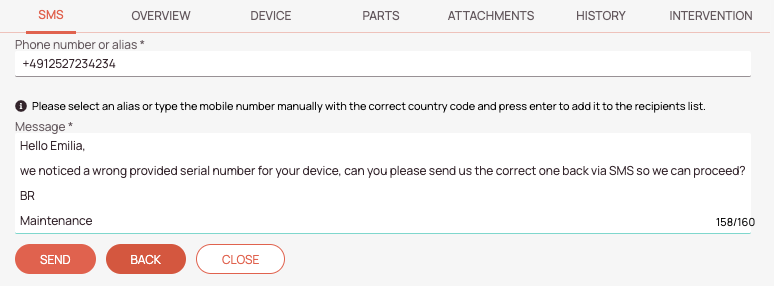
You are also able to use aliases in the message field and test them with the Preview button. - (Optional) – Click the Preview button to double check if the SMS behaves correctly.
- Click Send to directly send out the SMS.
Please note, that additional charges are applied per each SMS sent and will be invoiced to your account.
Important Notes for the SMS Feature:
- Available only for Enterprise users.
- Useful for urgent updates to field engineers.
Creating Templates
Templates are created inside the Admin panel -> Process -> Templates.
Please check out the matching topic: How to set up templates
Enterprise: COMS in X-Details
With the rollout of Fieldcode Plus and the enhanced X-Details functionalities, the COMS button has been extended to support:
- Sending emails
- Creating info messages for the selected record
- Info messages requiring acknowledgment will be shown in X-Details with a dedicated acknowledgment button.
- If a record contains multiple info messages, they will be grouped with an expand/collapse option to improve readability and reduce visual clutter.
5 out of 5 stars
2 ratings
| 5 Stars | 100% | |
| 4 Stars | 0% | |
| 3 Stars | 0% | |
| 2 Stars | 0% | |
| 1 Stars | 0% |