Tip: You can use filters for better results
-
Latest News
-
Getting Started
-
Work Place
-
-
-
- About Buttons
- Action Buttons
- Schedule Tickets
- Ticket Info and COMS Buttons
- Add Parts
- Assign Partners
- Remove Tickets from the Ticket Clipboard
- Inline Skill Editing
- Create Intervention Info
- Create Intervention Reports
- Cancel Tickets
- Cancel Appointments
- Clone Tickets
- Edit Ticket Details
- Edit Privat Notes
- Report Tickets
- Close Tickets
-
Admin Panel
-
FMA 2 App
-
Customer Portal
How to pre-qualify tickets
Tickets can be pre-qualified by technicians to simplify further work steps on the ticket. Ticket pre-qualification can be useful, for example, for certain ticket types (including user-defined), for certain projects, or due to other special work requirements within a company.
Ticket pre-qualification can also be useful if certain spare parts are to be determined preferentially by the technician.
For example, it may be the case that the technician knows better than the dispatcher which spare parts are required for a particular ticket.
The technician can then, for example, use ticket pre-qualification to forward ticket information to Work Place users in order to simplify the further work process.
Please contact support@fieldcode.com if you need the ticket pre-qualification configured for your business.
The pre-qualification process is customizable per company. If configured the behavior should be as follows:
- A ticket in Appointment status can be sent to the custom workflow status Engineer Validation (has to be enabled).
- Custom fields inside the ticket creation form can determine if a ticket needs pre-qualification (has to be configured).
- Solution engineers will gladly assist you in configuring "ticket pre-qualification" in the best possible way for your company.
The ticket will then for example move from Appointment status to Engineer validation status. After the engineer submits ticket info via the mobile website (accessible from within FMA application) the ticket can be moved to the next status (which is usually the Appointment status again).
Dispatcher steps
- Send the ticket to engineer validation status (has to be enabled and configured) by clicking the according workflow button inside the Ticket Details.
- The assigned engineer will now have the option to validate the assigned ticket inside his Fieldcode FMA app.
- After the engineer validated the ticket and sent the ticket info you can proceed with the ticket as usual with the additional information on the ticket.
- You must manually forward the ticket back to the Appointment status by clicking the according workflow button.
Engineer steps
- Inside your Fieldcode FMA app tap on the Settings tab.
- Tap on the Engineer pre-qualification menu.
- You should see a ticket list with tickets that require pre-validation/pre-qualification.
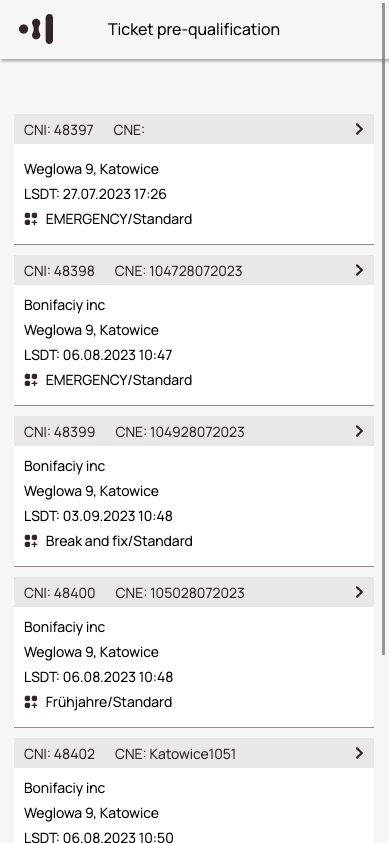
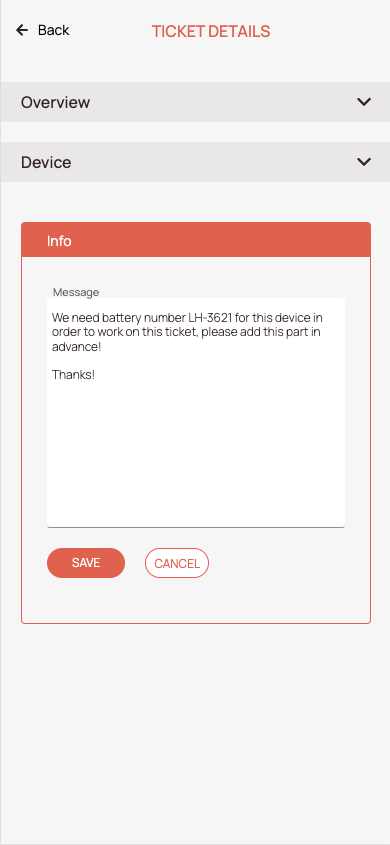
- Tap on the ticket you want to work on in order to check Ticket Details and Device details.
- Submit required ticket info in the Ticket Info field.
- Click Save.
- The dispatcher will receive the ticket info and the ticket will proceed further to the next status (which is usually the Appointment status again).
5 out of 5 stars
1 rating
| 5 Stars | 100% | |
| 4 Stars | 0% | |
| 3 Stars | 0% | |
| 2 Stars | 0% | |
| 1 Stars | 0% |