
Tip: You can use filters for better results
-
Latest News
-
Getting Started
-
Work Place
-
-
-
-
- About Buttons
- Action Buttons
- Schedule Tickets
- Ticket Info and COMS Buttons
- Add Parts
- Assign Partners
- Remove Tickets from the Ticket Clipboard
- Inline Skill Editing
- Create Intervention Info
- Create Intervention Reports
- Cancel Tickets
- Cancel Appointments
- Clone Tickets
- Edit Ticket Details
- Edit Privat Notes
- Report Tickets
- Close Tickets
-
-
Admin Panel
-
FMA 2 App
-
Customer Portal
About the Ticket Details
The Ticket Details give you an overview of all existing data inside a certain ticket. The Ticket Details give you all important options to work with a ticket and allow you to work on it by providing the workflow buttons. The Ticket Details display who is assigned to the ticket, if a ticket has been imported from a system connection or cooperation partner (indicator left from the CNI), if a ticket has conditions/indications, the project details of the ticket, the ticket history, and attachments.
Opening a specific ticket in a new tab or grabbing it results in opening the Ticket Details.
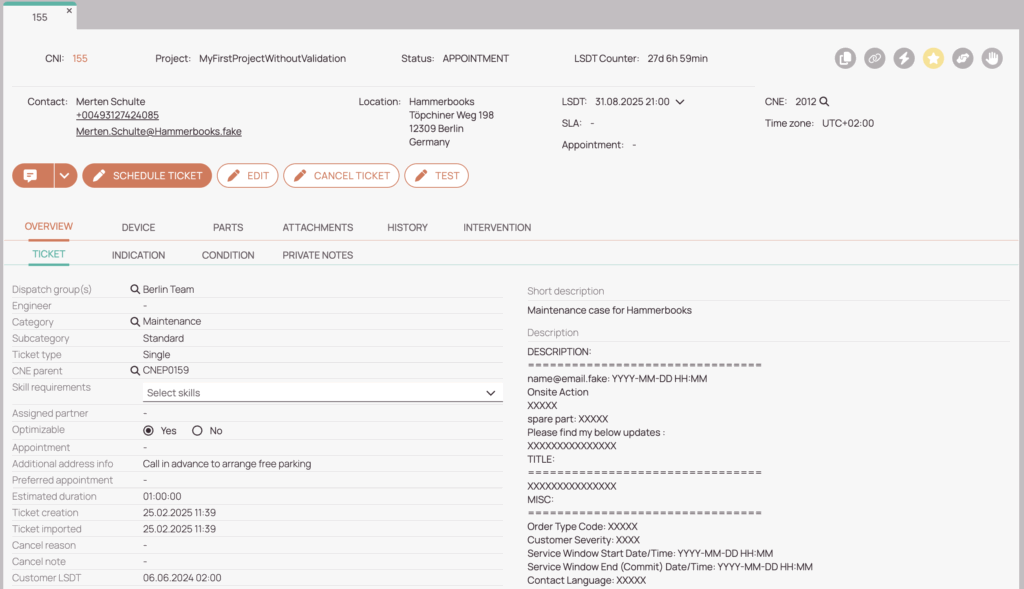
Ticket Details - Possible Actions
The Ticket header includes all important data of a ticket. It displays valuable data like the CNI, LSDT State, Conditions / Indications, and many other project details which are all explained in the table below.
Opening a specific ticket in a new tab or grabbing it results in opening the Ticket Details.
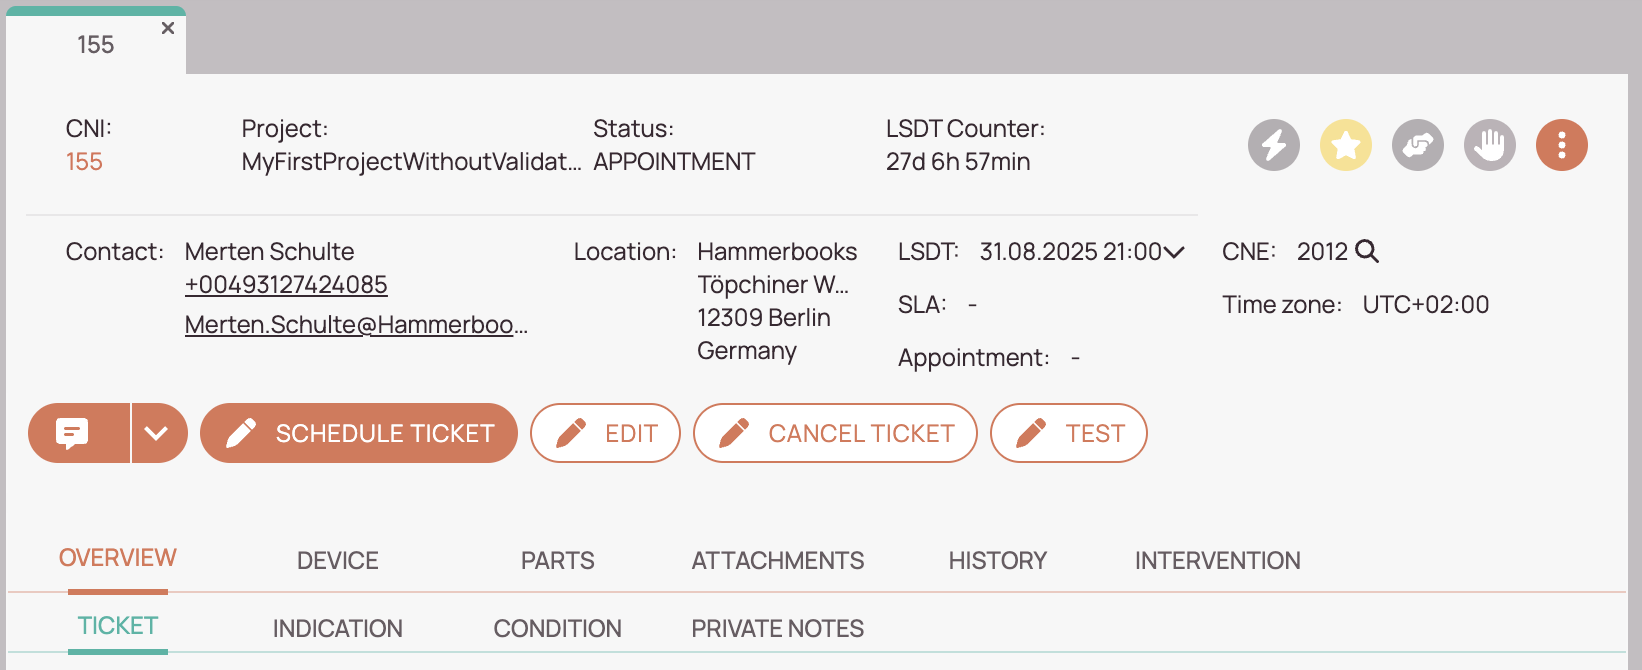
-
Ticket detail indicators:
If a ticket has been imported into the system a ticket detail indicator will be displayed here. -
Import indications / Call number internal:
You can check the call number internal. -
Project:
You can check the to the ticket assigned project. -
Status:
You can check the current status of the ticket. -
LSDT counter:
With the counter, you can check when the Latest Service Delivery time expires. -
Contact details:
You can check the provided ticket contact details. -
Location details:
You can check the provided ticket location details. -
LSDT details:
You can check the precise Latest Service Delivery time in detail.
LSDT changes will also be reflected.
The first set LSDT time has “initial” in brackets. -
Service Level Agreement details:
You can check Service Level Agreement details if they have been provided. -
Appointment details:
You can check Appointment details, if they have been provided. -
Call number external:
You can check the to the ticket-assigned Call number external if the number has been provided. -
Timezone:
You can check the ticket timezone.
Knowing the current ticket time zone could be a piece of helpful information if you have to handle different tickets with different time zones. -
Interaction buttons: The interaction buttons which can be found in the upper-right of the Ticket Details Header are explained in the dedicated interaction buttons topic and best practices sections.
-
Workflow buttons: The workflow buttons which can be found beneath the Ticket Details header are explained in the dedicated workflow buttons topic and best practices sections.
-
Ticket Details tabs: You can browse through all the different ticket tabs topics to learn more about the purpose of the many different Ticket Details tabs.
Ticket Details indicators
| Symbol | Description |
|---|---|
 | The ticket has been imported from a system connection. |
 | The ticket has been imported from a cooperation partner. |
Dispatch group assignment - Possible Action
Ticket dispatch groups are originally assigned as they are configured in the Admin panel under the Dispatch group definitions.

In addition to the originally assigned dispatch groups, the list of dispatch groups may be updated when a ticket is scheduled:
- If a ticket is assigned to an engineer who belongs to multiple dispatch groups, all of the engineer’s dispatch groups are added to the ticket.
- Once the appointment is scheduled, the dispatch group used for scheduling is highlighted with the active color and a magnifier icon. All other assigned dispatch groups remain visible but are displayed in grey to indicate that they were not used for scheduling:

5 out of 5 stars
1 rating
| 5 Stars | 100% | |
| 4 Stars | 0% | |
| 3 Stars | 0% | |
| 2 Stars | 0% | |
| 1 Stars | 0% |