Fieldcode Manual
Tip: You can use filters for better results
-
Latest News
-
Getting Started
-
Work Place
-
-
-
- About Buttons
- Action Buttons
- Schedule Tickets
- Ticket Info and COMS Buttons
- Add Parts
- Assign Partners
- Remove Tickets from the Ticket Clipboard
- Inline Skill Editing
- Create Intervention Info
- Create Intervention Reports
- Cancel Tickets
- Cancel Appointments
- Clone Tickets
- Edit Ticket Details
- Edit Privat Notes
- Report Tickets
- Close Tickets
-
Admin Panel
-
FMA 2 App
-
Customer Portal
Last updated:August 15, 2025
About the X-Pool
Copy the URL link to this section to share
You can configure your own X-Pool if you have a Fieldcode Plus plan. The X-Pool has the same basic functionality as the Ticket Pool, with the major difference that you can work with custom records in the X-Pool. We will take a closer look at all the functionalities in the following sections.
▶️ Accessing the X-Pool:
- Create a view which contains the X-Pool in the Views designer (Fieldcode Plus).
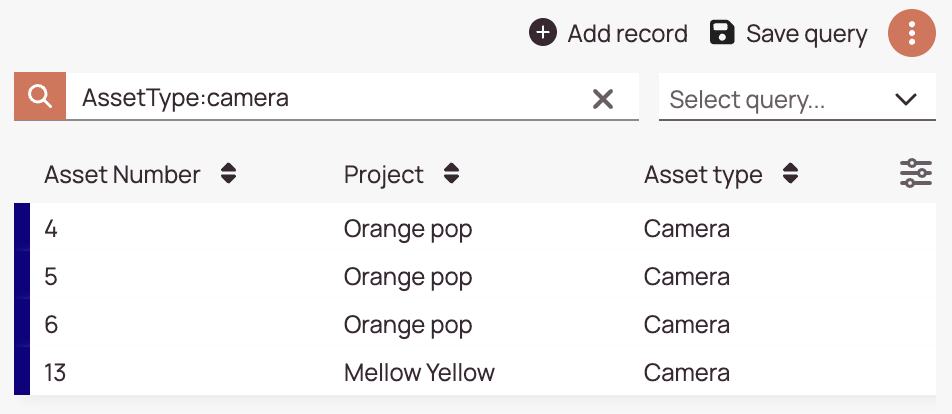
🔍 Searching in the X-Pool:
- Enter a keyword or use a queries to find object records.
🛸 Picking the Object:
- You can pick the object which should be displayed in the X-Pool in the first upper row of the X-Pool.
Column customization:
- You can customize which custom columns are displayed by clicking on the column customization button
Adding New Records
Copy the URL link to this section to share
You can add new records from the Sidebar or from the X-Pool.
Object records work in the same ways as created tickets would work.
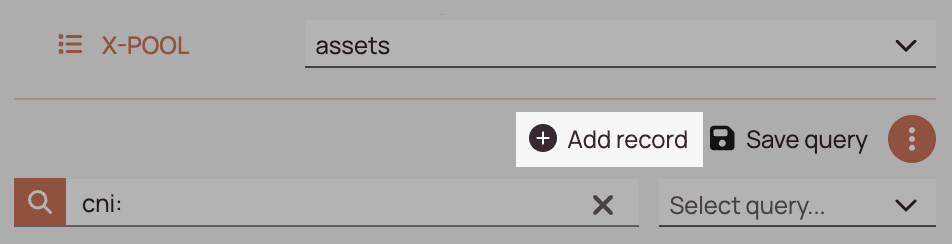
- Variant 1: You can add new records by clicking on the Add record button in the X-Pool.
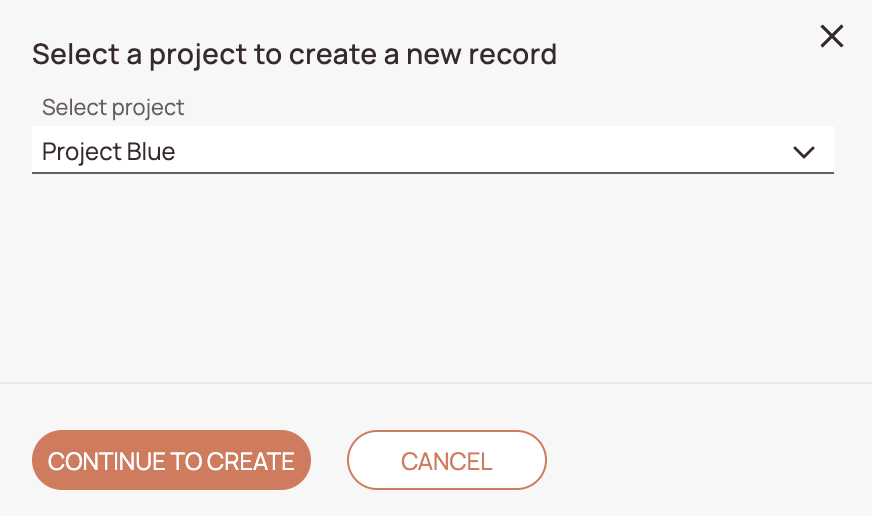
- Select for which project the object record should be created.
- Click on the Continue to create button.
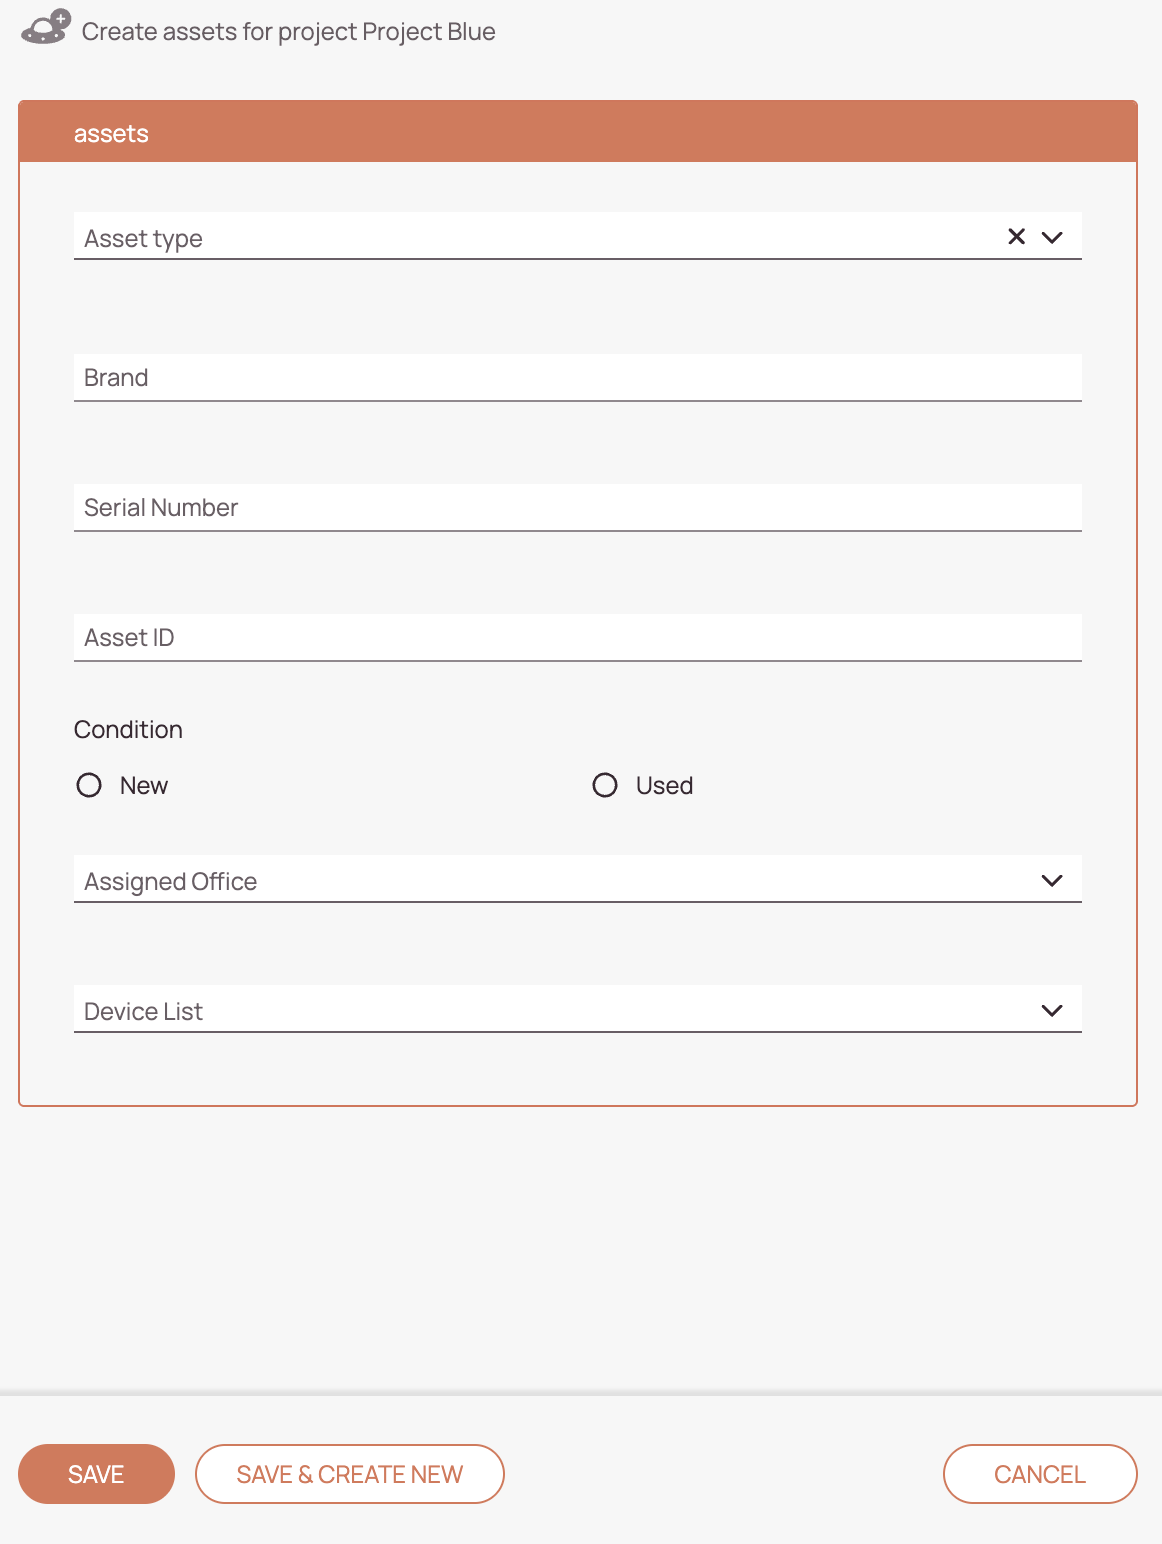
- The Custom Create Form opens where you can enter all the custom details. Note: If you haven't configured a custom create form, the default form will open.
- Click on Save to create the object record.
- Click on Save & Create New to directly create another object record.
- Variant 2: You can also add object records from the sidebar.
- Click on Create Object Record.
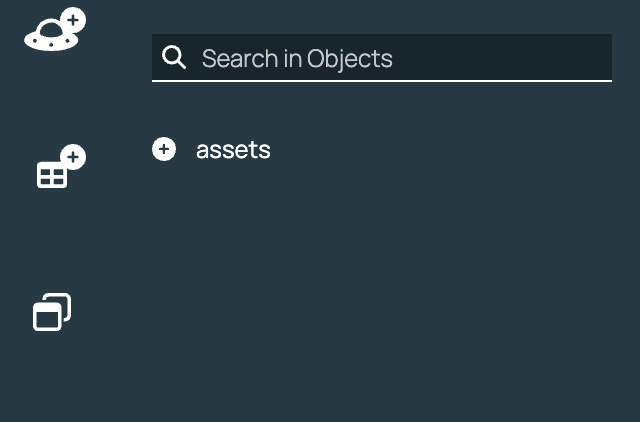
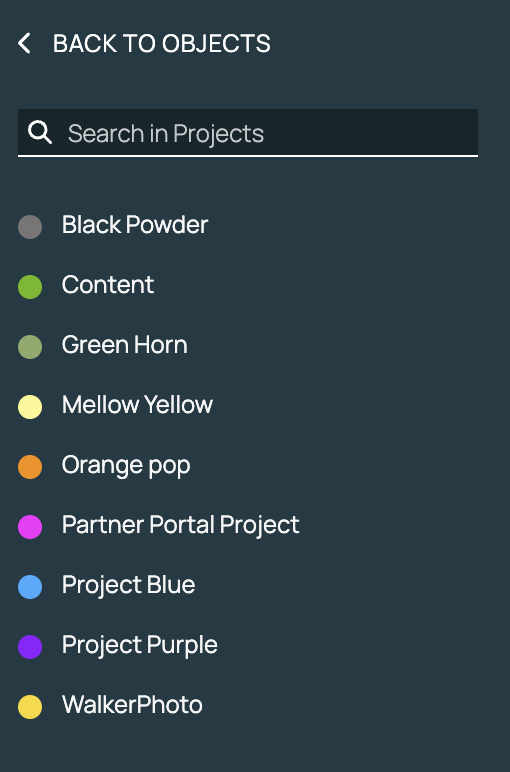
- Pick a object from the list.
- Pick a project from the list.
- The Custom Create Form opens where you can enter all the custom details. Note: If you haven't configured a custom create form, the default form will open.
- Click on Save to create the object record.
- Click on Save & Create New to directly create another object record.
Downloading Records
Copy the URL link to this section to share
You can download all the current object records in the X-Pool list as an excel file.
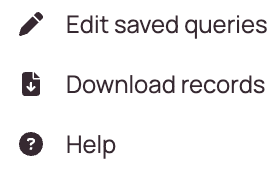
- Click on the context menu button in the X-Pool.

- Click on the Download records button.
- The excel file will start to download.
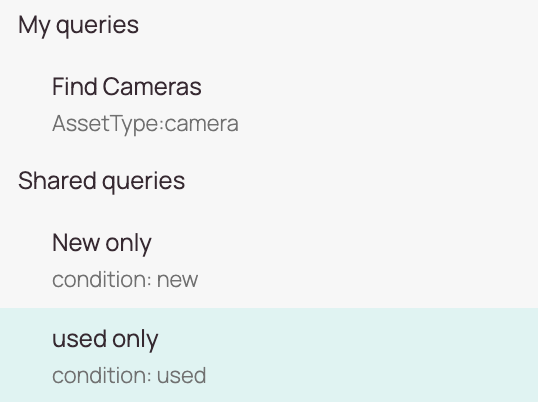
Saving Queries
Copy the URL link to this section to share
You can save queries to easily find your object records.
- Enter a query in the search box.
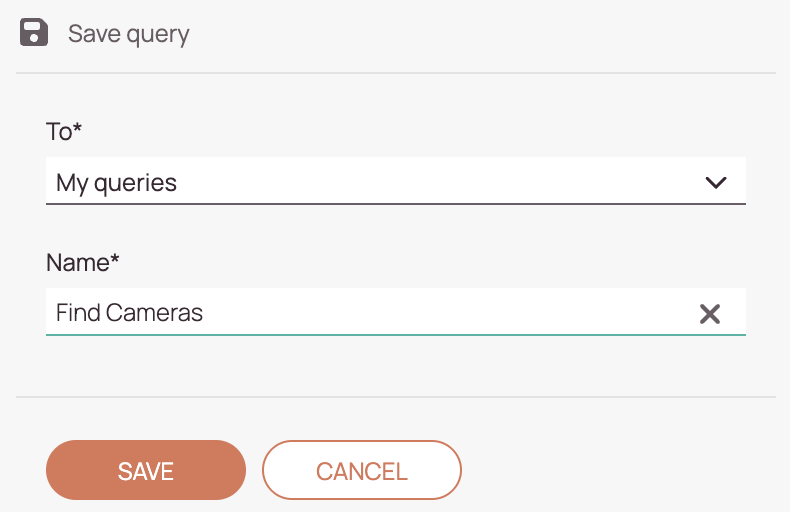
- Click on Save query.
- Pick a Save location. You can pick to save in my queries (personal). You can pick to save in shared queries (others).
- Enter a name for your search query.
- Click on Save.
- Your query is available for usage in the X-Pool.
Navigation