Tip: You can use filters for better results
-
Latest News
-
Getting Started
-
Work Place
-
-
-
- About Buttons
- Action Buttons
- Schedule Tickets
- Ticket Info and COMS Buttons
- Add Parts
- Assign Partners
- Remove Tickets from the Ticket Clipboard
- Inline Skill Editing
- Create Intervention Info
- Create Intervention Reports
- Cancel Tickets
- Cancel Appointments
- Clone Tickets
- Edit Ticket Details
- Edit Privat Notes
- Report Tickets
- Close Tickets
-
Admin Panel
-
FMA 2 App
-
Customer Portal
How to manage availabilities
You can manage availabilities in two ways, either directly from the Timeline or from the Fieldcode Admin Panel inside the Users menu.
Let’s have a look at how to do it from the Timeline.
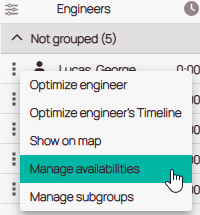
- Open the context menu of a particular engineer.
- Click on Manage availability.
You can either manage availabilities for your users from Admin Panel -> Users -> Absences & Availability tab or inside Work Place inside the Timeline.
Configuring absences from the Timeline
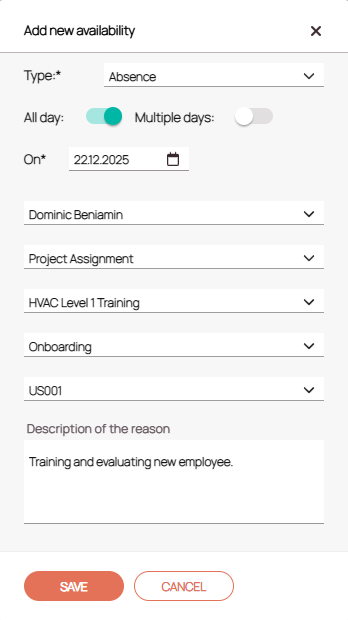
- Click on ADD NEW AVAILABILITY in the top-right corner to freely select the time, or click on a free spot in the calendar to have the time already pre-filled.
- Select the availability type absence.
- (Optional) – Toggle the All day availability toggle to create an absence for the whole day.
- (Optional) – Toggle the Multiple day toggle to create an absence over more days.
- Enter From and To times.
- Select a substitute from the dropdown that will fill in the position for this day.
- Select the matching absence type.
- Describe the reason for the absence.
- (Optional) – Provide a reason for the absence. The reason will be conveniently displayed on the Timeline afterward.
- Click on SAVE.

Configuring on-call duties from the Timeline
- Click on ADD NEW AVAILABILITY in the top-right corner to freely select the time, or click on a free spot in the calendar to have the time already pre-filled.
- Select the availability type on-call duty.
- (Optional) – Toggle the All day availability toggle to create an on-call duty for the whole day.
- (Optional) – Toggle the Multiple day toggle to create an on-call duty over more days.
- Enter From and To times.
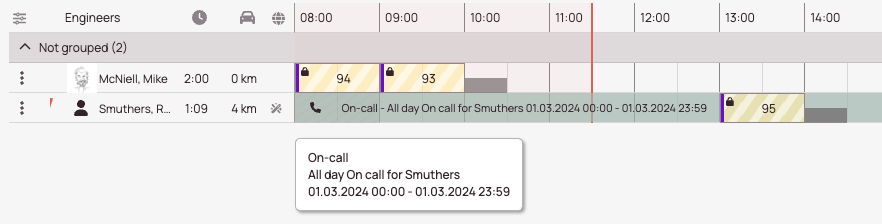
- (Optional) – Provide a comment for the on-call duty. The comment will be conveniently displayed on the Timeline afterward.
- Click on SAVE.

Project assignments
You must first create a list called PROJECT_ASSIGNMENT with three columns: assignmentProject, assignmentType, and costCenter. The values in these columns will be the values used to fill out the additional details of the project assignment in the Manage Availabilities form.
Project assignment is a special absence that let’s you mark an engineer as being unavailable while loaned out to another internal project.
You must select the Assignment Project, Assignment Type, and Cost Center. These are defined in the PROJECT_ASSIGNMENT list.
0 out of 5 stars
| 5 Stars | 0% | |
| 4 Stars | 0% | |
| 3 Stars | 0% | |
| 2 Stars | 0% | |
| 1 Stars | 0% |