Tip: You can use filters for better results

The Autodispatch Feature is only available for customers with an Enterprise plan.

- Inside the Admin panel go to Dispatch -> Dispatch Groups.
- From the list, select the group for which you want to make the autodispatch option available.
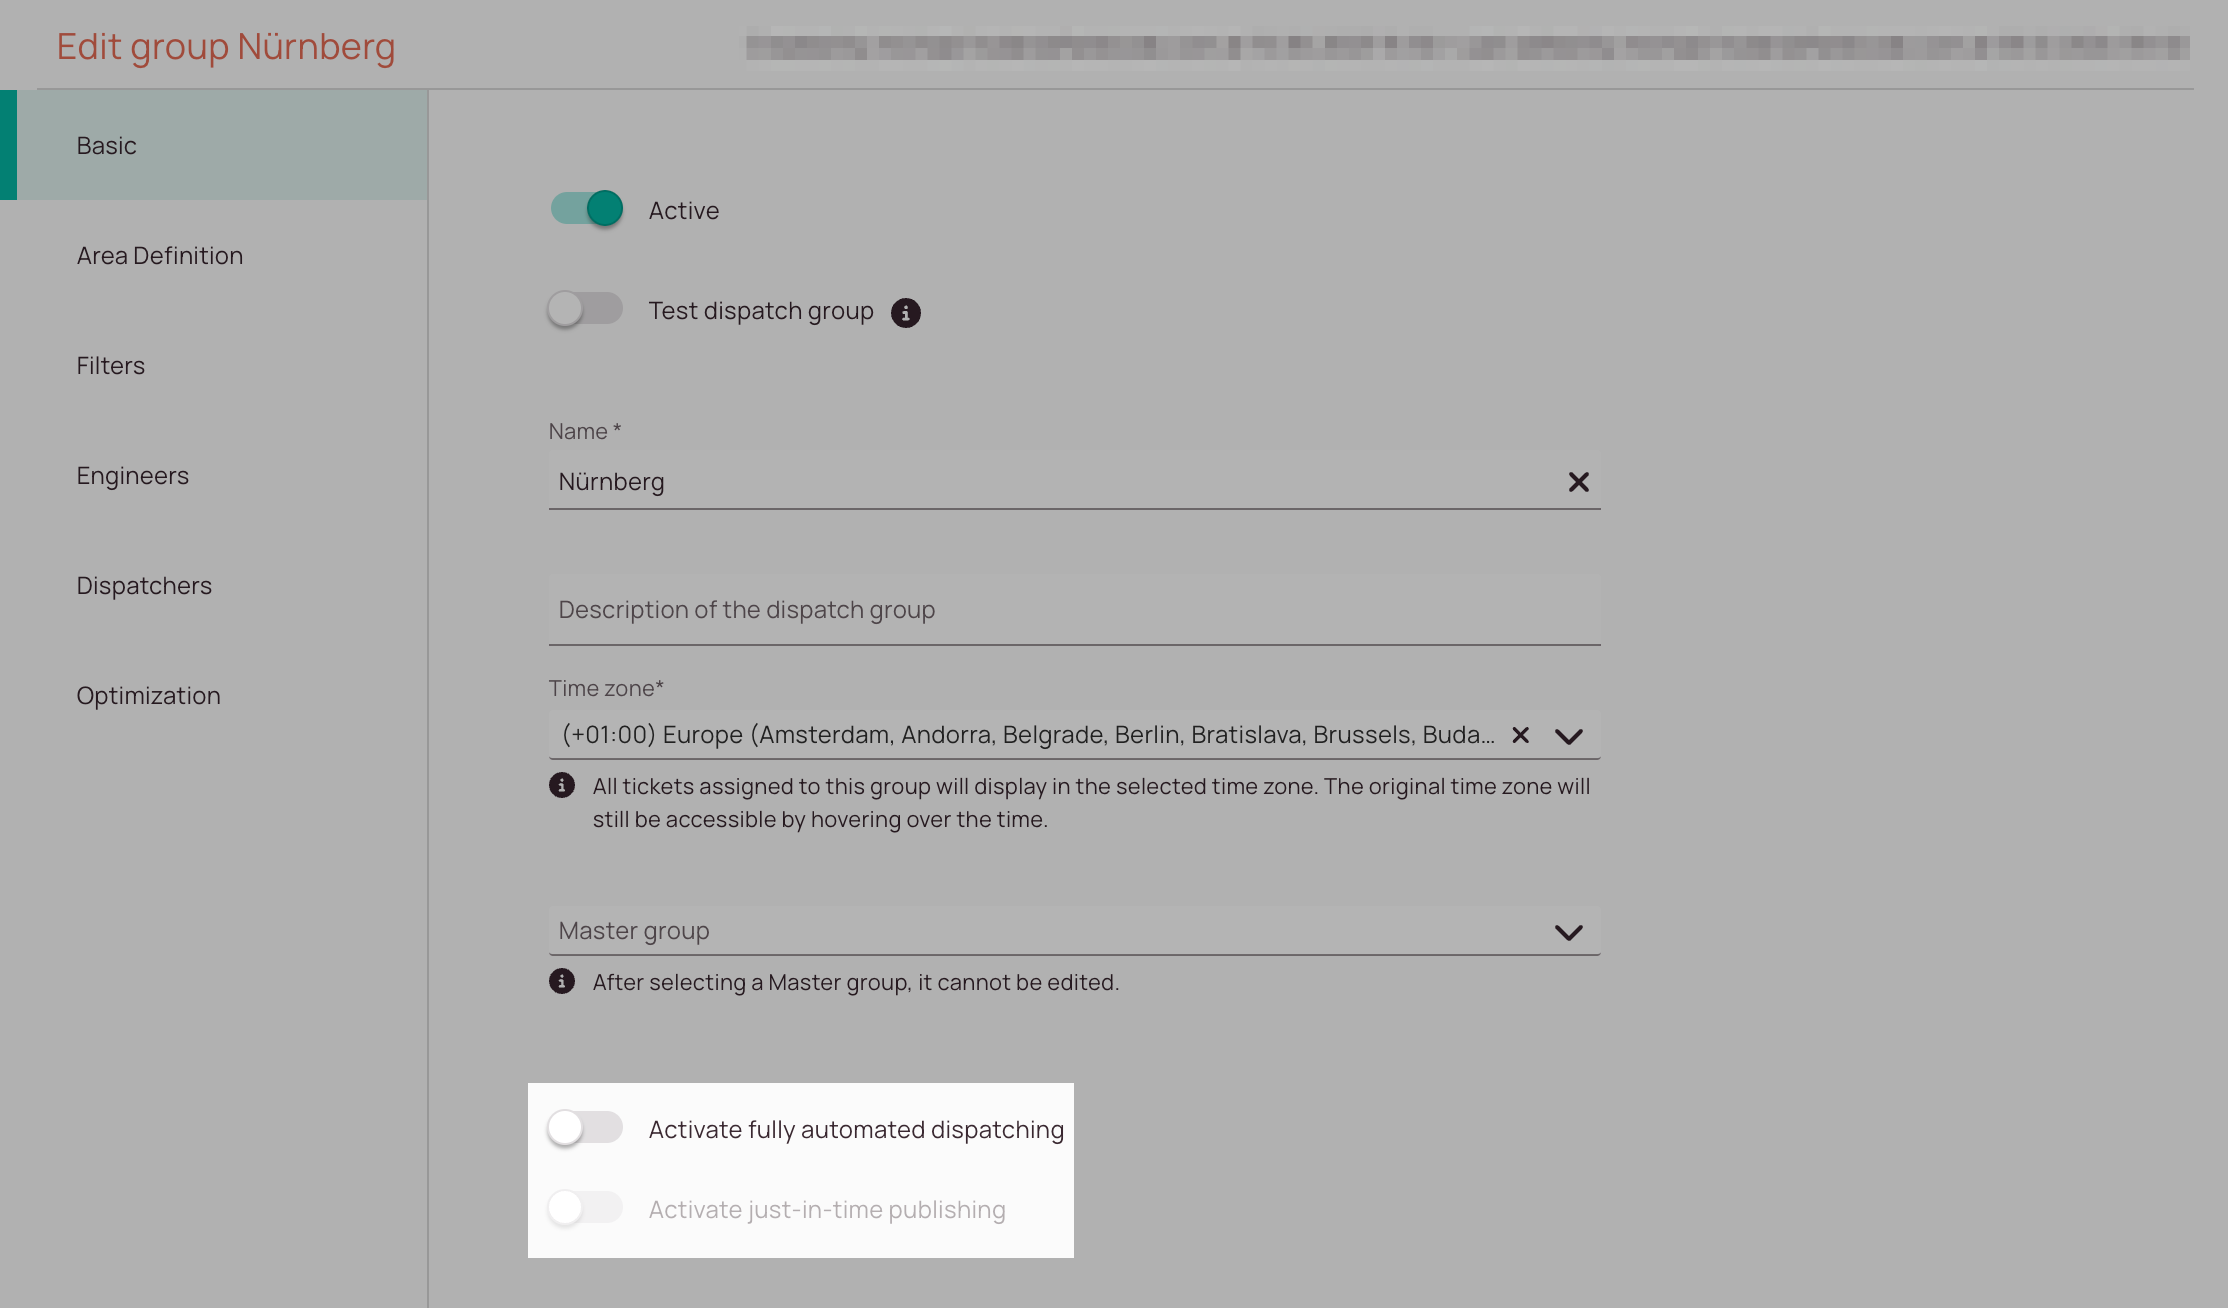
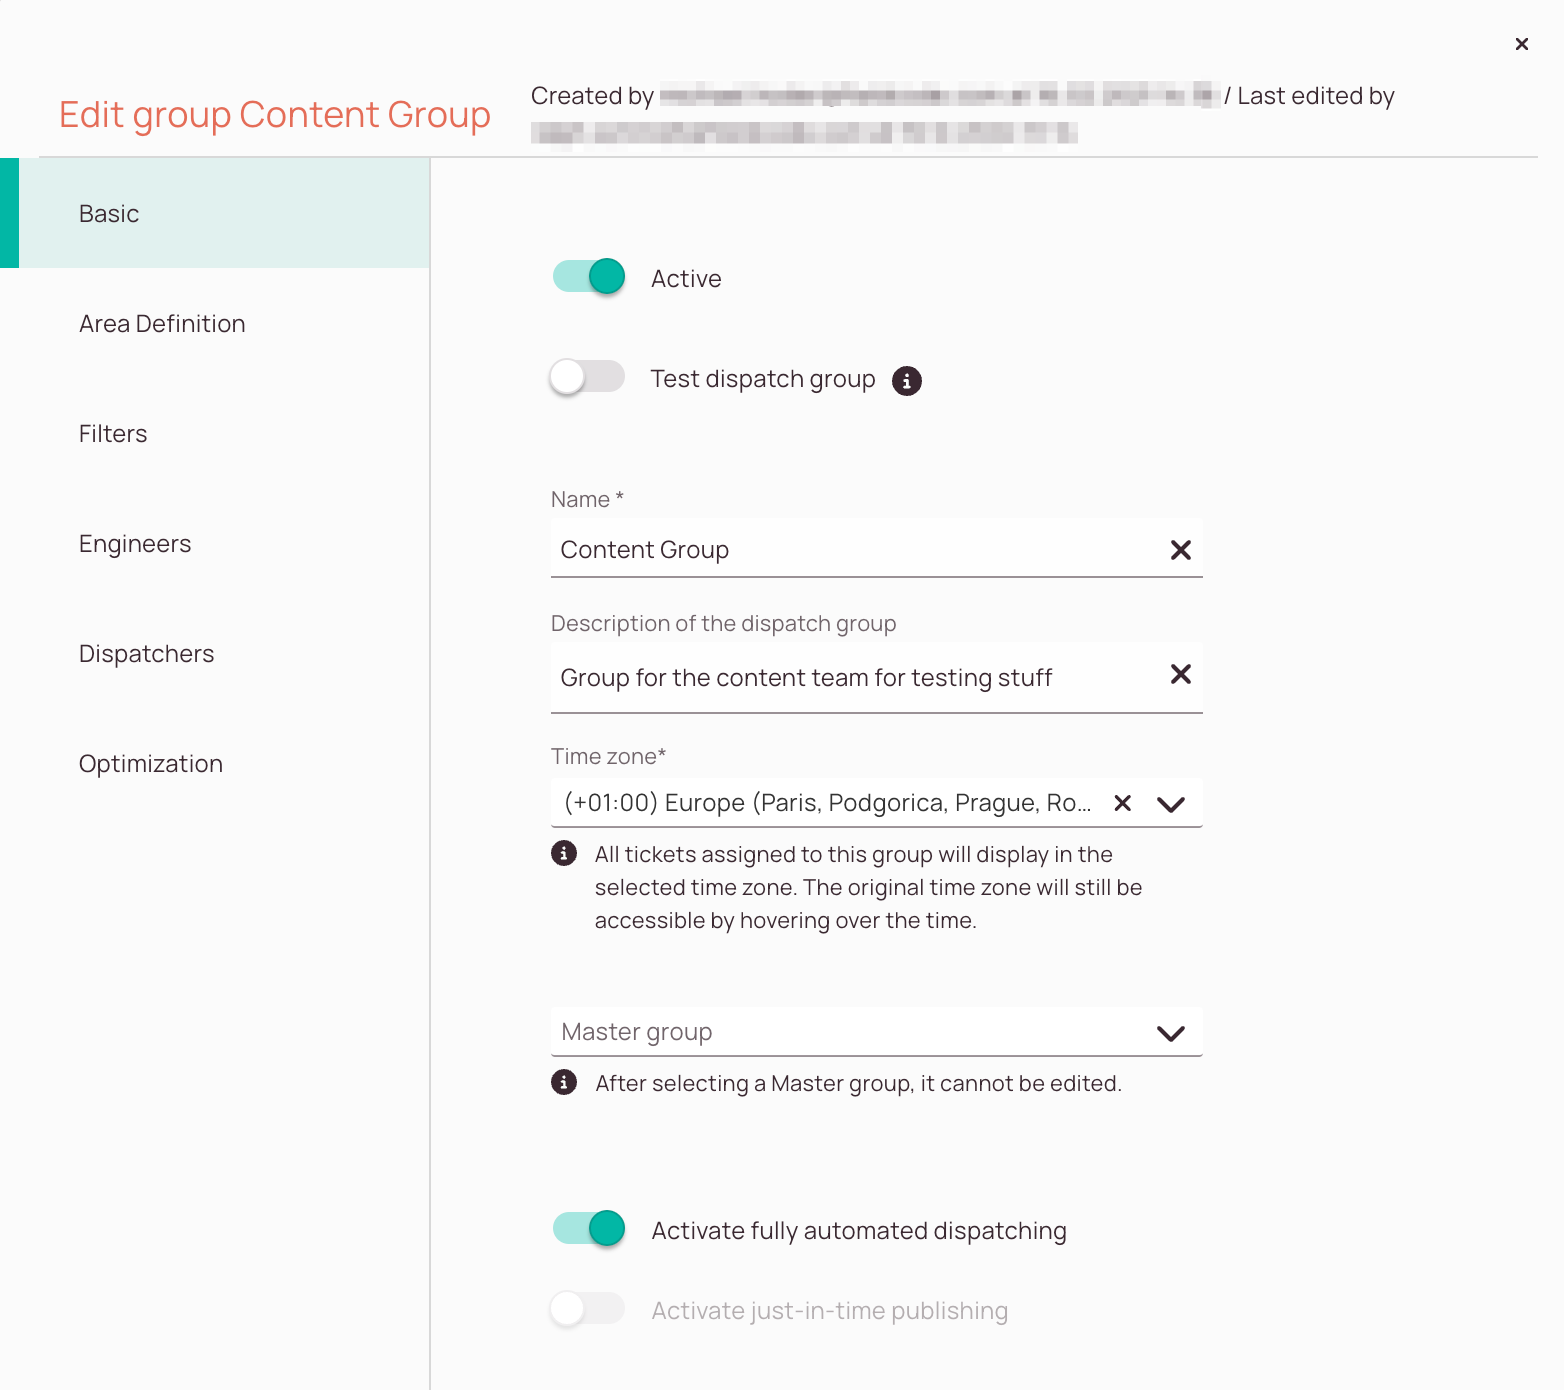
- Inside the Basic tab turn on the Activate fully automated dispatching toggle for the dispatch group that should have the option available in general.
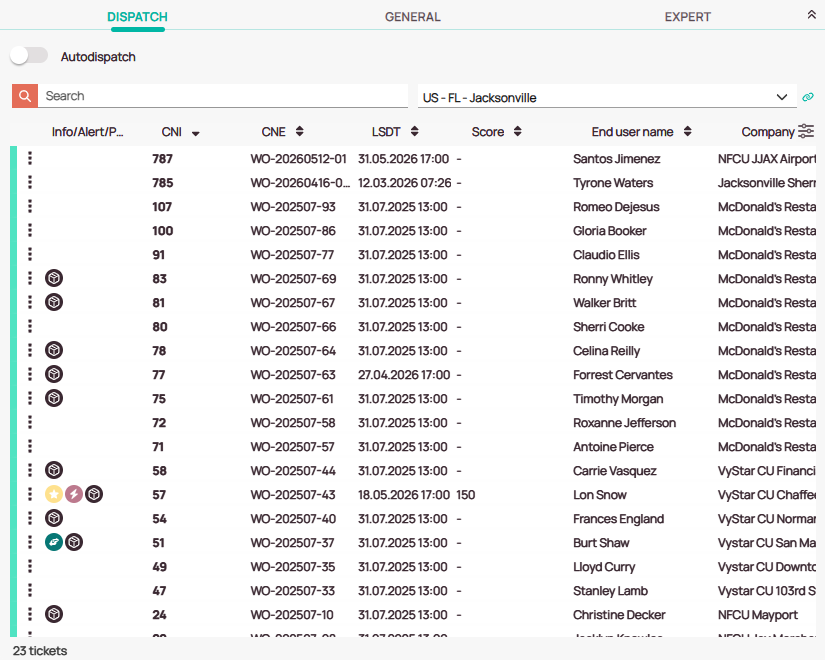
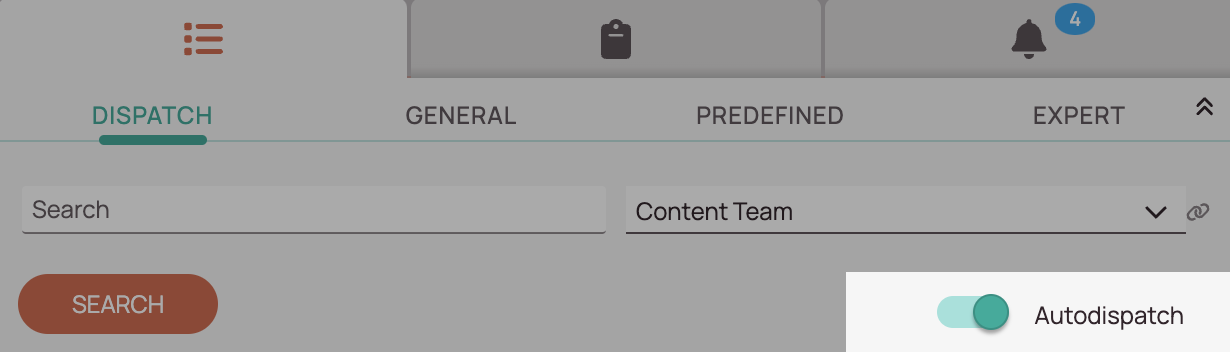
- Inside the Ticket Pool in Work place select the dispatch group inside the Dispatch tab.
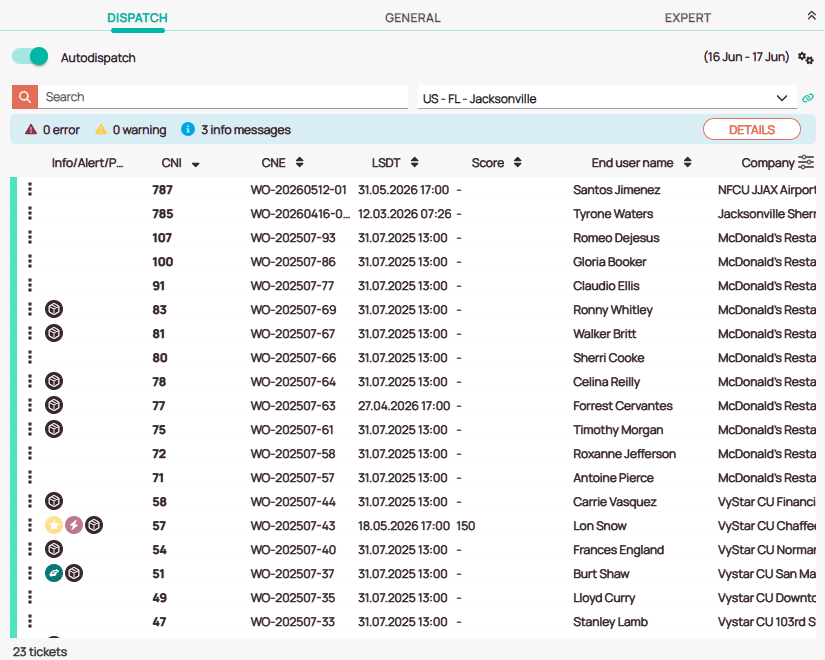
- Turn on the Autodispatch toggle here as well.
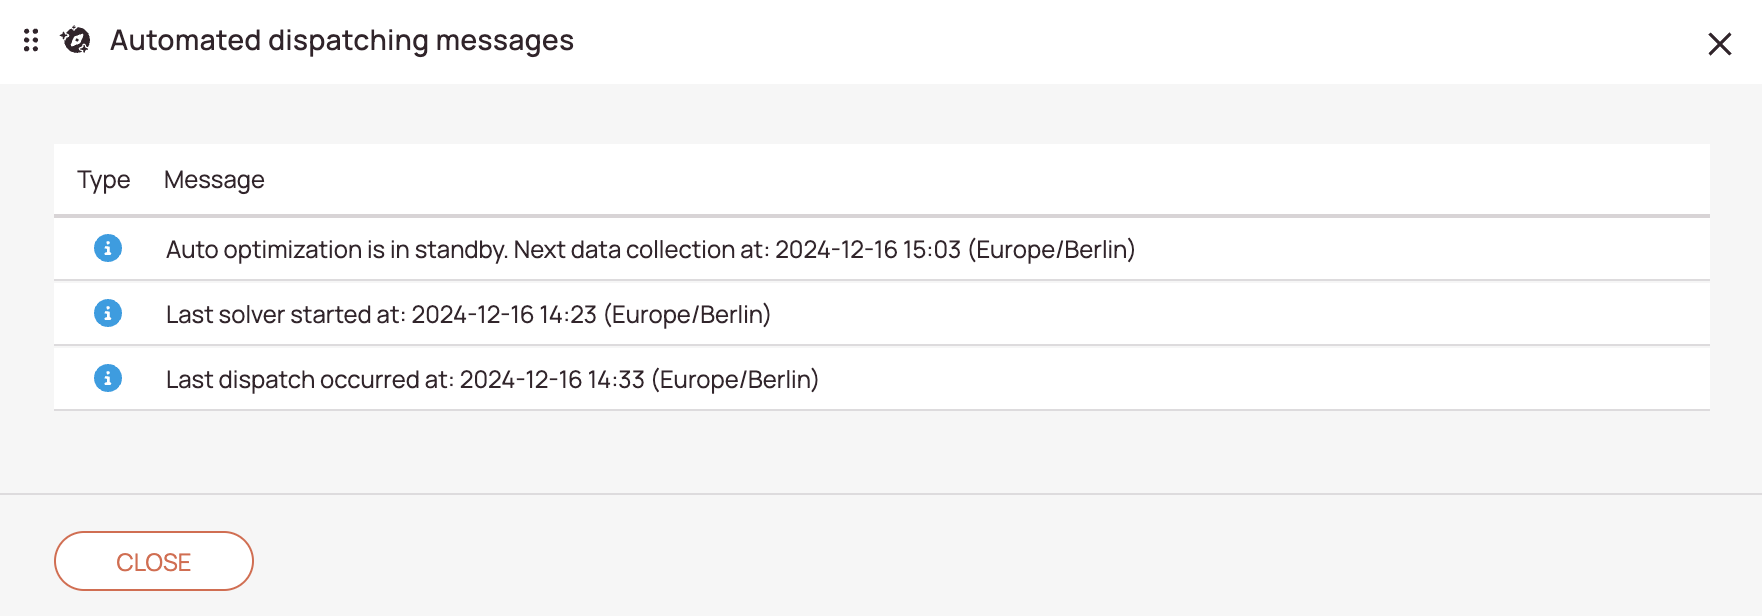
Note: Just turning on the option inside the Admin panel will not be enough for the feature to take effect. - From the next business day on (starting from 00:00 AM), tickets will be automatically dispatched to Timeline for the next 2 business days.
The optimization window and optimization settings icon (double gear) is displayed on the right.
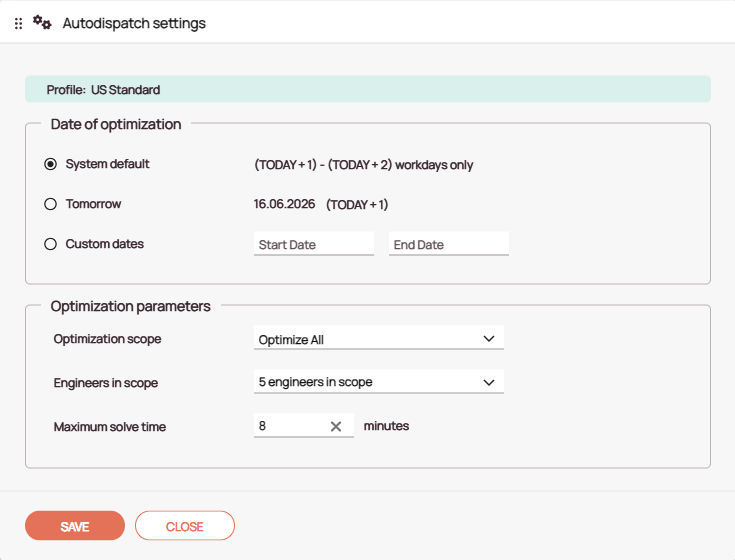
To open the optimization settings, select the double gear icon.

Date of optimization - Choose the window for optimization, relative to today. The default is for tomorrow and overmorrow. If custom dates are selected, this will shift automatically, so that the optimization window remains relative to the current day.
Optimization scope - choose between optimizing all tickets or only those which have already been added to the Timeline.
Engineers in scope - choose which engineers will be included in the optimization.
Maximum solve time - decide how long the optimizer has to come up with the best plan possible. The default duration is 8 minutes.
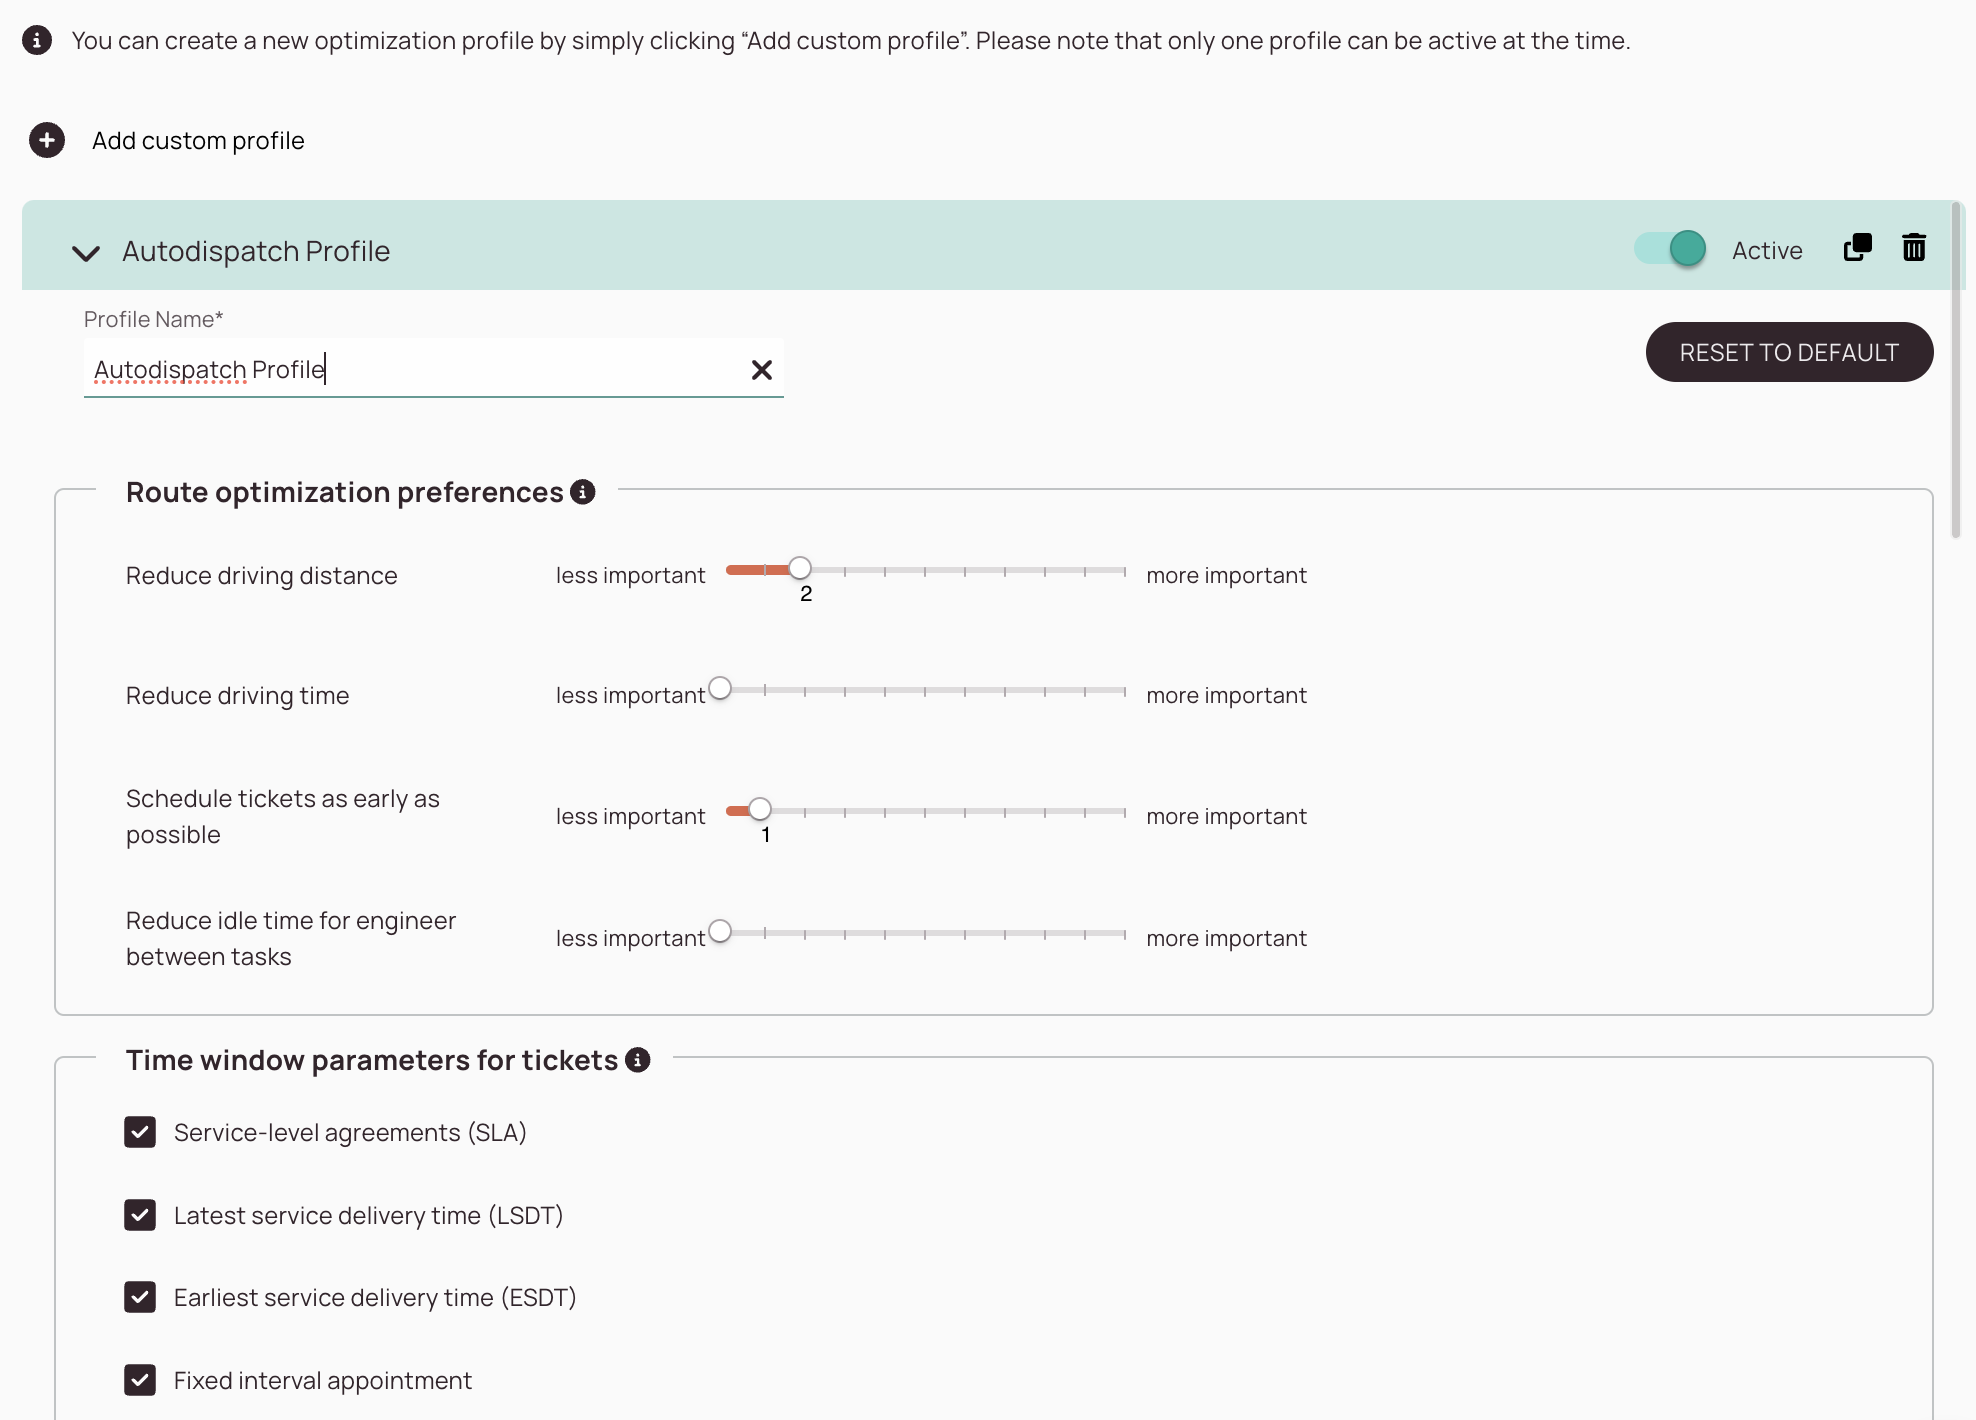
Additional customization can be set up in an optimizer profile.
One has to activate the fully automated dispatching feature for a particular group inside the Admin panel first.
Autodispatch can be temporarily enabled/disabled on a per-group basis in the Ticket Pool/Dispatch tab. We advise you that if you use Autodispatch, you should generally use it consistently and over time to really benefit from its results. To start the initial processing/data collection, you must first move the switch to the right within the Dispatch tab. Otherwise, Autodispatch won't work.
You can anytime temporarily enable/disable the Autodispatch feature.
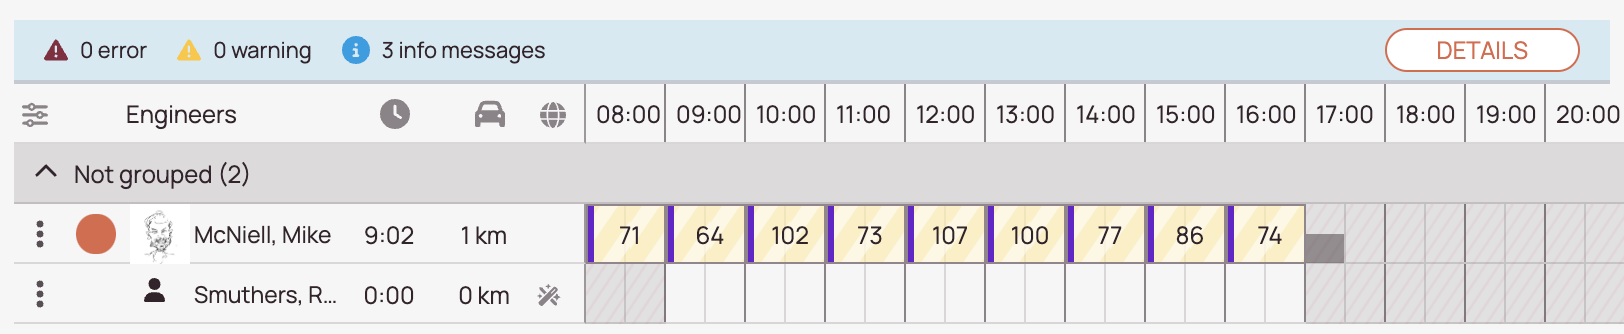
That fully automated dispatching is currently active for a group is indicated prominently inside the group picker in the Timeline.

While automated dispatching is active for a group, manual optimization is unavailable.

You can choose to enable/disable fully automated dispatching at any time by toggling the autodispatch toggle in the Ticket Pool on/off per-dispatch group. With this flexibility in mind, one could also benefit from using a mixed mode.
Select the interlocked gears icon on the right to access the settings for this dispatch group's automated dispatching. These settings can also be adjusted as part of the Optimzer Profile for the dispatch group in Admin Panel.

Tickets will automatically move from the Ticket Pool/Dispatch tab onto the Timeline. If you activate the autodispatch toggle for a group, you will actually see the autodispatch results from the next day on (from 00:00 AM onwards) and tickets will be automatically dispatched for the next 7 days.
You can customize your optimization profile to influence the autodispatch results.