Tip: You can use filters for better results
-
Latest News
-
Getting Started
-
Work Place
-
-
-
- About Buttons
- Action Buttons
- Schedule Tickets
- Ticket Info and COMS Buttons
- Add Parts
- Assign Partners
- Remove Tickets from the Ticket Clipboard
- Inline Skill Editing
- Create Intervention Info
- Create Intervention Reports
- Cancel Tickets
- Cancel Appointments
- Clone Tickets
- Edit Ticket Details
- Edit Privat Notes
- Report Tickets
- Close Tickets
-
Admin Panel
-
FMA 2 App
-
Customer Portal
Configuring Value Sets
With value sets, you can customize what is shown in drop downs (later not only drop downs) inside the Work place. There are two types of value sets, global ones, and your very own ones.
Accessing the Value Sets Page
Navigate to Projects and More → Value Sets to add/edit value sets.
Searching Value Sets
How to search:
- Navigate to Projects and more → Value Sets.
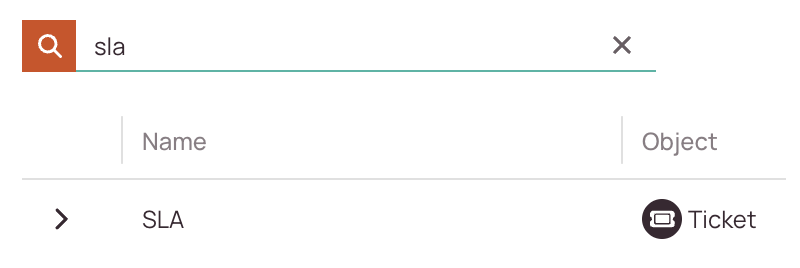
- Use the search bar at the top of the value sets list.
- Enter any of the following:
- Name
- Creator
- Status (e.g., active, inactive)
-
As you type, the list will automatically filter to match your query.
Adding Values
- Select the category of value sets by opening the arrow in order to add a new value to the value set.
- Click on Add new value in order to add a new value to the currently selected value set.
- Fill in the Basic tab.
- Insert a display text for your new value. The display text is the text that actually will be displayed in the drop-down itself later on.
- Insert a description for your new value.
- Insert a constant name. You can think of the constant name as a key for the system to address the value.
Therefore the name should be uniquely assignable in capital letters with no space letters (Please use the underscore _ spacing instead). - Fill in the Projects tab.
If your company uses custom values set you also have the option to activate and deactivate them from the Projects menu.
This can also be done directly in the Projects menu and the functionality behaves the same. - Select the project or projects that should use your new value and therefore the whole new value set.
By default, all projects will be selected. - Click Save.
Editing Values
- Select the category of value sets by opening the arrow in order to edit your own already existing value sets.
Please be advised that global used values cannot be edited – only your own created values. - (Optional) Edit your own value in the Basic tab.
- (Optional) Edit the assigned projects for the value.
Deactivating Values
It is currently not possible to entirely delete values - however - if you do not want to use them anymore you always have the option to deactivate them.
In case you do not want to use your own value anymore you have the option to deactivate it. Deactivated values will not show up in the system anymore.
- Select the category of value sets by opening the arrow in order to deactivate or activate already existing values.
- In the Basic tab toggle the Active toggle to the left to make the value inactive.
FAQ - Value Sets
Value sets are the items you see when you select a value from a drop down inside the Work Place.
A very prominent value set you can see for example when you create a ticket.
At the end of the ticket creation, you are asked for the ticket category. There you can select between different values like:
- Break & Fix
- Installation, Move, Add, Change and Disposal
- Maintenance
- Standard
All of the values together are called a value set. The value set shown above is a global value set, therefore you are not allowed to delete them or edit them.
Nonetheless, you can extend the lists with your very own value sets and deactivate them anytime, if you do not need them initially.
Values are configured project-specific, this allows you to customize values per project base. You can also configure them for multiple projects at once if wished.
Currently, you can edit values for the following drop downs:
- Appointment cancellation reasons
-> You could create custom reasons why an appointment can get canceled - Ticket clipboard reasons
-> You could create custom reasons why a ticket should move over to the Ticket Clipboard - Ticket info type
-> You could create custom ticket info types - Intervention type
-> You could create custom intervention types - LSDT update reason
-> You could create custom reasons why the LSDT needs to be updated - SLA
-> You could add custom Service Level Agreements - Ticket status
-> You could create custom ticket statuses - Ticket cancellation reason
-> You could create custom reasons why a ticket could get canceled - Ticket category
-> You could create custom ticket categories - Ticket subcategory
-> You could create custom ticket subcategories - Unsuccessful Reason
-> You could create custom reasons why an intervention could be unsuccessful - Workflow Timelog
-> You could create custom workflow timelogs - Part status
-> You could create custom part statuses - Usage
-> You could create custom part usage values - Return options
-> You could create custom part return options
0 out of 5 stars
| 5 Stars | 0% | |
| 4 Stars | 0% | |
| 3 Stars | 0% | |
| 2 Stars | 0% | |
| 1 Stars | 0% |