Fieldcode Manual
Tip: You can use filters for better results
-
Latest News
-
Getting Started
-
Work Place
-
-
-
- About Buttons
- Action Buttons
- Schedule Tickets
- Ticket Info and COMS Buttons
- Add Parts
- Assign Partners
- Remove Tickets from the Ticket Clipboard
- Inline Skill Editing
- Create Intervention Info
- Create Intervention Reports
- Cancel Tickets
- Cancel Appointments
- Clone Tickets
- Edit Ticket Details
- Edit Privat Notes
- Report Tickets
- Close Tickets
-
Admin Panel
-
FMA 2 App
-
Customer Portal
Last updated:August 5, 2025
About PUDO Locations
Copy the URL link to this section to share
PickUp-and-DropOff locations are used to temporarily store parts & goods. Engineers usually use those locations to pick up spare parts for service delivery.
Accessing the PUDO Locations Page
Copy the URL link to this section to share
Navigate to Dispatch → PUDO to add/edit PUDO locations.
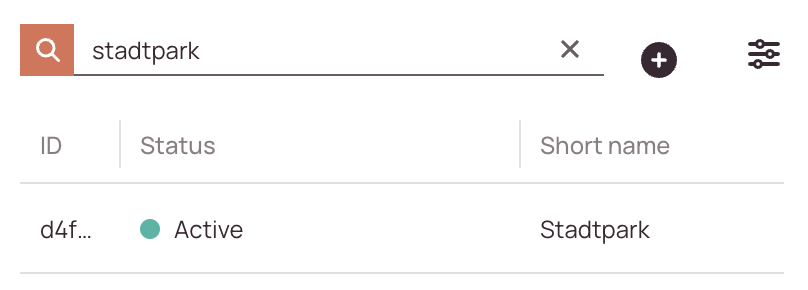
Searching for PUDO Locations
Copy the URL link to this section to share
Adding/Editing PUDO Locations
Copy the URL link to this section to share
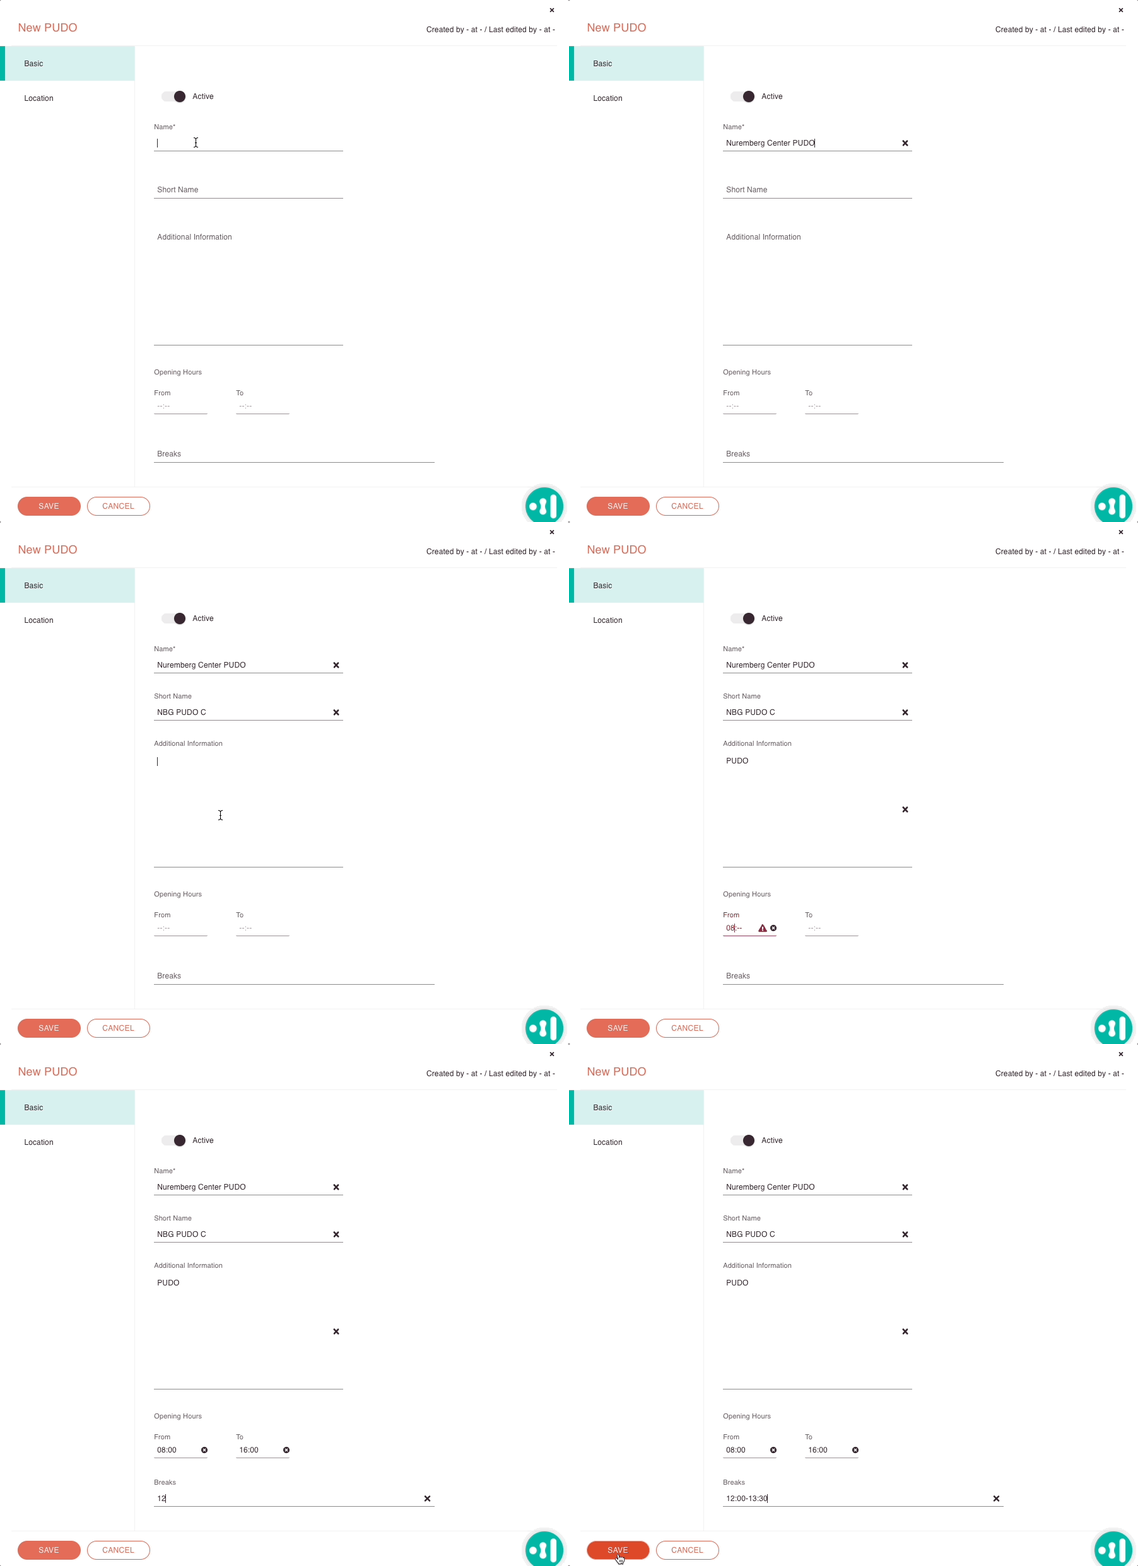
- Click on the Plus button to open the creation form.
- Fill in the Basic and Location tabs.
1. Basic tab
Copy the URL link to this section to share
- Decide if your new or existing PUDO should be set to active in the system.
- Enter a name for your new or existing PUDO.
- (Optional) – Enter a short description for your new or existing PUDO.
- (Optional) – Enter Additional Information for your new or existing PUDO.
- Enter the start time for the opening hours of the PUDO in the FROM field.
- Enter the end time of the opening hours of the PUDO in the TO field.
- (Optional) – Enter break times for the PUDO, if they are mentioned.
Please make sure to enter the break times in this style: 12:00-16:00
Otherwise, you may run into the issue that Work place won’t take this setting into account.
Entering PUDO hours correctly
It is a good practice to enter the opening hours exactly.
If your PUDO location is open for example 24x7, it is recommended to either enter 00:00 to 00:00 in the From and To fields or leave the opening hours blank.

2. Location tab
Copy the URL link to this section to share
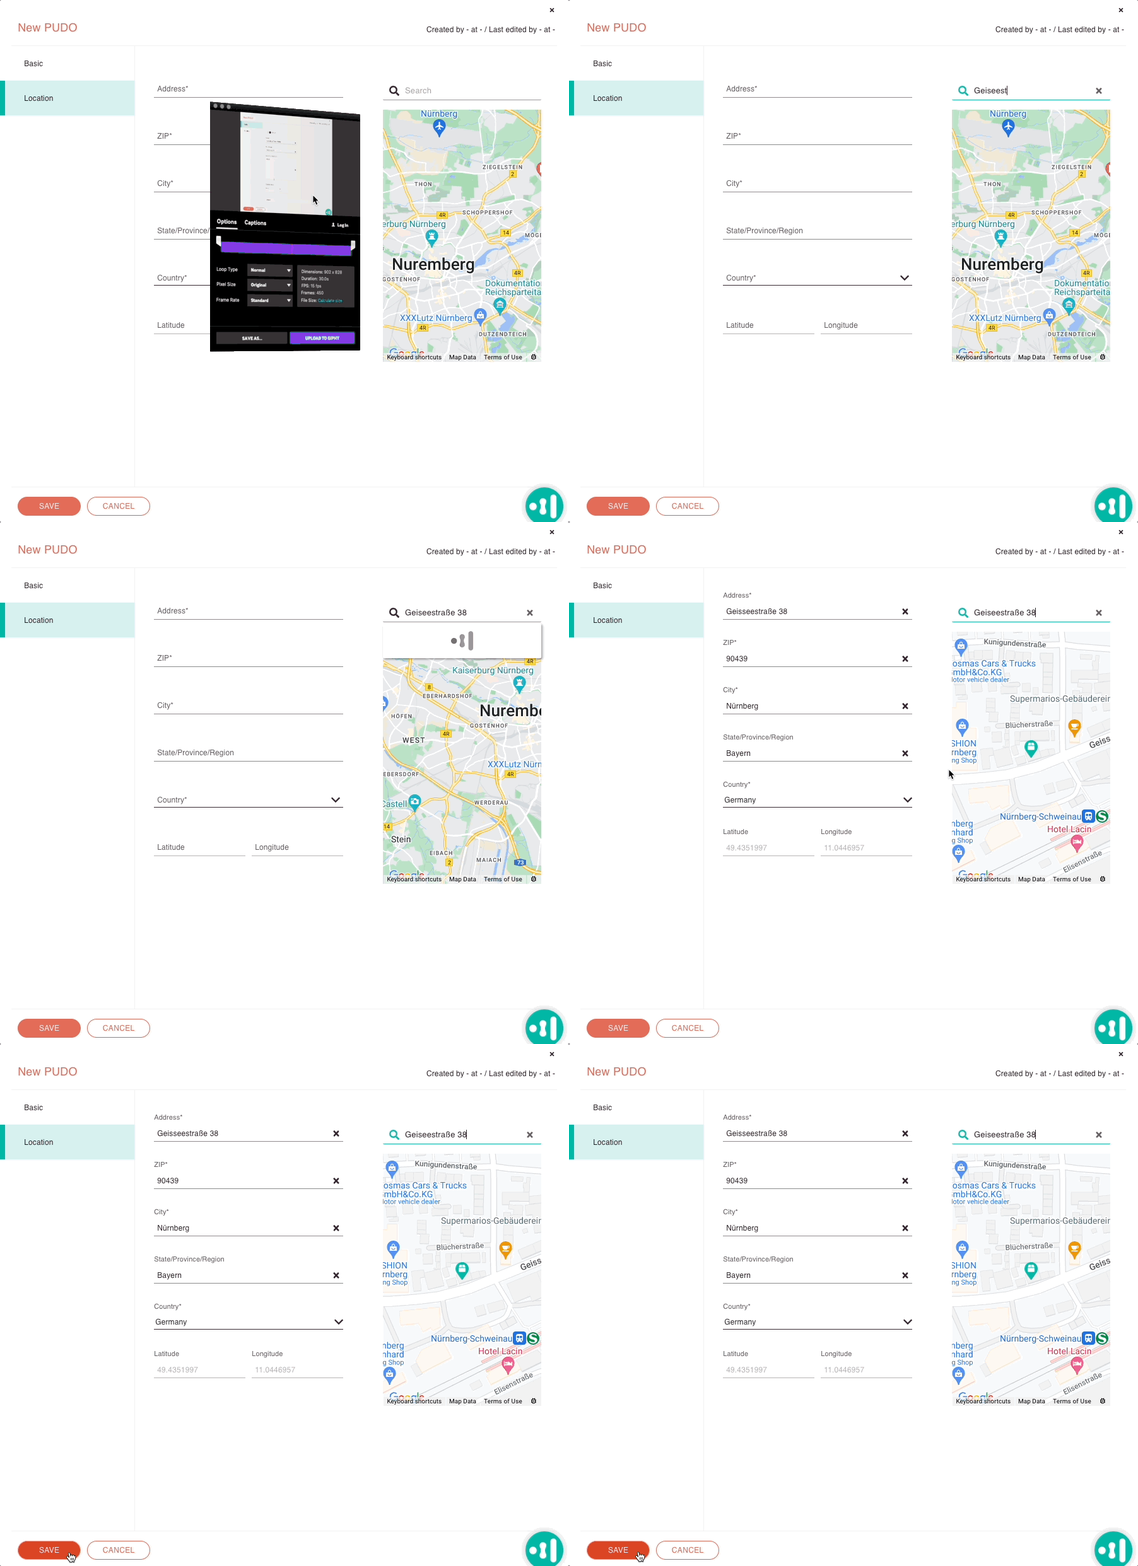
Fill in the Location form. You can either directly search and pinpoint a location on the map (Location fields will then be filled in automatically) or insert the location manually.
How to auto-search for a location
- In the search field enter an address as you would do in any other map application.
- The remaining fields will fill in automatically if the system recognizes the location.
- Click Save.
How to search for a location manually
- Insert the address of the PUDO in the address field.
- Insert the ZIP of the PUDO in the ZIP field.
- Insert the city of the PUDO in the city field.
- (Optional) Insert the state/province/region of the PUDO.
- Select the country from the drop-down, where your PUDO is located.

Was this topic helpful?
0 out of 5 stars
| 5 Stars | 0% | |
| 4 Stars | 0% | |
| 3 Stars | 0% | |
| 2 Stars | 0% | |
| 1 Stars | 0% |
5
Navigation

