Tip: You can use filters for better results
-
Latest News
-
Getting Started
-
Work Place
-
-
-
- About Buttons
- Action Buttons
- Schedule Tickets
- Ticket Info and COMS Buttons
- Add Parts
- Assign Partners
- Remove Tickets from the Ticket Clipboard
- Inline Skill Editing
- Create Intervention Info
- Create Intervention Reports
- Cancel Tickets
- Cancel Appointments
- Clone Tickets
- Edit Ticket Details
- Edit Privat Notes
- Report Tickets
- Close Tickets
-
Admin Panel
-
FMA 2 App
-
Customer Portal
About Label and Translations Customization
You can add your own translations and labels for the Work place and Admin panel in this menu. This is useful, for example, if you are not satisfied with how certain common labels are abbreviated and would prefer them to be written out, or because certain translations simply do not fit the industry.
All you have to do is find the corresponding translation path in the app for the label you want to replace.
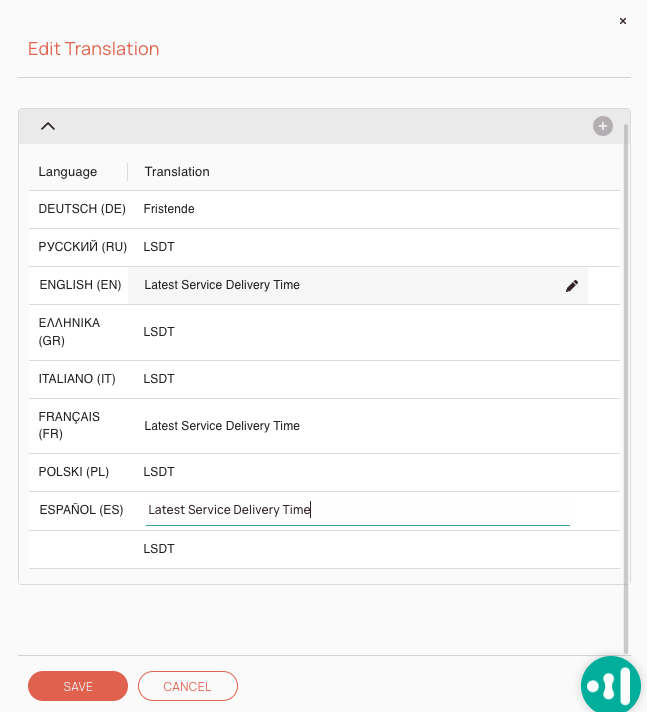
For the following instructions, let’s assume that we want to replace the label “LSDT”, which is visible in the Ticket details, with our own label, for example, “Latest Service Delivery Time”. This label could be more understandable for our dispatchers and therefore we want to change it for our example.

If you modify content containing curved brackets, it may break message behavior, because the content in the brackets pulls data from the backend. Therefore we strongly advise you to be very careful when changing labels and translations.
Accessing Custom Translations
Navigate to Access → Custom Translations to view and edit custom translations.
Searching for Translations
- Enter a search term to find the corresponding label. For this example, we will search for the term “LSDT“.
- Since this label is located inside the Ticket Details Component, we need to identify the correct LSDT label, the keys that are displayed when will help us.
- For our case, the correct path would be connect.ticketDetails.header.tableBody.lsdt
You may already understand the logic to successfully find a matching path -> (1) App Name; (2) Component name or menu name; (3) Location; (4) Label.
Creating/Editing Translations
- Click on the matching row.
- Inline-edit the item by clicking directly inside the field and replace “LSDT” with “Latest Service Delivery Time” for all the languages, that you want to change.
In our example, we will change the labels for the English, French, and Spanish languages.


- Click Save to save your custom translations after editing them and the translation item in the list should be updated with your new custom translations.
- (Optional) – Double-check if the custom translation is reflected inside the App.
You can also test-wise change the translation inside the My Settings menu for the Apps to double-check if the custom translations reflect the other languages.
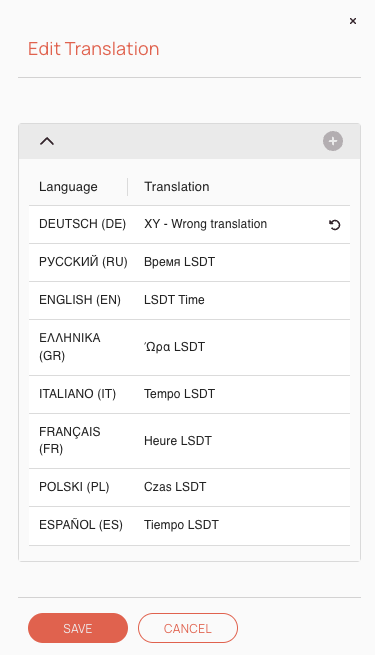
Resetting Modified Translations
Resetting translations functionality is only available for already modified translations.

0 out of 5 stars
| 5 Stars | 0% | |
| 4 Stars | 0% | |
| 3 Stars | 0% | |
| 2 Stars | 0% | |
| 1 Stars | 0% |
