Tip: You can use filters for better results
-
Latest News
-
Quick Start
-
Work Place
-
-
- How to schedule tickets
- How to search for tickets
- How to query tickets
- How to filter for tickets
- How to use the Ticket Clipboard tab
- How to grab/ungrab tickets
- How to link & unlink components together
- How to download ticket data as a excel sheet
- How to copy filters/queries for colleagues
- How to email filters/queries to colleagues
- How to assign/unassign tickets to/from partners
- How to manage parts
- How to show tickets on Map
- How to open tickets in a new tab
- How to use container tickets
-
-
- How to use the Optimizer
- How to schedule tickets
- How to publish/unpublish tickets
- How to lock/unlock tickets
- How to lock/unlock engineers
- How to manually reschedule PUDOs
- How to show tickets on Map
- How to manage availabilities
- How to manage subgroups
- How to display an additional time zone
- How to move tickets back to the Ticket Pool
-
-
-
- How to manage parts
- How to assign/unassign tickets to/from partners
- How to use the Interaction buttons
- How to use the Workflow buttons
- How to use communications
- How to schedule tickets
- How to edit ticket details
- How to cancel a ticket
- How to use the Remove Pending button
- How to report a ticket
- How to create intervention infos
- How to create intervention reports
- How to cancel an appointment
- How to clone tickets
- How to edit private notes
- How to add & remove skills
-
Admin Panel
-
- How to connect with ServiceNow
- How to create test tickets
- What are aliases?
- What does workflow mean?
- What are appearances in context of workflows?
- What are buttons in context of workflows?
- What are automations in context of workflows?
- What are guides in context of workflows?
- What are actions in context of workflows?
-
- What is the Process menu?
- What does workflow mean?
- What are appearances in context of workflows?
- What are buttons in context of workflows?
- What are automations in context of workflows?
- What are guides in context of workflows?
- What are actions in context of workflows?
- How to create & edit projects
- How to create & edit custom forms
- How to create & edit lists
- How to customize the Customer Portal
- How to create & edit automated actions
- How to create & edit conditions
- How to create & edit indications
- How to set up email templates
- How to create & edit ticket durations
- How to create & edit custom fields
- How to create & edit value sets
- How to create & edit SLA Profiles
- How to repair tickets with Ticket Workflow Monitoring
-
Fieldcode FMA app
-
- Fieldcode FMA app
- How to download the Fieldcode FMA app
- How to login
- How to configure multiple accounts
- How to enable/disable notifications
- How to change the theme
- How to log work times
- How to synchronize tickets
- How to navigate to appointments
- How to log drive times & drive breaks
- How to inform dispatchers
- How to view archived appointments
-
-
Customer Portal
How to configure value sets
With value sets, you can customize what is shown in drop downs (later not only drop downs) inside the Work Place.
There are two types of value sets, global ones, and your very own ones.
Inside the Admin Panel go to Process → Value Sets
Expand the menu by clicking the expand arrow in the Navigation ![]() OR click directly on the Process symbol to reveal all options of process configuration.
OR click directly on the Process symbol to reveal all options of process configuration.
Value sets are the items you see when you select a value from a drop down inside the Work Place.
A very prominent value set you can see for example when you create a ticket.
At the end of the ticket creation, you are asked for the ticket category. There you can select between different values like:
- Break & Fix
- Installation, Move, Add, Change and Disposal
- Maintenance
- Standard
All of the values together are called a value set. The value set shown above is a global value set, therefore you are not allowed to delete them or edit them.
Nonetheless, you can extend the lists with your very own value sets and deactivate them anytime, if you do not need them initially.
Values are configured project-specific, this allows you to customize values per project base. You can also configure them for multiple projects at once if wished.
Currently, you can edit values for the following drop downs:
- Appointment cancellation reasons
-> You could create custom reasons why an appointment can get canceled - Ticket clipboard reasons
-> You could create custom reasons why a ticket should move over to the Ticket Clipboard - Device category
-> You could create custom device categories - Device subcategory
-> You could create custom device subcategories - Ticket info type
-> You could create custom ticket info types - Intervention type
-> You could create custom intervention types - LSDT update reason
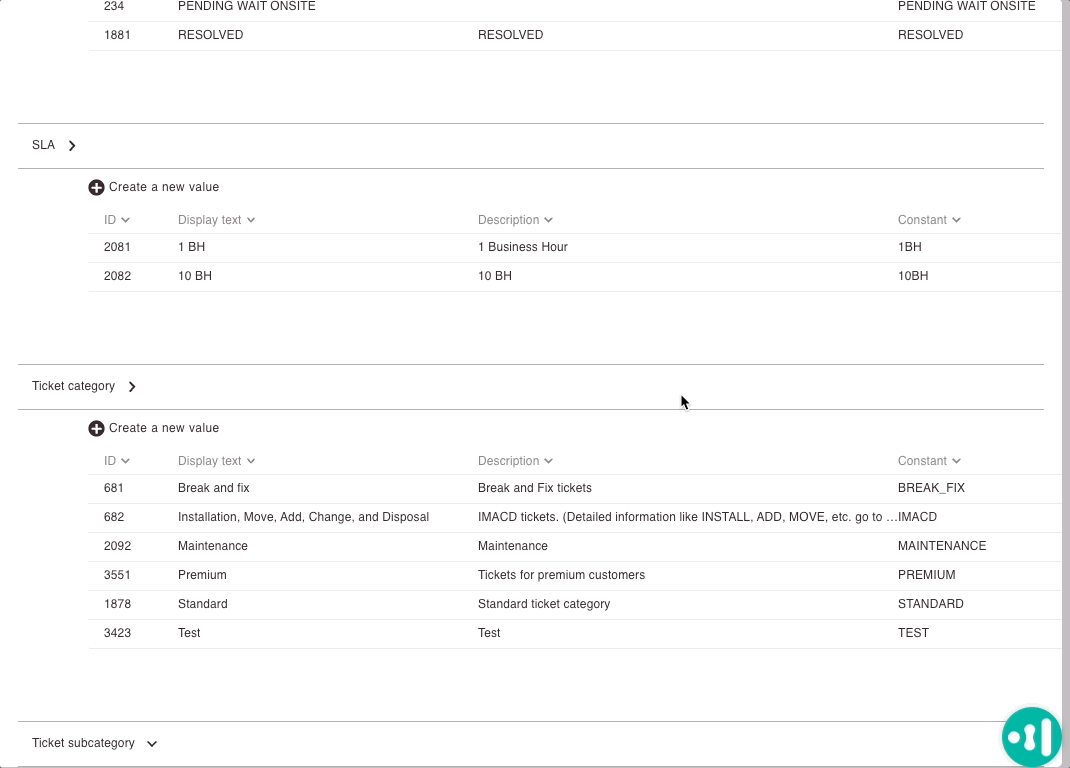
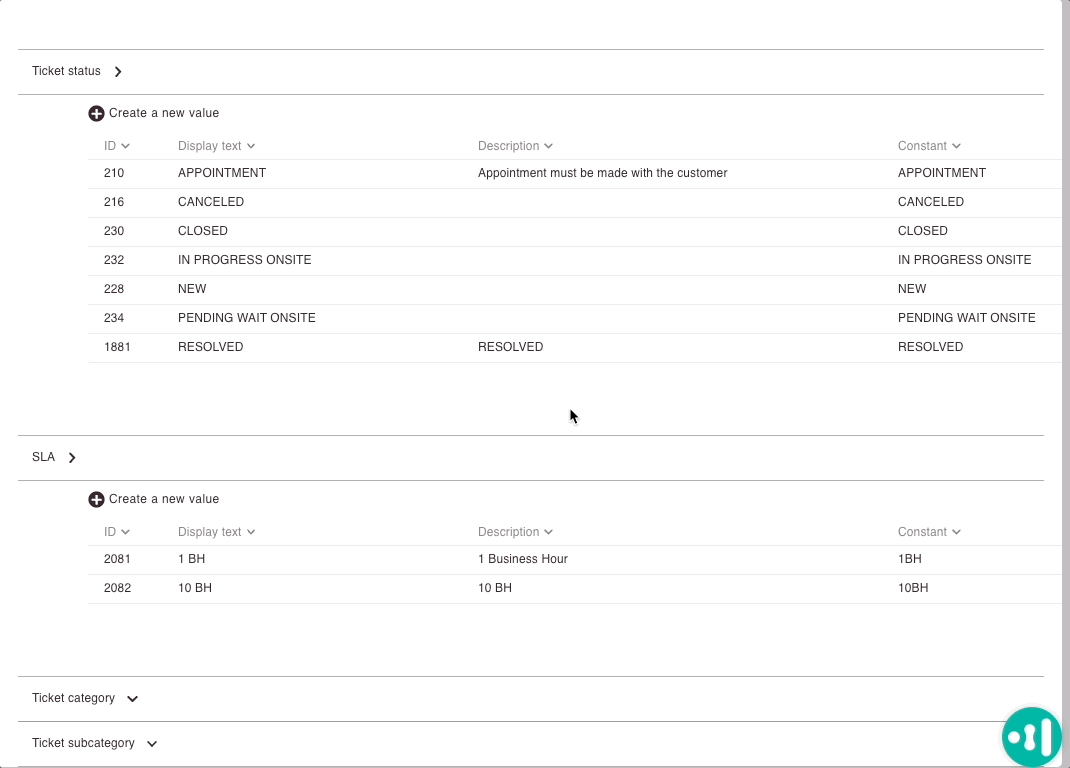
-> You could create custom reasons why the LSDT needs to be updated - SLA
-> You could add custom Service Level Agreements - Ticket cancellation reason
-> You could create custom reasons why a ticket could get canceled - Ticket category
-> You could create custom ticket categories - Ticket subcategory
-> You could create custom ticket subcategories - Unsuccessful Reason
-> You could create custom reasons why an intervention could be unsuccessful
How to add new values
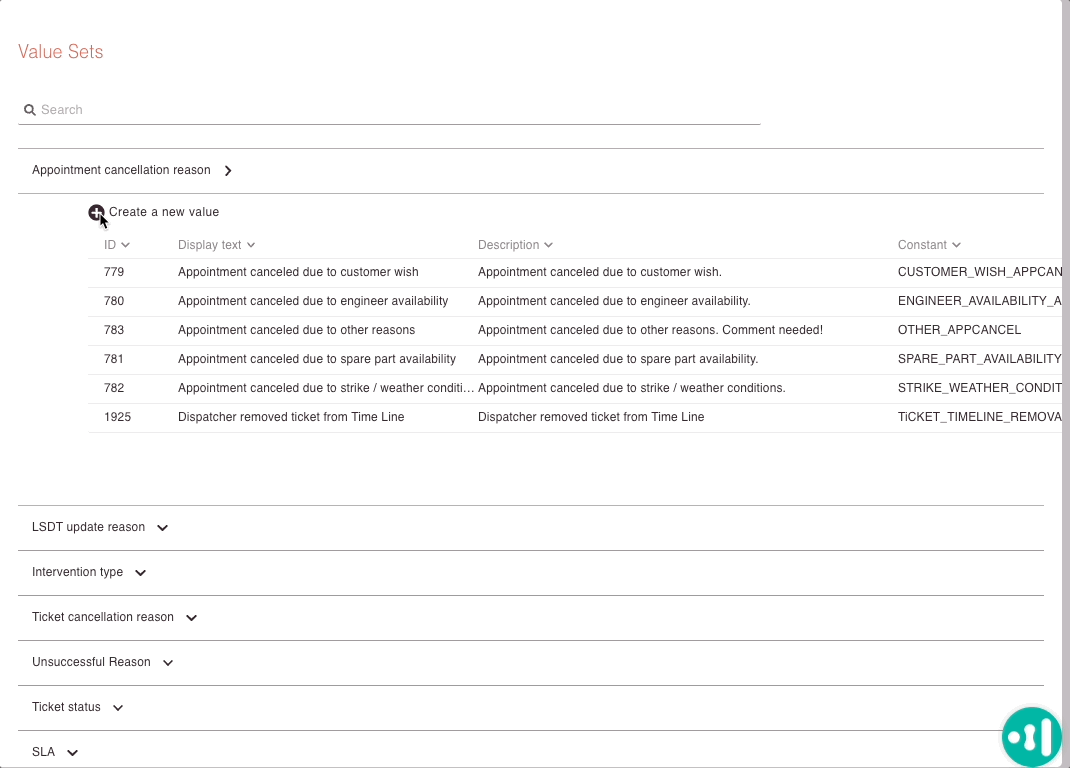
- Select the category of value sets by opening the arrow in order to add a new value to the value set.
- Click on Add new value in order to add a new value to the currently selected value set.
- Fill in the Basic tab.
- Insert a display text for your new value. The display text is the text that actually will be displayed in the drop-down itself later on.
- Insert a description for your new value.
- Insert a constant name. You can think of the constant name as a key for the system to address the value.
Therefore the name should be uniquely assignable in capital letters with no space letters (Please use the underscore _ spacing instead). - Fill in the Projects tab.
If your company uses custom values set you also have the option to activate and deactivate them from the Projects menu.
This can also be done directly in the Projects menu and the functionality behaves the same. - Select the project or projects that should use your new value and therefore the whole new value set.
By default, all projects will be selected. - Click Save.
How to edit own values
- Select the category of value sets by opening the arrow in order to edit your own already existing value sets.
Please be advised that global used values cannot be edited – only your own created values. - (Optional) Edit your own value in the Basic tab.
- (Optional) Edit the assigned projects for the value.
How to deactivate own values
It is currently not possible to entirely delete values - however - if you do not want to use them anymore you always have the option to deactivate them.
In case you do not want to use your own value anymore you have the option to deactivate it. Deactivated values will not show up in the system anymore.
- Select the category of value sets by opening the arrow in order to deactivate or activate already existing values.
- In the Basic tab toggle the Active toggle to the left to make the value inactive.
0 out of 5 stars
| 5 Stars | 0% | |
| 4 Stars | 0% | |
| 3 Stars | 0% | |
| 2 Stars | 0% | |
| 1 Stars | 0% |